IEC 60061-3:1969/AMD20:1998
(Amendment)Amendment 20 - Lamp caps and holders together with gauges for the control of interchangeability and safety. Part 3: Gauges
Amendment 20 - Lamp caps and holders together with gauges for the control of interchangeability and safety. Part 3: Gauges
Subscribe to IEC 60061 Database to access the full and updated content of the series.
Amendement 20 - Culots de lampes et douilles ainsi que calibres pour le contrôle de l'interchangeabilité et de la sécurité. Troisième partie: Calibres
Subscribe to IEC 60061 Database to access the full and updated content of the series.
Dimensions and output series for rotating electrical machines - Part 2: Frame numbers 355 to 1000 and flange numbers 1180 to 2360
General Information
- Status
- Published
- Publication Date
- 15-Mar-1998
- Technical Committee
- SC 34B - Fit systems for light sources
- Current Stage
- PPUB - Publication issued
- Start Date
- 16-Mar-1998
- Completion Date
- 31-Mar-1998
Note: the bibliographic reference you gave (IEC 60061-3:1969/AMD20:1998) differs from the document extract provided. The extract is from IEC 60072-2:2001 - Part 2: Dimensions and output series for rotating electrical machines (frame numbers 355–1000 and flange numbers 1180–2360). The summary below is based on the provided IEC 60072-2:2001 content.
Overview
IEC 60072-2:2001 defines standardized mounting and shaft dimensions, designation rules and preferred output series for large rotating electrical machines (motors and generators) with horizontal shafts. It covers frame numbers 355 to 1000 and flange numbers 1180 to 2360, and provides dimensional sketches, letter-symbols for dimensions, and tables for fixing and flange dimensions to ensure interchangeability, mechanical compatibility and safe mounting between manufacturers.
Key Topics
- Scope and applicability: Machines with horizontal shafts and three foot-mounting types (feet down, feet up, integral bed-plate), and mounting flanges with pitch circle diameters from 1180 mm to 2360 mm.
- Letter-symbols and designation: Standard symbols (A, B, C, D, E, H, M, etc.) are defined for all principal dimensions; machine designation formats (e.g., H(A/B/C)D/E, FF M (holes/S) D/E) are provided for consistent naming.
- Fixing dimensions: Recommended values for shaft heights (from ISO 496), A/B/C fixing dimensions (selected from Renard series R20/R40), and guidance for feet-up vs feet-down selections.
- Mounting flanges: Tables for flange numbers (FF/FD), pitch circles, number of holes, screw sizes, spigot/without-spigot options and tolerances for bores and holes.
- Shaft extensions, keys and keyways: Detailed dimension series for shaft diameters, key/keyway tolerances (N9/P9), and selection guidance.
- Greatest permissible torques: Torque values for continuous duty (selected from Renard R40 series) correlated to shaft sizes.
- Preferred rated outputs: Standardized kW values (e.g., 280, 300, …, 1000) for consistent rating and procurement.
- Dimensional sketches: Clear engineering sketches to illustrate principal dimensions for different machine shapes and mounting arrangements.
- Referenced standards: Cross-references to IEC 72-1, IEC 34-8, ISO 496 and ISO 1101 for shaft heights, terminal markings, geometrical tolerancing and more.
Applications
IEC 60072-2 is used by:
- Motor and generator manufacturers for designing interchangeable frames and flanges.
- Mechanical design engineers integrating rotating machines into plant layouts, gearboxes and couplings.
- OEMs and plant engineers for procurement, maintenance and retrofit decisions.
- Test laboratories and certification bodies verifying dimensional conformity and mounting compatibility.
- Purchasers and specifiers to write clear machine specifications and avoid mismatches.
Related Standards
- IEC 72-1 (frames 56–400)
- IEC 34-8 (terminal markings and rotation)
- ISO 496 (shaft heights)
- ISO 1101 (geometrical tolerancing)
For complete, authoritative tables, tolerances and full normative text, obtain the official IEC publication or access the IEC standards database.
Get Certified
Connect with accredited certification bodies for this standard

Intertek Testing Services NA Inc.
Intertek certification services in North America.

UL Solutions
Global safety science company with testing, inspection and certification.

ANCE
Mexican certification and testing association.
Sponsored listings
Frequently Asked Questions
IEC 60061-3:1969/AMD20:1998 is a standard published by the International Electrotechnical Commission (IEC). Its full title is "Amendment 20 - Lamp caps and holders together with gauges for the control of interchangeability and safety. Part 3: Gauges". This standard covers: Subscribe to IEC 60061 Database to access the full and updated content of the series.
Subscribe to IEC 60061 Database to access the full and updated content of the series.
IEC 60061-3:1969/AMD20:1998 is classified under the following ICS (International Classification for Standards) categories: 29.140.10 - Lamp caps and holders; 29.160 - Rotating machinery. The ICS classification helps identify the subject area and facilitates finding related standards.
IEC 60061-3:1969/AMD20:1998 is available in PDF format for immediate download after purchase. The document can be added to your cart and obtained through the secure checkout process. Digital delivery ensures instant access to the complete standard document.
Standards Content (Sample)
SLOVENSKI STANDARD
01-marec-2001
Dimensions and output series for rotating electrical machines - Part 2: Frame
numbers 355 to 1000 and flange numbers 1180 to 2360
Dimensions and output series for rotating electrical machines - Part 2: Frame numbers
355 to 1000 and flange numbers 1180 to 2360
Dimensions et séries de puissances des machines électriques tournantes - Partie 2:
Désignation des carcasses entre 355 et 1000 et des brides entre 1180 et 2360
Ta slovenski standard je istoveten z: IEC 60072-2
ICS:
29.160.01 Rotacijski stroji na splošno Rotating machinery in
general
2003-01.Slovenski inštitut za standardizacijo. Razmnoževanje celote ali delov tega standarda ni dovoljeno.
NORME CEI
IEC
INTERNATIONALE
60072-2
INTERNATIONAL
Première édition
STAN DARD
First edition
1990-12
Dimensions et séries de puissances
des machines électriques tournantes
Partie 2:
Désignation des carcasses entre 355 et 1000 et
des brides entre 1180 et 2360
Dimensions and output series for rotating
electrical machines
Part 2:
Frame numbers 355 to 1000 and flange
numbers 1180 to 2360
réservés — Copyright - all rights reserved
© IEC 1990 Droits de reproduction
publication ne peut être reproduite ni No part of this publication may be reproduced or utilized in
Aucune partie de cette
forme que ce soit et par aucun any form or by any means, electronic or mechanical,
utilisée sous quelque
y compris la photo- including photocopying and microfilm, without permission in
procédé, électronique ou mécanique,
de l'éditeur. writing from the publisher.
copie et les microfilms, sans l'accord écrit
International Electrotechnical Commission 3, rue de Varembé Geneva, Switzerland
Telefax: +41 22 919 0300 e-mail: inmail@iec.ch IEC web site http: //www.iec.ch
CODE PRIX
Commission Electrotechnique Internationale
N
PRICE CODE
International Electrotechnical Commission
IEC Me1KgyuaponHaH 3nenrporexHwiecnaa HoMuccua
Pour prix, voir catalogue en vigueur
• • For price, see current catalogue
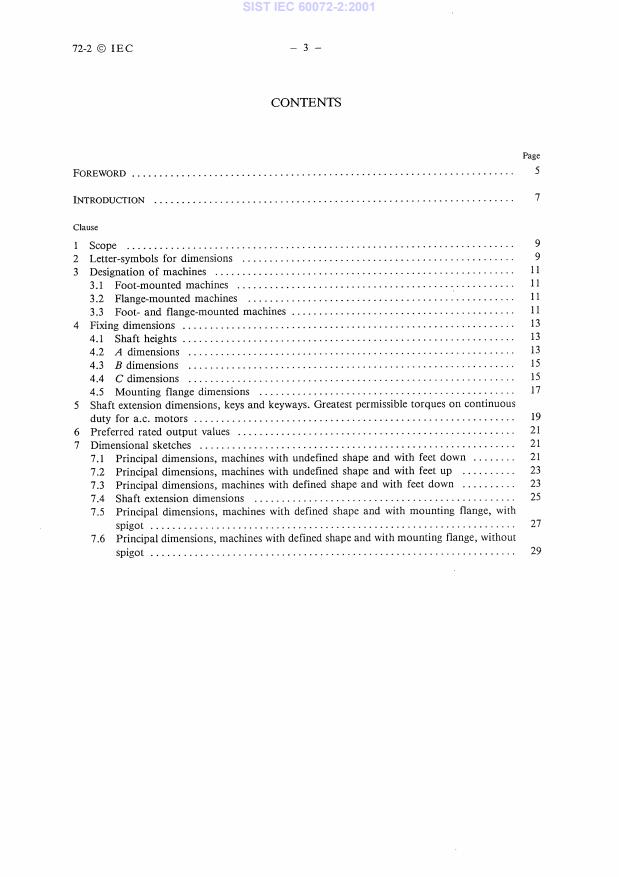
72-2 © I E C
CONTENTS
Page
FOREWORD 5
INTRODUCTION
Clause
1 Scope 9
2 Letter-symbols for dimensions 9
11 3 Designation of machines
11 3.1 Foot-mounted machines
3.2 Flange-mounted machines
3.3 Foot- and flange-mounted machines
4 Fixing dimensions
4.1 Shaft heights
4.2 A dimensions
4.3 B dimensions
4.4 C dimensions
4.5 Mounting flange dimensions
5 Shaft extension dimensions, keys and keyways. Greatest permissible torques on continuous
duty for a.c. motors
21 6 Preferred rated output values
7 Dimensional sketches
21 7.1 Principal dimensions, machines with undefined shape and with feet down
7.2 Principal dimensions, machines with undefined shape and with feet up
7.3 Principal dimensions, machines with defined shape and with feet down
7.4 Shaft extension dimensions
7.5 Principal dimensions, machines with defined shape and with mounting flange, with
spigot
7.6 Principal dimensions, machines with defined shape and with mounting flange, without
spigot
– 5 –
72-2 ©IEC
INTERNATIONAL ELECTROTECHNICAL COMMISSION
DIMENSIONS AND OUTPUT SERIES FOR ROTATING
ELECTRICAL MACHINES
Part 2: Frame numbers 355 to 1000 and flange numbers 1180 to 2 360
FOREWORD
The formal decisions or agreements of the IEC on technical matters, prepared by Technical Committees on which all the
1)
National Committees having a special interest therein are represented, express, as nearly as possible, an international consensus
of opinion on the subjects dealt with.
They have the form of recommendations for international use and they are accepted by the National Committees in that sense.
2)
3) In order to promote international unification, the IEC expresses the wish that all National Committees should adopt the
text of the IEC recommendation for their national rules in so far as national conditions will permit. Any divergence between
the I EC recommendation and the corresponding national rules should, as far as possible, be clearly indicated in the latter.
This part of the International Standard I E C 72 has been prepared by Sub-committee 2B: Mounting
dimensions and output series, of IEC Technical Committee No. 2: Rotating machinery.
It replaces IEC 72A published in 1970.
The text of this part is based on the following documents:
Report on Voting
Six Months' Rule
2B(CO)72
2B(CO)69
Full information on the voting for the approval of this part can be found in the Voting Report indicated
in the above table.
The following publications are quoted in this part of IEC 72:
I EC 34-8: 1972, Rotating electrical machines — Part 8: Terminal markings and direction of rotation of rotating
machines.
IEC 72-1: 1990, Dimensions and output series for rotating electrical machines — Part 1: Frame numbers 56 to 400 and
flange numbers 55 to 1080.
ISO 496: 1973, Driving and driven machines — Shaft heights.
ISO 1101: 1983, Technical drawings — Geometrical tolerancing — Tolerancing of form, orientation, location and run-out
— Generalities, definitions, symbols, indications on drawings.
72-2 ©IEC — 7
INTRODUCTION
I E C 72-1 contains standard values for shaft-heights, fixing dimensions, shaft extensions, maximum
permissible torques and outputs for machines with shaft-heights from 56 mm to 400 mm.
However, the variety of constructions and the wide range of applications for the large machines with
shaft-heights above 315 mm have led to the establishment of a relatively large number of values for
the dimensions in order to cover all possible constructions. Owing to this, the present part covers a
wider range than I E C 72-1 within which, range values suitable for all designs or for a more detailed
standardization can be chosen.
Thus, the mounting dimensions given in this part for shaft-heights 355 mm and 400 mm have been
chosen from values given in IEC 72-1.
72-2©IEC – 9 –
DIMENSIONS AND OUTPUT SERIES FOR ROTATING
ELECTRICAL MACHINES
Part 2: Frame numbers 355 to 1000 and flange numbers 1180 to 2 360
1 Scope
This part of IEC 72 relates to all kinds of rotating electrical machines with a horizontal shaft, and
with any one of three specific types of foot mounting — i.e. machines with feet down, machines with
feet up, and machines for which the bed-plate is an integral part — and with mounting flange for which
the shaft height in the feet down version is between 355 mm and 1000 mm and pitch circle diameter
of fixing holes between 1180 and 2 360 mm.
2 Letter-symbols for dimensions
The symbols defined below are illustrated by the dimensional sketches in clause 7.
A — distance between centre-lines of fixing holes (end view).
AA — width of the end of the foot (end view).
AB — overall dimension across the feet (end view).
AC — diameter of the machine.
AD — distance from the centre-line of the machine to extreme outside of the terminal box or other
most salient part mounted on the side of the machine.
B — distance between the centre-lines of the fixing holes (side view).
BA — length of the foot (side view).
BB — overall dimension across the feet (side view).
distance from the shoulder on the shaft at D-end to the centre-line of the mounting holes
C —
in the nearest feet.
distance from the shoulder on the shaft at N-end to the centre-line of the mounting holes
CA —
in the nearest feet.
D — diameter of the shaft extension at D-end.
DA — diameter of the shaft extension at N-end.
length of the shaft extension from the shoulder at D-end.
E —
EA — length of the shaft extension from the shoulder at N-end.
F — width of the keyway of shaft extension at D-end.
FA — width of the keyway of the shaft extension at N-end.
G — distance from the bottom of the keyway to the opposite surface of the shaft extension at
D-end.
distance from the top of the key to the opposite surface of the shaft extension at
GA —
D-end.
distance from the bottom of the keyway to the opposite surface of the shaft extension at
GB —
N-end.
GC — distance from the top of the key to the opposite surface of the shaft extension at
N-end.
GD — thickness of the key of the shaft extension at D-end.
GE — depth of the keyway at the crown of the shaft extension at D-end.
72-2 ©IEC — 11 —
GF — thickness of the key of the shaft extension at N-end.
GH — depth of the keyway at the crown of the shaft extension at N-end.
distance from the centre-line of the shaft to the bottom of the feet (basic dimension).
H —
H' — distance from the centre-line of the shaft to the mounting surface — e.g. the bottom of the
feet — in the feet-up version.
HA — thickness of the feet.
distance from the top of the horizontal machine to the bottom of the feet.
HC —
distance from the top of the lifting eye, the terminal box or other most salient part mounted
HD —
on the top of the machine to the bottom of the feet.
distance from the mounting surface to the lowest part of the machine in the feet-up
HE —
version.
K diameter of the holes or width of the slots in the feet of the machine.
overall length of the machine with a single shaft extension.
L
LA tickness of the flange.
distance from the mounting surface of the flange to the end of the machine.
LB
LC overall length of the machine when there is a shaft extension at N-end.
M — pitch circle diameter of the fixing holes.
N diameter of the spigot.
— outside diameter of the flange, or in the case of a non-circular outline twice the maximum
P
radial dimension.
R — distance from the mounting surface of the flange to the shoulder on the shaft.
— diameter of the fixing holes in the mounting flange or nominal diameter of the thread.
S
I depth of the spigot.
NOTE — The designation of D and N-end of a machine is given in IEC
...


Questions, Comments and Discussion
Ask us and Technical Secretary will try to provide an answer. You can facilitate discussion about the standard in here.
Loading comments...