EN 13555:2004
(Main)Flanges and their joints - Gasket parameters and test procedures relevant to the design rules for gasketed circular flange connections
Flanges and their joints - Gasket parameters and test procedures relevant to the design rules for gasketed circular flange connections
This document specifies the design parameters of gaskets and gasket materials required by EN 1591 1 and pro-vides the test procedures for establishing the values of these parameters for inclusion in ENV 1591 2.
The testing procedures given might be applicable to gaskets of other shapes and dimensions but this shall be indi-cated in the report.
Gaskets which are wholly based upon elastomers, or based upon elastomer with the inclusion of particulate fillers or particulate reinforcement, are beyond the scope of this document.
Flansche und ihre Verbindungen - Dichtungskennwerte und Prüfverfahren für die Anwendung der Regeln für die Auslegung von Flanschverbindungen mit runden Flanschen und Dichtungen
Dieses Dokument legt die Kennwerte für die Auslegung von Dichtungen und Dichtungswerkstoffen nach den Anforde-
rungen in EN 1591-1 fest und enthält Prüfverfahren zur Festlegung der entsprechenden Zahlenwerte für die Aufnah-
me in ENV 1591-2.
Diese Prüfverfahren können auch für andere Dichtungsformen und Maße angewendet werden, jedoch muss dies im
Prüfbericht angegeben werden.
Dichtungen auf Elastomer-Basis ohne oder auch mit speziellen Füllstoffen oder Verstärkungen liegen nicht im An-
wendungsbereich dieser Norm.
Brides et leurs assemblages - Paramètres de joints et modes opératoires d'essai relatifs aux règles de calcul des assemblages à brides circulaires avec joint
Le présent document définit les paramètres de conception des joints et des matériaux d'étanchéité requis par
l�EN 1591-1 et décrit les modes opératoires d�essai permettant de déterminer les valeurs de ces paramètres
en vue de les inclure dans l�ENV 1591-2.
Ces modes opératoires d�essai peuvent être appliqués à des joints de formes et de dimensions différentes
mais cela doit être indiqué dans le compte rendu.
Les joints entièrement fabriqués en matériaux élastomères ou fabriqués à partir de matériaux élastomères
additionnés de charges particulaires ou de renforts sous forme de particules, ne relèvent pas du domaine
d�application du présent document.
Prirobnice in prirobnični spoji - Parametri tesnil in preskusni postopki, potrebni za načrtovanje okroglih prirobičnih spojev s tesnili
General Information
- Status
- Withdrawn
- Publication Date
- 30-Nov-2004
- Withdrawal Date
- 29-Apr-2014
- Technical Committee
- CEN/TC 74 - Flanges and their joints
- Drafting Committee
- CEN/TC 74/WG 8 - Gaskets
- Current Stage
- 9960 - Withdrawal effective - Withdrawal
- Start Date
- 30-Apr-2014
- Completion Date
- 30-Apr-2014
- Directive
- 97/23/EC - Pressure equipment
Relations
- Effective Date
- 07-May-2014
- Effective Date
- 28-Jan-2026
- Effective Date
- 28-Jan-2026
- Effective Date
- 28-Jan-2026
- Effective Date
- 28-Jan-2026
- Effective Date
- 28-Jan-2026
- Effective Date
- 28-Jan-2026
- Refers
EN 1779:1999 - Non-destructive testing - Leak testing - Criteria for method and technique selection - Effective Date
- 28-Jan-2026
- Effective Date
- 28-Jan-2026
- Effective Date
- 28-Jan-2026
- Effective Date
- 28-Jan-2026
- Effective Date
- 28-Jan-2026
- Effective Date
- 28-Jan-2026
- Effective Date
- 28-Jan-2026
- Effective Date
- 28-Jan-2026
Get Certified
Connect with accredited certification bodies for this standard

Institut za varilstvo d.o.o. (Welding Institute)
Slovenia's leading welding institute since 1952. ISO 3834, EN 1090, pressure equipment certification, NDT personnel, welder qualification. Only IIW Au
Sponsored listings
Frequently Asked Questions
EN 13555:2004 is a standard published by the European Committee for Standardization (CEN). Its full title is "Flanges and their joints - Gasket parameters and test procedures relevant to the design rules for gasketed circular flange connections". This standard covers: This document specifies the design parameters of gaskets and gasket materials required by EN 1591 1 and pro-vides the test procedures for establishing the values of these parameters for inclusion in ENV 1591 2. The testing procedures given might be applicable to gaskets of other shapes and dimensions but this shall be indi-cated in the report. Gaskets which are wholly based upon elastomers, or based upon elastomer with the inclusion of particulate fillers or particulate reinforcement, are beyond the scope of this document.
This document specifies the design parameters of gaskets and gasket materials required by EN 1591 1 and pro-vides the test procedures for establishing the values of these parameters for inclusion in ENV 1591 2. The testing procedures given might be applicable to gaskets of other shapes and dimensions but this shall be indi-cated in the report. Gaskets which are wholly based upon elastomers, or based upon elastomer with the inclusion of particulate fillers or particulate reinforcement, are beyond the scope of this document.
EN 13555:2004 is classified under the following ICS (International Classification for Standards) categories: 23.040.60 - Flanges, couplings and joints; 23.040.80 - Seals for pipe and hose assemblies. The ICS classification helps identify the subject area and facilitates finding related standards.
EN 13555:2004 has the following relationships with other standards: It is inter standard links to EN 13555:2014, EN 915:1996, EN 12560-4:2001, CEN/TR 1591-2:2020, EN 12560-3:2001, EN 12560-7:2004, EN 12560-5:2001, EN 1779:1999, EN 1514-7:2004, EN 12560-1:2024, EN 1514-6:2003, EN 1514-1:2024, EN ISO 21920-2:2022, EN 1514-4:1997, EN 1514-3:1997. Understanding these relationships helps ensure you are using the most current and applicable version of the standard.
EN 13555:2004 is associated with the following European legislation: EU Directives/Regulations: 97/23/EC; Standardization Mandates: M/071. When a standard is cited in the Official Journal of the European Union, products manufactured in conformity with it benefit from a presumption of conformity with the essential requirements of the corresponding EU directive or regulation.
EN 13555:2004 is available in PDF format for immediate download after purchase. The document can be added to your cart and obtained through the secure checkout process. Digital delivery ensures instant access to the complete standard document.
Standards Content (Sample)
2003-01.Slovenski inštitut za standardizacijo. Razmnoževanje celote ali delov tega standarda ni dovoljeno.Flansche und ihre Verbindungen - Dichtungskennwerte und Prüfverfahren für die Anwendung der Regeln für die Auslegung von Flanschverbindungen mit runden Flanschen und DichtungenBrides et leurs assemblages - Parametres de joints et modes opératoires d'essai relatifs aux regles de calcul des assemblages a brides circulaires avec jointFlanges and their joints - Gasket parameters and test procedures relevant to the design rules for gasketed circular flange connections23.040.60Prirobnice, oglavki in spojni elementiFlanges, couplings and jointsICS:Ta slovenski standard je istoveten z:EN 13555:2004SIST EN 13555:2005en01-marec-2005SIST EN 13555:2005SLOVENSKI
STANDARD
EUROPEAN STANDARDNORME EUROPÉENNEEUROPÄISCHE NORMEN 13555December 2004ICS 23.040.60; 23.040.80English versionFlanges and their joints - Gasket parameters and testprocedures relevant to the design rules for gasketed circularflange connectionsBrides et leurs assemblages - Paramètres de joints etmodes opératoires d'essai relatifs aux règles de calcul desassemblages à brides circulaires avec jointFlansche und ihre Verbindungen - Dichtungskennwerte undPrüfverfahren für die Anwendung der Regeln für dieAuslegung von Flanschverbindungen mit runden Flanschenund DichtungenThis European Standard was approved by CEN on 27 October 2004.CEN members are bound to comply with the CEN/CENELEC Internal Regulations which stipulate the conditions for giving this EuropeanStandard the status of a national standard without any alteration. Up-to-date lists and bibliographical references concerning such nationalstandards may be obtained on application to the Central Secretariat or to any CEN member.This European Standard exists in three official versions (English, French, German). A version in any other language made by translationunder the responsibility of a CEN member into its own language and notified to the Central Secretariat has the same status as the officialversions.CEN members are the national standards bodies of Austria, Belgium, Cyprus, Czech Republic, Denmark, Estonia, Finland, France,Germany, Greece, Hungary, Iceland, Ireland, Italy, Latvia, Lithuania, Luxembourg, Malta, Netherlands, Norway, Poland, Portugal, Slovakia,Slovenia, Spain, Sweden, Switzerland and United Kingdom.EUROPEAN COMMITTEE FOR STANDARDIZATIONCOMITÉ EUROPÉEN DE NORMALISATIONEUROPÄISCHES KOMITEE FÜR NORMUNGManagement Centre: rue de Stassart, 36
B-1050 Brussels© 2004 CENAll rights of exploitation in any form and by any means reservedworldwide for CEN national Members.Ref. No. EN 13555:2004: ESIST EN 13555:2005
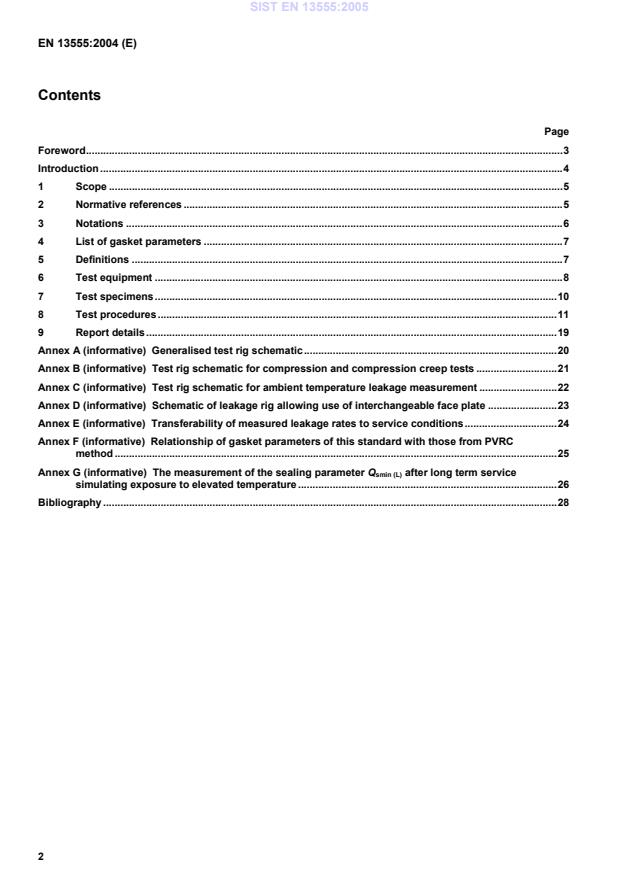
Generalised test rig schematic.20 Annex B (informative)
Test rig schematic for compression and compression creep tests.21 Annex C (informative)
Test rig schematic for ambient temperature leakage measurement.22 Annex D (informative)
Schematic of leakage rig allowing use of interchangeable face plate.23 Annex E (informative)
Transferability of measured leakage rates to service conditions.24 Annex F (informative)
Relationship of gasket parameters of this standard with those from PVRC method.25 Annex G (informative)
The measurement of the sealing parameter Qsmin (L) after long term service simulating exposure to elevated temperature.26 Bibliography.28
area of gasket subjected to surface pressure [mm] D external diameter of gasket [mm] Ds external diameter of area of gasket subjected to surface pressure [mm] EG the secant unloading modulus of the gasket [MPa] LN leakage rate class — subscript N indicates the maximum specific leakage rate for that [mg s- 1 m- 1]
leakage rate class
PQR ratio of gasket surface pressures after & before relaxation — Q surface pressure [MPa] QA gasket surface pressure at assembly [MPa] Qmin (L) the minimum level of surface pressure required for leakage rate class L on assembly [MPa] Qsmin (L) the minimum level of surface pressure required for leakage rate class L after off-loading [MPa] Qsmax the maximum surface pressure than can be safely imposed upon the gasket at the service [MPa]
temperature without damage SIST EN 13555:2005
Qsmax 5.1
8.4
Qmin (L) 5.2
8.7
Qsmin (L) 5.4
8.7 and 8.8
PQR 5.5
8.6
EG 5.6
8.5
αG 5.7
8.9
5 Definitions 5.1 Gasket parameter Qsmax maximum gasket surface pressure that may be imposed on the gasket at the indicated temperatures without col-lapse or compressive failure of the gasket 5.2 Gasket parameter Qmin (L) minimum gasket surface pressure on assembly required at ambient temperature in order to seat the gasket into the flange facing roughness and close the internal leakage channels so that the tightness class is to the required level L for the internal test pressure 5.3 Tightness class LN tightness classes are defined in Table 2 in terms of specific leak rates. Additional, better tightness classes can be introduced as required by continuing the series Table 2 — Tightness classes Tightness classes L1,0 L0,1 L0,01 Specific leak rates [mg s- 1 m- 1] ≤ 1,0 ≤ 0,1 ≤ 0,01
The specific leak rate shall be obtained by dividing the measured leak rate by the arithmetic mean of the inner and outer gasket peripheries subjected to surface pressure from the flange facings, π/2 (DS + dS). SIST EN 13555:2005
50 100 125 150 175 200225250 275300350400 450 500 550600 T [K] 323 373 398 423 448 473498523 548573623673 723 773 823873
In all cases the rate of increase of temperature shall be 2 °C per minute. 6 Test equipment 6.1 Design Schematics of test rigs for compression, compression creep, and leakage measurement are shown in informative Annexes A to D. Annex A is a generalised schematic with the other figures providing further detail for specific
aspects of the tests. SIST EN 13555:2005
EN 1759-1 for an NPS 4 CLASS 300 gasket. Figures B.1 and C.1 show the dimensions in the former case. 6.3 Surface finish of test platens The surface finish of the test platens shall conform to the following:
3,2 µm < Ra < 6,3 µm Exceptions to this range are acceptable where the gasket is intended for use with a surface finish outside of this range. In this case the surface finish used must be recorded. This surface finish can be achieved by lathe turning with the following parameters: Helical pitch: 0,3 mm; Tool radius: 0,8 mm; Depth: 0,015 mm. The recommended Ra values shall be checked before each test. Local errors shall not exceed twice the value of Ra (see EN ISO 4287). Before each test, the freedom from debris from the previous test and from scratch and impact damage to the sur-face finish of the platens shall be checked visually. Experience has indicated that during hot compression tests, such as the Qsmax test, the use of stainless steel foils or shims of thickness of 0,05 mm thickness between the test gasket and the platens protects the flange surface finish because platen cleaning, with the inherent probability of damaging the platen surface finish, is eliminated. If there is any effect from the use of such foils it will be conservative. Where foils are used the fact of their use shall be included in the test report issued. Foils shall not be re-used and shall not be used in sealing tests 6.4 Measurement of gasket thickness For those procedures where the gasket thickness has to be monitored during the test there shall be either three displacement transducers at 120° spacing around the circumference of the platens or one displacement transducer placed on the central line. However, for a leak test, the use of an axial transducer is not recommended as it introduces a sealing complication to the rig design. 6.5 Loading Any loading means may be used that allows the gasket to be loaded and unloaded at a required and consistent rate. The rate of loading and unloading to be used is fixed as: 0,5 MPa/s for all types of gasket except for PTFE based gaskets when 0,1 MPa/s shall be used. The loading shall be recorded as a function of time. SIST EN 13555:2005
Where the intended service is in tongue and groove flanges, the test gasket size is specified in EN 1092-1 or in EN 1759-1, and the test shall be carried out with test platens which have a tongue and groove configuration. Tolerance of the platens for tongue and groove configurations shall be as given below: Negative tolerance for tongue width, Positive tolerance for groove width. If this mode of testing is used it shall be clearly stated in the report. SIST EN 13555:2005
...


Questions, Comments and Discussion
Ask us and Technical Secretary will try to provide an answer. You can facilitate discussion about the standard in here.
Loading comments...