ASTM E127-06
(Practice)Standard Practice for Fabricating and Checking Aluminum Alloy Ultrasonic Standard Reference Blocks
Standard Practice for Fabricating and Checking Aluminum Alloy Ultrasonic Standard Reference Blocks
SIGNIFICANCE AND USE
Reference blocks fabricated to this practice will exhibit specific area-amplitude and distance-amplitude relationships only with an immersion test at 5 MHz using the search unit, test instrument, and test parameters described in this practice. Comparison tests at other frequencies or with uncalibrated test systems will not necessarily give the same relationships shown in this practice.
Note 2—The 1964 and prior issues of this practice required a test frequency of 15 MHz. Blocks conforming to earlier issues of this practice may not produce ultrasonic responses that conform to this issue. See Section 13 regarding provision for recertification or correction curves and tables.
Although the primary ultrasonic evaluation of blocks is performed at a specified frequency, the blocks may be used to standardize ultrasonic tests at any frequency and with any pulse-echo ultrasonic test system. Establishment of distance-amplitude and area-amplitude characteristics is necessary for each application. This use may be inappropriate for other materials and curved surfaces without special compensation. Also see (3) for cautions regarding use of standard blocks for test standardization.
SCOPE
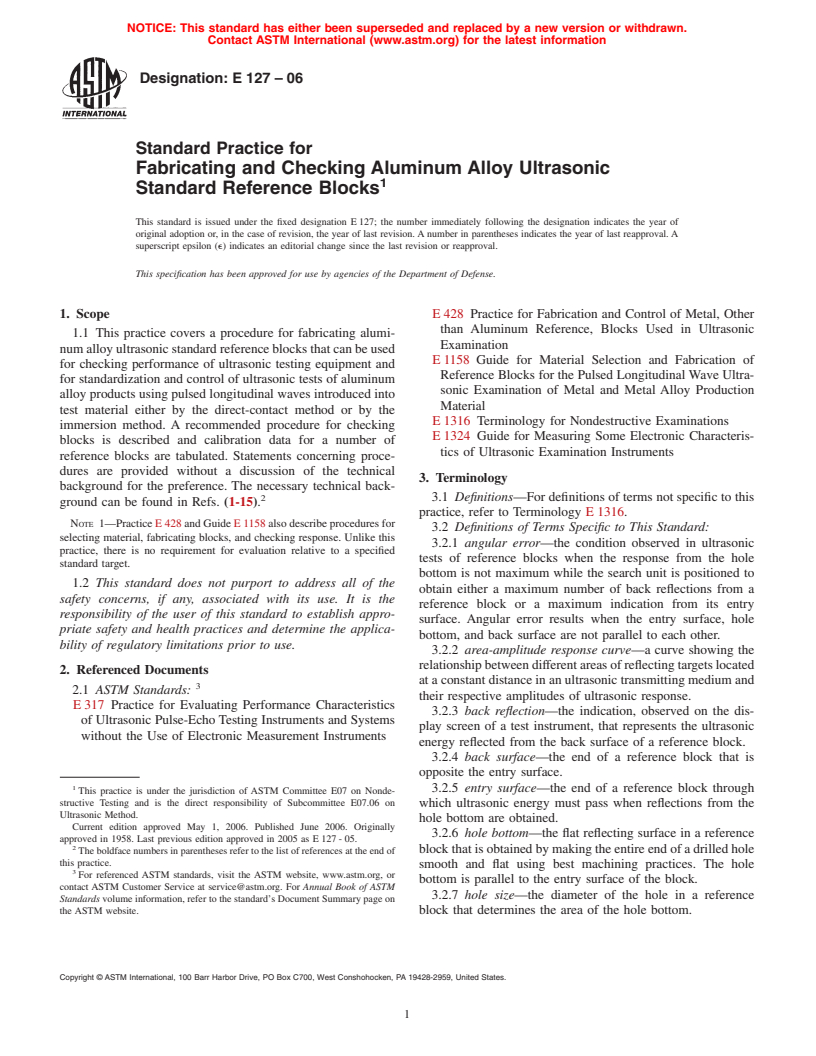
1.1 This practice covers a procedure for fabricating aluminum alloy ultrasonic standard reference blocks that can be used for checking performance of ultrasonic testing equipment and for standardization and control of ultrasonic tests of aluminum alloy products using pulsed longitudinal waves introduced into test material either by the direct-contact method or by the immersion method. A recommended procedure for checking blocks is described and calibration data for a number of reference blocks are tabulated. Statements concerning procedures are provided without a discussion of the technical background for the preference. The necessary technical background can be found in Refs. (1-15).
Note 1—Practice E 428 and Guide E 1158 also describe procedures for selecting material, fabricating blocks, and checking response. Unlike this practice, there is no requirement for evaluation relative to a specified standard target.
This standard does not purport to address all of the safety concerns, if any, associated with its use. It is the responsibility of the user of this standard to establish appropriate safety and health practices and determine the applicability of regulatory limitations prior to use.
General Information
Relations
Standards Content (Sample)
NOTICE: This standard has either been superseded and replaced by a new version or withdrawn.
Contact ASTM International (www.astm.org) for the latest information
Designation: E 127 – 06
Standard Practice for
Fabricating and Checking Aluminum Alloy Ultrasonic
1
Standard Reference Blocks
This standard is issued under the fixed designation E127; the number immediately following the designation indicates the year of
original adoption or, in the case of revision, the year of last revision.Anumber in parentheses indicates the year of last reapproval.A
superscript epsilon (e) indicates an editorial change since the last revision or reapproval.
This specification has been approved for use by agencies of the Department of Defense.
1. Scope E428 Practice for Fabrication and Control of Metal, Other
than Aluminum Reference, Blocks Used in Ultrasonic
1.1 This practice covers a procedure for fabricating alumi-
Examination
numalloyultrasonicstandardreferenceblocksthatcanbeused
E1158 Guide for Material Selection and Fabrication of
for checking performance of ultrasonic testing equipment and
Reference Blocks for the Pulsed LongitudinalWave Ultra-
for standardization and control of ultrasonic tests of aluminum
sonic Examination of Metal and Metal Alloy Production
alloy products using pulsed longitudinal waves introduced into
Material
test material either by the direct-contact method or by the
E1316 Terminology for Nondestructive Examinations
immersion method. A recommended procedure for checking
E1324 Guide for Measuring Some Electronic Characteris-
blocks is described and calibration data for a number of
tics of Ultrasonic Examination Instruments
reference blocks are tabulated. Statements concerning proce-
dures are provided without a discussion of the technical
3. Terminology
background for the preference. The necessary technical back-
2 3.1 Definitions—For definitions of terms not specific to this
ground can be found in Refs. (1-15).
practice, refer to Terminology E1316.
NOTE 1—PracticeE428andGuideE1158alsodescribeproceduresfor
3.2 Definitions of Terms Specific to This Standard:
selecting material, fabricating blocks, and checking response. Unlike this
3.2.1 angular error—the condition observed in ultrasonic
practice, there is no requirement for evaluation relative to a specified
tests of reference blocks when the response from the hole
standard target.
bottom is not maximum while the search unit is positioned to
1.2 This standard does not purport to address all of the
obtain either a maximum number of back reflections from a
safety concerns, if any, associated with its use. It is the
reference block or a maximum indication from its entry
responsibility of the user of this standard to establish appro-
surface. Angular error results when the entry surface, hole
priate safety and health practices and determine the applica-
bottom, and back surface are not parallel to each other.
bility of regulatory limitations prior to use.
3.2.2 area-amplitude response curve—a curve showing the
relationshipbetweendifferentareasofreflectingtargetslocated
2. Referenced Documents
ataconstantdistanceinanultrasonictransmittingmediumand
3
2.1 ASTM Standards:
their respective amplitudes of ultrasonic response.
E317 Practice for Evaluating Performance Characteristics
3.2.3 back reflection—the indication, observed on the dis-
of Ultrasonic Pulse-EchoTesting Instruments and Systems
play screen of a test instrument, that represents the ultrasonic
without the Use of Electronic Measurement Instruments
energy reflected from the back surface of a reference block.
3.2.4 back surface—the end of a reference block that is
opposite the entry surface.
1
3.2.5 entry surface—the end of a reference block through
This practice is under the jurisdiction of ASTM Committee E07 on Nonde-
structive Testing and is the direct responsibility of Subcommittee E07.06 on
which ultrasonic energy must pass when reflections from the
Ultrasonic Method.
hole bottom are obtained.
Current edition approved May 1, 2006. Published June 2006. Originally
3.2.6 hole bottom—the flat reflecting surface in a reference
approved in 1958. Last previous edition approved in 2005 as E127-05.
2
blockthatisobtainedbymakingtheentireendofadrilledhole
Theboldfacenumbersinparenthesesrefertothelistofreferencesattheendof
this practice.
smooth and flat using best machining practices. The hole
3
For referenced ASTM standards, visit the ASTM website, www.astm.org, or
bottom is parallel to the entry surface of the block.
contact ASTM Customer Service at service@astm.org. For Annual Book of ASTM
3.2.7 hole size—the diameter of the hole in a reference
Standards volume information, refer to the standard’s Document Summary page on
the ASTM website. block that determines the area of the hole bottom.
Copyright © ASTM International, 100 Barr Harbor Drive, PO Box C700, West Conshohocken, PA 19428-2959, United States.
1
---------------------- Page: 1 ----------------------
E127–06
3.2.8 metal distance—thedistanceinareferenceblo
...


Questions, Comments and Discussion
Ask us and Technical Secretary will try to provide an answer. You can facilitate discussion about the standard in here.