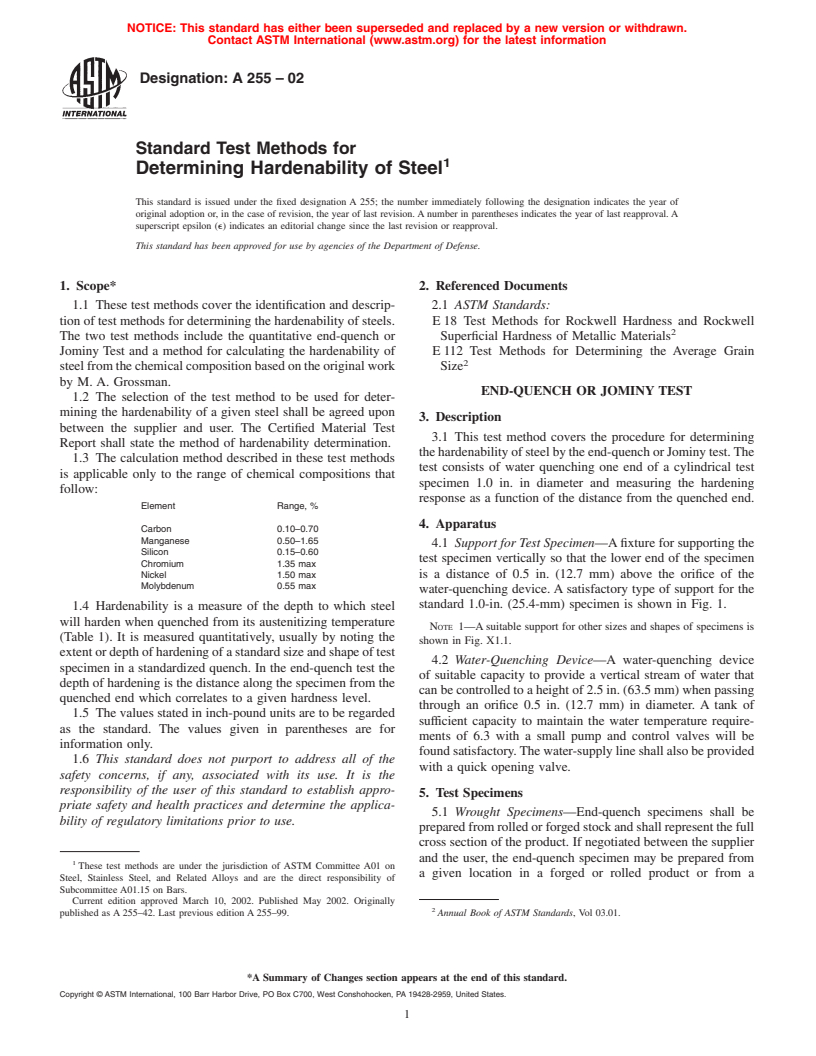
ASTM A255-02
(Test Method)Standard Test Method for Determining Hardenability of Steel
Standard Test Method for Determining Hardenability of Steel
SCOPE
1.1 These test methods cover the identification and description of test methods for determining the hardenability of steels. The two test methods include the quantitative end-quench or Jominy Test and a method for calculating the hardenability of steel from the chemical composition based on the original work by M. A. Grossman.
1.2 The selection of the test method to be used for determining the hardenability of a given steel shall be agreed upon between the supplier and user. The Certified Material Test Report shall state the method of hardenability determination.
1.3 The calculation method described in these test methods is applicable only to the range of chemical compositions that follow: ElementRange, % Carbon0.10-0.70 Manganese0.50-1.65 Silicon0.15-0.60 Chromium1.35 max Nickel1.50 max Molybdenum0.55 max
1.4 Hardenability is a measure of the depth to which steel will harden when quenched from its austenitizing temperature (Table 1). It is measured quantitatively, usually by noting the extent or depth of hardening of a standard size and shape of test specimen in a standardized quench. In the end-quench test the depth of hardening is the distance along the specimen from the quenched end which correlates to a given hardness level.
1.5 The values stated in inch-pound units are to be regarded as the standard. The values given in parentheses are for information only.
1.6 This standard does not purport to address all of the safety concerns, if any, associated with its use. It is the responsibility of the user of this standard to establish appropriate safety and health practices and determine the applicability of regulatory limitations prior to use.
General Information
Relations
Standards Content (Sample)
NOTICE: This standard has either been superseded and replaced by a new version or withdrawn.
Contact ASTM International (www.astm.org) for the latest information
Designation: A 255 – 02
Standard Test Methods for
1
Determining Hardenability of Steel
This standard is issued under the fixed designation A 255; the number immediately following the designation indicates the year of
original adoption or, in the case of revision, the year of last revision. A number in parentheses indicates the year of last reapproval. A
superscript epsilon (e) indicates an editorial change since the last revision or reapproval.
This standard has been approved for use by agencies of the Department of Defense.
1. Scope* 2. Referenced Documents
1.1 These test methods cover the identification and descrip- 2.1 ASTM Standards:
tion of test methods for determining the hardenability of steels. E 18 Test Methods for Rockwell Hardness and Rockwell
2
The two test methods include the quantitative end-quench or Superficial Hardness of Metallic Materials
Jominy Test and a method for calculating the hardenability of E 112 Test Methods for Determining the Average Grain
2
steelfromthechemicalcompositionbasedontheoriginalwork Size
by M. A. Grossman.
END-QUENCH OR JOMINYTEST
1.2 The selection of the test method to be used for deter-
mining the hardenability of a given steel shall be agreed upon
3. Description
between the supplier and user. The Certified Material Test
3.1 This test method covers the procedure for determining
Report shall state the method of hardenability determination.
thehardenabilityofsteelbytheend-quenchorJominytest.The
1.3 The calculation method described in these test methods
test consists of water quenching one end of a cylindrical test
is applicable only to the range of chemical compositions that
specimen 1.0 in. in diameter and measuring the hardening
follow:
response as a function of the distance from the quenched end.
Element Range, %
4. Apparatus
Carbon 0.10–0.70
Manganese 0.50–1.65
4.1 Support for Test Specimen—Afixture for supporting the
Silicon 0.15–0.60
test specimen vertically so that the lower end of the specimen
Chromium 1.35 max
Nickel 1.50 max is a distance of 0.5 in. (12.7 mm) above the orifice of the
Molybdenum 0.55 max
water-quenching device. A satisfactory type of support for the
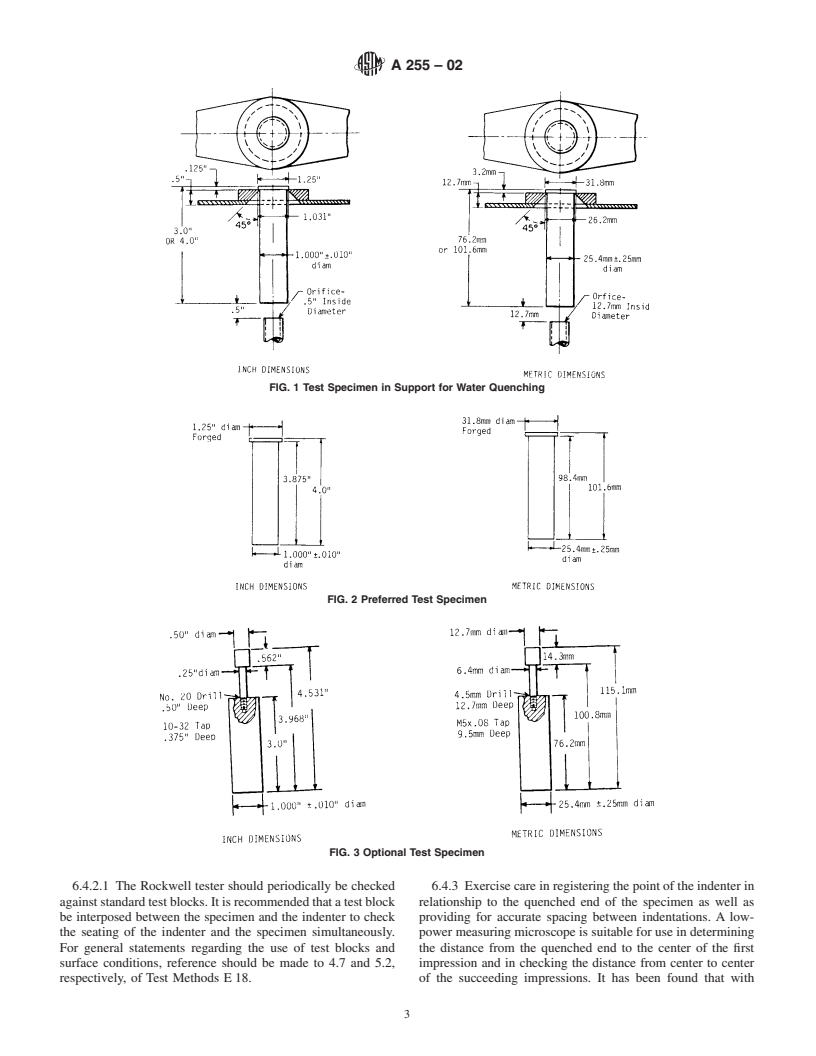
standard 1.0-in. (25.4-mm) specimen is shown in Fig. 1.
1.4 Hardenability is a measure of the depth to which steel
will harden when quenched from its austenitizing temperature
NOTE 1—A suitable support for other sizes and shapes of specimens is
(Table 1). It is measured quantitatively, usually by noting the
shown in Fig. X1.1.
extentordepthofhardeningofastandardsizeandshapeoftest
4.2 Water-Quenching Device—A water-quenching device
specimen in a standardized quench. In the end-quench test the
of suitable capacity to provide a vertical stream of water that
depth of hardening is the distance along the specimen from the
canbecontrolledtoaheightof2.5in.(63.5mm)whenpassing
quenched end which correlates to a given hardness level.
through an orifice 0.5 in. (12.7 mm) in diameter. A tank of
1.5 The values stated in inch-pound units are to be regarded
sufficient capacity to maintain the water temperature require-
as the standard. The values given in parentheses are for
ments of 6.3 with a small pump and control valves will be
information only.
foundsatisfactory.Thewater-supplylineshallalsobeprovided
1.6 This standard does not purport to address all of the
with a quick opening valve.
safety concerns, if any, associated with its use. It is the
responsibility of the user of this standard to establish appro-
5. Test Specimens
priate safety and health practices and determine the applica-
5.1 Wrought Specimens—End-quench specimens shall be
bility of regulatory limitations prior to use.
preparedfromrolledorforgedstockandshallrepresentthefull
cross section of the product. If negotiated between the supplier
and the user, the end-quench specimen may be prepared from
1
These test methods are under the jurisdiction of ASTM Committee A01 on
a given location in a forged or rolled product or from a
Steel, Stainless Steel, and Related Alloys and are the direct responsibility of
Subcommittee A01.15 on Bars.
Current edition approved March 10, 2002. Published May 2002. Originally
2
published as A 255–42. Last previous edition A 255–99. Annual Book of ASTM Standards, Vol 03.01.
*ASummary of Changes section appears at the end of this standard.
Copyright © ASTM International, 100 Barr Harbor Drive, PO Box C700, West Conshohocken, PA 19428-2959, United States.
1
---------------------- Page: 1 ----------------------
A 255–02
A
TABLE 1 Normalizing and Austenitizing Temperatures
6.2.1 Other methods consist of placing the specimen in an
Normalizing Austenitizing appropriately sized hole in a graphite block or placing the
Steel Series Ordered Carbon Temperature, °F Temperature, °F
specimen in an upright tube attached to a flat base, both of a
Content, max, % (°C) (°C)
heat-re
...


Questions, Comments and Discussion
Ask us and Technical Secretary will try to provide an answer. You can facilitate discussion about the standard in here.