OSIST prEN 12517:2004
(Main)Non destructive examination of welds - Radiographic examination of welded joints in steel - Acceptance level
Non destructive examination of welds - Radiographic examination of welded joints in steel - Acceptance level
This standard specifies acceptance levels for indications from imperfections in steel butt welds detected by radiography . If agreed, the acceptance levels may be applied to other types of welds or materials. The acceptance levels may be related to welding standards, application standards, specifications or codes. Such a relationship is shown in EN 12062 for EN 25817. This standard assumes that the radiographic examination has been carried out in accordance with EN 1435. When assessing whether a weld meets the requirements specified for a weld quality level, the sizes of imperfections permitted by standards are compared with the dimensions of indications revealed by a radiograph made of the weld.
Zerstörungsfreie Prüfung von Schweißverbindungen - Durchstrahlungsprüfung von Schweißverbindungen - Zulässigkeitsgrenzen
Contrôle non destructif des assemblages soudés - Contrôle par radiographie des assemblages soudés en acier - Niveaux d'acceptation
Non destructive examination of welds - Radiographic examination of welded joints in steel - Acceptance level
General Information
- Status
- Not Published
- Technical Committee
- VAR - Welding
- Current Stage
- 98 - Abandoned project (Adopted Project)
- Start Date
- 04-Nov-2013
- Due Date
- 09-Nov-2013
- Completion Date
- 04-Nov-2013
Relations
- Effective Date
- 08-Mar-2023
- Effective Date
- 08-Mar-2023
- Effective Date
- 22-Dec-2008
- Effective Date
- 22-Dec-2008
Overview
prEN 12517 - "Non destructive examination of welds - Radiographic examination of welded joints in steel - Acceptance level" (CEN draft) defines acceptance criteria for indications from imperfections in steel butt welds revealed by radiographic examination. It assumes radiography was performed in accordance with EN 1435 and is intended to be linked to weld quality levels such as EN ISO 5817. If agreed between parties, the acceptance levels can be applied to other weld types or materials and referenced in specifications, codes or application standards (for example EN 12062).
Key topics and requirements
- Scope and assumptions: Applies to radiographic detection of internal imperfections in butt welds; radiographic technique A or B of EN 1435 is required depending on the quality level.
- Acceptance levels: Three quality/acceptance levels are provided (1 = most stringent to 3 = least stringent). Metrics include:
- Porosity / gas pores: permitted total projected area (%) per 100 mm (examples - single layer: Level 3 A ≤ 2.5%, Level 2 A ≤ 1.5%, Level 1 A ≤ 1%). Maximum pore diameter limits are given as proportions of nominal weld thickness (d ≤ 0.4s down to 0.2s) with capped mm values.
- Clustered and linear porosity: larger percent allowances (e.g., clustered porosity up to 16% at Level 3) and defined maximum pore sizes.
- Elongated cavities / wormholes, inclusions, lack of fusion/penetration: dimensional limits on width (h), length (l) and related restrictions; some planar defects (e.g., cracks) are not permitted at any level.
- Surface imperfections: evaluated according to visual testing limits (EN 970); some surface conditions may require additional radiographic quantification procedures.
- Evaluation rules: Annexes explain radiography limitations, examples for percent-area determination and rules for summing connected pore areas (normative diagrams in Annex C).
Applications and users
This standard is practical for:
- Welding inspectors and NDT technicians performing radiographic acceptance checks
- Fabrication and quality engineers in steel construction, pressure vessels, pipelines and heavy engineering
- Procurement and code authorities specifying weld acceptance criteria in contracts and application standards
- Designers and welding coordinators aligning welding procedures with radiographic acceptance levels
Typical applications: production quality control, final inspection of butt welds, conformity assessment against EN ISO 5817 quality levels, and establishing contractual acceptance criteria for radiographic reports.
Related standards
- EN 1435 - Radiographic examination technique and exposure requirements
- EN ISO 5817 - Quality levels for imperfections in fusion-welded joints
- EN 12062 - Linking NDE acceptance criteria to welding quality standards
- EN 970 - Visual examination of fusion welds
- EN ISO 6520-1 - Classification of geometric imperfections
Keywords: radiographic examination, non-destructive examination, weld acceptance levels, butt welds, EN 1435, EN ISO 5817, porosity, lack of fusion, NDT.
Frequently Asked Questions
OSIST prEN 12517:2004 is a draft published by the Slovenian Institute for Standardization (SIST). Its full title is "Non destructive examination of welds - Radiographic examination of welded joints in steel - Acceptance level". This standard covers: This standard specifies acceptance levels for indications from imperfections in steel butt welds detected by radiography . If agreed, the acceptance levels may be applied to other types of welds or materials. The acceptance levels may be related to welding standards, application standards, specifications or codes. Such a relationship is shown in EN 12062 for EN 25817. This standard assumes that the radiographic examination has been carried out in accordance with EN 1435. When assessing whether a weld meets the requirements specified for a weld quality level, the sizes of imperfections permitted by standards are compared with the dimensions of indications revealed by a radiograph made of the weld.
This standard specifies acceptance levels for indications from imperfections in steel butt welds detected by radiography . If agreed, the acceptance levels may be applied to other types of welds or materials. The acceptance levels may be related to welding standards, application standards, specifications or codes. Such a relationship is shown in EN 12062 for EN 25817. This standard assumes that the radiographic examination has been carried out in accordance with EN 1435. When assessing whether a weld meets the requirements specified for a weld quality level, the sizes of imperfections permitted by standards are compared with the dimensions of indications revealed by a radiograph made of the weld.
OSIST prEN 12517:2004 is classified under the following ICS (International Classification for Standards) categories: 25.160.40 - Welded joints and welds. The ICS classification helps identify the subject area and facilitates finding related standards.
OSIST prEN 12517:2004 has the following relationships with other standards: It is inter standard links to SIST EN 12517-1:2006, SIST EN 12517-2:2008; is excused to SIST EN 12517-1:2006, SIST EN 12517-2:2008. Understanding these relationships helps ensure you are using the most current and applicable version of the standard.
OSIST prEN 12517:2004 is associated with the following European legislation: EU Directives/Regulations: 97/23/EC; Standardization Mandates: M/071. When a standard is cited in the Official Journal of the European Union, products manufactured in conformity with it benefit from a presumption of conformity with the essential requirements of the corresponding EU directive or regulation.
OSIST prEN 12517:2004 is available in PDF format for immediate download after purchase. The document can be added to your cart and obtained through the secure checkout process. Digital delivery ensures instant access to the complete standard document.
Standards Content (Sample)
SLOVENSKI OSIST prEN 12517:2004
PREDSTANDARD
oct 2004
Non destructive examination of welds - Radiographic examination of welded joints
in steel - Acceptance level
ICS 25.160.40 Referenčna številka
© Standard je založil in izdal Slovenski inštitut za standardizacijo. Razmnoževanje ali kopiranje celote ali delov tega dokumenta ni dovoljeno
EUROPEAN STANDARD
DRAFT
NORME EUROPÉENNE
EUROPÄISCHE NORM
August 2004
ICS Will supersede EN 12517:1998
English version
Non destructive examination of welds - Radiographic
examination of welded joints in steel - Acceptance level
Contrôle non destructif des assemblages soudés - Contrôle Zerstörungsfreie Prüfung von Schweißverbindungen -
par radiographie des assemblages soudés en acier - Durchstrahlungsprüfung von Schweißverbindungen -
Niveaux d'acceptation Zulässigkeitsgrenzen
This draft European Standard is submitted to CEN members for enquiry. It has been drawn up by the Technical Committee CEN/TC 121.
If this draft becomes a European Standard, CEN members are bound to comply with the CEN/CENELEC Internal Regulations which
stipulate the conditions for giving this European Standard the status of a national standard without any alteration.
This draft European Standard was established by CEN in three official versions (English, French, German). A version in any other language
made by translation under the responsibility of a CEN member into its own language and notified to the Management Centre has the same
status as the official versions.
CEN members are the national standards bodies of Austria, Belgium, Cyprus, Czech Republic, Denmark, Estonia, Finland, France,
Germany, Greece, Hungary, Iceland, Ireland, Italy, Latvia, Lithuania, Luxembourg, Malta, Netherlands, Norway, Poland, Portugal, Slovakia,
Slovenia, Spain, Sweden, Switzerland and United Kingdom.
Warning : This document is not a European Standard. It is distributed for review and comments. It is subject to change without notice and
shall not be referred to as a European Standard.
EUROPEAN COMMITTEE FOR STANDARDIZATION
COMITÉ EUROPÉEN DE NORMALISATION
EUROPÄISCHES KOMITEE FÜR NORMUNG
Management Centre: rue de Stassart, 36 B-1050 Brussels
© 2004 CEN All rights of exploitation in any form and by any means reserved Ref. No. prEN 12517:2004: E
worldwide for CEN national Members.
prEN 12517:2004 (E)
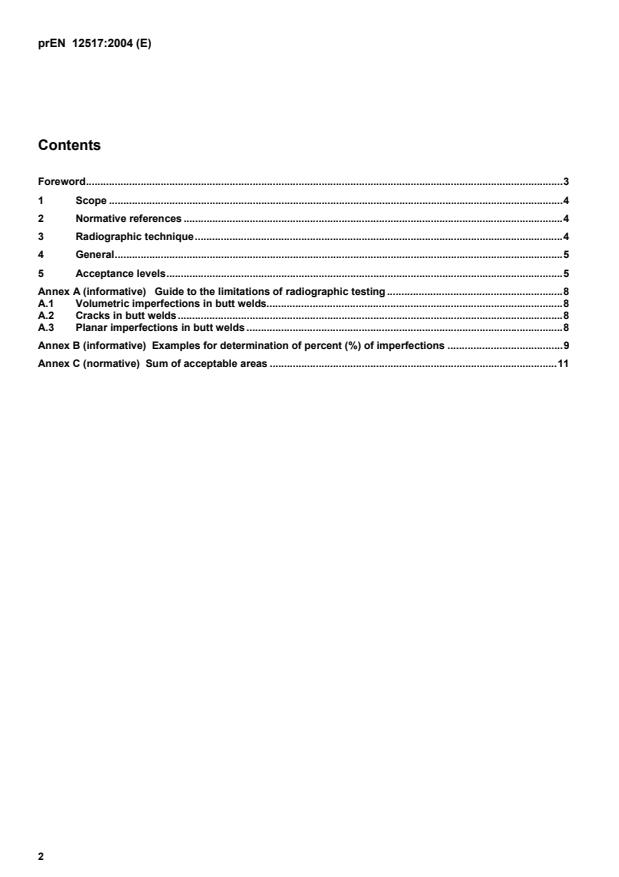
Contents
Foreword.3
1 Scope .4
2 Normative references .4
3 Radiographic technique.4
4 General.5
5 Acceptance levels.5
Annex A (informative) Guide to the limitations of radiographic testing.8
A.1 Volumetric imperfections in butt welds.8
A.2 Cracks in butt welds.8
A.3 Planar imperfections in butt welds .8
Annex B (informative) Examples for determination of percent (%) of imperfections .9
Annex C (normative) Sum of acceptable areas .11
prEN 12517:2004 (E)
Foreword
This document (prEN 12517:2004) has been prepared by Technical Committee CEN/TC 121 “Welding”, the
secretariat of which is held by DIN.
This document is currently submitted to the CEN Enquiry.
This document will supersede EN 12517:1998
This document has been prepared under a mandate given to CEN by the European Commission and the European
Free Trade Association, and supports essential requirements of EU Directive(s).
prEN 12517:2004 (E)
1 Scope
This standard specifies acceptance levels for indications from imperfections in steel butt welds detected by
radiographic testing . If agreed, the acceptance levels may be applied to other types of welds or materials.
The acceptance levels may be related to welding standards, application standards, specifications or codes. Such a
relationship is shown in EN 12062 for EN ISO 5817.
This standard assumes that the radiographic testing has been carried out in accordance with EN 1435.
When assessing whether a weld meets the requirements specified for a weld quality level, the sizes of
imperfections permitted by standards are compared with the dimensions of indications revealed by a radiograph
made of the weld.
2 Normative references
The following referenced documents are indispensable for the application of this document. For dated references,
only the edition cited applies. For undated references, the latest edition of the referenced document (including any
amendments) applies.
EN 970, Non-destructive examination of fusion welds — Visual examination.
EN 1435, Non-destructive examination of welds — Radiographic examination of welded joints.
EN 12062, Non-destructive examination of welds — General rules for metallic materials.
EN ISO 5817, Welding — Fusion-welded joints in steel, nickel, titanium and their alloys (beam welding excluded) —
Quality levels for imperfections (ISO 5817:2003).
EN ISO 6520-1, Welding and allied processes — Classification of geometric imperfections in metallic materials —
Part 1: Fusion welding (ISO 6520-1:1998).
3 Radiographic technique
Depending on the weld quality level, radiographic technique A or B in accordance with EN 1435 is used as shown
in table 1.
Table 1 – Radiographic examination
Quality levels in accordance Examination techniques and Acceptance levels in
with EN ISO 5817 classes in accordance with accordance with
EN 1435 EN 12517
B B 1
a
C 2
B
D A 3
a
However, the minimum number of exposure for circumferencial weld testing shall correspond
to the requirements of class A of EN 1435.
prEN 12517:2004 (E)
4 General
Welded joints should be visually tested and evaluated in accordance with EN 970 before radiographic testing.
The acceptance levels in this document are basically valid for evaluation of imperfections which cannot be detected
and evaluated by visual testing. Surface imperfections (such as undercut and excessive penetration, surface
damage, weld spatter, etc.) which due to object geometry cannot be evaluated, but where the interpreter suspects
the EN ISO 5817 quality levels are not fulfilled, shall be subject to more specific testing.
When quantification of undercut and/or excessive penetration by radiographic testing is required, specific
procedures using test exposures may be applied in order to established a basis for approximate quantification in
accordance with the requirements of EN ISO 5
...


Questions, Comments and Discussion
Ask us and Technical Secretary will try to provide an answer. You can facilitate discussion about the standard in here.
Loading comments...