ISO/TS 19096:2023
(Main)Metallic materials — Instrumented indentation test for hardness and materials parameters — Evaluation of stress change using indentation force differences
Metallic materials — Instrumented indentation test for hardness and materials parameters — Evaluation of stress change using indentation force differences
This document specifies the method of instrumented indentation test for evaluation of stress change between reference and target states using indentation force differences. This document primarily applies to measuring the stress change in a specific location and the stress difference between different locations.
Matériaux métalliques — Essai d'indentation instrumenté pour les paramètres de dureté et de matériaux — Évaluation de la variation de contrainte en utilisant les différences de force d'indentation
General Information
- Status
- Published
- Publication Date
- 14-Nov-2023
- Technical Committee
- ISO/TC 164/SC 3 - Hardness testing
- Current Stage
- 6060 - International Standard published
- Start Date
- 15-Nov-2023
- Due Date
- 17-Apr-2023
- Completion Date
- 15-Nov-2023
Overview
ISO/TS 19096:2023 - Metallic materials - Instrumented indentation test for hardness and materials parameters - Evaluation of stress change using indentation force differences - specifies a method to evaluate stress change between a reference and a target state by comparing instrumented indentation force–displacement responses. The technique is aimed at near-surface, plane-stress measurements on metallic materials and is intended for point measurements and comparative mapping across locations.
Key topics and requirements
- Principle: Stress changes shift the instrumented indentation force/indentation-depth curve. The standard quantifies stress change from the force difference between reference and target curves (constant-depth or constant-load approaches).
- Scope of measurement: Primarily measures average near-surface stress change in the plane of the surface (the method yields the change equal to half the first invariant of the stress tensor when normal stress is zero).
- Test equipment & calibration: Uses instrumented indentation systems complying with ISO 14577 series requirements (machine verification and calibration).
- Test piece and procedure: Specifies sample selection, acquisition of reference and target states, indentation arrays (1D or 2D) and procedures for controlling local hardness variations (see Annex A).
- Data processing: Calculation of projected areas, force differences, and average stress change; guidance on uncertainty estimation (ISO/IEC Guide 98-3 referenced).
- Verification and combination methods: Includes normative and informative annexes for hardness uniformity verification (A), combining with stress relief methods (B), Knoop indenter usage (C), verification by bending specimens (D), and comparison with hole‑drilling/saw‑cutting (E).
Practical applications
- Rapid semi‑destructive evaluation of residual/stress change after processes such as heat treatment, welding, forming, shot peening, coating and surface modification.
- Localized stress mapping (1D/2D indentation arrays) to identify regions of tensile or compressive change.
- In-field quality control where minimal surface preparation and fast point measurements (<~30 s per point) are advantageous.
- Complementary use with XRD, hole‑drilling and destructive stress‑relief techniques to convert stress change to absolute residual stress when required.
Who should use this standard
- Materials and metallurgical laboratories performing hardness and residual stress assessments
- Mechanical engineers and failure‑analysis teams evaluating process-induced stresses
- Quality control and NDT specialists seeking a fast, localized stress-change measurement method
- Researchers developing indentation-based stress measurement techniques
Related standards and notes
- Normative references: ISO 14577‑1:2015, ISO 14577‑2:2015, and ISO/IEC Guide 98‑3:2008 (GUM).
- Annexes provide verification procedures, comparisons with hole‑drilling and saw‑cutting, and guidance for specific indenters (Knoop) and validation methods.
Keywords: ISO/TS 19096:2023, instrumented indentation test, residual stress, indentation force differences, metallic materials, hardness testing, stress mapping.
Get Certified
Connect with accredited certification bodies for this standard

Element Materials Technology
Materials testing and product certification.

Inštitut za kovinske materiale in tehnologije
Institute of Metals and Technology. Materials testing, metallurgical analysis, NDT.
Sponsored listings
Frequently Asked Questions
ISO/TS 19096:2023 is a technical specification published by the International Organization for Standardization (ISO). Its full title is "Metallic materials — Instrumented indentation test for hardness and materials parameters — Evaluation of stress change using indentation force differences". This standard covers: This document specifies the method of instrumented indentation test for evaluation of stress change between reference and target states using indentation force differences. This document primarily applies to measuring the stress change in a specific location and the stress difference between different locations.
This document specifies the method of instrumented indentation test for evaluation of stress change between reference and target states using indentation force differences. This document primarily applies to measuring the stress change in a specific location and the stress difference between different locations.
ISO/TS 19096:2023 is classified under the following ICS (International Classification for Standards) categories: 77.040.10 - Mechanical testing of metals. The ICS classification helps identify the subject area and facilitates finding related standards.
ISO/TS 19096:2023 is available in PDF format for immediate download after purchase. The document can be added to your cart and obtained through the secure checkout process. Digital delivery ensures instant access to the complete standard document.
Standards Content (Sample)
TECHNICAL ISO/TS
SPECIFICATION 19096
First edition
2023-11
Metallic materials — Instrumented
indentation test for hardness and
materials parameters — Evaluation of
stress change using indentation force
differences
Matériaux métalliques — Essai d'indentation instrumenté pour les
paramètres de dureté et de matériaux — Évaluation de la variation
de contrainte en utilisant les différences de force d'indentation
Reference number
© ISO 2023
All rights reserved. Unless otherwise specified, or required in the context of its implementation, no part of this publication may
be reproduced or utilized otherwise in any form or by any means, electronic or mechanical, including photocopying, or posting on
the internet or an intranet, without prior written permission. Permission can be requested from either ISO at the address below
or ISO’s member body in the country of the requester.
ISO copyright office
CP 401 • Ch. de Blandonnet 8
CH-1214 Vernier, Geneva
Phone: +41 22 749 01 11
Email: copyright@iso.org
Website: www.iso.org
Published in Switzerland
ii
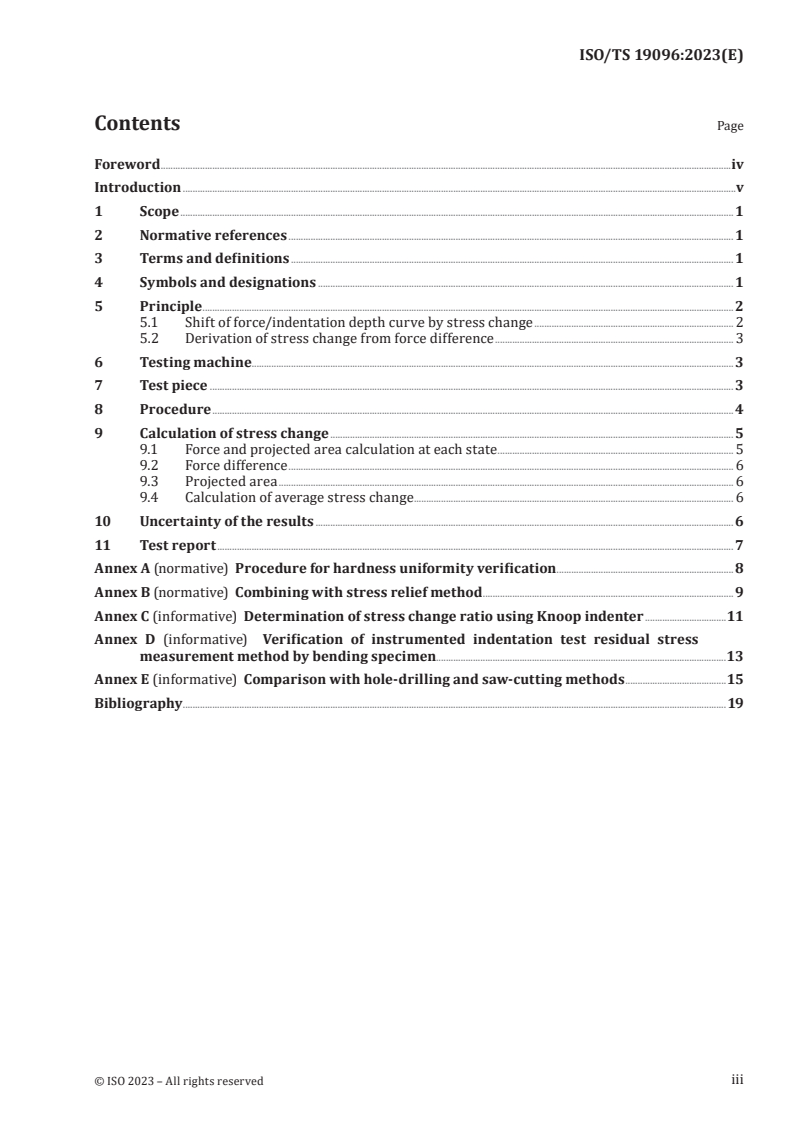
Contents Page
Foreword .iv
Introduction .v
1 Scope . 1
2 Normative references . 1
3 Terms and definitions . 1
4 Symbols and designations . 1
5 Principle . 2
5.1 Shift of force/indentation depth curve by stress change . 2
5.2 Derivation of stress change from force difference . 3
6 Testing machine.3
7 Test piece . 3
8 Procedure .4
9 Calculation of stress change . 5
9.1 Force and projected area calculation at each state . 5
9.2 Force difference . 6
9.3 Projected area . 6
9.4 Calculation of average stress change . 6
10 Uncertainty of the results . 6
11 Test report . 7
Annex A (normative) Procedure for hardness uniformity verification . 8
Annex B (normative) Combining with stress relief method . 9
Annex C (informative) Determination of stress change ratio using Knoop indenter .11
Annex D (informative) Verification of instrumented indentation test residual stress
measurement method by bending specimen.13
Annex E (informative) Comparison with hole-drilling and saw-cutting methods .15
Bibliography .19
iii
Foreword
ISO (the International Organization for Standardization) is a worldwide federation of national standards
bodies (ISO member bodies). The work of preparing International Standards is normally carried out
through ISO technical committees. Each member body interested in a subject for which a technical
committee has been established has the right to be represented on that committee. International
organizations, governmental and non-governmental, in liaison with ISO, also take part in the work.
ISO collaborates closely with the International Electrotechnical Commission (IEC) on all matters of
electrotechnical standardization.
The procedures used to develop this document and those intended for its further maintenance are
described in the ISO/IEC Directives, Part 1. In particular, the different approval criteria needed for the
different types of ISO document should be noted. This document was drafted in accordance with the
editorial rules of the ISO/IEC Directives, Part 2 (see www.iso.org/directives).
ISO draws attention to the possibility that the implementation of this document may involve the use
of (a) patent(s). ISO takes no position concerning the evidence, validity or applicability of any claimed
patent rights in respect thereof. As of the date of publication of this document, ISO had received notice of
(a) patent(s) which may be required to implement this document. However, implementers are cautioned
that this may not represent the latest information, which may be obtained from the patent database
available at www.iso.org/patents. ISO shall not be held responsible for identifying any or all such patent
rights.
Any trade name used in this document is information given for the convenience of users and does not
constitute an endorsement.
For an explanation of the voluntary nature of standards, the meaning of ISO specific terms and
expressions related to conformity assessment, as well as information about ISO's adherence to
the World Trade Organization (WTO) principles in the Technical Barriers to Trade (TBT), see
www.iso.org/iso/foreword.html.
This document was prepared by Technical Committee ISO/TC 164, Mechanical testing of metals,
Subcommittee SC 3, Hardness testing.
Any feedback or questions on this document should be directed to the user’s national standards body. A
complete listing of these bodies can be found at www.iso.org/members.html.
iv
Introduction
Residual stress is defined as the “locked-in” stress that exists in materials and structures independent
of the presence of any external loads. The mechanisms that create residual stress are diverse and
include non-uniform plastic deformation, surface modification and thermal gradients.
Numerous techniques have been developed for evaluating residual stress, each with their own merits
and drawbacks. Physical methods such as X-ray diffraction (XRD) and neutron diffraction are non-
destructive tests based on measuring lattice parameters, and thus they are restricted to crystalline
materials; in addition, they are sensitive to microstructure and to the test environment.
On the other hand, destructive methods such as hole drilling and sectioning method let us quantify the
residual stress mechanically and require no reference sample. However, these methods cannot avoid
destruction of the sample and require a strain gauge attachment. Then the observed change in strain
must be converted to the stress.
The results of these methods for determining residual stress can differ because the residual stress
sensing depth and area in each method are different. The hole-drilling measures the amount of
strain relaxation caused by the removal of the hole material. The spatial resolution of the method
is approximately the size of the hole (typically 2 mm diameter). In case of XRD, the smaller size of
irradiated area requires a longer measurement time. The indentation method requires less precise
surface preparation than XRD because it obtains a direct response from the material, and strain gauges
are unnecessary. It takes less than 30 s to measure one point and has high in-field applicability. This
document, using a semi-destructive method for measuring stress change, makes it unnecessary to
machine samples from in-service components or manufactured products exhibiting internal or external
stress changes.
Residual stress is not a material property but a state of stress. In general, it has been observed that
when a material is subject to stress change, its indentation curve is shifted upward or downward
compared to the initial indentation curve, because the stress change makes indentation easier
(relatively tensile) and more difficult (relatively compressive). In a constant depth test (fixed h ): an
max
increase in compressive stress squeezes the material around the indenter and hence a greater load is
needed to reach to the same indentation depth than in the initial stress state. On the other hand, an
increase in tensile stress releases the material and a smaller load is necessary to keep the same
indentation depth than in the initial stress state. In fact, a smaller load/larger load is required at
constant h from initial surface. It seems as if an imaginary (virtual) force works in the same/
max
opposite direction as/to the indenting direction.
To quantify the effect of stress on indentation behaviour, the deviatoric stress concept along the
indenting direction is proposed in this document. The method for calculation of the average stress
change is given in Clause 8. The described procedure can be applied only when the observed change
in force-displacement curves is a result of stress change. The proposed method measures the near-
surface stress change in the direction parallel to the test surface.
Similarly, in a constant load test (fixed L ): compressive stress change makes indentation difficult
max
and hence the indentation depth becomes shallow. Tensile stress change makes indentation easy and
the indentation depth becomes deeper. Thus, in the elastic modulus approach, the sign (mode) of stress
change can be determined by using this constant-load test as is similar to the above constant-depth (
h ) test in this proposal.
max
The material for the reference and target states should be selected so as to maintain identical chemical
composition with relatively little change of mechanical properties to the target material. This test
method is limited to examinations that conform to the conditions given in Annex A. Annex A provides
a procedure to achieve satisfactory results by sorting out locally hardening test points. The test point
showing the largest deviation is reasonably considered as being from a locally severely changed
region. The test point showing the greatest deviation from the average value should be screened out
and this process be repeated with remaining test points until the criterion is met. Nevertheless, it is
v
recommended to carefully control the factors between the target and reference states, such as chemical
composition, grain size, dislocation density and texture, which can cause errors in measurements.
If the condition given in Annex A is not satisfied, destructive stress relief methods by electrical
discharge machining or focused ion beam can be combined to obtain the reference state (stress-free
state) without changing material properties following Annex B. The stress change from this document
can be converted to the residual stress of the target state by considering the stress value of the reference
state measured by other methods, such as X-ray diffraction and hole-drilling method.
This document proposes a method to measure the average stress change between reference and target
states. Residual stress caused by non-uniform plastic forming and heat treatment usually shows stress
components of the same sign in the region requiring stress evaluation. Therefore, there is high demand
for the proposed method in many fields. Additionally, if the user wants to resolve stress components,
Annex C in the draft can be utilized. The average stress change measured by this method is change of
half the first invariant of stress tensor because the stress normal to the test surface is zero. In other
words, the average normal stress change is always constant, even if the coordinate system is rotated on
the surface.
The method proposed in the draft has been applied and verified for many different materials and
conditions, and extensive evidence shows that it is both reasonable and useful, as shown in Annex D
and E. The purpose of this item is to measure the stress change between reference and target states.
As proposed in this draft, the relative stress change can be quantitatively determined and whether
the stress change involved is tensile (indentation curve down) or compressive (indentation curve up)
compared to the reference (initial) state. Thus, if the state of initial stress is known, it is possible to
determine the magnitude and sign of the altered stress state as well.
Some materials show the sensitivity of indentation force to residual stress, which results the force
difference greater in a tensile stress state than a compressive stress state, although the difference
is in general not large. Even for materials showing different sensitivity of peak load in compressive
vs. tensile stress, the load difference is a monotone function of stress change, so that the region of
maximum stress can be identified. Furthermore, for many materials, the load difference sensitivity
does not significantly violate the fundamental concept.
This document has been prepared to provide useful guidelines on how to extract a two-dimensional
representation of the entire 3D residual stress state by means of local size-controllable indentations
over the component surface. The testing surface may be indented in one-dimensional or two-
dimensional indentation arrays for a more reliable evaluation of the entire bulk residual stress state.
The stress state detected by the proposed methodology provides accurate measurement of the plane
stress residual stress state from the near-surface region in the component.
vi
TECHNICAL SPECIFICATION ISO/TS 19096:2023(E)
Metallic materials — Instrumented indentation test for
hardness and materials parameters — Evaluation of stress
change using indentation force differences
1 Scope
This document specifies the method of instrumented indentation test for evaluation of stress change
between reference and target states using indentation force differences.
This document primarily applies to measuring the stress change in a specific location and the stress
difference between different locations.
2 Normative references
The following documents are referred to in the text in such a way that some or all of their content
constitutes requirements of this document. For dated references, only the edition cited applies. For
undated references, the latest edition of the referenced document (including any amendments) applies.
ISO 14577-1:2015, Metallic materials — Instrumented indentation test for hardness and materials
parameters — Part 1: Test method
ISO 14577-2:2015, Metallic materials — Instrumented indentation test for hardness and materials
parameters — Part 2: Verification and calibration of testing machines
ISO/IEC Guide 98-3:2008, Uncertainty of measurement — Part 3: Guide to the expression of uncertainty in
me a s ur ement (GUM: 1995)
3 Terms and definitions
No terms and definitions are listed in this document.
ISO and IEC maintain terminology databases for use in standardization at the following addresses:
— ISO Online browsing platform: available at https:// www .iso .org/ obp
— IEC Electropedia: available at https:// www .electropedia .org/
4 Symbols and designations
For the purpose of this document, the symbols and designations in Table 1 apply.
Table 1 — Symbols and designations
Symbol Designation Unit
A Average projected area of reference and target states mm
A Projected area of reference state mm
r
A Projected area of target state mm
t
∆F Force difference from target curve to reference curve at maximum indentation displacement N
F Maximum test force N
max
F Maximum test force on reference state N
r
F Maximum test force on target state N
t
TTabablele 1 1 ((ccoonnttiinnueuedd))
Symbol Designation Unit
h Indentation depth mm
h Maximum indentation depth (should be the same for target and reference state) mm
max
p Ratio of stress changes along one direction to that along the normal direction -
r Reference state (used as subscript) -
t Target state (used as subscript) -
Δσ
Average stress change of surface stress change components. MPa
avg
Stress change from reference state to target state along a direction perpendicular to in-
Δσ MPa
denting direction
Δ′σ Shear deviatoric stress component of stress change from reference state to target state MPa
Δ′σ z component of shear deviatoric stress of stress change from reference state to target state MPa
z
5 Principle
5.1 Shift of force/indentation depth curve by stress change
The stress change in the same material between two different states creates a shift in the force/
indentation depth curve (see Figure 1). A stress increase to be in a relatively tensile state makes
indentation easier because the material around the indenter is relaxed. Thus, the indentation force
required to reach a given depth in a relatively tensile stress state is lower than that in the initial stress
state. In a relatively compressive stress state, the reverse is true. Therefore, the stress change can be
evaluated by measuring the indentation force difference at maximum indentation depth ( FF− )=ΔF
rt
between the reference and target states.
Key
X indentation depth
Y force
A tensile stress
B compressive stress
1 compressive
2 reference
3 tensile
Figure 1 — Change in morphology and force/indentation depth curve with stress change
5.2 Derivation of stress change from force difference
The stress change in one direction can be expressed asΔσ ; the stress normal to Δσ on the surface can
be expressed as pΔσ (p is the stress ratio change). Since the stress change normal to the surface (along
the indentation test direction) is taken as zero, only surface biaxial stresses affect the shape of the
force/indentation depth curve. The biaxial stress change can be divided into a hydrostatic stress term
and a shear deviatoric stress term. The only shear deviatoric stress component (Δ′σ ) applied along the
indentation test direction (z), Δ′σ , can influence the force/indentation depth curve when the
z
indentation test is performed along the z direction. Δ′σ can be related to the force difference as in
z
Formula (5.1). This formula reflects the fact that the shear deviatoric stress along the indentation test
direction is directly related to the indentation stress change (indentation force difference divided by
[1],[2]
projected area) :
1+p FF−
() ()
rt
Δ′σσ= Δ = (5.1)
z
3 A
From Formula (5.1), the stress change; Δσ can be expressed as in Formula (5.2), and the other stress
normal to Δσ can be determined as pΔσ :
FF−
3 ()
rt
Δσ = (5.2)
()1+p A
6 Testing machine
6.1 The testing machine shall have the capability of applying predetermined test forces or
displacements within the required scope and shall fulfil the requirements of ISO 14577-2.
6.2 The testing machine shall have the capability of measuring and reporting applied force,
indentation displacement and time throughout the testing cycle.
6.3 The testing machine shall have the capability of compensating for the machine compliance (see
ISO 14577-1:2015 Annex C and ISO 14577-2:2015, 4.5).
6.4 A self-s
...


Questions, Comments and Discussion
Ask us and Technical Secretary will try to provide an answer. You can facilitate discussion about the standard in here.
Loading comments...