ISO 7257:2016
(Main)Aircraft — Hydraulic tubing joints and fittings — Rotary flexure test
Aircraft — Hydraulic tubing joints and fittings — Rotary flexure test
ISO 7257:2016 specifies a flexure test procedure to determine and classify the fatigue strengths of reconnectable or permanent hydraulic tube joints. The procedure is intended for conducting flexure tests of fittings and joints with high-strength hydraulic tubes of various alloys such as corrosion resistant steel, Nimonic?[1], titanium and aluminium alloy hydraulic tube for use on commercial and military aircraft. A mean stress is applied by holding system pressure in the specimens and then flexing in a rotary bending test machine. [1] Nimonic? is the trademark of a product supplied by Special Metals Corporation. This information is given for the convenience of users of this document and does not constitute an endorsement by ISO of the product named. Equivalent products can be used if they can be shown to lead to the same results.
Aéronautique — Joints et raccords pour tubes hydrauliques — Essai de flexion rotative
General Information
- Status
- Published
- Publication Date
- 30-May-2016
- Technical Committee
- ISO/TC 20/SC 10 - Aerospace fluid systems and components
- Drafting Committee
- ISO/TC 20/SC 10/WG 6 - Couplings for rigid pipe
- Current Stage
- 9093 - International Standard confirmed
- Start Date
- 19-Nov-2021
- Completion Date
- 12-Feb-2026
Relations
- Effective Date
- 03-Nov-2011
Overview
ISO 7257:2016 specifies a rotary flexure test procedure to determine and classify the fatigue strengths of reconnectable or permanent aircraft hydraulic tubing joints and fittings. The standard covers flexure testing of high‑strength hydraulic tubes made from alloys such as corrosion‑resistant steel, Nimonic (trademark), titanium and aluminium, using a rotary bending (rotary flexure) test machine with system pressure applied to produce mean stress. It is intended primarily for comparative evaluation of fitting/tube combinations and for generating S/N and D/N data for fatigue classification.
Key topics and technical requirements
- Test scope: Flexure fatigue tests for reconnectable or permanent hydraulic tube joints and fittings used on commercial and military aircraft.
- Specimens: Typical specimen = adapter fitting (headstock), straight tubing section, and test fitting (tailstock). Specimen lengths are specified by tube nominal diameters (DN) and available in metric and imperial tables.
- Test device: Rotary flexure machine capable of maintaining system pressure, automatic shutdown on pressure loss, and headstock/tailstock alignment. Headstock should permit up to 25 mm (1 in) total deflection and rotation at 1 500–3 600 min−1.
- Loading: Mean stress applied via internal pressure (water or system fluid) while cyclic rotary bending produces alternating bending stress.
- Instrumentation: Use of strain gauges (specified sizes and locations) to establish bending stress; dial indicators may be used for deflection measurement once correlation is established.
- Data output & classification:
- S/N curves (bending stress vs. cycles to failure) for fatigue classification.
- D/N curves (deflection vs. cycles to failure) to assess deflection/fatigue strength and relative rigidity.
- Minimum sampling for S/N testing: at least four sets of two specimens per size.
- Procedure essentials: Specimen centring, free‑state microstrain measurements, bend setting verification at rpm, pressurization, controlled temperature where specified.
Applications and users
- Who uses ISO 7257:2016: aerospace design and stress engineers, qualification/test laboratories, hydraulic‑fittings manufacturers, procurement and quality assurance teams, certification authorities, and MRO (maintenance, repair & overhaul) organisations.
- Practical uses:
- Comparative evaluation of fitting designs and material combinations for fatigue performance.
- Producing characteristic S/N and D/N curves used for component selection, design validation, and life‑assessment studies.
- Supporting qualification programs (complementary to ISO 7169, which covers separable tube fittings procurement requirements).
Related standards
- ISO 2964 - Tubing outside diameters and thicknesses (metric dimensions)
- ISO 7169 - Separable tube fittings for aerospace fluid systems (qualification/procurement)
Keywords: ISO 7257:2016, rotary flexure test, hydraulic tubing joints, hydraulic tube fittings, fatigue strength, S/N curves, D/N curves, strain gauges, aircraft hydraulic systems.
Get Certified
Connect with accredited certification bodies for this standard

DEKRA North America
DEKRA certification services in North America.

Eagle Registrations Inc.
American certification body for aerospace and defense.

Element Materials Technology
Materials testing and product certification.
Sponsored listings
Frequently Asked Questions
ISO 7257:2016 is a standard published by the International Organization for Standardization (ISO). Its full title is "Aircraft — Hydraulic tubing joints and fittings — Rotary flexure test". This standard covers: ISO 7257:2016 specifies a flexure test procedure to determine and classify the fatigue strengths of reconnectable or permanent hydraulic tube joints. The procedure is intended for conducting flexure tests of fittings and joints with high-strength hydraulic tubes of various alloys such as corrosion resistant steel, Nimonic?[1], titanium and aluminium alloy hydraulic tube for use on commercial and military aircraft. A mean stress is applied by holding system pressure in the specimens and then flexing in a rotary bending test machine. [1] Nimonic? is the trademark of a product supplied by Special Metals Corporation. This information is given for the convenience of users of this document and does not constitute an endorsement by ISO of the product named. Equivalent products can be used if they can be shown to lead to the same results.
ISO 7257:2016 specifies a flexure test procedure to determine and classify the fatigue strengths of reconnectable or permanent hydraulic tube joints. The procedure is intended for conducting flexure tests of fittings and joints with high-strength hydraulic tubes of various alloys such as corrosion resistant steel, Nimonic?[1], titanium and aluminium alloy hydraulic tube for use on commercial and military aircraft. A mean stress is applied by holding system pressure in the specimens and then flexing in a rotary bending test machine. [1] Nimonic? is the trademark of a product supplied by Special Metals Corporation. This information is given for the convenience of users of this document and does not constitute an endorsement by ISO of the product named. Equivalent products can be used if they can be shown to lead to the same results.
ISO 7257:2016 is classified under the following ICS (International Classification for Standards) categories: 49.080 - Aerospace fluid systems and components. The ICS classification helps identify the subject area and facilitates finding related standards.
ISO 7257:2016 has the following relationships with other standards: It is inter standard links to ISO 7257:1983. Understanding these relationships helps ensure you are using the most current and applicable version of the standard.
ISO 7257:2016 is available in PDF format for immediate download after purchase. The document can be added to your cart and obtained through the secure checkout process. Digital delivery ensures instant access to the complete standard document.
Standards Content (Sample)
INTERNATIONAL ISO
STANDARD 7257
Second edition
2016-06-01
Aircraft — Hydraulic tubing joints and
fittings — Rotary flexure test
Aéronautique — Joints et raccords pour tubes hydrauliques — Essai
de flexion rotative
Reference number
©
ISO 2016
© ISO 2016, Published in Switzerland
All rights reserved. Unless otherwise specified, no part of this publication may be reproduced or utilized otherwise in any form
or by any means, electronic or mechanical, including photocopying, or posting on the internet or an intranet, without prior
written permission. Permission can be requested from either ISO at the address below or ISO’s member body in the country of
the requester.
ISO copyright office
Ch. de Blandonnet 8 • CP 401
CH-1214 Vernier, Geneva, Switzerland
Tel. +41 22 749 01 11
Fax +41 22 749 09 47
copyright@iso.org
www.iso.org
ii © ISO 2016 – All rights reserved
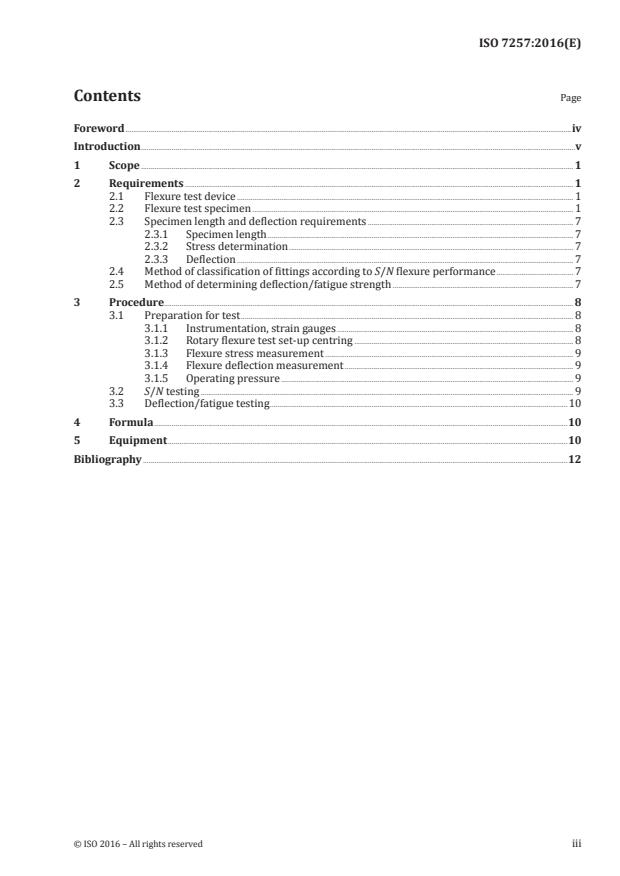
Contents Page
Foreword .iv
Introduction .v
1 Scope . 1
2 Requirements . 1
2.1 Flexure test device . 1
2.2 Flexure test specimen . 1
2.3 Specimen length and deflection requirements . 7
2.3.1 Specimen length . 7
2.3.2 Stress determination . 7
2.3.3 Deflection . 7
2.4 Method of classification of fittings according to S/N flexure performance . 7
2.5 Method of determining deflection/fatigue strength . 7
3 Procedure. 8
3.1 Preparation for test . 8
3.1.1 Instrumentation, strain gauges . 8
3.1.2 Rotary flexure test set-up centring . 8
3.1.3 Flexure stress measurement . 9
3.1.4 Flexure deflection measurement . 9
3.1.5 Operating pressure . 9
3.2 S/N testing . 9
3.3 Deflection/fatigue testing .10
4 Formula .10
5 Equipment .10
Bibliography .12
Foreword
ISO (the International Organization for Standardization) is a worldwide federation of national standards
bodies (ISO member bodies). The work of preparing International Standards is normally carried out
through ISO technical committees. Each member body interested in a subject for which a technical
committee has been established has the right to be represented on that committee. International
organizations, governmental and non-governmental, in liaison with ISO, also take part in the work.
ISO collaborates closely with the International Electrotechnical Commission (IEC) on all matters of
electrotechnical standardization.
The procedures used to develop this document and those intended for its further maintenance are
described in the ISO/IEC Directives, Part 1. In particular the different approval criteria needed for the
different types of ISO documents should be noted. This document was drafted in accordance with the
editorial rules of the ISO/IEC Directives, Part 2 (see www.iso.org/directives).
Attention is drawn to the possibility that some of the elements of this document may be the subject of
patent rights. ISO shall not be held responsible for identifying any or all such patent rights. Details of
any patent rights identified during the development of the document will be in the Introduction and/or
on the ISO list of patent declarations received (see www.iso.org/patents).
Any trade name used in this document is information given for the convenience of users and does not
constitute an endorsement.
For an explanation on the meaning of ISO specific terms and expressions related to conformity assessment,
as well as information about ISO’s adherence to the World Trade Organization (WTO) principles in the
Technical Barriers to Trade (TBT) see the following URL: www.iso.org/iso/foreword.html.
The committee responsible for this document is ISO/TC 20, Aircraft and space vehicles, Subcommittee
SC 10, Aerospace fluid systems and components.
This second edition cancels and replaces the first edition (ISO 7257:1983), which has been technically
revised to add imperial unit equivalents, three DN sizes, and for additional clarifications.
iv © ISO 2016 – All rights reserved
Introduction
This International Standard describes a flexure fatigue test procedure which allows evaluation of
various tube fitting designs or material combinations. This evaluation is performed by fatigue testing
the tube joints over a spectrum of bending stresses and then plotting the cycles to failure. Other test
methods may be used as long as they develop the same data as the rotary flexure test.
INTERNATIONAL STANDARD ISO 7257:2016(E)
Aircraft — Hydraulic tubing joints and fittings — Rotary
flexure test
1 Scope
This International Standard specifies a flexure test procedure to determine and classify the fatigue
strengths of reconnectable or permanent hydraulic tube joints.
The procedure is intended for conducting flexure tests of fittings and joints with high-strength
1)
hydraulic tubes of various alloys such as corrosion resistant steel, Nimonic™ , titanium and aluminium
alloy hydraulic tube for use on commercial and military aircraft.
A mean stress is applied by holding system pressure in the specimens and then flexing in a rotary
bending test machine.
2 Requirements
2.1 Flexure test device
The test device should be capable of testing in-line or bulkhead union test specimens and other
configurations such as elbows and tees.
The rotary flexure test device should be similar to that shown in Figure 1. Each rotary flexure test
device should be capable of testing one specimen, but several specimens may be mounted on one plate.
The device should be capable of constantly maintaining the required operating pressure during
the test. The test fluid shall be water or system fluid (working fluid) unless otherwise specified by
the responsible authorities. A typical pressurization and automatic shutdown system is shown
in Figure 2. The shut-down should be automatic in the event of failure or pressure drop. The device
should be capable of testing at controlled constant temperature, if specified by the procuring agency.
The tailstock of the test device should be designed to permit alignment during initial installation and
specimen mounting, and to serve as a pressure manifold. The rotating headstock should have a low-
friction, self-aligning bearing and should be designed to permit total deflections of up to 25 mm/1 inch,
−1 −1
and a constant rotational frequency within the range of 1 500 min to 3 600 min . The base should be
of rigid construction.
2.2 Flexure test specimen
The test specimen should be consisting of an adapter fitting (headstock end), a section of straight
tubing, and a test fitting at the tailstock end. Typical test specimens are shown in Figure 3. The tubing
shall be of a size and wall thickness as specified by the user or procuring agency.
1) Nimonic™ is the trademark of a product supplied by Special Metals Corporation. This information is given for
the convenience of users of this document and does not constitute an endorsement by ISO of the product named.
Equivalent products can be used if they can be shown to lead to the same results.
Key
1 adjustment for deflection 8 adapter fitting
2 self-aligning bearing (without torsion on test joint) 9 10 mm/0,400 inch max
3 test length, L 10 (5 ± 1) mm/(0,200 ± 0,040) inch
4 tailstock 11 hydraulic pressure
5 tailstock alignment bolt 12 deflection, D
6 dial indicator, alternate for
...


Questions, Comments and Discussion
Ask us and Technical Secretary will try to provide an answer. You can facilitate discussion about the standard in here.
Loading comments...