ISO 11922-1:2018
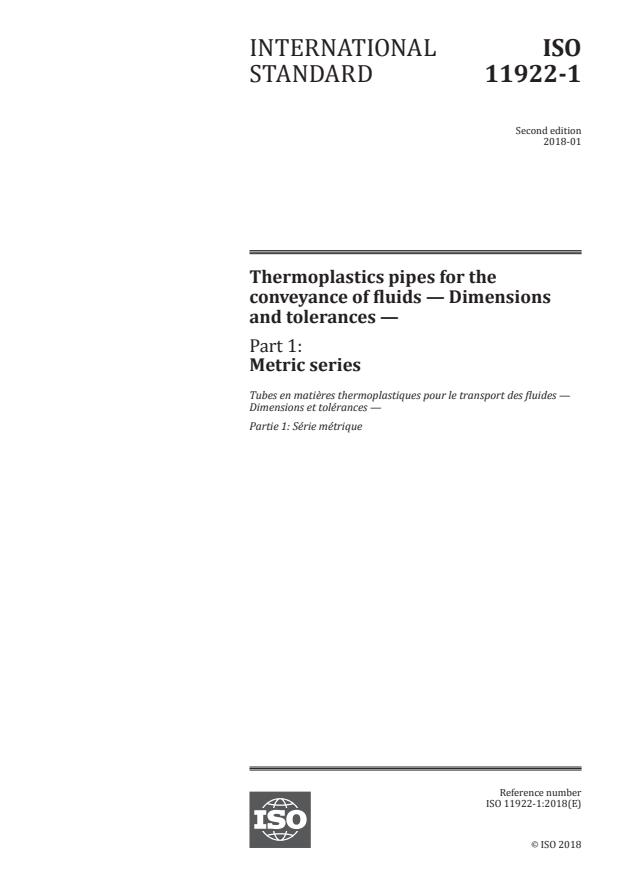
(Main)Thermoplastics pipes for the conveyance of fluids — Dimensions and tolerances — Part 1: Metric series
Thermoplastics pipes for the conveyance of fluids — Dimensions and tolerances — Part 1: Metric series
ISO 11922-1:2018 specifies tolerance grades for the outside diameter, out-of-roundness and wall thickness of metric thermoplastics pipes for the conveyance of fluids and manufactured with nominal outside diameters and nominal pressures in accordance with ISO 161‑1 and nominal wall thicknesses in accordance with ISO 4065. ISO 11922-1:2018 is applicable to smooth thermoplastics pipes of constant circular cross-section along the whole length of the pipe, whatever the method of manufacture, the pipe material or the intended application. NOTE It is intended that the tolerance grades specified in product standards are selected from this document taking into account the material and the intended application.
Tubes en matières thermoplastiques pour le transport des fluides — Dimensions et tolérances — Partie 1: Série métrique
General Information
- Status
- Published
- Publication Date
- 07-Jan-2018
- Technical Committee
- ISO/TC 138 - Plastics pipes, fittings and valves for the transport of fluids
- Current Stage
- 9093 - International Standard confirmed
- Start Date
- 30-Oct-2023
- Completion Date
- 12-Feb-2026
Relations
- Effective Date
- 09-Feb-2026
- Effective Date
- 09-Feb-2026
- Effective Date
- 09-Feb-2026
- Effective Date
- 09-Feb-2026
- Effective Date
- 09-Feb-2026
- Effective Date
- 09-Feb-2026
- Effective Date
- 09-Feb-2026
- Effective Date
- 09-Feb-2026
- Effective Date
- 09-Feb-2026
- Effective Date
- 09-Feb-2026
- Effective Date
- 09-Feb-2026
- Effective Date
- 09-Feb-2026
- Effective Date
- 09-Feb-2026
- Effective Date
- 09-Feb-2026
- Effective Date
- 09-Feb-2026
Overview
ISO 11922-1:2018 - Thermoplastics pipes for the conveyance of fluids - Dimensions and tolerances - Part 1: Metric series - establishes standardized tolerance grades for metric thermoplastics pipes. It applies to smooth, constant circular cross‑section thermoplastic pipes (regardless of material or manufacturing method) used for the conveyance of fluids. The standard links to nominal outside diameters and pressures in ISO 161‑1 and nominal wall thicknesses in ISO 4065.
Key technical topics and requirements
- Tolerance grades: Defines groups of tolerances for mean outside diameter, out‑of‑roundness and wall thickness. Grades (e.g., A, B, C, D for diameter; K, L, M, N for out‑of‑roundness; T, U, V for wall thickness) let product standards select the appropriate accuracy for the material and application.
- Mean outside diameter (dem): Measured as the circumference divided by π (π taken as 3.142), rounded to 0.1 mm. For pipes conforming to ISO 161‑1, nominal outside diameters are minimum mean diameters and tolerances are expressed as +x/−0 mm.
- Out‑of‑roundness: Specified tolerance grades and calculation factors for different nominal diameters. Notes include the measurement timing (e.g., at extrusion, on leaving factory or at time of use) and a recommendation (Grade K) for coiled pipe with relaxation treatment.
- Wall thickness: Covers wall thickness at any point (emin) and mean wall thickness (em). Mean wall thickness is the arithmetic mean of at least four regularly spaced measurements including the minimum and maximum, rounded up to 0.1 mm. Specific formulae and tabulated tolerances are provided for different wall thickness ranges and grades (T, U, V).
- Measurement rules: Rounding rules (nearest 0.1 mm or rounded up), minimum measurement counts and how to convert tolerances into limit deviations are specified to ensure consistent inspection and verification.
Practical applications and users
ISO 11922‑1 is used by:
- Pipe manufacturers and extrusion shops to set production tolerances and quality control limits.
- Product standards committees to select appropriate tolerance grades for particular pipe systems and materials.
- Design engineers and specifiers ensuring dimensional compatibility with fittings and mechanical connectors.
- Inspection and testing laboratories implementing measurement procedures and reporting tolerances.
- Procurement and quality assurance teams verifying supplied pipe conforms to required dimensions and tolerances.
Practical benefits include consistent interchangeability, reduced assembly issues with fittings, clearer supplier specifications, and harmonized quality control across thermoplastic piping products.
Related standards
- ISO 161‑1 - Nominal outside diameters and nominal pressures (metric series)
- ISO 4065 - Universal wall thickness table
- ISO 3126 - Determination of dimensions for plastics piping components
- ISO 11922 series (other part(s) in the series) for complementary tolerancing guidance.
Keywords: ISO 11922-1:2018, thermoplastics pipes, dimensions and tolerances, metric series, outside diameter, out-of-roundness, wall thickness, tolerance grades, pipe manufacturing, extrusion.
Get Certified
Connect with accredited certification bodies for this standard

Institut za varilstvo d.o.o. (Welding Institute)
Slovenia's leading welding institute since 1952. ISO 3834, EN 1090, pressure equipment certification, NDT personnel, welder qualification. Only IIW Au
Sponsored listings
Frequently Asked Questions
ISO 11922-1:2018 is a standard published by the International Organization for Standardization (ISO). Its full title is "Thermoplastics pipes for the conveyance of fluids — Dimensions and tolerances — Part 1: Metric series". This standard covers: ISO 11922-1:2018 specifies tolerance grades for the outside diameter, out-of-roundness and wall thickness of metric thermoplastics pipes for the conveyance of fluids and manufactured with nominal outside diameters and nominal pressures in accordance with ISO 161‑1 and nominal wall thicknesses in accordance with ISO 4065. ISO 11922-1:2018 is applicable to smooth thermoplastics pipes of constant circular cross-section along the whole length of the pipe, whatever the method of manufacture, the pipe material or the intended application. NOTE It is intended that the tolerance grades specified in product standards are selected from this document taking into account the material and the intended application.
ISO 11922-1:2018 specifies tolerance grades for the outside diameter, out-of-roundness and wall thickness of metric thermoplastics pipes for the conveyance of fluids and manufactured with nominal outside diameters and nominal pressures in accordance with ISO 161‑1 and nominal wall thicknesses in accordance with ISO 4065. ISO 11922-1:2018 is applicable to smooth thermoplastics pipes of constant circular cross-section along the whole length of the pipe, whatever the method of manufacture, the pipe material or the intended application. NOTE It is intended that the tolerance grades specified in product standards are selected from this document taking into account the material and the intended application.
ISO 11922-1:2018 is classified under the following ICS (International Classification for Standards) categories: 23.040.20 - Plastics pipes. The ICS classification helps identify the subject area and facilitates finding related standards.
ISO 11922-1:2018 has the following relationships with other standards: It is inter standard links to EN 17176-2:2019, EN 1555-2:2025, EN ISO 16486-3:2020, EN ISO 16486-2:2024, EN 13476-1:2025, EN ISO 23856:2021, EN 17613:2022, EN 17176-2:2019+A1:2022, EN ISO 16486-2:2020, EN ISO 13479:2022, EN 1555-2:2021, EN 13476-1:2018, EN ISO 16486-3:2025, EN 12201-2:2024, EN 14125:2025. Understanding these relationships helps ensure you are using the most current and applicable version of the standard.
ISO 11922-1:2018 is available in PDF format for immediate download after purchase. The document can be added to your cart and obtained through the secure checkout process. Digital delivery ensures instant access to the complete standard document.
Standards Content (Sample)
INTERNATIONAL ISO
STANDARD 11922-1
Second edition
2018-01
Thermoplastics pipes for the
conveyance of fluids — Dimensions
and tolerances —
Part 1:
Metric series
Tubes en matières thermoplastiques pour le transport des fluides —
Dimensions et tolérances —
Partie 1: Série métrique
Reference number
©
ISO 2018
© ISO 2018, Published in Switzerland
All rights reserved. Unless otherwise specified, no part of this publication may be reproduced or utilized otherwise in any form
or by any means, electronic or mechanical, including photocopying, or posting on the internet or an intranet, without prior
written permission. Permission can be requested from either ISO at the address below or ISO’s member body in the country of
the requester.
ISO copyright office
Ch. de Blandonnet 8 • CP 401
CH-1214 Vernier, Geneva, Switzerland
Tel. +41 22 749 01 11
Fax +41 22 749 09 47
copyright@iso.org
www.iso.org
ii © ISO 2018 – All rights reserved
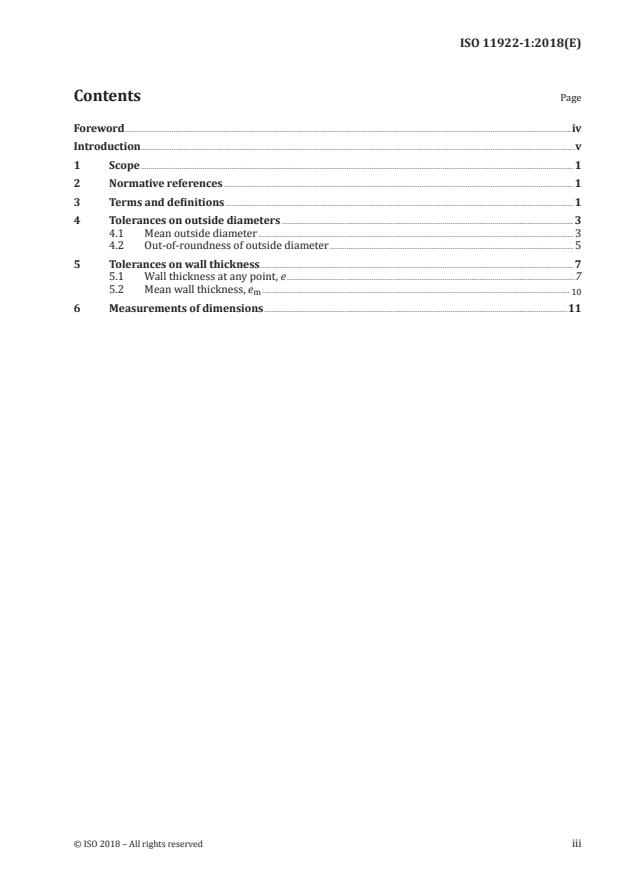
Contents Page
Foreword .iv
Introduction .v
1 Scope . 1
2 Normative references . 1
3 Terms and definitions . 1
4 Tolerances on outside diameters . 3
4.1 Mean outside diameter . 3
4.2 Out-of-roundness of outside diameter . 5
5 Tolerances on wall thickness . 7
5.1 Wall thickness at any point, e .7
5.2 Mean wall thickness, e .
m 10
6 Measurements of dimensions .11
Foreword
ISO (the International Organization for Standardization) is a worldwide federation of national standards
bodies (ISO member bodies). The work of preparing International Standards is normally carried out
through ISO technical committees. Each member body interested in a subject for which a technical
committee has been established has the right to be represented on that committee. International
organizations, governmental and non-governmental, in liaison with ISO, also take part in the work.
ISO collaborates closely with the International Electrotechnical Commission (IEC) on all matters of
electrotechnical standardization.
The procedures used to develop this document and those intended for its further maintenance are
described in the ISO/IEC Directives, Part 1. In particular the different approval criteria needed for the
different types of ISO documents should be noted. This document was drafted in accordance with the
editorial rules of the ISO/IEC Directives, Part 2 (see www.iso.org/directives).
Attention is drawn to the possibility that some of the elements of this document may be the subject of
patent rights. ISO shall not be held responsible for identifying any or all such patent rights. Details of
any patent rights identified during the development of the document will be in the Introduction and/or
on the ISO list of patent declarations received (see www.iso.org/patents).
Any trade name used in this document is information given for the convenience of users and does not
constitute an endorsement.
For an explanation on the voluntary nature of standards, the meaning of ISO specific terms and
expressions related to conformity assessment, as well as information about ISO's adherence to the
World Trade Organization (WTO) principles in the Technical Barriers to Trade (TBT) see the following
URL: www.iso.org/iso/foreword.html.
This document was prepared by Technical Committee ISO/TC 138, Plastics pipes, fittings and valves for
the transport of fluids.
This second edition cancels and replaces the first edition (ISO 11922-1:1997), which has been technically
revised.
The main changes are:
— Tolerance values for diameters up to 3000 mm are included;
— Diameter tolerance grade E has been deleted.
A list of all the parts in the ISO 11922 series, can be found on the ISO website.
iv © ISO 2018 – All rights reserved
Introduction
In the past, International Standards specifying the tolerances to be applied to thermoplastics pipes have
covered individual materials separately. The philosophy of the ISO 11922 series is to combine these
already published standards into а single two-part standard covering the tolerances for extruded pipes
manufactured from all thermoplastics materials, thus avoiding the need for а standard to be developed
for each individual material.
The ISO 11922 series therefore contains а number of tolerance grades covering the mean outside
diameter, the out-of-roundness of the outside diameter, the wall thickness at any point and the mean
wall thickness. The bodies responsible for writing the various product and system standards will
choose, from the specified tolerance grades, that grade which is suitable for the application and material
involved.
INTERNATIONAL STANDARD ISO 11922-1:2018(E)
Thermoplastics pipes for the conveyance of fluids —
Dimensions and tolerances —
Part 1:
Metric series
1 Scope
This document specifies tolerance grades for the outside diameter, out-of-roundness and wall thickness
of metric thermoplastics pipes for the conveyance of fluids and manufactured with nominal outside
diameters and nominal pressures in accordance with ISO 161-1 and nominal wall thicknesses in
accordance with ISO 4065.
It is applicable to smooth thermoplastics pipes of constant circular cross-section along the whole length
of the pipe, whatever the method of manufacture, the pipe material or the intended application.
NOTE It is intended that the tolerance grades specified in product standards are selected from this document
taking into account the material and the intended application.
2 Normative references
The following documents are referred to in the text in such a way that some or all of their content
constitutes requirements of this document. For dated references, only the edition cited applies. For
undated references, the latest edition of the referenced document (including any amendments) applies.
ISO 161-1, Thermoplastics pipes for the conveyance of fluids — Nominal outside diameters and nominal
pressures — Part 1: Metric series
ISO 3126, Plastics piping systems — Plastics components — Determination of dimensions
ISO 4065, Thermoplastics pipes — Universal wall thickness table
3 Terms and definitions
For the purposes of this document, the following terms and definitions apply.
ISO and IEC maintain terminological databases for use in standardization at the following addresses:
— IEC Electropedia: available at http://www.electropedia.org/
— ISO Online browsing platform: available at https://www.iso.org/obp
3.1
nominal outside diameter
d
n
numerical designation of the size of a component, other than a component designated by thread size,
which is approximately equal to the manufacturing dimension
Note 1 to entry: Nominal outside diameter is expressed in millimetres (mm).
Note 2 to entry: For metric pipes conforming to ISO 161, the nominal outside diameter, expressed in millimetres,
is the minimum mean outside diameter dem.min specified in the applicable pipe standard.
3.2
outside diameter
d
e
3.2.1
mean outside diameter
d
em
measured length of the outer circumference of the pipe divided by π, rounded up to the nearest 0,1 mm
Note 1 to entry: The value of π is taken to be 3,142.
3.2.2
minimum mean outside diameter
d
em min
minimum value of the mean outside diameter specified in the applicable pipe standard, equal to the
nominal outside diameter d
n
Note 1 to entry: Minimum mean outside diameter is expressed in millimetres.
3.2.3
maximum mean outside diameter
d
em max
maximum value of the mean outside diameter specified in the applicable pipe standard
3.2.4
outside diameter at any point
d
e
measured outside diameter through the cross-section at any point of the pipe, rounded up to the
nearest 0,1 mm
3.2.5
out-of-roundness
difference between the measured maximum outside diameter and the measured minimum outside
diameter in the same cross-sectional plane of the pipe
3.3 Terms relating to tolerances
3.3.1
tolerance
difference between the limit deviation and the nominal value
3.3.2
limit deviation
difference between upper limit of size minus nominal size
3.3.3
tolerance grade
group of tolerances for linear sizes characterized by a common identifier
Note 1 to entry: A specific tolerance grade is considered as corresponding to the same level of accuracy for all
nominal sizes.
3.4 Wall thickness
3.4.1
wall thickness at any point
e
measured wall thickness at any point around the circumference of the pipe, rounded to the nearest 0,1 mm
2 © ISO 2018 – All rights reserved
3.4.2
minimum wall thickness
e
min
minimum wall thickness for the pipe specified in the applicable pipe standard
3.4.3
maximum wall thickness
e
max
maximum wall thickness for the pipe specified in the applicable pipe standard
3.4.4
mean wall thickness
e
m
arithmetic mean of at least four measurements regularly spaced around the same cross-sectional
plane of the pipe, including the measured minimum and maximum values obtained, rounded up to the
nearest 0,1 mm.
Note 1 to entry: The minimum number of measurements will be specified in the applicable pipe standard. The
actual number of measurements will then depend on the fact that the measurement points have to be regularly
spaced round the cross-sectional plane and, in addition, have to include both the minimum and the maximum
measured values.
3.4.5
nominal wall thickness
e
n
wall thickness, as tabulated in ISO 4065, corresponding to the minimum wall thickness at any point e
,min
Note 1 to entry: Nominal wall thickness is expressed in millimetres.
4 Tolerances on outside diameters
4.1 Mean outside diameter
For pipes conforming to ISO 161-1, the values specified therein as nominal outside diameters are
minimum mean outside diameters, expressed in millimetres, and the limit deviations from these
diameters shall be positive. Hence the tolerances shall be expressed in the form +x/−0 mm, where х is
the value of the tolerance from Table 1 appropriate to the tolerance grade.
The values in Table 1 are based on the d specified in the applicable product standard, all dimensions
n
being expressed in millimetres.
Grade А: For all nominal outside diameters, the tolerance equals 0,009d , rounded up to the nearest
n
0,1 mm, with а minimum value of 0,3 mm.
Grade В: For all nominal outside diameters, the tolerance equals 0,006d , rounded up to the nearest
n
0,1 mm, with а minimum value of 0,3 mm.
Grade С: For all nominal outside diameters, the tolerance equals 0,003d , rounded up to the nearest
n
0,1 mm. with а minimum value of 0,3 mm.
Grade D: For nomi
...


Questions, Comments and Discussion
Ask us and Technical Secretary will try to provide an answer. You can facilitate discussion about the standard in here.
Loading comments...