ISO 1288-5:2016
(Main)Glass in building — Determination of the bending strength of glass — Part 5: Coaxial double ring test on flat specimens with small test surface areas
Glass in building — Determination of the bending strength of glass — Part 5: Coaxial double ring test on flat specimens with small test surface areas
ISO 1288-5:2016 specifies a method for determining the comparative bending strength of glass for use in buildings, excluding the effects of the edges. See ISO 1288‑1, 5.1.4 for an explanation as to why this test method should only be used for comparing the strength of types of glass and not for assessing strength for design purposes. The limitations of this part of ISO 1288 are described in ISO 1288‑1. ISO 1288‑1 should be read in conjunction with this part of ISO 1288. This test method is not suitable for patterned glass.
Verre dans la construction — Détermination de la résistance du verre à la flexion — Partie 5: Essais avec doubles anneaux concentriques sur éprouvettes planes, avec de petites surfaces de sollicitation
General Information
- Status
- Published
- Publication Date
- 15-Feb-2016
- Technical Committee
- ISO/TC 160/SC 2 - Use considerations
- Drafting Committee
- ISO/TC 160/SC 2/WG 1 - Design strength of glazing
- Current Stage
- 9093 - International Standard confirmed
- Start Date
- 12-Oct-2021
- Completion Date
- 12-Feb-2026
Relations
- Effective Date
- 12-Feb-2026
Overview
ISO 1288-5:2016 (Glass in building - Determination of the bending strength of glass - Part 5) specifies the coaxial double‑ring test for measuring the comparative bending strength of flat glass specimens with small test surface areas. The method isolates the central tensile stress field (excluding edge effects) so the test is suitable for comparing strength of glass types but not for structural design. Patterned glass is excluded.
Key topics and technical requirements
- Test principle: A flat circular or square specimen rests on a supporting ring and is loaded concentrically by a smaller loading ring to produce a uniform tensile stress area bounded by the loading ring; failure load is used to calculate bending strength.
- Loading device sets: Four ring combinations are standardized (R30, R45, R60, R105) with specified loading/support-ring radii and corresponding specimen diameters (examples: R30 → 66 mm diameter; R45 → 100 mm; R60 → 240 mm; R105 → 420 mm).
- Specimen geometry & tolerances:
- Circular or square specimens with defined diameters/side lengths.
- Local flatness tolerance: 0.1 mm; parallelism tolerance: 2% of specimen thickness within the support contact area.
- Minimum specimen thickness depends on expected bending strength (see ISO 1288‑5 Table 3); if unknown, use values for up to 600 MPa.
- Apparatus & measurement:
- Testing machine with stepless, low‑shock loading and load-measuring accuracy ±2%.
- Loading/support rings with 2.5 mm bearing radius; silicone rubber spacer 3 mm thick (hardness ~40 ±10 IRHD) as required.
- Measuring precision: diameter/side to 1 mm; thickness to 0.01 mm.
- Procedure essentials:
- Remove protective coatings 24 h before test; condition specimens in test environment ≥4 h.
- Use adhesive film on the loaded side to retain fragments and locate fracture origins.
- Evaluate only the central stressed area; follow calculation and reporting rules in the standard.
Practical applications and users
- Who uses it: glass manufacturers, testing laboratories, quality control teams, research & development groups, and conformity assessment bodies involved in material comparison.
- Why use it: to compare bending strength performance across glass types, assess production consistency, support R&D and product development, and provide repeatable laboratory test data for material characterization.
- Not for: direct structural design or load-bearing calculations - designers should consult appropriate design standards.
Related standards
- ISO 1288‑1 (Fundamentals) - essential reading for limitations and interpretation.
- Other parts of ISO 1288 cover large test areas, four‑point bending and channel‑shaped glass.
Keywords: ISO 1288-5, coaxial double‑ring test, bending strength of glass, glass testing standard, glass in building, specimen preparation, comparative glass strength.
Frequently Asked Questions
ISO 1288-5:2016 is a standard published by the International Organization for Standardization (ISO). Its full title is "Glass in building — Determination of the bending strength of glass — Part 5: Coaxial double ring test on flat specimens with small test surface areas". This standard covers: ISO 1288-5:2016 specifies a method for determining the comparative bending strength of glass for use in buildings, excluding the effects of the edges. See ISO 1288‑1, 5.1.4 for an explanation as to why this test method should only be used for comparing the strength of types of glass and not for assessing strength for design purposes. The limitations of this part of ISO 1288 are described in ISO 1288‑1. ISO 1288‑1 should be read in conjunction with this part of ISO 1288. This test method is not suitable for patterned glass.
ISO 1288-5:2016 specifies a method for determining the comparative bending strength of glass for use in buildings, excluding the effects of the edges. See ISO 1288‑1, 5.1.4 for an explanation as to why this test method should only be used for comparing the strength of types of glass and not for assessing strength for design purposes. The limitations of this part of ISO 1288 are described in ISO 1288‑1. ISO 1288‑1 should be read in conjunction with this part of ISO 1288. This test method is not suitable for patterned glass.
ISO 1288-5:2016 is classified under the following ICS (International Classification for Standards) categories: 81.040.20 - Glass in building. The ICS classification helps identify the subject area and facilitates finding related standards.
ISO 1288-5:2016 has the following relationships with other standards: It is inter standard links to prEN 1288-5 rev. Understanding these relationships helps ensure you are using the most current and applicable version of the standard.
ISO 1288-5:2016 is available in PDF format for immediate download after purchase. The document can be added to your cart and obtained through the secure checkout process. Digital delivery ensures instant access to the complete standard document.
Standards Content (Sample)
INTERNATIONAL ISO
STANDARD 1288-5
First edition
2016-02-15
Glass in building — Determination of
the bending strength of glass —
Part 5:
Coaxial double ring test on flat
specimens with small test surface areas
Verre dans la construction — Détermination de la résistance du verre
à la flexion —
Partie 5: Essais avec doubles anneaux concentriques sur éprouvettes
planes, avec de petites surfaces de sollicitation
Reference number
©
ISO 2016
© ISO 2016, Published in Switzerland
All rights reserved. Unless otherwise specified, no part of this publication may be reproduced or utilized otherwise in any form
or by any means, electronic or mechanical, including photocopying, or posting on the internet or an intranet, without prior
written permission. Permission can be requested from either ISO at the address below or ISO’s member body in the country of
the requester.
ISO copyright office
Ch. de Blandonnet 8 • CP 401
CH-1214 Vernier, Geneva, Switzerland
Tel. +41 22 749 01 11
Fax +41 22 749 09 47
copyright@iso.org
www.iso.org
ii © ISO 2016 – All rights reserved
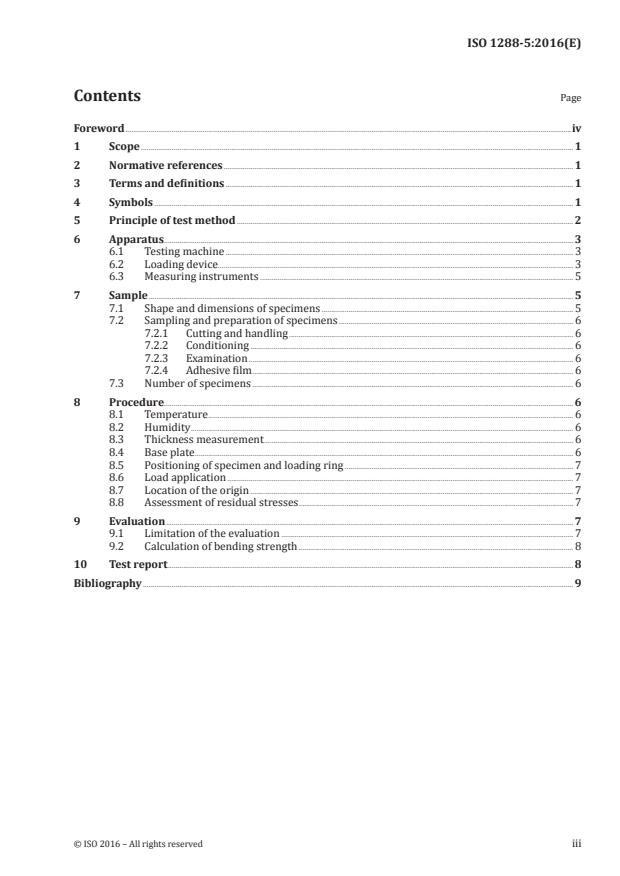
Contents Page
Foreword .iv
1 Scope . 1
2 Normative references . 1
3 Terms and definitions . 1
4 Symbols . 1
5 Principle of test method . 2
6 Apparatus . 3
6.1 Testing machine . 3
6.2 Loading device. 3
6.3 Measuring instruments . 5
7 Sample . 5
7.1 Shape and dimensions of specimens . 5
7.2 Sampling and preparation of specimens . 6
7.2.1 Cutting and handling . 6
7.2.2 Conditioning . 6
7.2.3 Examination . 6
7.2.4 Adhesive film . 6
7.3 Number of specimens . 6
8 Procedure. 6
8.1 Temperature . 6
8.2 Humidity . 6
8.3 Thickness measurement . 6
8.4 Base plate . 6
8.5 Positioning of specimen and loading ring . 7
8.6 Load application . 7
8.7 Location of the origin . 7
8.8 Assessment of residual stresses . 7
9 Evaluation . 7
9.1 Limitation of the evaluation . 7
9.2 Calculation of bending strength . 8
10 Test report . 8
Bibliography . 9
Foreword
ISO (the International Organization for Standardization) is a worldwide federation of national standards
bodies (ISO member bodies). The work of preparing International Standards is normally carried out
through ISO technical committees. Each member body interested in a subject for which a technical
committee has been established has the right to be represented on that committee. International
organizations, governmental and non-governmental, in liaison with ISO, also take part in the work.
ISO collaborates closely with the International Electrotechnical Commission (IEC) on all matters of
electrotechnical standardization.
The procedures used to develop this document and those intended for its further maintenance are
described in the ISO/IEC Directives, Part 1. In particular the different approval criteria needed for the
different types of ISO documents should be noted. This document was drafted in accordance with the
editorial rules of the ISO/IEC Directives, Part 2 (see www.iso.org/directives).
Attention is drawn to the possibility that some of the elements of this document may be the subject of
patent rights. ISO shall not be held responsible for identifying any or all such patent rights. Details of
any patent rights identified during the development of the document will be in the Introduction and/or
on the ISO list of patent declarations received (see www.iso.org/patents).
Any trade name used in this document is information given for the convenience of users and does not
constitute an endorsement.
For an explanation on the meaning of ISO specific terms and expressions related to conformity
assessment, as well as information about ISO’s adherence to the WTO principles in the Technical
Barriers to Trade (TBT) see the following URL: Foreword - Supplementary information
The committee responsible for this document is ISO/TC 160, Glass in building, Subcommittee SC 2, Use
considerations in conjunction with Technical Committee CEN/TC 129, Glass in building.
ISO 1288 consists of the following parts, under the general title Glass in building — Determination of the
bending strength of glass:
— Part 1: Fundamentals of testing glass
— Part 2: Coaxial double-ring test on flat specimens with large test surface areas
— Part 3: Test with specimen supported at two points (four-point bending)
— Part 4: Testing of channel-shaped glass
— Part 5: Coaxial double-ring test on flat specimens with small test surface areas
This International Standard has been based on EN 1288-5, Glass in building — Determination of the
bending strength of glass — Part 5: Coaxial double-ring test on flat specimens with small test surface areas
prepared by Technical Committee CEN/TC 129 “Glass in building”.
According to the CEN/CENELEC Internal Regulations, the national standards organizations of the
following countries are bound to implement this European Standard: Austria, Belgium, Czech Republic,
Denmark, Finland, France, Germany, Greece, Iceland, Ireland, Italy, Luxembourg, Netherlands, Norway,
Portugal, Spain, Sweden, Switzerland and the United Kingdom.
iv © ISO 2016 – All rights reserved
INTERNATIONAL STANDARD ISO 1288-5:2016(E)
Glass in building — Determination of the bending
strength of glass —
Part 5:
Coaxial double ring test on flat specimens with small test
surface areas
1 Scope
This part of ISO 1288 specifies a method for determining the comparative bending strength of glass for
use in buildings, excluding the effects of the edges.
See ISO 1288-1, 5.1.4 for an explanation as to why this test method should only be used for comparing
the strength of types of glass and not for assessing strength for design purposes.
The limitations of this part of ISO 1288 are described in ISO 1288-1.
ISO 1288-1 should be read in conjunction with this part of ISO 1288.
This test method is not suitable for patterned glass.
2 Normative references
The following documents, in whole or in part, are normatively referenced in this document and are
indispensable for its application. For dated references, only the edition cited applies. For undated
references, the latest edition of the referenced document (including any amendments) applies.
ISO 48, Rubber, vulcanized or thermoplastic — Determination of hardness (hardness between 10 IRHD
and 100 IRHD)
3 Terms and definitions
For the purposes of this document, the following terms and definitions apply.
3.1
bending stress
tensile bending stress induced in the surface of a specimen
Note 1 to entry: For testing purposes, the bending stress should be uniform over a specified part of the surface.
4 Symbols
F load N
F load at breakage, “breaking load” N
max
h thickness of specimen m
L side length of square specimens m
K ,K constants for calculation of bending stress
1 2
r radius of loading ring m
r radius of supporting ring m
r radius of circular specim
...


Questions, Comments and Discussion
Ask us and Technical Secretary will try to provide an answer. You can facilitate discussion about the standard in here.
Loading comments...