ASTM F1914-98
(Test Method)Standard Test Method for Short-Term Indentation and Residual Indentation of Resilient Floor Covering
Standard Test Method for Short-Term Indentation and Residual Indentation of Resilient Floor Covering
SCOPE
1.1 This method covers the determination of short term indentation and residual indentation of resilient nontextile floor coverings, such as vinyl plastic, linoleum, and felt-backed materials, when subjected to a concentrated load.
1.2 The values stated in inch-pound units are to be regarded as the standard. The values given in parentheses are provided for information only.
1.3 This standard does not purport to address all of the safety concerns, if any, associated with its use. It is the responsibility of the user of this standard to establish appropriate safety and health practices and determine the applicability of regulatory limitations prior to use.
General Information
Relations
Standards Content (Sample)
NOTICE: This standard has either been superseded and replaced by a new version or withdrawn.
Contact ASTM International (www.astm.org) for the latest information
Designation:F1914–98
Standard Test Method for
Short-Term Indentation and Residual Indentation of
Resilient Floor Covering
This standard is issued under the fixed designation F 1914; the number immediately following the designation indicates the year of
original adoption or, in the case of revision, the year of last revision. A number in parentheses indicates the year of last reapproval. A
superscript epsilon (e) indicates an editorial change since the last revision or reapproval.
1. Scope 4.2 The indentation of a resilient floor covering shall be
measured using a specified type of indentor, flat or spherical,
1.1 This method covers the determination of short term
under a specified load and time.
indentation and residual indentation of resilient nontextile floor
4.3 The residual indentation of a resilient floor covering
coverings, such as vinyl plastic, linoleum, and felt-backed
shall be measured after a specified recovery time.
materials, when subjected to a concentrated load.
4.4 See Table 1 for detailed testing and conditioning re-
1.2 The values stated are in inch-pound units are to be
quirements by products (specification) type.
regarded as the standard. The values given in parentheses are
provided for information only.
5. Apparatus
1.3 This standard does not purport to address all of the
5.1 There are two types of machines used to produce
safety concerns, if any, associated with its use. It is the
indentation. The first one is as described in Test Method F 142
responsibility of the user of this standard to establish appro-
and is restricted to a spherical foot and it is used for initial
priate safety and health practices and determine the applica-
indentation measurements only. The second one is described
bility of regulatory limitations prior to use.
hereafter and has interchangeable feet with variable geometry,
2. Referenced Documents and it is used to measure initial indentation and the residual
indentation.
2.1 ASTM Standards:
5.2 Apparatus for Measuring Indentation and Residual
E 691 Practice for Conducting an Interlaboratory Study to
Indentation:
Determine the Precision of a Test Method
5.2.1 The apparatus shall consist of an indentor acting
F 141 Terminology Relating to Resilient Floor Coverings
underadeadweight,adialindicatorformeasuringthedepthof
F 142 Test Method for Indentation of Resilient Floor Tiles
indentation, a rigid metal plate for supporting the specimen,
(McBurney Test)
3 and a rigid metal frame for guiding the weight and indentor.A
F 1066 Specification for Vinyl Composition Floor Tile
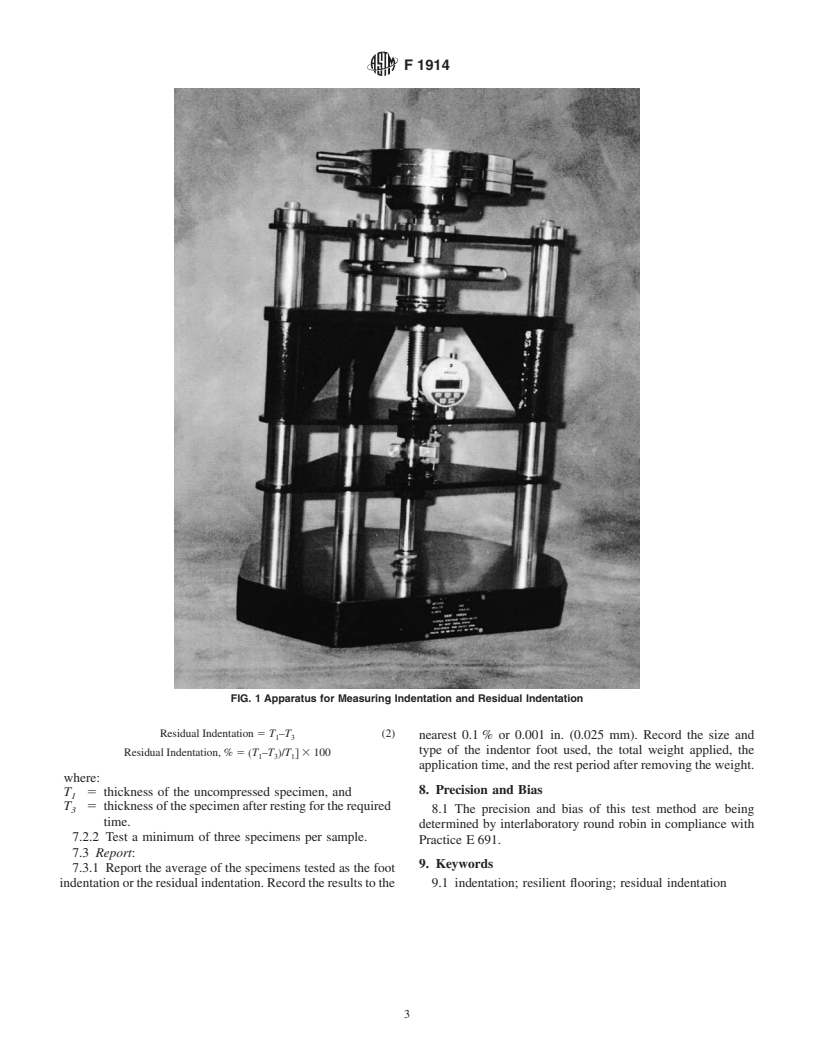
suitable apparatus is shown in Fig. 1.
F 1303 Specification for Sheet Vinyl Floor Covering with
3 5.2.2 The indentor consists of a plunger part and a foot part.
Backing
The plunger part is made of a steel bar rigidly supported
F 1700 Specification for Solid Vinyl Floor Tile
vertically in such a manner that its lower end face is flat and
3. Terminology
parallel to the specimen support. The foot part of the indentor
is either spherical or cylindrical with its axis perpendicular to
3.1 Definitions—For definitions of terms used in this test
the specimen support. The face of the indentor foot that
method, refer to Terminology F 141.
contacts the specimen is buffed smooth to a roughness of 16 to
4. Significance and Use
8 µin. (0.4 to 0.2 µm). For standard sizes, refer to Table 1. The
indentor may be either monolithic or have a detachable foot
4.1 The indentation and the residual indentation of resilient
parttopermittheuseofvaryingfootsizes.Thedetachablefoot
floor covering is important since the resistance and recovery
mustbeattachedtightlytotheplungerbeforeproceedingtothe
from indentation reflects on the ability of the resilient floor
tests. The upper end of the indentor is provided with a
covering to perform properly after installation.
weight-releasingdeviceforapplyingtheloadwithoutimpactto
the indentor and for activating a dial indicator from which the
1 depth of penetration of the indentor can be read. The weight of
This test method is under the jurisdiction ofASTM Committee F-6 on Resilient
Floor Coverings and is the direct responsibility of Subcommittee F06.30 on Test the indentor shall be 1 6 0.01 lb (0.45 6 0.05 kg).
Methods—Performance.
Current edition approved Aug. 10, 1998. Published February 1999.
2 4
Annual Book of ASTM Standards, Vol 14.02. Available from DEK-TRON Scientific Instruments, 244 East Third Street,
Annual Book of ASTM Standards, Vol 15.04. Plainfield, NJ 07060.
Copyright © ASTM International, 100 Barr Harbor Drive, PO Box C700, West Conshohocken, PA 19428-2959, United States.
F1914
TABLE 1 Sample Conditioning and Testing Procedure
Recovery Time for
Conditioning Residual
Specification Foot Geometry and Diameter Total Load Indentation Time Indentation
Temperature Time Medium
F 1066 77 6 1°F 15–30 min or 1 h water spherical 30 6 0.25 lb 1 min N/A
0.25 6 0.0005 in. (13.6 6 0.115 kg)
air (6.35 6 0.0127 mm)
77 6 1°F 15–30 min or 1 h water spherical 30 6 0.25 lb 10 min N/A
0.25 6 0.0005 in. (13.6 6 0.115 kg)
air (6.35 6 0.0127 mm)
115 6 1°F 15–30 min or 1 h water spherical 30 6 0.25 lb 30 s N/A
0.256 0.0005 in. (13.6 6 0.115 kg)
air (6.35 6 0.0127 mm)
F 303, Type I 75 6 4°F 6 h air spherical 50 6 0.5 lb 5 min 60 min
0.75 6 0.0005 in. (22.7 6 0.225 kg)
(19.05 6 0.0127 mm)
F 1303, Type II 75 6 4°F 6 h air flat 75 6 0.75 lb 15 min 60 min
0.25 6 0.0005 in. (34.2 6 0.340 kg)
(6.35 6 0.0127 mm)
F 1700 75 6 4°F 6 h air flat 140 61lb 10min 60min
0.178 6 0.0005 in. (63.5 6 0.454 kg)
(4.521 6 0.0127 mm)
5.2.3 The dial indicator attached to the plunger part of the measurements, allow the specimen to rest 60 6 1 min between
indentor is equipped with a scale graduated to read the depth of the removal o
...


Questions, Comments and Discussion
Ask us and Technical Secretary will try to provide an answer. You can facilitate discussion about the standard in here.