ASTM D6924-03
(Specification)Standard Specification for Preformed Thermoplastic Vulcanizate Elastomeric Joint Seals for Bridges
Standard Specification for Preformed Thermoplastic Vulcanizate Elastomeric Joint Seals for Bridges
SCOPE
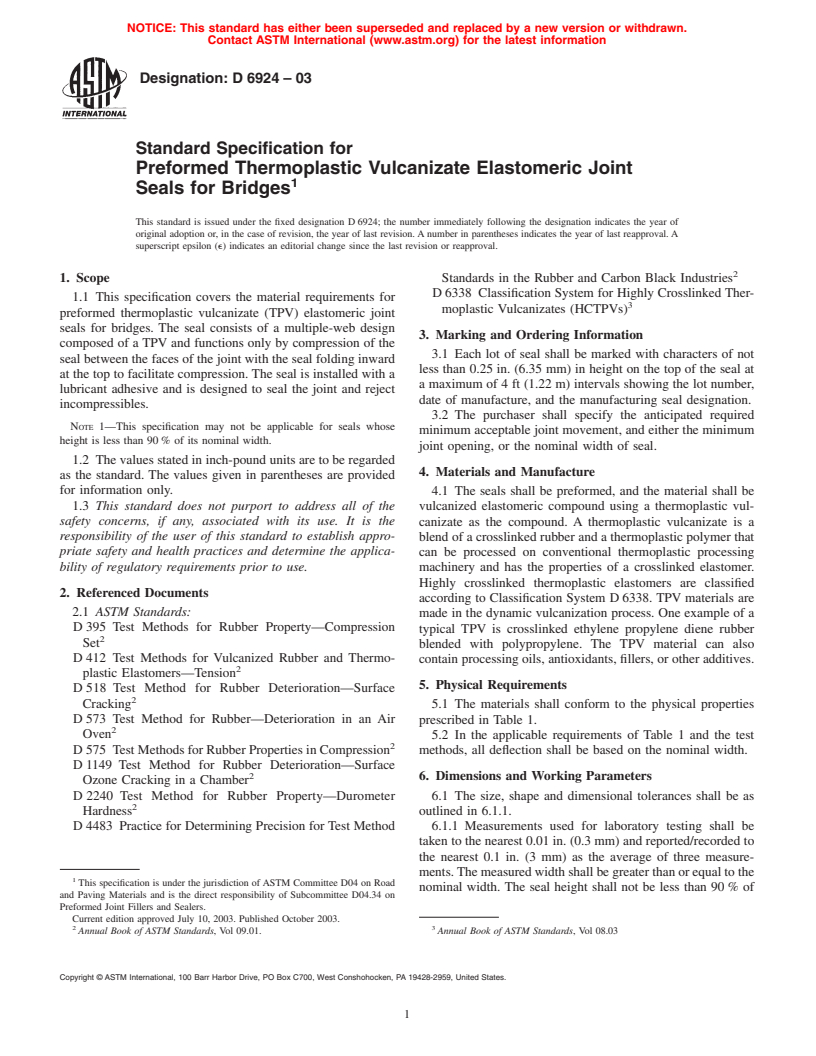
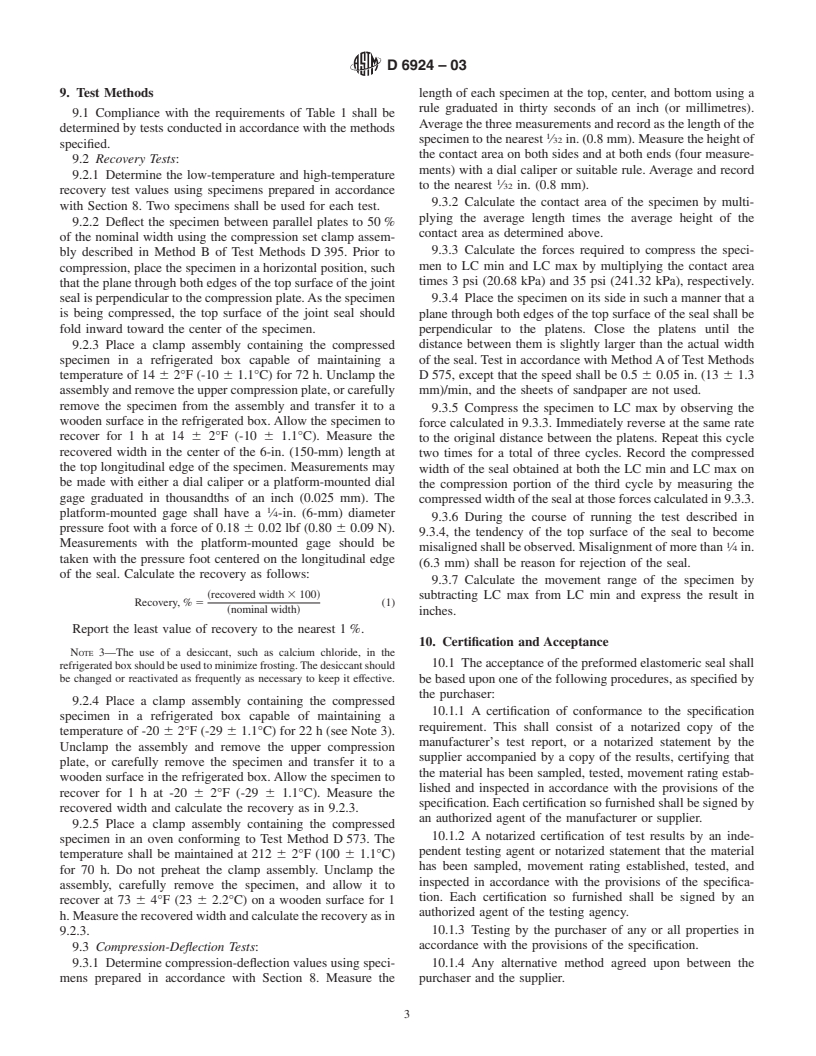
1.1 This specification covers the material requirements for preformed thermoplastic vulcanizate (TPV) elastomeric joint seals for bridges. The seal consists of a multiple-web design composed of a TPV and functions only by compression of the seal between the faces of the joint with the seal folding inward at the top to facilitate compression. The seal is installed with a lubricant adhesive and is designed to seal the joint and reject incompressibles.
Note 1—This specification may not be applicable for seals whose height is less than 90 % of its nominal width.
1.2 The values stated in inch-pound units are to be regarded as the standard. The values given in parentheses are provided for information only.
1.3 This standard does not purport to address all of the safety concerns, if any, associated with its use. It is the responsibility of the user of this standard to establish appropriate safety and health practices and determine the applicability of regulatory requirements prior to use.
General Information
Relations
Standards Content (Sample)
NOTICE: This standard has either been superseded and replaced by a new version or withdrawn.
Contact ASTM International (www.astm.org) for the latest information
Designation: D 6924 – 03
Standard Specification for
Preformed Thermoplastic Vulcanizate Elastomeric Joint
Seals for Bridges
This standard is issued under the fixed designation D 6924; the number immediately following the designation indicates the year of
original adoption or, in the case of revision, the year of last revision. A number in parentheses indicates the year of last reapproval. A
superscript epsilon (e) indicates an editorial change since the last revision or reapproval.
1. Scope Standards in the Rubber and Carbon Black Industries
D 6338 Classification System for Highly Crosslinked Ther-
1.1 This specification covers the material requirements for
moplastic Vulcanizates (HCTPVs)
preformed thermoplastic vulcanizate (TPV) elastomeric joint
seals for bridges. The seal consists of a multiple-web design
3. Marking and Ordering Information
composed of a TPV and functions only by compression of the
3.1 Each lot of seal shall be marked with characters of not
seal between the faces of the joint with the seal folding inward
less than 0.25 in. (6.35 mm) in height on the top of the seal at
at the top to facilitate compression. The seal is installed with a
a maximum of 4 ft (1.22 m) intervals showing the lot number,
lubricant adhesive and is designed to seal the joint and reject
date of manufacture, and the manufacturing seal designation.
incompressibles.
3.2 The purchaser shall specify the anticipated required
NOTE 1—This specification may not be applicable for seals whose
minimum acceptable joint movement, and either the minimum
height is less than 90 % of its nominal width.
joint opening, or the nominal width of seal.
1.2 The values stated in inch-pound units are to be regarded
4. Materials and Manufacture
as the standard. The values given in parentheses are provided
for information only.
4.1 The seals shall be preformed, and the material shall be
1.3 This standard does not purport to address all of the vulcanized elastomeric compound using a thermoplastic vul-
safety concerns, if any, associated with its use. It is the
canizate as the compound. A thermoplastic vulcanizate is a
responsibility of the user of this standard to establish appro- blend of a crosslinked rubber and a thermoplastic polymer that
priate safety and health practices and determine the applica-
can be processed on conventional thermoplastic processing
bility of regulatory requirements prior to use. machinery and has the properties of a crosslinked elastomer.
Highly crosslinked thermoplastic elastomers are classified
2. Referenced Documents
according to Classification System D 6338. TPV materials are
2.1 ASTM Standards:
made in the dynamic vulcanization process. One example of a
D 395 Test Methods for Rubber Property—Compression
typical TPV is crosslinked ethylene propylene diene rubber
Set
blended with polypropylene. The TPV material can also
D 412 Test Methods for Vulcanized Rubber and Thermo-
contain processing oils, antioxidants, fillers, or other additives.
plastic Elastomers—Tension
5. Physical Requirements
D 518 Test Method for Rubber Deterioration—Surface
Cracking
5.1 The materials shall conform to the physical properties
D 573 Test Method for Rubber—Deterioration in an Air prescribed in Table 1.
Oven
5.2 In the applicable requirements of Table 1 and the test
D 575 Test Methods for Rubber Properties in Compression methods, all deflection shall be based on the nominal width.
D 1149 Test Method for Rubber Deterioration—Surface
6. Dimensions and Working Parameters
Ozone Cracking in a Chamber
D 2240 Test Method for Rubber Property—Durometer 6.1 The size, shape and dimensional tolerances shall be as
Hardness outlined in 6.1.1.
D 4483 Practice for Determining Precision for Test Method 6.1.1 Measurements used for laboratory testing shall be
taken to the nearest 0.01 in. (0.3 mm) and reported/recorded to
the nearest 0.1 in. (3 mm) as the average of three measure-
ments.The measured width shall be greater than or equal to the
This specification is under the jurisdiction of ASTM Committee D04 on Road
nominal width. The seal height shall not be less than 90 % of
and Paving Materials and is the direct responsibility of Subcommittee D04.34 on
Preformed Joint Fillers and Sealers.
Current edition approved July 10, 2003. Published October 2003.
2 3
Annual Book of ASTM Standards, Vol 09.01. Annual Book of ASTM Standards, Vol 08.03
Copyright © ASTM International, 100 Barr Harbor Drive, PO Box C700, West Conshohocken, PA 19428-2959, United States.
D6924–03
TABLE 1 Physical Requirements for Preformed Elastomeric
with 9.3. For the purpose of calculating movement range, a
Joint Seals
value at 85 % of nominal width shall be used for LC min when
ASTM
the measured value of LC min exceeds 85 %.
Requirements
Test Method
NOTE 2—If the seal generates a pressure of 3 psi at 90 % of nominal
Tensile strength, min, psi (MPa) 730 (4.4) D 412
width, LC min equals 85 %. However, if the seal generates 3 psi at 70 %
Elongation at break, min, % 300 D 412
Hardness, Type A durometer, points 50 to 70 D 2240 of nominal width, the LC min equals 70 %.
A
(modified)
Oven aging, 168 h at 212°F (100°C) 6.2.3 The maximum limit of compressibility (LC max) is
Tensile strength, max, % loss 10
defined as the compressed width (expressed in terms of percent
Elongation, max, % loss 10
of nominal width) corresponding to a contact pressure of 35 psi
Hardness, Type A durometer, 0to5
points change (241.32 kPa). The LC max shall be determined in accordance
B C
Ozone resistance no cracks D 1149
with 9.3. LC max has been designated at 35 psi (241.32 kPa)
20 % strain, 300 pphm in air, 70 h,
in order to mitigate the tendencies toward pressure decay of the
at 104°F (40°C) (wiped with toluene
to remove surface contamination)
seal during use. A reading of 35 psi is considered an absolute
Low-temperature recovery,
maximum pressure which should not be exceeded.
72 h at 14°F (-10°C), 50 %:
D
6.2.4 The movement range of the seal is defined as the
Deflection, min, % 80 Section 7
Low-temperature recovery,
numerical difference between the LC min and the LC max
22 h at -20°F (-29°C), 50 %:
expressed in inches (mm). For the purpose of calculating the
D
Deflection, min, % 70 Section 7
movement range, a value at 85 % shall be used for LC min
High-temperature recovery,
70 h, at 212°F (100°C), 50 %:
when the measured value of LC min exceeds 85 %. For
D
Deflection, min, % 75 Section 7
purposes of acceptance testing, the calculated movement range
Compression-deflection properties:
of the seal shall not be less than the specified value.
LC min in. (mm) 9.3 D 575 Method A
E
LC max in. (mm) 9.3 (modified)
Movement range, in. (mm) 9.3
7. Sampling
A
The term “modified” in the table relates to the specimen preparation. The use
7.1 A lot shall consist of the quantity for each cross section
of the joint seal as the specimen source requires that more plies than specified in
either of the modified test procedures be used. Such specimen modification shall
agreed upon between the purchaser and the supplier.
be agreed upon between the purchaser and the supplier prior to testing. The
7.2 Samplesshallbetakenatrandomfromeachshipmentof
hardness test shall be made with the durometer in a durometer stand as
material. If the shipment consists of more than one lot, each lot
recommended in Test Method D 2240.
B
Sample prepared in accordance with Method A of Test Method D 518.
shall be sampled.
C
Cracking, splitting, or sticking of a specimen during a recovery test shall mean
7.3 The minimum lengths of samples for testing purposes
that the specimen has failed the test.
D
The reference section and subsections are those of this specification. The shallbeasprescribedbythepurchaserorasprescribedinTable
values found in 6.2.2, 6.2.3, and 6.2.4 shall be within the range specified by the
2.
purchaser in 3.2.
E
Speed of testing shall be 0.5 6 0.05 in. (13 6 1.3 mm), min at room
temperature of 73 6 4°F (23 6 2.2°C). The sheets of sandpaper are not used.
8. Specimen Preparation
8.1 All test specimens shall be cut, buffed, or both from the
sample of preformed seal. Care should be taken not to overheat
the nominal width unless joint recess dimensions or special
the test specimen during buffing. The cut shall be square to
design considerations dictate the geometry.
within 2° and smooth, with no roughness visible to the naked
6.2 Compression Deflection Properties—The contact pres-
eye. The use of a tooth blade device or a guillotine-type cutter,
sure expressed in pounds-force per square inch (or pascals)
or both, is not acceptable. This process will eliminate irregu-
when the seal is compressed to any particular width indicates
larities.
the stress-strain relationship that exists in the seal. This
8.2 Specimens for determining tensile strength and elonga-
relationship is dependent on both the properties of the elas-
tion (Test Methods D 412) shall be prepared using Die C when
tomer and the cross-sectional configuration of the seal. There-
possible. Die D may be used when the flat sections of a seal are
fore, for a predetermined allowable pressure, a definitive
too small for Die C. However, the requirement of Table 1 shall
relationshipwillexistandtheworkinglimitsofthesealmaybe
apply regardless of the die used. Buffing should be carefully
defined.
performed and kept to a minimum.
6.2.1 The working limits (minimum and maximum degrees
8.3 Specimens for low-temperature and high-temperature
of compression) of the seal shall be determined on the basis of
recovery tests and for pressure deflection tests shall consist of
the minimum and maximum limits of compressibility (LC min
6-in. (150-mm) lengths of the preformed seal.
and LC max), and the movement range
...


Questions, Comments and Discussion
Ask us and Technical Secretary will try to provide an answer. You can facilitate discussion about the standard in here.