ISO 21342:2019
(Main)Synchronous belt drives - Automotive belts and pulleys
Synchronous belt drives - Automotive belts and pulleys
This document specifies the characteristics of synchronous endless belts and their related pulleys for use in automotive applications such as engine camshaft drives. The characteristics include: - belt pitch spacing; - belt nominal tooth dimensions; - belt width and width tolerance; - belt pitch length and pitch length tolerance; - pulley groove dimensions and tolerances; - pulley tolerances and quality specifications. Test methods for measuring belt pitch length and lateral runout are also included.
Titre manque
General Information
- Status
- Published
- Publication Date
- 29-Apr-2019
- Technical Committee
- ISO/TC 41/SC 4 - Synchronous belt drives
- Drafting Committee
- ISO/TC 41/SC 4 - Synchronous belt drives
- Current Stage
- 9093 - International Standard confirmed
- Start Date
- 12-Sep-2025
- Completion Date
- 13-Dec-2025
Relations
- Effective Date
- 28-Oct-2017
- Effective Date
- 28-Oct-2017
Overview
ISO 21342:2019 - Synchronous belt drives - Automotive belts and pulleys defines the geometric and quality requirements for synchronous endless belts and mating pulleys used in automotive applications (for example, engine camshaft drives). The standard specifies belt tooth profiles, belt and pulley dimensions, tolerances and quality criteria, plus test methods for pitch length measurement and lateral runout measurement. ISO 21342:2019 supersedes earlier ISO 9010/9011 documents and is published by ISO/TC 41 (Pulleys and belts), SC 4.
Key topics and technical requirements
- Profiles and belt types: standardized tooth profiles for automotive synchronous belts - types ZA, ZB (trapezoidal) and curvilinear types ZH/YH, ZR/YR, ZS/YS.
- Belt tooth dimensions: nominal tooth geometry (pitch, tooth height, root/tip radii, widths) for each profile family.
- Belt designation: systematic naming that encodes tooth count, pitch, profile and belt width.
- Belt dimensions and tolerances:
- Pitch length defined as number of teeth × tooth pitch; pitch length tolerances given by length ranges.
- Belt width and width tolerances are specified (with options for tighter tolerances by agreement).
- Pulley geometry and tolerances:
- Pulley groove profiles and dimensional tolerances for mating with each belt profile.
- Pulley quality specs: axial/radial runout, parallelism, taper, outside diameter and pitch tolerances, minimum pulley widths and flange dimensions.
- Test and measurement methods:
- Pitch length measurement: procedure using a measuring fixture with two standard pulleys (typically 20 or 22 tooth measuring pulleys), specified measuring force and precise centre-distance measurement.
- Lateral runout measurement: fixtures, measuring devices and procedures to assess belt and pulley lateral runout and reportable results.
- Normative references: ISO 254 (pulleys - quality, finish and balance) and others where applicable.
Applications and users
ISO 21342:2019 is essential for:
- Automotive OEMs and powertrain designers specifying synchronous belt drives (e.g., camshaft/timing drives).
- Belt and pulley manufacturers ensuring interchangeability and compliance.
- Quality engineers and test labs performing pitch length and lateral runout measurements.
- Aftermarket suppliers and procurement teams requiring clear dimensional/tolerance specifications.
Practical benefits include improved part interchangeability, predictable dynamic behavior, reduced noise/vibration from poorly matched components, and consistent inspection/testing procedures.
Related standards
- ISO 254 - Belt drives: pulleys - quality, finish and balance (normative reference)
- ISO 9010 / ISO 9011 - earlier standards replaced by ISO 21342:2019
Keywords: ISO 21342:2019, synchronous belt drives, automotive belts and pulleys, belt pitch length, pulley groove dimensions, lateral runout measurement, belt tooth dimensions, pulley tolerances, engine camshaft drives.
Frequently Asked Questions
ISO 21342:2019 is a standard published by the International Organization for Standardization (ISO). Its full title is "Synchronous belt drives - Automotive belts and pulleys". This standard covers: This document specifies the characteristics of synchronous endless belts and their related pulleys for use in automotive applications such as engine camshaft drives. The characteristics include: - belt pitch spacing; - belt nominal tooth dimensions; - belt width and width tolerance; - belt pitch length and pitch length tolerance; - pulley groove dimensions and tolerances; - pulley tolerances and quality specifications. Test methods for measuring belt pitch length and lateral runout are also included.
This document specifies the characteristics of synchronous endless belts and their related pulleys for use in automotive applications such as engine camshaft drives. The characteristics include: - belt pitch spacing; - belt nominal tooth dimensions; - belt width and width tolerance; - belt pitch length and pitch length tolerance; - pulley groove dimensions and tolerances; - pulley tolerances and quality specifications. Test methods for measuring belt pitch length and lateral runout are also included.
ISO 21342:2019 is classified under the following ICS (International Classification for Standards) categories: 21.220.10 - Belt drives and their components; 43.060.10 - Engine block and internal components. The ICS classification helps identify the subject area and facilitates finding related standards.
ISO 21342:2019 has the following relationships with other standards: It is inter standard links to ISO 9011:1997, ISO 9010:1997. Understanding these relationships helps ensure you are using the most current and applicable version of the standard.
ISO 21342:2019 is available in PDF format for immediate download after purchase. The document can be added to your cart and obtained through the secure checkout process. Digital delivery ensures instant access to the complete standard document.
Standards Content (Sample)
INTERNATIONAL ISO
STANDARD 21342
First edition
2019-05
Synchronous belt drives — Automotive
belts and pulleys
Reference number
©
ISO 2019
© ISO 2019
All rights reserved. Unless otherwise specified, or required in the context of its implementation, no part of this publication may
be reproduced or utilized otherwise in any form or by any means, electronic or mechanical, including photocopying, or posting
on the internet or an intranet, without prior written permission. Permission can be requested from either ISO at the address
below or ISO’s member body in the country of the requester.
ISO copyright office
CP 401 • Ch. de Blandonnet 8
CH-1214 Vernier, Geneva
Phone: +41 22 749 01 11
Fax: +41 22 749 09 47
Email: copyright@iso.org
Website: www.iso.org
Published in Switzerland
ii © ISO 2019 – All rights reserved
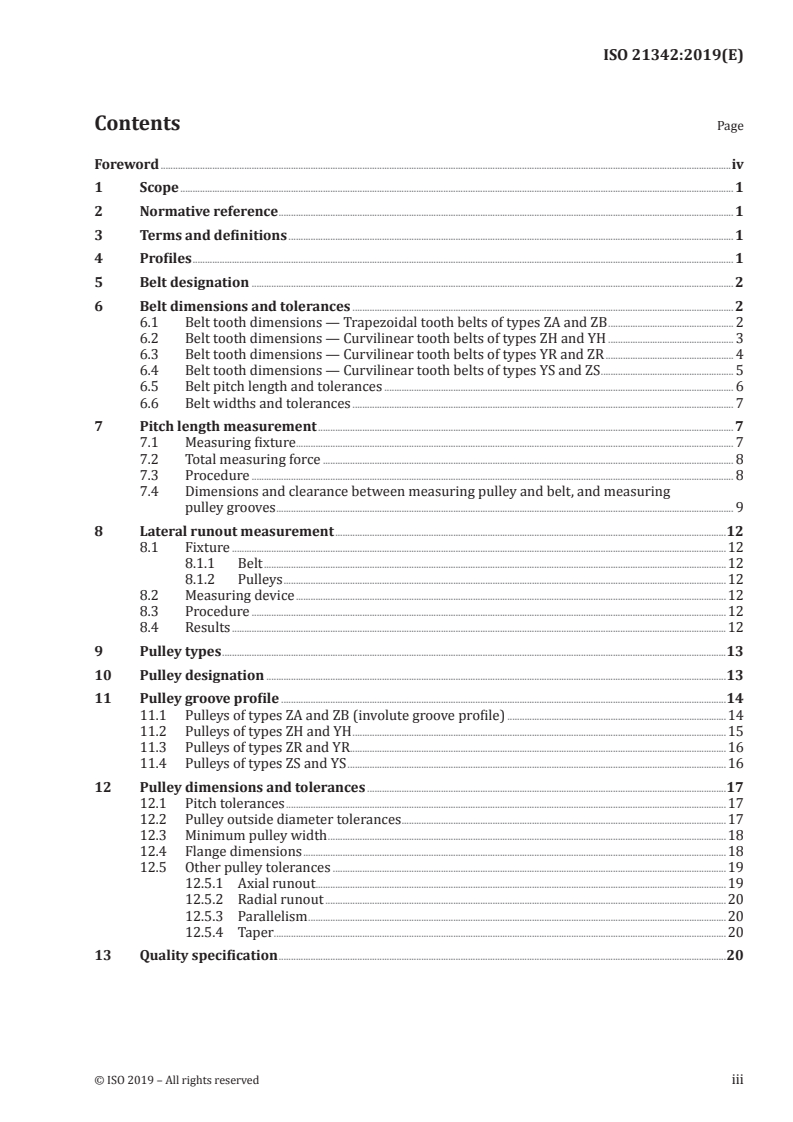
Contents Page
Foreword .iv
1 Scope . 1
2 Normative reference . 1
3 Terms and definitions . 1
4 Profiles . 1
5 Belt designation . 2
6 Belt dimensions and tolerances . 2
6.1 Belt tooth dimensions — Trapezoidal tooth belts of types ZA and ZB . 2
6.2 Belt tooth dimensions — Curvilinear tooth belts of types ZH and YH . 3
6.3 Belt tooth dimensions — Curvilinear tooth belts of types YR and ZR . 4
6.4 Belt tooth dimensions — Curvilinear tooth belts of types YS and ZS . 5
6.5 Belt pitch length and tolerances . 6
6.6 Belt widths and tolerances . 7
7 Pitch length measurement . 7
7.1 Measuring fixture. 7
7.2 Total measuring force . 8
7.3 Procedure . 8
7.4 Dimensions and clearance between measuring pulley and belt, and measuring
pulley grooves . 9
8 Lateral runout measurement .12
8.1 Fixture .12
8.1.1 Belt .12
8.1.2 Pulleys .12
8.2 Measuring device .12
8.3 Procedure .12
8.4 Results .12
9 Pulley types .13
10 Pulley designation .13
11 Pulley groove profile .14
11.1 Pulleys of types ZA and ZB (involute groove profile) .14
11.2 Pulleys of types ZH and YH .15
11.3 Pulleys of types ZR and YR.16
11.4 Pulleys of types ZS and YS .16
12 Pulley dimensions and tolerances .17
12.1 Pitch tolerances .17
12.2 Pulley outside diameter tolerances .17
12.3 Minimum pulley width .18
12.4 Flange dimensions .18
12.5 Other pulley tolerances .19
12.5.1 Axial runout.19
12.5.2 Radial runout .20
12.5.3 Parallelism .20
12.5.4 Taper.20
13 Quality specification .20
Foreword
ISO (the International Organization for Standardization) is a worldwide federation of national standards
bodies (ISO member bodies). The work of preparing International Standards is normally carried out
through ISO technical committees. Each member body interested in a subject for which a technical
committee has been established has the right to be represented on that committee. International
organizations, governmental and non-governmental, in liaison with ISO, also take part in the work.
ISO collaborates closely with the International Electrotechnical Commission (IEC) on all matters of
electrotechnical standardization.
The procedures used to develop this document and those intended for its further maintenance are
described in the ISO/IEC Directives, Part 1. In particular, the different approval criteria needed for the
different types of ISO documents should be noted. This document was drafted in accordance with the
editorial rules of the ISO/IEC Directives, Part 2 (see www .iso .org/directives).
Attention is drawn to the possibility that some of the elements of this document may be the subject of
patent rights. ISO shall not be held responsible for identifying any or all such patent rights. Details of
any patent rights identified during the development of the document will be in the Introduction and/or
on the ISO list of patent declarations received (see www .iso .org/patents).
Any trade name used in this document is information given for the convenience of users and does not
constitute an endorsement.
For an explanation of the voluntary nature of standards, the meaning of ISO specific terms and
expressions related to conformity assessment, as well as information about ISO's adherence to the
World Trade Organization (WTO) principles in the Technical Barriers to Trade (TBT) see www .iso
.org/iso/foreword .html.
This document was prepared by Technical Committee ISO/TC 41, Pulleys and belts (including vee belts),
Subcommittee SC 4, Synchronous belt drives.
Any feedback or questions on this document should be directed to the user’s national standards body. A
complete listing of these bodies can be found at www .iso .org/members .html.
This first edition of ISO 21342 cancels and replaces ISO 9010:1997 and ISO 9011:1997.
iv © ISO 2019 – All rights reserved
INTERNATIONAL STANDARD ISO 21342:2019(E)
Synchronous belt drives — Automotive belts and pulleys
1 Scope
This document specifies the characteristics of synchronous endless belts and their related pulleys for
use in automotive applications such as engine camshaft drives.
The characteristics include:
— belt pitch spacing;
— belt nominal tooth dimensions;
— belt width and width tolerance;
— belt pitch length and pitch length tolerance;
— pulley groove dimensions and tolerances;
— pulley tolerances and quality specifications.
Test methods for measuring belt pitch length and lateral runout are also included.
2 Normative reference
The following documents are referred to in the text in such a way that some or all of their content
constitutes requirements of this document. For dated references, only the edition cited applies. For
undated references, the latest edition of the referenced document (including any amendments) applies.
ISO 254, Belt drives — Pulleys — Quality, finish and balance
3 Terms and definitions
No terms and definitions are listed in this document.
ISO and IEC maintain terminological databases for use in standardization at the following addresses:
— ISO Online browsing platform: available at https: //www .iso .org/obp.
— IEC Electropedia: available at http: //www .electropedia .org/
4 Profiles
The following profiles for synchronous drives for automotive applications are standardized:
— type ZA: trapezoidal tooth;
— type ZB: trapezoidal tooth;
— type ZH: curvilinear tooth, "H" system;
— type YH: curvilinear tooth, "H" system;
— type ZR: curvilinear tooth, "R" system;
— type YR: curvilinear tooth, "R" system;
— type ZS: curvilinear tooth, "S" system;
— type YS: curvilinear tooth, "S" system.
5 Belt designation
A belt is designated by a series of numbers and letters as follows:
a) the first set of numbers indicates the number of teeth;
b) the first letter indicates tooth pitch;
c) the second letter indicates tooth profile;
d) The second set of numbers indicates the width in millimetres.
EXAMPLE
6 Belt dimensions and tolerances
6.1 Belt tooth dimensions — Trapezoidal tooth belts of types ZA and ZB
The nominal belt tooth dimensions for trapezoidal tooth belts of types ZA and ZB are shown in Figure 1
and given in Table 1.
2 © ISO 2019 – All rights reserved
Key
1 tooth pitch (p )
b
2 tooth angle (2β)
3 height (h )
s
4 pitch line differential (a)
5 root radius (r )
r
6 tip radius (r )
a
7 tooth height (h )
t
8 tooth width (S)
Figure 1 — Nominal tooth dimensions (profile) for types ZA and ZB
Table 1 — Nominal tooth dimensions for types ZA and ZB
Nominal profile
Key number Symbol
Type ZA Type ZB
1 p 9,525 9,525
b
2 2β 40 40
3 h 4,1 4,5
s
4 a 0,686 0,686
5 r 0,51 1,02
r
6 r 0,51 1,02
a
7 h 1,91 2,29
t
8 S 4,65 6,12
6.2 Belt tooth dimensions — Curvilinear tooth belts of types ZH and YH
The nominal belt tooth dimensions for curvilinear tooth belts of types ZH and YH are shown in Figure 2
and given in Table 2.
Key
1 tooth pitch (p )
b
2 height (h )
s
3 pitch line differential (a)
4 root radius (r )
r
5 tooth height (h )
t
6 tooth radius (R)
7 vertical offset (Y)
8 root radius distance (S )
r
Figure 2 — Nominal tooth dimensions (profile) for types ZH and YH
Table 2 — Nominal tooth dimensions for types YH and ZH
Dimensions in millimetres
Angles in degrees
Nominal profile
Key number Symbol
Type YH Type ZH
1 p 8 9,525
b
2 h 5,2 5,5
s
3 a 0,686 0,686
4 r 0,64 0,76
r
5 h 3,04 3,5
t
6 R 2,11 2,45
7 Y 0,93 1,05
8 S 2,84 3,27
r
6.3 Belt tooth dimensions — Curvilinear tooth belts of types YR and ZR
The nominal tooth dimensions for curvilinear tooth belts of types YR and ZR are shown in Figure 3 and
given in Table 3.
4 © ISO 2019 – All rights reserved
Key
1 tooth pitch (p )
b
2 tooth angle (2β)
3 height (h )
s
4 pitch line differential (a)
5 root radius (r )
r
6 tooth height (h )
t
7 tooth width (S)
8 Y = kX
Figure 3 — Nominal tooth dimensions (profile) for YR and ZR
Table 3 — Nominal tooth dimensions for types YR and ZR
Dimensions in millimetres
Angles in degrees
Nominal profile
Key number Symbol
Type YR Type ZR
1 p 8 9,525
b
2 2β 30 32
3 h 5,1 5,4
s
4 a 0,75 0,75
5 r 0,8 1,00
r
6 h 2,8 3,2
t
7 S 5,3 5,5
Tooth form parameter k 1,692 1,228
6.4 Belt tooth dimensions — Curvilinear tooth belts of types YS and
...


Questions, Comments and Discussion
Ask us and Technical Secretary will try to provide an answer. You can facilitate discussion about the standard in here.
Loading comments...