ISO 10303-219:2007
(Main)Industrial automation systems and integration — Product data representation and exchange — Part 219: Application protocol: Dimensional inspection information exchange
Industrial automation systems and integration — Product data representation and exchange — Part 219: Application protocol: Dimensional inspection information exchange
ISO 10303-219:2007 establishes the entities and relationships necessary for the accommodation, preservation and exchange of dimensional inspection results, with their associated product data.
Systèmes d'automatisation industrielle et intégration — Représentation et échange de données de produits — Partie 219: Protocole d'application: Échange d'information par vérification dimensionnelle
General Information
- Status
- Published
- Publication Date
- 10-Dec-2007
- Technical Committee
- ISO/TC 184/SC 4 - Industrial data
- Drafting Committee
- ISO/TC 184/SC 4/WG 12 - STEP product modelling and resources
- Current Stage
- 9093 - International Standard confirmed
- Start Date
- 28-Jun-2024
- Completion Date
- 14-Feb-2026
Relations
- Consolidated By
ISO 669:2016 - Resistance welding — Resistance welding equipment — Mechanical and electrical requirements - Effective Date
- 06-Jun-2022
Overview
ISO 10303-219:2007 - Part 219 of the ISO 10303 (STEP) family - is an application protocol for dimensional inspection information exchange. The standard establishes the entities and relationships required to accommodate, preserve and exchange dimensional inspection results together with their associated product data. Published in 2007, ISO 10303-219 supports interoperable transfer of measurement and inspection information across CAD, CAM, metrology and quality systems.
Key Topics
- Data model for inspection results: defines the core entities and relationships needed to represent dimensional measurement outcomes.
- Preservation and exchange: specifies how inspection information is packaged so it can be stored and transmitted reliably across systems.
- Association with product data: links inspection results to relevant product information (for example, part identification, associated product definition and inspection metadata) to maintain context and traceability.
- Interoperability focus: designed to enable consistent interpretation of inspection data by disparate software and hardware, reducing manual translation and data loss.
Applications
ISO 10303-219 is used where consistent, traceable transfer of measurement and inspection data is critical:
- Quality assurance and metrology: exchange of dimensional inspection results between coordinate measuring machines (CMMs), inspection software and quality management systems.
- Manufacturing and shop floor integration: transferring inspection outcomes to ERP, MES and production control systems for corrective actions and process control.
- Supply chain collaboration: sharing verified measurement data between OEMs, suppliers and inspection service providers to support acceptance, audit and compliance.
- Long-term data preservation: archiving inspection evidence alongside product data for regulatory, warranty and lifecycle management purposes.
Who uses it:
- Metrology and inspection software vendors
- CAD/CAM/PLM integrators and implementers
- Manufacturing quality engineers and metrologists
- OEMs, contract manufacturers and third‑party inspection laboratories
Benefits
- Improves interoperability between measurement devices and enterprise systems
- Preserves contextual product data with inspection results for traceability
- Reduces manual rework and data translation errors
- Enables automated workflows for quality and compliance reporting
Related standards
- ISO 10303 (STEP) series - the broader product data representation and exchange framework
- Other STEP application protocols and industrial metrology standards that address product definition, tolerance and data exchange
Keywords: ISO 10303-219, dimensional inspection information exchange, STEP, product data representation, inspection results exchange, metrology, industrial automation, inspection data interoperability.
Buy Documents
ISO 10303-219:2007 - Industrial automation systems and integration -- Product data representation and exchange
ISO 10303-219:2007 - Industrial automation systems and integration -- Product data representation and exchange
Get Certified
Connect with accredited certification bodies for this standard

National Aerospace and Defense Contractors Accreditation Program (NADCAP)
Global cooperative program for special process quality in aerospace.

CARES (UK Certification Authority for Reinforcing Steels)
UK certification for reinforcing steels and construction.

DVS-ZERT GmbH
German welding certification society.
Sponsored listings
Frequently Asked Questions
ISO 10303-219:2007 is a standard published by the International Organization for Standardization (ISO). Its full title is "Industrial automation systems and integration — Product data representation and exchange — Part 219: Application protocol: Dimensional inspection information exchange". This standard covers: ISO 10303-219:2007 establishes the entities and relationships necessary for the accommodation, preservation and exchange of dimensional inspection results, with their associated product data.
ISO 10303-219:2007 establishes the entities and relationships necessary for the accommodation, preservation and exchange of dimensional inspection results, with their associated product data.
ISO 10303-219:2007 is classified under the following ICS (International Classification for Standards) categories: 25.040.40 - Industrial process measurement and control. The ICS classification helps identify the subject area and facilitates finding related standards.
ISO 10303-219:2007 has the following relationships with other standards: It is inter standard links to ISO 669:2016. Understanding these relationships helps ensure you are using the most current and applicable version of the standard.
ISO 10303-219:2007 is available in PDF format for immediate download after purchase. The document can be added to your cart and obtained through the secure checkout process. Digital delivery ensures instant access to the complete standard document.
Standards Content (Sample)
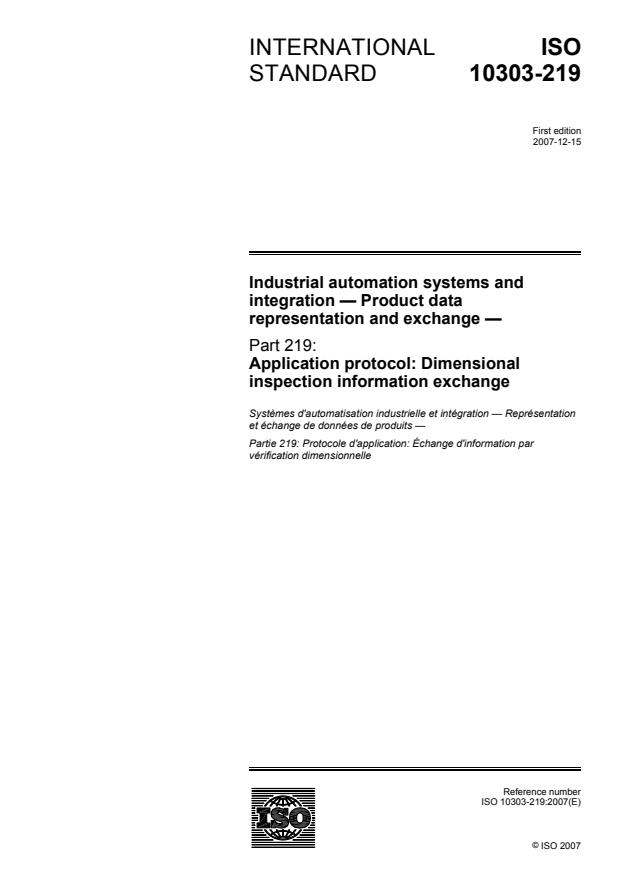
INTERNATIONAL ISO
STANDARD 10303-219
First edition
2007-12-15
Industrial automation systems and
integration — Product data
representation and exchange —
Part 219:
Application protocol: Dimensional
inspection information exchange
Systèmes d'automatisation industrielle et intégration — Représentation
et échange de données de produits —
Partie 219: Protocole d'application: Échange d'information par
vérification dimensionnelle
Reference number
©
ISO 2007
PDF disclaimer
PDF files may contain embedded typefaces. In accordance with Adobe's licensing policy, such files may be printed or viewed but shall
not be edited unless the typefaces which are embedded are licensed to and installed on the computer performing the editing. In
downloading a PDF file, parties accept therein the responsibility of not infringing Adobe's licensing policy. The ISO Central Secretariat
accepts no liability in this area.
Adobe is a trademark of Adobe Systems Incorporated.
Details of the software products used to create the PDF file(s) constituting this document can be found in the General Info relative to
the file(s); the PDF-creation parameters were optimized for printing. Every care has been taken to ensure that the files are suitable for
use by ISO member bodies. In the unlikely event that a problem relating to them is found, please inform the Central Secretariat at the
address given below.
This CD-ROM contains the publication ISO 10303-219:2007 in portable document format (PDF), which can
be viewed using Adobe® Acrobat® Reader.
Adobe and Acrobat are trademarks of Adobe Systems Incorporated.
© ISO 2007
All rights reserved. Unless required for installation or otherwise specified, no part of this CD-ROM may be reproduced, stored in a retrieval
system or transmitted in any form or by any means without prior permission from ISO. Requests for permission to reproduce this product
should be addressed to
I
...
INTERNATIONAL ISO
STANDARD 10303-219
First edition
2007-12-15
Industrial automation systems and
integration — Product data
representation and exchange —
Part 219:
Application protocol: Dimensional
inspection information exchange
Systèmes d'automatisation industrielle et intégration — Représentation
et échange de données de produits —
Partie 219: Protocole d'application: Échange d'information par
vérification dimensionnelle
Reference number
©
ISO 2007
PDF disclaimer
This PDF file may contain embedded typefaces. In accordance with Adobe's licensing policy, this file may be printed or viewed but
shall not be edited unless the typefaces which are embedded are licensed to and installed on the computer performing the editing. In
downloading this file, parties accept therein the responsibility of not infringing Adobe's licensing policy. The ISO Central Secretariat
accepts no liability in this area.
Adobe is a trademark of Adobe Systems Incorporated.
Details of the software products used to create this PDF file can be found in the General Info relative to the file; the PDF-creation
parameters were optimized for printing. Every care has been taken to ensure that the file is suitable for use by ISO member bodies. In
the unlikely event that a problem relating to it is found, please inform the Central Secretariat at the address given below.
© ISO 2007
All rights reserved. Unless otherwise specified, no part of this publication may be reproduced or utilized in any form or by any means,
electronic or mechanical, including photocopying and microfilm, without permission in writing from either ISO at the address below or
ISO's member body in the country of the requester.
ISO copyright office
Case postale 56 • CH-1211 Geneva 20
Tel. + 41 22 749 01 11
Fax + 41 22 749 09 47
E-mail copyright@iso.org
Web www.iso.org
Published in Switzerland
ii © ISO 2007 – All rights reserved
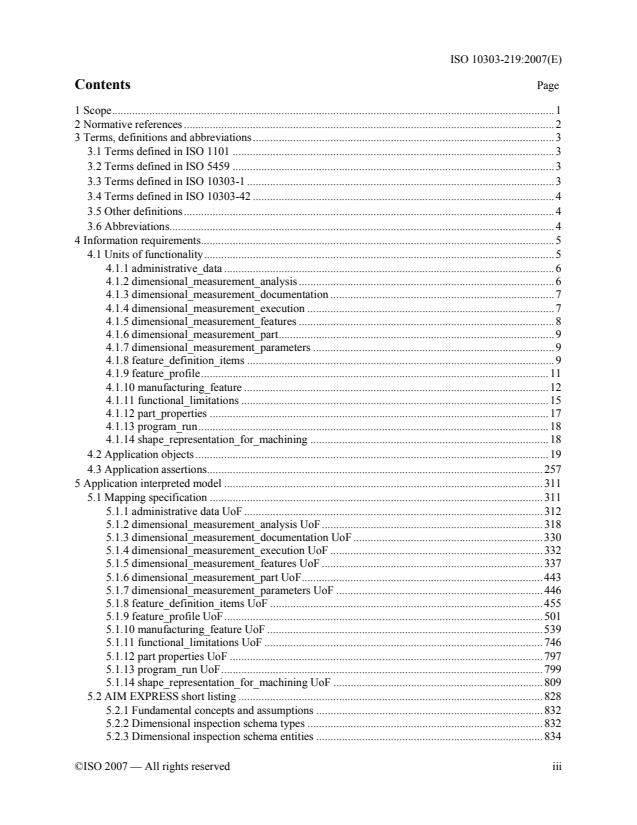
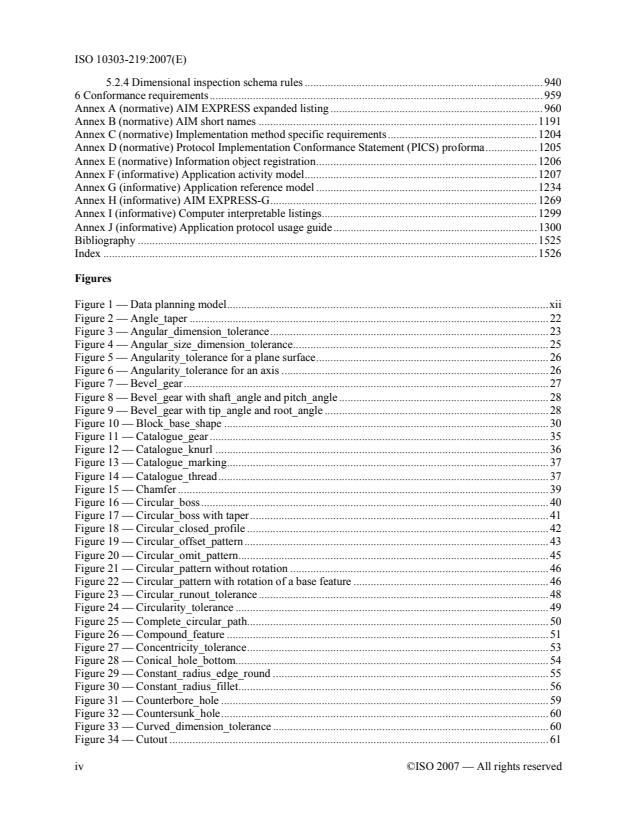
Contents Page
1 Scope.1
2 Normative references .2
3 Terms, definitions and abbreviations.3
3.1 Terms defined in ISO 1101 .3
3.2 Terms defined in ISO 5459 .3
3.3 Terms defined in ISO 10303-1 .3
3.4 Terms defined in ISO 10303-42 .4
3.5 Other definitions.4
3.6 Abbreviations.4
4 Information requirements.5
4.1 Units of functionality.5
4.1.1 administrative_data .6
4.1.2 dimensional_measurement_analysis .6
4.1.3 dimensional_measurement_documentation .7
4.1.4 dimensional_measurement_execution .7
4.1.5 dimensional_measurement_features .8
4.1.6 dimensional_measurement_part.9
4.1.7 dimensional_measurement_parameters .9
4.1.8 feature_definition_items .9
4.1.9 feature_profile.11
4.1.10 manufacturing_feature .12
4.1.11 functional_limitations .15
4.1.12 part_properties .17
4.1.13 program_run.18
4.1.14 shape_representation_for_machining .18
4.2 Application objects.19
4.3 Application assertions.257
5 Application interpreted model .311
5.1 Mapping specification .311
5.1.1 administrative data UoF .312
5.1.2 dimensional_measurement_analysis UoF.318
5.1.3 dimensional_measurement_documentation UoF .330
5.1.4 dimensional_measurement_execution UoF .332
5.1.5 dimensional_measurement_features UoF .337
5.1.6 dimensional_measurement_part UoF.443
5.1.7 dimensional_measurement_parameters UoF .446
5.1.8 feature_definition_items UoF .455
5.1.9 feature_profile UoF.501
5.1.10 manufacturing_feature UoF .539
5.1.11 functional_limitations UoF .746
5.1.12 part properties UoF .797
5.1.13 program_run UoF.799
5.1.14 shape_representation_for_machining UoF .809
5.2 AIM EXPRESS short listing .828
5.2.1 Fundamental concepts and assumptions .832
5.2.2 Dimensional inspection schema types .832
5.2.3 Dimensional inspection schema entities .834
©ISO 2007 — All rights reserved iii
5.2.4 Dimensional inspection schema rules .940
6 Conformance requirements.959
Annex A (normative) AIM EXPRESS expanded listing .960
Annex B (normative) AIM short names .1191
Annex C (normative) Implementation method specific requirements.1204
Annex D (normative) Protocol Implementation Conformance Statement (PICS) proforma.1205
Annex E (normative) Information object registration.1206
Annex F (informative) Application activity model.1207
Annex G (informative) Application reference model .1234
Annex H (informative) AIM EXPRESS-G.1269
Annex I (informative) Computer interpretable listings.1299
Annex J (informative) Application protocol usage guide.1300
Bibliography .1525
Index .1526
Figures
Figure 1 — Data planning model.xii
Figure 2 — Angle_taper .22
Figure 3 — Angular_dimension_tolerance.23
Figure 4 — Angular_size_dimension_tolerance.25
Figure 5 — Angularity_tolerance for a plane surface.26
Figure 6 — Angularity_tolerance for an axis .26
Figure 7 — Bevel_gear.27
Figure 8 — Bevel_gear with shaft_angle and pitch_angle .28
Figure 9 — Bevel_gear with tip_angle and root_angle .28
Figure 10 — Block_base_shape .30
Figure 11 — Catalogue_gear .35
Figure 12 — Catalogue_knurl .36
Figure 13 — Catalogue_marking.37
Figure 14 — Catalogue_thread.37
Figure 15 — Chamfer .39
Figure 16 — Circular_boss.40
Figure 17 — Circular_boss with taper.41
Figure 18 — Circular_closed_profile .42
Figure 19 — Circular_offset_pattern.43
Figure 20 — Circular_omit_pattern.45
Figure 21 — Circular_pattern without rotation .46
Figure 22 — Circular_pattern with rotation of a base feature .46
Figure 23 — Circular_runout_tolerance.48
Figure 24 — Circularity_tolerance .49
Figure 25 — Complete_circular_path.50
Figure 26 — Compound_feature .51
Figure 27 — Concentricity_tolerance.53
Figure 28 — Conical_hole_bottom.54
Figure 29 — Constant_radius_edge_round .55
Figure 30 — Constant_radius_fillet.56
Figure 31 — Counterbore_hole .59
Figure 32 — Countersunk_hole.60
Figure 33 — Curved_dimension_tolerance .60
Figure 34 — Cutout .61
iv ©ISO 2007 — All rights reserved
Figure 35 — Cylindrical_base_shape.62
Figure 36 — Cylindricity_tolerance .63
Figure 37 — Defined_marking.66
Figure 38 — Defined_thread .68
Figure 39 — Diagonal_knurl .70
Figure 40 — Diameter_dimension_tolerance .71
Figure 41 — Diameter_taper .72
Figure 42 — Diamond_knurl.73
Figure 43 — Distance_along_curve_tolerance.76
Figure 44 — Dmf_arc.93
Figure 45 — Dmf_circle.95
Figure 46 — Dmf_cone .96
Figure 47 — Dmf_cylinder.99
Figure 48 — Dmf_edge_point .100
Figure 49 — Dmf_ellipse .102
Figure 50 — Dmf_generic_feature.104
Figure 51 — Dmf_geometric_curve.105
Figure 52 — Dmf_geometric_surface .106
Figure 53 — Dmf_line_bounded .107
Figure 54 — Dmf_line_closed_parallel.109
Figure 55 — Dmf_line_unbounded .111
Figure 56 — Dmf_pattern.112
Figure 57 — Dmf_plane .113
Figure 58 — Dmf_plane_closed_parallel .115
Figure 59 — Dmf_plane_symmetric .117
Figure 60 — Dmf_point.118
Figure 61 — Dmf_sphere .120
Figure 62 — Dmf_surface_of_revolution_dml .122
Figure 63 — Dmf_torus.123
Figure 64 — Edge_round.126
Figure 65 — Fillet.130
Figure 66 — Flat_hole_bottom types .131
Figure 67 — Flat_slot_end_type.132
Figure 68 — Flatness_tolerance .134
Figure 69 — Gear face_width.135
Figure 70 — Gear nominal_tooth_depth .136
Figure 71 — Gear profile_shift.137
Figure 72 — Gear reference_presure_angle .137
Figure 73 — Gear root_fillet_radius.138
Figure 74 — Gear tip_diameter .138
Figure 75 — General_boss .139
Figure 76 — General_closed_profile.140
Figure 77 — General_open_profile .141
Figure 78 — General_outside_profile .142
Figure 79 — General_path.143
Figure 80 — General_pattern .144
Figure 81 — General_pocket.145
Figure 82 — General_removal_volume .147
Figure 83 — General_revolution for outer shape .148
Figure 84 — General_revolution for volume removal .149
Figure 85 — Groove .154
©ISO 2007 — All rights reserved v
Figure 86 — Helical_gear.156
Figure 87 — Helical_gear left_or_right_tooth .156
Figure 88 — Helical_gear reference_helix_angle .157
Figure 89 — Implicit_base_shape .158
Figure 90 — Knurl and types of Turned_knurl .160
Figure 91 — Linear_path.162
Figure 92 — Linear_profile .162
Figure 93 — Linear_profile_tolerance .163
Figure 94 — Location_dimension_tolerance.164
Figure 95 — Ngon_base_shape .170
Figure 96 — Ngon_profile.172
Figure 97 — Open_slot_end_type .175
Figure 98 — Outer_diameter .177
Figure 99 — Outer_diameter_to_shoulder .179
Figure 100 — Parallelism_tolerance for an axis.181
Figure 101 — Parallelism_tolerance for a plane.181
Figure 102 — Partial_circular_path.185
Figure 103 — Partial_circular_profile.186
Figure 104 — Perpendicularity_tolerance .188
Figure 105 — Perpendicularity_tolerance for an axis .189
Figure 106 — Planar_face .192
Figure 107 — Pocket_bottom_condition.198
Figure 108 — Position_tolerance .198
Figure 109 — Protrusion .202
Figure 110 — Radial_dimension_tolerance .203
Figure 111 — Radiused_slot_end_type.203
Figure 112 — Recess .204
Figure 113 — Rectangular_boss.205
Figure 114 — Rectangular_closed_pocket .207
Figure 115 — Rectangular_closed_profile .208
Figure 116 — Rectangular_offset_pattern.209
Figure 117 — Rectangular_omit_pattern .210
Figure 118 — Rectangular_open_pocket .212
Figure 119 — Rectangular_pattern.213
Figure 120 — Revolved_flat.216
Figure 121 — Revolved_round.217
Figure 122 — Rib_top .218
Figure 123 — Round_hole.220
Figure 124 — Rounded_end.221
Figure 125 — Rounded_U_profile .222
Figure 126 — Shape_profile.226
Figure 127 — Slot.228
Figure 128 — Spherical_cap.231
Figure 129 — Spherical_hole_bottom.232
Figure 130 — Spur_gear.232
Figure 131 — Square_U_profile.233
Figure 132 — Step.235
Figure 133 — Straight_knurl .236
Figure 134 — Straightness_tolerance.237
Figure 135 — Surface_profile_tolerance.238
Figure 136 — Symmetry_tolerance.239
vi ©ISO 2007 — All rights reserved
Figure 137 — Tee_profile .242
Figure 138 — Thread.244
Figure 139 — Through_bottom_condition .247
Figure 140 — Total_runout_tolerance.251
Figure 141 — Turned_knurl .254
Figure 142 — Vee_profile .255
Figure 143 — Woodroff_slot_end_type.256
Figure F.1 — IDEF0 Basic notation .1207
Figure F.2 – A0 Manage dimensional inspection .1218
Figure F.3 - A0 Manage dimensional inspection.1219
Figure F.4 - A2 Perform Inspection Planning.1220
Figure F.5 - A21 Identify inspection scope and accuracy requirements.1221
Figure F.6 - A23 Select DME, tools, fixtures and functions.1222
Figure F.7 – A24 Develop inspection process plan .1223
Figure F.8 – A241 Determine setup.1224
Figure F.9 - A242 Specify inspection plan .1225
Figure F.10 - A243 Validate and approve the inspection plan .1226
Figure F.11 - A3 Execute inspection .1227
Figure F.12 - A31 Setup for inspection.1228
Figure F.13 - A4 Perform analysis of inspection .1229
Figure F.14 - A1 Perform inspection administration and archiving .1230
Figure F.15 - A2 Perform inspection planning .1231
Figure F.16 - A3 Execute inspection .1232
Figure F.17 - A4 Perform analysis of dimensional inspection.1233
Figure G.1 — ARM EXPRESS-G diagram 1 of 34.1235
Figure G.2 — ARM EXPRESS-G diagram 2 of 34.1236
Figure G.3 — ARM EXPRESS-G diagram 3 of 34.1237
Figure G.4 — ARM EXPRESS-G diagram 4 of 34.1238
Figure G.5 — ARM EXPRESS-G diagram 5 of 34.1239
Figure G.6 — ARM EXPRESS-G diagram 6 of 34.1240
Figure G.7 — ARM EXPRESS-G diagram 7 of 34.1241
Figure G.8 — ARM EXPRESS-G diagram 8 of 34.1242
Figure G.9 — ARM EXPRESS-G diagram 9 of 34.1243
Figure G.10 — ARM EXPRESS-G diagram 10 of 34.1244
Figure G.11 — ARM EXPRESS-G diagram 11 of 34.1245
Figure G.12 — ARM EXPRESS-G diagram 12 of 34.1246
Figure G.13 — ARM EXPRESS-G diagram 13 of 34.1247
Figure G.14 — ARM EXPRESS-G diagram 14 of 34.1248
Figure G.15 — ARM EXPRESS-G diagram 15 of 34.1249
Figure G.16 — ARM EXPRESS-G diagram 16 of 34.1250
Figure G.17 — ARM EXPRESS-G diagram 17 of 34.1251
Figure G.18 — ARM EXPRESS-G diagram 18 of 34.1252
Figure G.19 — ARM EXPRESS-G diagram 19 of 34.1253
Figure G.20 — ARM EXPRESS-G diagram 20 of 34.1254
Figure G.21 — ARM EXPRESS-G diagram 21 of 34.1255
Figure G.22 — ARM EXPRESS-G diagram 22 of 34.1256
Figure G.23 — ARM EXPRESS-G diagram 23 of 34.1257
Figure G.24 — ARM EXPRESS-G diagram 24 of 34.1258
Figure G.25 — ARM EXPRESS-G diagram 25 of 34.1259
Figure G.26 — ARM EXPRESS-G diagram 26 of 34.1260
Figure G.27 — ARM EXPRESS-G diagram 27 of 34.1261
©ISO 2007 — All rights reserved vii
Figure G.28 — ARM EXPRESS-G diagram 28 of 34.1262
Figure G.29 — ARM EXPRESS-G diagram 29 of 34.1263
Figure G.30 — ARM EXPRESS-G diagram 30 of 34.1264
Figure G.31 — ARM EXPRESS-G diagram 31 of 34.1265
Figure G.32 — ARM EXPRESS-G diagram 32 of 34.1266
Figure G.33 — ARM EXPRESS-G diagram 33 of 34.1267
Figure G.34 — ARM EXPRESS-G diagram 34 of 34.1268
Figure H.1 — AIM EXPRESS-G diagram 1 of 29.1270
Figure H.2 — AIM EXPRESS-G diagram 2 of 29.1271
Figure H.3 — AIM EXPRESS-G diagram 3 of 29.1272
Figure H.4 — AIM EXPRESS-G diagram 4 of 29.1273
Figure H.5 — AIM EXPRESS-G diagram 5 of 29.1274
Figure H.6 — AIM EXPRESS-G diagram 6 of 29.1275
Figure H.7 — AIM EXPRESS-G diagram 7 of 29.1276
Figure H.8 — AIM EXPRESS-G diagram 8 of 29.1277
Figure H.9 — AIM EXPRESS-G diagram 9 of 29.1278
Figure H.10 — AIM EXPRESS-G diagram 10 of 29.1279
Figure H-11 — AIM EXPRESS-G diagram 11 of 29.1280
Figure H.12 — AIM EXPRESS-G diagram 12 of 29.1281
Figure H.13 — AIM EXPRESS-G diagram 13 of 29.1282
Figure H.14 — AIM EXPRESS-G diagram 14 of 29.1283
Figure H.15 — AIM EXPRESS-G diagram 15 of 29.1284
Figure H.16 — AIM EXPRESS-G diagram 16 of 29.1285
Figure H.17 — AIM EXPRESS-G diagram 17 of 29.1286
Figure H.18 — AIM EXPRESS-G diagram 18 of 29.1287
Figure H.19 — AIM EXPRESS-G diagram 19 of 29.1288
Figure H.20 — AIM EXPRESS-G diagram 20 of 29.1289
Figure H.21 — AIM EXPRESS-G diagram 21 of 29.1290
Figure H.22 — AIM EXPRESS-G diagram 22 of 29.1291
Figure H.23 — AIM EXPRESS-G diagram 23 of 29.1292
Figure H.24 — AIM EXPRESS-G diagram 24 of 29.1293
Figure H.25 — AIM EXPRESS-G diagram 25 of 29.1294
Figure H.26 — AIM EXPRESS-G diagram 26 of 29.1295
Figure H.27 — AIM EXPRESS-G diagram 27 of 29.1296
Figure H.28 — AIM EXPRESS-G diagram 28 of 29.1297
Figure H.29 — AIM EXPRESS-G diagram 29 of 29.1298
Figure J.1 — Manufacturing suite test case test part drawing .1353
Figure J.2 — Manufacturing suite test case part.1354
Tables
Table B.1 — AIM short names of entities.1191
viii ©ISO 2007 — All rights reserved
Foreword
ISO (the International Organization for Standardization) is a worldwide federation of national standards
bodies (ISO member bodies). The work of preparing International Standards is normally carried out
through ISO technical committees. Each member body interested in a subject for which a technical
committee has been established has the right to be represented on that committee. International
organizations, governmental and non-governmental, in liaison with ISO, also take part in the work. ISO
collaborates closely with the International Electrotechnical Commission (IEC) on all matters of
electrotechnical standardization.
International Standards are drafted in accordance with the rules given in the ISO/IEC Directives, Part 2.
The main task of technical committees is to prepare International Standards. Draft International Standards
adopted by the technical committees are circulated to the member bodies for voting. Publication as an
International Standard requires approval by at least 75 % of the member bodies casting a vote.
Attention is drawn to the possibility that some of the elements of this document may be the subject of
patent rights. ISO shall not be held responsible for identifying any or all such patent rights.
ISO 10303-219 was prepared by Technical Committee ISO/TC 184, Industrial automation systems
and integration, Subcommittee SC 4, Industrial data.
ISO 10303 is organized as a series of parts, each published separately. The structure of ISO 10303 is
described in ISO 10303-1.
Each part of ISO 10303 is a member of one of the following series: description methods, implementation
methods, conformance testing methodology and framework, integrated generic resources, integrated
application resources, application protocols, abstract test suites, application interpreted constructs, and
application modules. This part of ISO 10303 is a member of the application protocol series.
A complete list of parts of ISO 10303 is available from the Internet:
©ISO 2007 — All rights reserved ix
Introduction
ISO 10303 is an International Standard for the computer-interpretable representation production
...



Questions, Comments and Discussion
Ask us and Technical Secretary will try to provide an answer. You can facilitate discussion about the standard in here.
Loading comments...