ISO 17841:2015
(Main)Fine ceramics (advanced ceramics, advanced technical ceramics) — Test method for thermal fatigue of fine ceramics substrate
Fine ceramics (advanced ceramics, advanced technical ceramics) — Test method for thermal fatigue of fine ceramics substrate
ISO 17841:2015 describes the test methods for determining thermal fatigue property of fine ceramic substrates applied to power modules, electronic control unit and similar devices.
Céramiques techniques — Méthode d'essai de la fatigue thermique des substrats des céramiques techniques
General Information
- Status
- Published
- Publication Date
- 04-Aug-2015
- Technical Committee
- ISO/TC 206 - Fine ceramics
- Drafting Committee
- ISO/TC 206/WG 12 - Engineering applications
- Current Stage
- 9060 - Close of review
- Completion Date
- 04-Jun-2031
Overview - ISO 17841:2015 (thermal fatigue test for fine ceramics substrate)
ISO 17841:2015 specifies standardized test methods for determining the thermal fatigue properties of fine ceramic substrates (advanced/technical ceramics) used in power modules, electronic control units (ECUs) and similar devices. The standard defines specimen geometry, thermal cycling regimes, mechanical test methods (four‑point bending), measurement precision and reporting requirements to assess how ceramic substrates and metal‑ceramic assemblies resist repeated temperature changes.
Key technical topics and requirements
- Test specimens: Composite specimens consist of a fine ceramic plate with metal plates joined to both faces. Standard ceramic dimensions: length 40.0 mm, width 10.0 ± 0.5 mm. Ceramic thicknesses listed from 0.20 mm to 1.50 mm; metal plate thicknesses from 0.125 mm to 0.6 mm. Minimum of 10 specimens per condition.
- Thermal cycling / thermal fatigue:
- Defined combinations of low and high temperatures (e.g., low: −65 °C to +5 °C; high: +30 °C to +200 °C) with ±2 °C tolerances.
- Standard cycle counts: N = 0, 10, 100, 300, 1 000, 3 000 (other N allowed if reported).
- Standard exposure time: 30 min (adjustable for specimen heat capacity).
- Transfer time categories: <10 s, 10 s–1 min, 1–2 min (shorter transfer increases thermal shock severity).
- Temperature recovery time included in exposure time and must be within 20% of exposure.
- Mechanical testing - four‑point bending:
- Four‑point flexure to determine maximum stress (four‑point bending strength) after cycling.
- Testing machine load accuracy ≤ 1% of maximum load; specimen dimension measurement precision 0.01 mm.
- Support specifications: elastic modulus ≥ 147 GPa, support diameter 4.0–6.0 mm, surface roughness ≤ 0.40 μm Ra.
- Results and calculations:
- Calculation of mean strength, standard deviation, and residual strength ratio (post‑cycle strength divided by virgin mean strength).
- Test report items and an informative annex for stress intensity factor calculation.
Practical applications and users
ISO 17841:2015 is used by:
- Materials and reliability engineers in power electronics, automotive ECUs, and semiconductor packaging.
- Test laboratories performing thermal fatigue, qualification and supplier validation testing.
- R&D teams assessing new advanced ceramics, metallization layers, joining methods and substrate designs. Benefits include standardized, repeatable assessment of substrate durability, design validation under thermal cycling, and basis for supplier acceptance criteria.
Related standards
Normative references include ISO 4287 (surface texture), ISO 3611 (micrometers), ISO 13385‑1 (callipers) and ISO 80000‑1 (quantities and units).
Keywords: ISO 17841:2015, thermal fatigue, thermal cycling, fine ceramics, ceramic substrate, four‑point bending, power modules, electronic control unit, residual strength ratio.
Frequently Asked Questions
ISO 17841:2015 is a standard published by the International Organization for Standardization (ISO). Its full title is "Fine ceramics (advanced ceramics, advanced technical ceramics) — Test method for thermal fatigue of fine ceramics substrate". This standard covers: ISO 17841:2015 describes the test methods for determining thermal fatigue property of fine ceramic substrates applied to power modules, electronic control unit and similar devices.
ISO 17841:2015 describes the test methods for determining thermal fatigue property of fine ceramic substrates applied to power modules, electronic control unit and similar devices.
ISO 17841:2015 is classified under the following ICS (International Classification for Standards) categories: 81.060.30 - Advanced ceramics. The ICS classification helps identify the subject area and facilitates finding related standards.
ISO 17841:2015 is available in PDF format for immediate download after purchase. The document can be added to your cart and obtained through the secure checkout process. Digital delivery ensures instant access to the complete standard document.
Standards Content (Sample)
INTERNATIONAL ISO
STANDARD 17841
First edition
2015-08-01
Fine ceramics (advanced ceramics,
advanced technical ceramics) — Test
method for thermal fatigue of fine
ceramics substrate
Céramiques techniques — Méthode d’essai de la fatigue thermique
des substrats des céramiques techniques
Reference number
©
ISO 2015
© ISO 2015, Published in Switzerland
All rights reserved. Unless otherwise specified, no part of this publication may be reproduced or utilized otherwise in any form
or by any means, electronic or mechanical, including photocopying, or posting on the internet or an intranet, without prior
written permission. Permission can be requested from either ISO at the address below or ISO’s member body in the country of
the requester.
ISO copyright office
Ch. de Blandonnet 8 • CP 401
CH-1214 Vernier, Geneva, Switzerland
Tel. +41 22 749 01 11
Fax +41 22 749 09 47
copyright@iso.org
www.iso.org
ii © ISO 2015 – All rights reserved
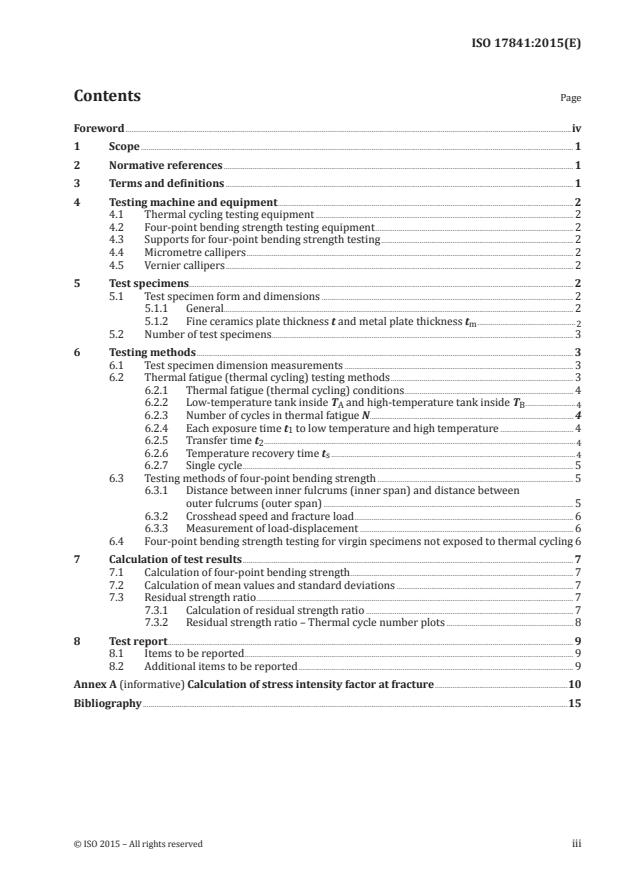
Contents Page
Foreword .iv
1 Scope . 1
2 Normative references . 1
3 Terms and definitions . 1
4 Testing machine and equipment. 2
4.1 Thermal cycling testing equipment . 2
4.2 Four-point bending strength testing equipment . 2
4.3 Supports for four-point bending strength testing . 2
4.4 Micrometre callipers . 2
4.5 Vernier callipers . 2
5 Test specimens. 2
5.1 Test specimen form and dimensions . 2
5.1.1 General. 2
5.1.2 Fine ceramics plate thickness t and metal plate thickness t .
m 2
5.2 Number of test specimens . 3
6 Testing methods . 3
6.1 Test specimen dimension measurements . 3
6.2 Thermal fatigue (thermal cycling) testing methods . 3
6.2.1 Thermal fatigue (thermal cycling) conditions . 4
6.2.2 Low-temperature tank inside T and high-temperature tank inside T .
A B 4
6.2.3 Number of cycles in thermal fatigue N .4
6.2.4 Each exposure time t to low temperature and high temperature . 4
6.2.5 Transfer time t .
2 4
6.2.6 Temperature recovery time t .
s 4
6.2.7 Single cycle . 5
6.3 Testing methods of four-point bending strength . 5
6.3.1 Distance between inner fulcrums (inner span) and distance between
outer fulcrums (outer span) . 5
6.3.2 Crosshead speed and fracture load . 6
6.3.3 Measurement of load-displacement . 6
6.4 Four-point bending strength testing for virgin specimens not exposed to thermal cycling 6
7 Calculation of test results . 7
7.1 Calculation of four-point bending strength . 7
7.2 Calculation of mean values and standard deviations . 7
7.3 Residual strength ratio . 7
7.3.1 Calculation of residual strength ratio . 7
7.3.2 Residual strength ratio – Thermal cycle number plots . 8
8 Test report . 9
8.1 Items to be reported . 9
8.2 Additional items to be reported . 9
Annex A (informative) Calculation of stress intensity factor at fracture .10
Bibliography .15
Foreword
ISO (the International Organization for Standardization) is a worldwide federation of national standards
bodies (ISO member bodies). The work of preparing International Standards is normally carried out
through ISO technical committees. Each member body interested in a subject for which a technical
committee has been established has the right to be represented on that committee. International
organizations, governmental and non-governmental, in liaison with ISO, also take part in the work.
ISO collaborates closely with the International Electrotechnical Commission (IEC) on all matters of
electrotechnical standardization.
The procedures used to develop this document and those intended for its further maintenance are
described in the ISO/IEC Directives, Part 1. In particular the different approval criteria needed for the
different types of ISO documents should be noted. This document was drafted in accordance with the
editorial rules of the ISO/IEC Directives, Part 2 (see www.iso.org/directives).
Attention is drawn to the possibility that some of the elements of this document may be the subject of
patent rights. ISO shall not be held responsible for identifying any or all such patent rights. Details of
any patent rights identified during the development of the document will be in the Introduction and/or
on the ISO list of patent declarations received (see www.iso.org/patents).
Any trade name used in this document is information given for the convenience of users and does not
constitute an endorsement.
For an explanation on the meaning of ISO specific terms and expressions related to conformity
assessment, as well as information about ISO’s adherence to the WTO principles in the Technical
Barriers to Trade (TBT) see the following URL: Foreword - Supplementary information
The committee responsible for this document is ISO/TC 206, Fine ceramics.
iv © ISO 2015 – All rights reserved
INTERNATIONAL STANDARD ISO 17841:2015(E)
Fine ceramics (advanced ceramics, advanced technical
ceramics) — Test method for thermal fatigue of fine
ceramics substrate
1 Scope
This International Standard describes the test methods for determining thermal fatigue property of
fine ceramic substrates applied to power modules, electronic control unit and similar devices.
2 Normative references
The following documents, in whole or in part, are normatively referenced in this document and are
indispensable for its application. For dated references, only the edition cited applies. For undated
references, the latest edition of the referenced document (including any amendments) applies.
ISO 4287, Geometrical Product Specifications (GPS) — Surface texture: Profile method — Terms, definitions
and surface texture parameters
ISO 3611, Geometrical product specifications (GPS) — Dimensional measuring equipment: Micrometers for
external measurements — Design and metrological characteristics
ISO 13385-1, Geometrical product specifications (GPS) — Dimensional measuring equipment — Part 1:
Callipers; Design and metrological characteristics
ISO 80000-1, Quantities and units — Part 1: General
3 Terms and definitions
For the purposes of this document, the following terms and definitions apply.
3.1
ceramic substrate
electrical circuits substrate which joined the metal plate to ceramics, applied to power modules and
similar devices
3.2
thermal cycling
temperature which is simply and cyclically repeated between a specific high value and a specific low
value
3.3
four-point bending strength
maximum value of stress generated in a test specimen obtained by a four-point bending test
3.4
residual strength ratio
value (σσ/ ) of four-point bending strength of a test specimen exposed to thermal cycling (σ )
bb0 b
divided by the mean four-point bending strength of test specimens not exposed to thermal cycling
(N = 0) (σ )
b0
4 Testing machine and equipment
4.1 Thermal cycling testing equipment
Two types of thermal cycling equipment may be used. Type 1 provides two chambers one at a high
temperature and the other at a low temperature and a means of moving the test specimen from one to
the other within a specified time period. Type 2 provides a single chamber in which the temperature
can be changed. The equipment shall be able to maintain the specified temperatures. Attachments and
supports used with the test specimens shall have low thermal conductivity and the test specimens shall
be thermally insulated. Test specimens shall be arranged so as not to disturb the circulation in the
chambers and between specimens when multiple specimens are tested simultaneously.
4.2 Four-point bending strength testing equipment
This testing equipment shall be so constructed that compressive stress can be applied to a test specimen
at a constant crosshead speed. The testing machine shall be equipped with an apparatus measuring or
indicating the load with an accuracy of at most 1 % of the maximum load.
4.3 Supports for four-point bending strength testing
Four-point flexure configurations measured four-point bending strength shall be used as illustrated in
Figure 3. Supports wherein a testing specimen is supported as supporting points, or a load is applied
to the specimen, shall be of the same shape in left and right and have a length exceeding a width of the
specimen. The material of the supports shall be at least 147 GPa in elastic modulus, and free from plastic
deformation and being broken midway through testing. The diameter of supports shall be 4,0 mm to
6,0 mm, and its surface roughness shall be at most 0,40 μm Ra as specified in ISO 4287. Also, supports
should be able to be rotated and not to disturb the transformation of the test specimen by load.
4.4 Micrometre callipers
Micrometre callipers shall be those for external measurement specified in ISO 3611 or shall have better
precision.
4.5 Vernier callipers
Vernier callipers shall be those for external measurement specified in ISO 13385-1 or shall have better
precision.
5 Test specimens
5.1 Test specimen form and dimensions
5.1.1 General
The shape of test specimens shall be two metal plates joined respectively to the front and back of a fine
ceramics plate, i.e. a total of four metal sheets, as shown in Figure 1. The standard dimensions of the
fine ceramics shall be: total length h = 40,0 mm, width w = (10,0 ± 0,5) mm, and metal plate dimensions
shall be: total length h = 17,0 mm, width w = (8,0 ± 0,5) mm. Metal plate spacing shall be d = 2 mm.
m m
The four corner portions of metal plates shall be chamfered to R = 1,0 mm, as shown in Figure 1. Any
dimensions differing from the standard dimensions shall be mentioned in the test report.
5.1.2 Fine ceramics plate thickness t and metal plate thickness t
m
Fine ceramics plate thickness t and metal plate thickness t shall follow product specifications, but in
m
principle, t and t shall be selected from the plate thicknesses listed in 5.1.2.1 and 5.1.2.2.
m
2 © ISO 2015 – All rights reserved
8-R
8-R
5.1.2.1 Fine ceramic sheet thickness t
Thickness t = 1,50 mm; 1,00 mm; 0,787 mm; 0,635 mm; 0,381 mm; 0,32 mm; 0,254 mm; 0,2 mm
5.1.2.2 Metal plate thickness t
m
Thickness t = 0,6 mm; 0,4 mm; 0,3 mm; 0,25 mm; 0,2 mm; 0,125 mm
m
5.2 Number of test specimens
The number of test specimens shall be 10 or more for each thermal cycle measuring four-point bending
strength.
ddh h d
m m
h
t
Key
h length of ceramics (h = 40,0 mm)
w width of ceramics (w = 10,0 mm ± 0,5 mm)
t thickness of ceramics (t = 0,2 mm to 1,50 mm)
h length of metal plate (h = 17,0 mm)
m m
w width of metal plate (w = 8,0 mm ± 0,5 mm)
m m
t thickness of metal plate (t = 0,125 mm to 0,6 mm)
m m
d metal plate spacing (d = 2 mm)
R chamfering (R = 1mm)
Figure 1 — Test specimen dimensions
6 Testing methods
6.1 Test specimen dimension measurements
The horizontal and vertical lengths and thickness of the specimen shall be preliminarily measured in
a precision of 0,01 mm by using micrometre callipers for external measurement specified in ISO 3611,
Vernier callipers specified in ISO 13385-1 or a measuring instrument at least equal in precision thereto.
6.2 Thermal fatigue (thermal cycling) testing methods
Thermal fatigue (thermal cycling) testing shall be carried out after test specimen dimensions are
measured.
w
m
t t
m m
w
6.2.1 Thermal fatigue (thermal cycling) conditions
Thermal cycling (the
...


Questions, Comments and Discussion
Ask us and Technical Secretary will try to provide an answer. You can facilitate discussion about the standard in here.
Loading comments...