ASTM D5301-92(1997)
(Practice)Standard Practice for Physical Characterization of Paint Brushes
Standard Practice for Physical Characterization of Paint Brushes
SCOPE
1.1 This practice covers the dimensions, terminology, materials and characteristics generally considered of importance to those within, or dealing with paint brushes, and describes methods of determining these parameters. This practice is not meant to be a definitive analytical method to deformulate brushes.
1.2 This standard does not purport to address all of the safety problems, if any, associated with its use. It is the responsibility of the user of this standard to establish appropriate safety and health practices and determine the applicability of regulatory limitations prior to use.
General Information
Relations
Standards Content (Sample)
Designation: D 5301 – 92 (Reapproved l997)
AMERICAN SOCIETY FOR TESTING AND MATERIALS
100 Barr Harbor Dr., West Conshohocken, PA 19428
Reprinted from the Annual Book of ASTM Standards. Copyright ASTM
Standard Practice for
Physical Characterization of Paint Brushes
This standard is issued under the fixed designation D 5301; the number immediately following the designation indicates the year of
original adoption or, in the case of revision, the year of last revision. A number in parentheses indicates the year of last reapproval. A
superscript epsilon (e) indicates an editorial change since the last revision or reapproval.
1. Scope
1.1 This practice covers the dimensions, terminology, ma-
terials and characteristics generally considered of importance
to those within, or dealing with paint brushes, and describes
methods of determining these parameters. This practice is not
meant to be a definitive analytical method to deformulate
brushes.
1.2 This standard does not purport to address all of the
safety concerns, if any, associated with its use. It is the
responsibility of the user of this standard to establish appro-
priate safety and health practices and determine the applica-
bility of regulatory limitations prior to use.
2. Terminology
2.1 Definitions:
2.1.1 chisel (or chiseled)—a description of the configura-
tion of the tip of the brush as being of a more or less convex
shape across the thickness dimension.
2.1.2 flat tip—a description of the configuration of the tip of
the brush as being flat or of uniform length across the thickness
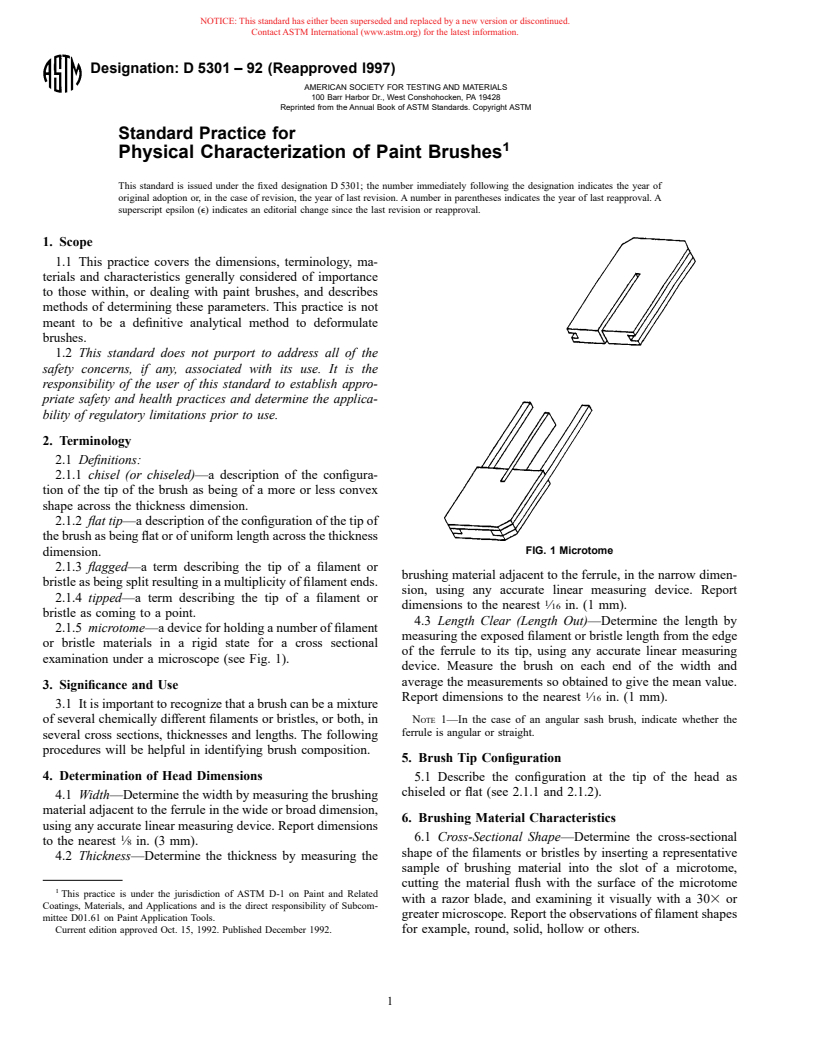
FIG. 1 Microtome
dimension.
2.1.3 flagged—a term describing the tip of a filament or
brushing material adjacent to the ferrule, in the narrow dimen-
bristle as being split resulting in a multiplicity of filament ends.
sion, using any accurate linear measuring device. Report
2.1.4 tipped—a term describing the tip of a filament or
dimensions to the nearest ⁄16 in. (1 mm).
bristle as coming to a point.
4.3 Length Clear (Length Out)—Determine the length by
2.1.5 microtome—a device for holding a number of filament
measuring the exposed filament or bristle length from the edge
or bristle materials in a rigid state for a cross sectional
of the ferrule to its tip, using any accurate linear measuring
examination under a microscope (see Fig. 1).
device. Measure the brush on each end of the width and
average the measurements so obtained to give the mean value.
3. Significance and Use
Report dimensions to the nearest ⁄16 in. (1 mm).
3.1 It is important to recognize that a brush can be a mixture
of several chemically different filaments or bristles, or both, in NOTE 1—In the case of an angular sash brush, indicate whether the
ferrule is angular or straight.
several cross sections, thicknesses and lengths. The following
procedures will be helpful in identifying brush composition.
5. Brush Tip Configuration
4. Determination of Head Dimensions
5.1 Describe the configuration at the tip of the head as
chiseled or flat (see 2.1.1 and 2.1.2).
4.1 Width—Determine the width by measuring the brushing
material adjacent to the ferrule in the wide or broad dimension,
6. Brushing Material Characteristics
using any accurate linear measuring device. Report dimensions
1 6.1 Cross-Sectional Shape—Determine the cross-sectional
to the nearest ⁄8 in. (3 mm).
shape of the filaments or bristles by inserting a representative
4.2 Thickness—Determine the thickness by measuring the
sample of brushing material into the slot of a microtome,
cutting the material flush with the surface of the microtome
This practice is under the jurisdiction of ASTM D-1 on Paint and Related
with a razor blade, and examining it visually with a 303 or
Coatings, Materials, and Applications and is the direct responsibility of Subcom-
greater microscope. Report the observations of filament shapes
mittee D01.61 on Paint Application Tools.
Current edition approved Oct. 15, 1992. Published December 1992. for example, round, solid, hollow or others.
D 5301
6.2 Filament or Bristle Length—Determine the lengths of 7.1.3 Measure dimension across the closed part of the
the filaments or bristles used in a brush by opening the ferrule ferrule (height) to the nearest ⁄16in. (1 mm).
and removing the filaments from that portion of the brush 7.2 Ferrule Material:
unaffect
...


Questions, Comments and Discussion
Ask us and Technical Secretary will try to provide an answer. You can facilitate discussion about the standard in here.