ISO 10303-224:2006
(Main)Industrial automation systems and integration — Product data representation and exchange — Part 224: Application protocol: Mechanical product definition for process planning using machining features
Industrial automation systems and integration — Product data representation and exchange — Part 224: Application protocol: Mechanical product definition for process planning using machining features
ISO 10303-224:2006 documents the application protocol for the representation and exchange of information for manufacturing single piece mechanical parts. ISO 10303-224:2006 includes explicit and implicit shape representation of machining features. It addresses manufacturing part properties, process control documentation, manufacturing specifications, administration data, and requisitions.
Systèmes d'automatisation industrielle et intégration — Représentation et échange de données de produits — Partie 224: Protocole d'application: Définition de produits mécaniques pour la planification de procédés utilisant des caractéristiques d'usinage
General Information
- Status
- Published
- Publication Date
- 11-Sep-2006
- Technical Committee
- ISO/TC 184/SC 4 - Industrial data
- Drafting Committee
- ISO/TC 184/SC 4/WG 12 - STEP product modelling and resources
- Current Stage
- 9060 - Close of review
- Completion Date
- 04-Jun-2031
Relations
- Effective Date
- 15-Apr-2008
Overview
ISO 10303-224:2006 (commonly known as AP224 or STEP AP224) is an ISO application protocol in the ISO 10303 family for product data representation and exchange. It defines a standardized data model for representing and exchanging information required for process planning of single-piece mechanical parts using machining features. The third edition (2006) updates the earlier 2001 release and includes both explicit and implicit shape representations for machining features, plus EXPRESS schema listings for implementation.
Key Topics
- Machining features: standardized ways to represent holes, pockets, slots and other geometry used in process planning.
- Shape representation: support for both explicit (feature geometry described directly) and implicit (feature-driven) representations.
- Manufacturing part properties: material, tolerances, surface finish and other part-level attributes needed for manufacturing.
- Process control documentation: information for controlling process steps, inspection requirements, and quality control.
- Manufacturing specifications: workholding, dimensioning, machining allowances and other production instructions.
- Administration and requisitions: metadata, authorization, and ordering/requisition information associated with manufacturing data.
- Implementation artifacts: EXPRESS listings included with the standard to enable interoperable schema implementation.
Applications
ISO 10303-224 is used to enable interoperable exchange of process-planning data across software and systems. Typical applications include:
- CAD-to-CAM data transfer that preserves machining intent and feature definitions.
- Process planning and manufacturing work instructions generation.
- Integration of PLM/PDM systems with CAM and shop-floor systems.
- Data exchange between vendors, suppliers and contract manufacturers to reduce rework and ambiguity.
- Archiving of manufacturing definitions in neutral, standardized formats.
Who Uses It
- CAD/CAM software developers implementing STEP AP224 support.
- Manufacturing and process planners who need feature-based data exchange.
- PLM/PDM integrators and system architects focused on interoperability.
- Contract manufacturers, CNC programmers and quality engineers requiring unambiguous manufacturing specifications.
Related Standards
- ISO 10303 (STEP) family - general context for APs and data models.
- Other STEP application protocols (for example, AP203, AP242) for complementary product data exchange capabilities.
By adopting ISO 10303-224:2006, organizations can improve data consistency, preserve machining intent across tools, and streamline process planning workflows - reducing errors and accelerating time-to-manufacture.
Buy Documents
ISO 10303-224:2006 - Industrial automation systems and integration — Product data representation and exchange — Part 224: Application protocol: Mechanical product definition for process planning using machining features Released:9/12/2006
ISO 10303-224:2006 - Industrial automation systems and integration — Product data representation and exchange — Part 224: Application protocol: Mechanical product definition for process planning using machining features Released:9/12/2006
Get Certified
Connect with accredited certification bodies for this standard

National Aerospace and Defense Contractors Accreditation Program (NADCAP)
Global cooperative program for special process quality in aerospace.

CARES (UK Certification Authority for Reinforcing Steels)
UK certification for reinforcing steels and construction.

DVS-ZERT GmbH
German welding certification society.
Sponsored listings
Frequently Asked Questions
ISO 10303-224:2006 is a standard published by the International Organization for Standardization (ISO). Its full title is "Industrial automation systems and integration — Product data representation and exchange — Part 224: Application protocol: Mechanical product definition for process planning using machining features". This standard covers: ISO 10303-224:2006 documents the application protocol for the representation and exchange of information for manufacturing single piece mechanical parts. ISO 10303-224:2006 includes explicit and implicit shape representation of machining features. It addresses manufacturing part properties, process control documentation, manufacturing specifications, administration data, and requisitions.
ISO 10303-224:2006 documents the application protocol for the representation and exchange of information for manufacturing single piece mechanical parts. ISO 10303-224:2006 includes explicit and implicit shape representation of machining features. It addresses manufacturing part properties, process control documentation, manufacturing specifications, administration data, and requisitions.
ISO 10303-224:2006 is classified under the following ICS (International Classification for Standards) categories: 25.040.40 - Industrial process measurement and control. The ICS classification helps identify the subject area and facilitates finding related standards.
ISO 10303-224:2006 has the following relationships with other standards: It is inter standard links to ISO 10303-224:2001. Understanding these relationships helps ensure you are using the most current and applicable version of the standard.
ISO 10303-224:2006 is available in PDF format for immediate download after purchase. The document can be added to your cart and obtained through the secure checkout process. Digital delivery ensures instant access to the complete standard document.
Standards Content (Sample)
INTERNATIONAL ISO
STANDARD 10303-224
Third edition
2006-08-15
Industrial automation systems and
integration — Product data
representation and exchange —
Part 224:
Application protocol: Mechanical product
definition for process planning using
machining features
Systèmes d'automatisation industrielle et intégration — Représentation
et échange de données de produits —
Partie 224: Protocole d'application: Définition de produits mécaniques
pour la planification de procédés utilisant des caractéristiques d'usinage
Reference number
©
ISO 2006
PDF disclaimer
PDF files may contain embedded typefaces. In accordance with Adobe's licensing policy, such files may be printed or viewed but shall
not be edited unless the typefaces which are embedded are licensed to and installed on the computer performing the editing. In
downloading a PDF file, parties accept therein the responsibility of not infringing Adobe's licensing policy. The ISO Central Secretariat
accepts no liability in this area.
Adobe is a trademark of Adobe Systems Incorporated.
Details of the software products used to create the PDF file(s) constituting this document can be found in the General Info relative to
the file(s); the PDF-creation parameters were optimized for printing. Every care has been taken to ensure that the files are suitable for
use by ISO member bodies. In the unlikely event that a problem relating to them is found, please inform the Central Secretariat at the
address given below.
This CD-ROM contains:
1) the publication ISO 10303-224:2006 in portable document format (PDF), which can be viewed using
Adobe® Acrobat® Reader;
2) the EXPRESS listings for ISO 10303-224:2006.
Adobe and Acrobat are trademarks of Adobe Systems Incorporated.
This third edition of ISO 10303-224 cancels and replaces the second edition (ISO 10303-224:2001), which
has been technically revised.
© ISO 2006
All rights reserved. Unless otherwise specified, no part of this CD-ROM may be reproduced, stored in a retrieval system or transmitted in
any form or
...
INTERNATIONAL ISO
STANDARD 10303-224
Third edition
2006-08-15
Industrial automation systems and
integration — Product data
representation and exchange —
Part 224:
Application protocol: Mechanical product
definition for process planning using
machining feature
Systèmes d'automatisation industrielle et intégration — Représentation
et échange de données de produits —
Partie 224: Protocole d'application: Définition de produits mécaniques
pour la planification de procédés utilisant des caractéristiques d'usinage
Reference number
©
ISO 2006
PDF disclaimer
This PDF file may contain embedded typefaces. In accordance with Adobe's licensing policy, this file may be printed or viewed but
shall not be edited unless the typefaces which are embedded are licensed to and installed on the computer performing the editing. In
downloading this file, parties accept therein the responsibility of not infringing Adobe's licensing policy. The ISO Central Secretariat
accepts no liability in this area.
Adobe is a trademark of Adobe Systems Incorporated.
Details of the software products used to create this PDF file can be found in the General Info relative to the file; the PDF-creation
parameters were optimized for printing. Every care has been taken to ensure that the file is suitable for use by ISO member bodies. In
the unlikely event that a problem relating to it is found, please inform the Central Secretariat at the address given below.
© ISO 2006
All rights reserved. Unless otherwise specified, no part of this publication may be reproduced or utilized in any form or by any means,
electronic or mechanical, including photocopying and microfilm, without permission in writing from either ISO at the address below or
ISO's member body in the country of the requester.
ISO copyright office
Case postale 56 • CH-1211 Geneva 20
Tel. + 41 22 749 01 11
Fax + 41 22 749 09 47
E-mail copyright@iso.org
Web www.iso.org
Published in Switzerland
ii © ISO 2006 – All rights reserved
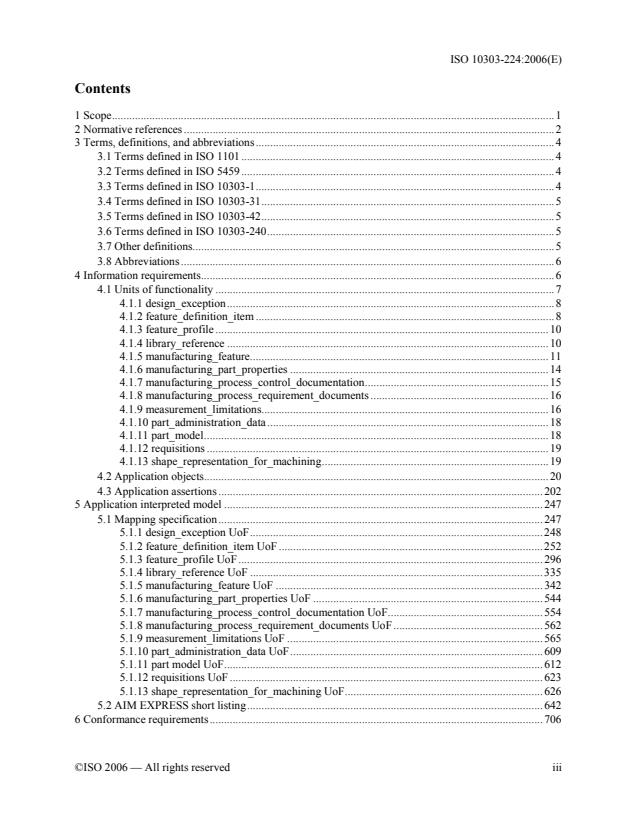
Contents
1 Scope.1
2 Normative references .2
3 Terms, definitions, and abbreviations.4
3.1 Terms defined in ISO 1101.4
3.2 Terms defined in ISO 5459.4
3.3 Terms defined in ISO 10303-1.4
3.4 Terms defined in ISO 10303-31.5
3.5 Terms defined in ISO 10303-42.5
3.6 Terms defined in ISO 10303-240.5
3.7 Other definitions.5
3.8 Abbreviations .6
4 Information requirements.6
4.1 Units of functionality .7
4.1.1 design_exception.8
4.1.2 feature_definition_item .8
4.1.3 feature_profile .10
4.1.4 library_reference .10
4.1.5 manufacturing_feature.11
4.1.6 manufacturing_part_properties .14
4.1.7 manufacturing_process_control_documentation.15
4.1.8 manufacturing_process_requirement_documents .16
4.1.9 measurement_limitations.16
4.1.10 part_administration_data.18
4.1.11 part_model.18
4.1.12 requisitions .19
4.1.13 shape_representation_for_machining.19
4.2 Application objects.20
4.3 Application assertions .202
5 Application interpreted model .247
5.1 Mapping specification.247
5.1.1 design_exception UoF.248
5.1.2 feature_definition_item UoF .252
5.1.3 feature_profile UoF .296
5.1.4 library_reference UoF .335
5.1.5 manufacturing_feature UoF .342
5.1.6 manufacturing_part_properties UoF .544
5.1.7 manufacturing_process_control_documentation UoF.554
5.1.8 manufacturing_process_requirement_documents UoF .562
5.1.9 measurement_limitations UoF .565
5.1.10 part_administration_data UoF.609
5.1.11 part model UoF.612
5.1.12 requisitions UoF .623
5.1.13 shape_representation_for_machining UoF.626
5.2 AIM EXPRESS short listing.642
6 Conformance requirements.706
©ISO 2006 — All rights reserved iii
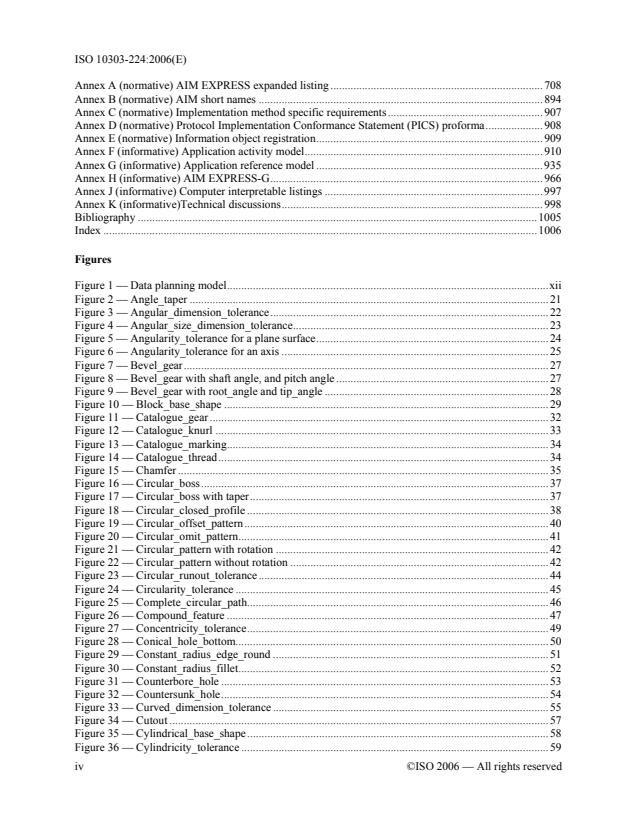
Annex A (normative) AIM EXPRESS expanded listing .708
Annex B (normative) AIM short names .894
Annex C (normative) Implementation method specific requirements.907
Annex D (normative) Protocol Implementation Conformance Statement (PICS) proforma.908
Annex E (normative) Information object registration.909
Annex F (informative) Application activity model.910
Annex G (informative) Application reference model .935
Annex H (informative) AIM EXPRESS-G.966
Annex J (informative) Computer interpretable listings .997
Annex K (informative)Technical discussions.998
Bibliography .1005
Index .1006
Figures
Figure 1 — Data planning model.xii
Figure 2 — Angle_taper .21
Figure 3 — Angular_dimension_tolerance.22
Figure 4 — Angular_size_dimension_tolerance.23
Figure 5 — Angularity_tolerance for a plane surface.24
Figure 6 — Angularity_tolerance for an axis .25
Figure 7 — Bevel_gear.27
Figure 8 — Bevel_gear with shaft angle, and pitch angle .27
Figure 9 — Bevel_gear with root_angle and tip_angle .28
Figure 10 — Block_base_shape .29
Figure 11 — Catalogue_gear .32
Figure 12 — Catalogue_knurl .33
Figure 13 — Catalogue_marking.34
Figure 14 — Catalogue_thread.34
Figure 15 — Chamfer .35
Figure 16 — Circular_boss.37
Figure 17 — Circular_boss with taper.37
Figure 18 — Circular_closed_profile .38
Figure 19 — Circular_offset_pattern.40
Figure 20 — Circular_omit_pattern.41
Figure 21 — Circular_pattern with rotation .42
Figure 22 — Circular_pattern without rotation .42
Figure 23 — Circular_runout_tolerance.44
Figure 24 — Circularity_tolerance .45
Figure 25 — Complete_circular_path.46
Figure 26 — Compound_feature .47
Figure 27 — Concentricity_tolerance.49
Figure 28 — Conical_hole_bottom.50
Figure 29 — Constant_radius_edge_round .51
Figure 30 — Constant_radius_fillet.52
Figure 31 — Counterbore_hole .53
Figure 32 — Countersunk_hole.54
Figure 33 — Curved_dimension_tolerance .55
Figure 34 — Cutout .57
Figure 35 — Cylindrical_base_shape.58
Figure 36 — Cylindricity_tolerance .59
iv ©ISO 2006 — All rights reserved
Figure 37 — Defined_marking.61
Figure 38 — Defined_thread .62
Figure 39 — Diagonal_knurl .65
Figure 40 — Diameter_dimension_tolerance .66
Figure 41 — Diameter_taper .66
Figure 42 — Diamond_knurl.67
Figure 43 — Distance_along_curve_tolerance.70
Figure 44 — Edge_round.71
Figure 45 — Fillet.76
Figure 46 — Flat_hole_bottom.77
Figure 47 — Flat_slot_end_type.78
Figure 48 — Flatness_tolerance .79
Figure 49 — Gear face_width.81
Figure 50 — Gear nominal_tooth_depth .81
Figure 51 — Gear profile_shift.82
Figure 52 — Gear reference_pressure_angle.83
Figure 53 — Gear root_fillet_radius.83
Figure 54 — Gear tip_diameter .84
Figure 55 — General_boss .84
Figure 56 — General_closed_profile.85
Figure 57 — General_open_profile .86
Figure 58 — General_outside_profile .87
Figure 59 — General_path.88
Figure 60 — General_pattern .88
Figure 61 — General_pocket.90
Figure 62 — General_removal_volume .91
Figure 63 — General_revolution for an outer shape .92
Figure 64 — General_revolution for a volume removal.93
Figure 65 — Groove .96
Figure 66 — Helical_gear.98
Figure 67 — Helical_gear left_or_right_hand_tooth.99
Figure 68 — Helical_gear reference_helix_angle .99
Figure 69 — Implicit_base_shape_representation.100
Figure 70 — Knurl.102
Figure 71 — Linear_path.104
Figure 72 — Linear_profile .105
Figure 73 — Linear_profile_tolerance .106
Figure 74 — Location_dimension_tolerance.106
Figure 75 — Manufactured_assembly and Mating_definition .109
Figure 76 — Ngon_base_shape .115
Figure 77 — Ngon_profile.117
Figure 78 — Open_slot_end_type .120
Figure 79 — Outer_diameter .122
Figure 80 — Outer_diameter_to_shoulder .123
Figure 81 — Parallelism_tolerance for a plane .124
Figure 82 — Parallelism_tolerance for an axis.125
Figure 83 — Partial_circular_path.130
Figure 84 — Partial_circular_profile.131
Figure 85 — Perpendicularity_tolerance for a plane .133
Figure 86 — Perpendicularity_tolerance for a axis .133
©ISO 2006 — All rights reserved v
Figure 87 — Planar_face .137
Figure 88 — Planar_pocket_bottom_condition.142
Figure 89 — Position_tolerance .143
Figure 90 — Protrusion .150
Figure 91 — Radial_dimension_tolerance .150
Figure 92 — Radiused_slot_end_type.151
Figure 93 — Recess.152
Figure 94 — Rectangular_boss.153
Figure 95 — Rectangular_closed_pocket .154
Figure 96 — Rectangular_closed_profile .155
Figure 97 — Rectangular_offset_pattern.156
Figure 98 — Rectangular_omit_pattern .157
Figure 99 — Rectangular_open_pocket .158
Figure 100 — Rectangular_pattern.159
Figure 101 — Revolved_flat.164
Figure 102 — Revolved_round.165
Figure 103 — Rib_top .166
Figure 104 — Round_hole.167
Figure 105 — Rounded_end.168
Figure 106 — Rounded_U_profile .170
Figure 107 — Shape_profile.172
Figure 108 — Slot.175
Figure 109 — Spherical_cap.177
Figure 110 — Spherical_hole_bottom.178
Figure 111 — Spur_gear.179
Figure 112 — Square_U_profile.179
Figure 113 — Step.181
Figure 114 — Straight_knurl .182
Figure 115 — Straightness_tolerance.183
Figure 116 — Surface_profile_tolerance.184
Figure 117 — Symmetry_tolerance.185
Figure 118 — Tee_profile .188
Figure 119 — Thread.190
Figure 120 — Through_bottom_condition .193
Figure 121 — Total_runout_tolerance.197
Figure 122 — Turned_knurl .198
Figure 123 — Vee_profile .200
Figure 124 — Woodruff_slot_end_type.202
Figure F.1 — IDEF0 basic notation.910
Figure F.2 — Mechanical products definition for process planning using machining features .921
Figure F.3 — A0 manufacture mechanical parts .922
Figure F.4 — A1 manage manufacturing process .923
Figure F.5 — A13 manage equipment and materials .924
Figure F.6 — A131 manage inventory .925
Figure F.7 — A2 capture digital product definition .926
Figure F.8 — A21 capture part data definition.927
Figure F.9 — A214 create part model .928
Figure F.10 — A3 generate manufacturing data.929
Figure F.11 — A31 generate process plan.930
Figure F.12 — A311 define resources .931
vi ©ISO 2006 — All rights reserved
Figure F.13 — A312 define operator data .932
Figure F.14 — A315 define machine instructions.933
Figure F.15 — A4 operate shop floor.934
Figure G.1 — ARM EXPRESS-G diagram 1 of 30.936
Figure G.2 — ARM EXPRESS-G diagram 2 of 30.937
Figure G.3 — ARM EXPRESS-G diagram 3 of 30.938
Figure G.4 — ARM EXPRESS-G diagram 4 of 30.939
Figure G.5 — ARM EXPRESS-G diagram 5 of 30.940
Figure G.6 — ARM EXPRESS-G diagram 6 of 30.941
Figure G.7 — ARM EXPRESS-G diagram 7 of 30.942
Figure G.8 — ARM EXPRESS-G diagram 8 of 30.943
Figure G.9 — ARM EXPRESS-G diagram 9 of 30.944
Figure G.10 — ARM EXPRESS-G diagram 10 of 30.945
Figure G.11— ARM EXPRESS-G diagram 11 of 30.946
Figure G.12 — ARM EXPRESS-G diagram 12 of 30.947
Figure G.13 — ARM EXPRESS-G diagram 13 of 30.948
Figure G.14 — ARM EXPRESS-G diagram 14 of 30.949
Figure G.15 — ARM EXPRESS-G diagram 15 of 30.950
Figure G.16 — ARM EXPRESS-G diagram 16 of 30.951
Figure G.17— ARM EXPRESS-G diagram 17 of 30.952
Figure G.18 — ARM EXPRESS-G diagram 18 of 30.953
Figure G.19 — ARM EXPRESS-G diagram 19 of 30.954
Figure G.20 — ARM EXPRESS-G diagram 20 of 30.955
Figure G.21 — ARM EXPRESS-G diagram 21 of 30.956
Figure G.22 — ARM EXPRESS-G diagram 22 of 30.957
Figure G.23 — ARM EXPRESS-G diagram 23 of 30.958
Figure G.24 — ARM EXPRESS-G diagram 24 of 30.959
Figure G.25 — ARM EXPRESS-G diagram 25 of 30.960
Figure G.26 — ARM EXPRESS-G diagram 26 of 30.961
Figure G.27 — ARM EXPRESS-G diagram 27 of 30.962
Figure G.28 — ARM EXPRESS-G diagram 28 of 30.963
Figure G.29 — ARM EXPRESS-G diagram 29 of 30.964
Figure G.30 — ARM EXPRESS-G diagram 30 of 30.965
Figure H.1 — application context — AIM EXPRESS-G diagram 1 of 30 .967
Figure H.2 — product definition — AIM EXPRESS-G diagram 2 of 30 .968
Figure H.3 — property definition — AIM EXPRESS-G diagram 3 of 30.969
Figure H.4 — representation — AIM EXPRESS-G diagram 4 of 30 .970
Figure H.5 — shape_representation — AIM EXPRESS-G diagram 5 of 30 .971
Figure H.6 — shape_aspect — AIM EXPRESS-G diagram 6 of 30.972
Figure H.7 — characterized_object — AIM EXPRESS-G diagram 7 of 30.973
Figure H.8 — geometry topology — AIM EXPRESS-G diagram 8 of 30.974
Figure H.9 — geometric orientation — AIM EXPRESS-G diagram 9 of 30.975
Figure H.10 — curve — AIM EXPRESS-G diagram 10 of 30 .976
Figure H.11 — bounded_curve — AIM EXPRESS-G diagram 11 of 30 .977
Figure H.12 — surface — AIM EXPRESS-G diagram 12 of 30 .978
Figure H.13 — bounded_surface — AIM EXPRESS-G diagram 13 of 30.979
Figure H.14 — topology — AIM EXPRESS-G diagram 14 of 30.980
Figure H.15 — shell — AIM EXPRESS-G diagram 15 of 30 .981
Figure H.16 — document — AIM EXPRESS-G diagram 16 of 30 .982
Figure H.17 — approval — AIM EXPRESS-G diagram 17 of 30.983
©ISO 2006 — All rights reserved vii
Figure H.18 — person organization — AIM EXPRESS-G diagram 18 of 30 .984
Figure H.19 — person organization assignment — AIM EXPRESS-G diagram 19 of 30 .985
Figure H.20 — date — AIM EXPRESS-G diagram 20 of 30 .986
Figure H.21 — action — AIM EXPRESS-G diagram 21 of 30 .987
Figure H.22 — security classification — AIM EXPRESS-G diagram 22 of 30 .988
Figure H.23 — units — AIM EXPRESS-G diagram 23 of 30 .989
Figure H.24 — measure with unit — AIM EXPRESS-G diagram 24 of 30 .990
Figure H.25 — measure qualification and datums — AIM EXPRESS-G diagram 25 of 30 .991
Figure H.26 — tolerances — AIM EXPRESS-G diagram 26 of 30.992
Figure H.27 — geometric tolerance — AIM EXPRESS-G diagram 27 of 30 .993
Figure H.28 — group and identification assignment — AIM EXPRESS-G diagram 28 of 30.994
Figure H.29 — externally defined item — AIM EXPRESS-G diagram 29 of 30.995
Figure H.30 — attributes — AIM EXPRESS-G diagram 30 of 30 .996
Tables
Table B.1 — AIM short names of entities.894
rd
Table K.1 — Summary of 3 edition ARM changes.999
rd
Table K.2 — Summary of 3 edition AIM changes.1000
rd
Table K.3 — Summary of 3 edition changes for gear entity .1003
viii ©ISO 2006 — All rights reserved
Foreword
ISO (the International Organization for Standardization) is a worldwide federation of national standards
bodies (ISO member bodies). The work of preparing International Standards is normally carried out
through ISO technical committees. Each member body interested in a subject for which a technical
committee has been established has the right to be represented on that committee. International
organizations, governmental and non-governmental, in liaison with ISO, also take part in the work. ISO
collaborates closely with the International Electrotechnical Commission (IEC) on all matters of
electrotechnical standardization.
International Standards are drafted in accordance with the rules given in the ISO/IEC Directives, Part 2.
The main task of technical committees is to prepare International Standards. Draft International Standards
adopted by the technical committees are circulated to the member bodies for voting. Publication as an
International Standard requires approval by at least 75 % of the member bodies casting a vote.
Attention is drawn to the possibility that some of the elements of this document may be the subject of
patent rights. ISO shall not be held responsible for identifying any or all such patent rights.
ISO 10303-224 was prepared by Technical Committee ISO/TC 184, Industrial automation systems
and integration, Subcommittee SC 4 Industrial data.
This third edition of ISO 10303-224 cancels and replaces the second edition (ISO 10303-224:2001), of
which it constitutes a technical revision.
ISO 10303 is organized as a series of parts, each published separately. The structure of ISO 10303 is
described in ISO 10303-1.
Each part of ISO 10303 is a member of one of the following series: description methods, implementation
methods, conformance testing methodology and framework, integrated generic resources, integrated
application resources, application protocols, abstract test suites, application interpreted constructs, and
application modules. This part is a member of the 200 series.
A complete list of parts of ISO 10303 is available from the Internet:
©ISO 2006 — All rights reserved ix
Introduction
ISO 10303 is an International Standard for the computer-interpretable representation production
information and exchange of product data. The objective is to provide a neutral mechanism capable of
describing product data throughout the life cycle of a product, independent from any particular system.
The nature of this description makes it suitable not only for neutral file exchange, but also as a basis for
implementing and sharing product databases and archiving.
ISO 10303 is organized as a series of parts, each published separately. The parts of ISO 10303 fall into
one of the following series: description methods, integrated resources, application protocols, application
interpreted constructs, abstract test suites, implementation methods, and conformance testing. The series
are described in ISO 10303-1. This part of ISO 10303 is a member of the application protocol series.
ISO 10303-224 specifies an application protocol (AP) for the representation of information needed to
produce a mechanical part definition for process planning of a single piece or an assembly of piece parts
for machining operations, and specifies the integrated resources necessary to satisfy these requirements.
This application protocol defines the context, scope, and information requirements for the representation
of information needed to produce a mechanical part definition. These requirements specify the part
identification, tracking, shape, representation of the shape and material data necessary for the definition
of a part for process planning. The process planning function in an organization can be assisted a great
deal by identifying machining-oriented part shape features, so that the process planner can more readily
identify machining tools and processes to manufacture a part.
This application protocol identifies specific characteristics of part shape used in manufacturing. These
characteristics are used to define manufacturing features. These shapes can be represented either by
machining features defined in this application protocol, or by a boundary representation solid model,
shared by other application protocols and used as application interpreted constructs in this part. The
purpose of manufacturing features is to facilitate the identification of manufacturing shapes that are
human and computer interpretable. Manufacturing features allow information about the shape to be used
for decisions in computerized process planning systems.
Information about the part material is supplied so the process planning activity can determine equipment
and material requirements. Also supplied is administrative information necessary for tracking customer
information, supplier information about the part, and internal control information for the manufacturing
operation to support process planning. Tracking of certain administrative information is a component of
the iterative process for creating a process plan.
Application protocols provide the basis for developing implementations of ISO 10303 and abstract test
suites for the conformance testing of AP implementations.
Clause 1 defines the scope of the application protocol and summarizes the functionality and data covered
by the AP. Clause 3 lists the words defined in this part of ISO 10303 and gives pointers to words defined
elsewhere. An application activity model that is the basis for the definition of the scope is provided in
Annex F. The information requirements of the application are specified in Clause 4 using terminology
appropriate to the application. A graphical representation of the information requirements, referred to as
the application reference model, is given in Annex G.
Resource constructs are interpreted to meet the information requirements. This interpretation produces the
application interpreted model (AIM). This interpretation, given in 5.1, shows the correspondence between
x ©ISO 2006 — All rights reserved
the information requirements and the A
...



Questions, Comments and Discussion
Ask us and Technical Secretary will try to provide an answer. You can facilitate discussion about the standard in here.
Loading comments...