ISO 23748:2016
(Main)Aerospace series — O-ring grooves — Dimensions
Aerospace series — O-ring grooves — Dimensions
ISO 23748:2016 specifies the dimensions of grooves for use with O-rings for aerospace in static sealing applications: - radial sealing: rod or bore mounted O-rings; - axial sealing: internal or external pressure source.
Série aérospatiale — Gorges pour joints toriques — Dimensions
General Information
- Status
- Published
- Publication Date
- 05-Oct-2016
- Technical Committee
- ISO/TC 20/SC 10 - Aerospace fluid systems and components
- Drafting Committee
- ISO/TC 20/SC 10 - Aerospace fluid systems and components
- Current Stage
- 9093 - International Standard confirmed
- Start Date
- 18-Nov-2022
- Completion Date
- 12-Feb-2026
Relations
- Effective Date
- 12-Feb-2026
- Effective Date
- 06-Jun-2022
- Effective Date
- 25-Apr-2020
Overview
ISO 23748:2016 - Aerospace series - O-ring grooves - Dimensions specifies groove geometries and tolerances for O‑rings used in aerospace static sealing applications. The standard covers both radial sealing (rod- or bore-mounted O‑rings) and axial sealing (internal or external pressure). It provides recommended groove dimensions, surface roughness limits, run‑out tolerances and drawing/presentation rules to ensure consistent sealing performance across aerospace components.
Key topics and technical requirements
- Scope: Groove dimensions for static aerospace seals - radial (rod or bore mounted) and axial (internal/external pressure).
- Configuration codes: Four configurations are defined
- A: Radial sealing - rod housing (recommended)
- B: Radial sealing - bore housing (not recommended)
- C: Axial sealing for internal pressure
- D: Axial sealing for external pressure
- Dimensional tables: Detailed tables for O‑ring groove parameters by O‑ring section diameters (1.80, 2.65, 3.55, 5.30, 7.00 mm) and multiple nominal diameters. Tables include groove width, depth, lead‑in chamfer, corner/edge radii and tolerances.
- Surface roughness: Specified roughness values (µm) for side surfaces, groove surfaces and inside diameters, with distinctions for pressure variation levels (≤5 MPa and >5 MPa).
- Tolerances and run‑out: Run‑out tolerances are provided (e.g., groove diameter d ≤ 50 mm: Y = 0.025 mm; d > 50 mm: Y = 0.05 mm) and dimensional tolerances reference ISO tolerance systems (e.g., ISO 286‑2).
- Designation and drawings: Requirements for designation, drawing presentation and use of ISO 3601‑1 O‑ring size codes are included to standardize engineering documentation.
- Notes: The edition explicitly adds “static applications” to title/scope and adopts ISO 3601‑1 size codes.
Applications and users
ISO 23748:2016 is used when designing and specifying O‑ring grooves for aerospace static seals, including:
- Hydraulic/pneumatic actuators and cylinders (rod and bore interfaces)
- Static flange seals, valve housings and pressure-retaining joints
- Aerospace component designers, mechanical and sealing engineers
- Seal manufacturers, quality & procurement teams, and CAD/drawing specialists Using this standard helps ensure interchangeability, reliable sealing performance and conformity with aerospace industry practices.
Related standards
- ISO 3601‑1 - O‑ring size codes (referenced for O‑ring codification)
- ISO 286‑2 - Tolerances (referenced for fit/tolerance values)
- Other ISO/industry standards on seal materials and dynamic sealing may be used in conjunction with ISO 23748:2016.
Keywords: ISO 23748:2016, O‑ring grooves, aerospace, groove dimensions, static sealing, radial sealing, axial sealing, ISO 3601‑1, surface roughness, tolerances.
Get Certified
Connect with accredited certification bodies for this standard

DEKRA North America
DEKRA certification services in North America.

Eagle Registrations Inc.
American certification body for aerospace and defense.

Element Materials Technology
Materials testing and product certification.
Sponsored listings
Frequently Asked Questions
ISO 23748:2016 is a standard published by the International Organization for Standardization (ISO). Its full title is "Aerospace series — O-ring grooves — Dimensions". This standard covers: ISO 23748:2016 specifies the dimensions of grooves for use with O-rings for aerospace in static sealing applications: - radial sealing: rod or bore mounted O-rings; - axial sealing: internal or external pressure source.
ISO 23748:2016 specifies the dimensions of grooves for use with O-rings for aerospace in static sealing applications: - radial sealing: rod or bore mounted O-rings; - axial sealing: internal or external pressure source.
ISO 23748:2016 is classified under the following ICS (International Classification for Standards) categories: 49.080 - Aerospace fluid systems and components; 49.100 - Ground service and maintenance equipment. The ICS classification helps identify the subject area and facilitates finding related standards.
ISO 23748:2016 has the following relationships with other standards: It is inter standard links to EN 3748:2001, ISO/IEC 9636-1:1991, ISO 23748:2016/Amd 1:2021. Understanding these relationships helps ensure you are using the most current and applicable version of the standard.
ISO 23748:2016 is available in PDF format for immediate download after purchase. The document can be added to your cart and obtained through the secure checkout process. Digital delivery ensures instant access to the complete standard document.
Standards Content (Sample)
INTERNATIONAL ISO
STANDARD 23748
First edition
2016-10-01
Aerospace series — O-ring grooves —
Dimensions
Série aérospatiale — Gorges pour joints toriques — Dimensions
Reference number
©
ISO 2016
© ISO 2016, Published in Switzerland
All rights reserved. Unless otherwise specified, no part of this publication may be reproduced or utilized otherwise in any form
or by any means, electronic or mechanical, including photocopying, or posting on the internet or an intranet, without prior
written permission. Permission can be requested from either ISO at the address below or ISO’s member body in the country of
the requester.
ISO copyright office
Ch. de Blandonnet 8 • CP 401
CH-1214 Vernier, Geneva, Switzerland
Tel. +41 22 749 01 11
Fax +41 22 749 09 47
copyright@iso.org
www.iso.org
ii © ISO 2016 – All rights reserved
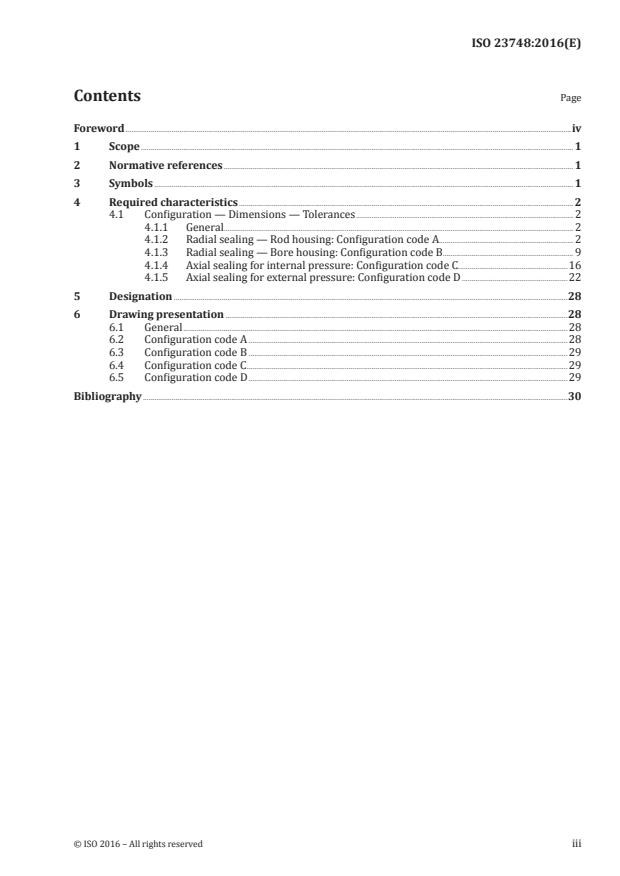
Contents Page
Foreword .iv
1 Scope . 1
2 Normative references . 1
3 Symbols . 1
4 Required characteristics . 2
4.1 Configuration — Dimensions — Tolerances . 2
4.1.1 General. 2
4.1.2 Radial sealing — Rod housing: Configuration code A. 2
4.1.3 Radial sealing — Bore housing: Configuration code B . . 9
4.1.4 Axial sealing for internal pressure: Configuration code C .16
4.1.5 Axial sealing for external pressure: Configuration code D .22
5 Designation .28
6 Drawing presentation .28
6.1 General .28
6.2 Configuration code A .28
6.3 Configuration code B .29
6.4 Configuration code C .29
6.5 Configuration code D .29
Bibliography .30
Foreword
ISO (the International Organization for Standardization) is a worldwide federation of national standards
bodies (ISO member bodies). The work of preparing International Standards is normally carried out
through ISO technical committees. Each member body interested in a subject for which a technical
committee has been established has the right to be represented on that committee. International
organizations, governmental and non-governmental, in liaison with ISO, also take part in the work.
ISO collaborates closely with the International Electrotechnical Commission (IEC) on all matters of
electrotechnical standardization.
The procedures used to develop this document and those intended for its further maintenance are
described in the ISO/IEC Directives, Part 1. In particular the different approval criteria needed for the
different types of ISO documents should be noted. This document was drafted in accordance with the
editorial rules of the ISO/IEC Directives, Part 2 (see www.iso.org/directives).
Attention is drawn to the possibility that some of the elements of this document may be the subject of
patent rights. ISO shall not be held responsible for identifying any or all such patent rights. Details of
any patent rights identified during the development of the document will be in the Introduction and/or
on the ISO list of patent declarations received (see www.iso.org/patents).
Any trade name used in this document is information given for the convenience of users and does not
constitute an endorsement.
For an explanation on the meaning of ISO specific terms and expressions related to conformity assessment,
as well as information about ISO’s adherence to the World Trade Organization (WTO) principles in the
Technical Barriers to Trade (TBT) see the following URL: www.iso.org/iso/foreword.html.
ISO 23748 was prepared by ACE/12/1 as EN 3748:2001 and was adopted (without modification
other than those stipulated below) by Technical Committee ISO/TC 20, Aircraft and space vehicles,
Subcommittee SC 10, Aerospace fluid systems and components.
The following are the modifications made in this International Standard:
— reference to ISO 3601-1 size codes in tables;
— correction in Table 13 of value 90,27 to 91,27;
— addition of “static applications” in the title and scope;
— “according to European Standards” was removed in the scope;
— any reference to European Standards were removed.
iv © ISO 2016 – All rights reserved
INTERNATIONAL STANDARD ISO 23748:2016(E)
Aerospace series — O-ring grooves — Dimensions
1 Scope
This International Standard specifies the dimensions of grooves for use with O-rings for aerospace in
static sealing applications:
— radial sealing: rod or bore mounted O-rings;
— axial sealing: internal or external pressure source.
2 Normative references
The following documents are referred to in the text in such a way that some or all of their content
constitutes requirements of this document. For dated references, only the edition cited applies. For
undated references, the latest edition of the referenced document (including any amendments) applies.
There are no normative references in this document.
3 Symbols
b O-ring groove width
d O-ring inside diameter
d O-ring section diameter
d O-ring groove diameter, rod mounted
d bore diameter, rod mounted
d rod outside diameter bore mounted
d O-ring groove diameter bore mounted
d O-ring groove outside diameter, internal pressure
d O-ring groove inside diameter, external pressure
d rod outside diameter, rod mounted
d bore diameter, bore mounted
h groove height
R edge radius on groove
r corner radius on groove
t housing depth
Z lead-in chamfer length
4 Required characteristics
4.1 Configuration — Dimensions — Tolerances
4.1.1 General
Only recommended sizes are given in the tables.
Dimensions and tolerances are in millimetres. Surface roughness values are in micrometres.
4.1.2 Radial sealing — Rod housing: Configuration code A
4.1.2.1 General
This configuration corresponds to radial grooves in static applications, rod mounted. See Figure 1 and
Tables 1 to 7.
Key
1 bore
2 rod
a
See Table 1.
b
Groove diameter d ≤ 50: maximum run-out tolerance Y = 0,025.
Groove diameter d > 50: maximum run-out tolerance Y = 0,05.
c
No burrs permitted in this area.
Figure 1
2 © ISO 2016 – All rights reserved
Table 1
Roughness
R R
a
Surface
max.
continuous with pressure continuous with pressure
pressure variation pressure variation
≤5 MPa >5 MPa ≤5MPa >5 MPa ≤5 MPa >5 MPa ≤5 MPa >5 MPa
Side
3,2 12,5
surfaces
Groove 1,6 1,6 1,6 6,3 6,3 6,3
Inside
1,6 6,3
diameter
Homologous surface 0,8 3,2
Table 2
d b Z r R
2 1
nom. max. min. min. max. min. max. min.
1,80 2,65 2,40 1,1
0,4 0,2
2,65 3,85 3,60 1,5
0,3 0,1
3,55 5,05 4,80 1,8
0,8 0,4
5,30 7,35 7,10 2,7
7,00 9,45 9,20 3,6 1,2 0,8
4.1.2.2 Section diameter d = 1,80
Table 3
d d d d
1 3 4 9
+0,06
a b
Code nom. f7
−0,04
A0040 4,00 4,24 7,00 7,00
A0050 5,00 5,27 8,03 8,03
A0060 6,00 6,30 9,06 9,06
A0069 6,90 7,24 10,00 10,00
A0087 8,75 9,12 11,88 11,88
A0106 10,60 11,02 13,78 13,78
A0125 12,50 12,97 15,73 15,73
A0140 14,00 14,54 17,30 17,30
A0160 16,00 16,64 19,40 19,40
A0180 18,00 18,64 21,40 21,40
A0212 21,20 21,94 24,70 24,70
A0236 23,60 24,44 27,20 27,20
A0280 28,00 28,94 31,70 31,70
A0315 31,50 32,54 35,30 35,30
A0355 35,50 36,64 39,40 39,40
A0365 36,50 37,64 40,40 40,40
A0375 37,50 38,64 41,40 41,40
A0387 38,70 39,84 42,60 42,60
A0400 40,00 41,24 44,00 44,00
a
Size code corresponding to the codification of O-rings according to
ISO 3601-1.
b
See ISO 286-2.
4 © ISO 2016 – All rights reserved
4.1.2.3 Section diameter d = 2,65
Table 4
d d d d
1 3 4 9
+0,07
a b
Code nom. f7
−0,05
B0053 5,30 5,58 9,72 9,72
B0069 6,90 7,25 11,39 11,39
B0095 9,50 9,90 14,04 14,04
B0112 11,20 11,66 15,80 15,80
B0132 13,20 13,76 17,90 17,90
B0150 15,00 15,56 19,70 19,70
B0170 17,00 17,66 21,80 21,80
B0200 20,00 20,66 24,80 24,80
B0224 22,40 23,16 27,30 27,30
B0265 26,50 27,36 31,50 31,50
B0300 30,00 30,96 35,10 35,10
B0345 34,50 35,56 39,70 39,70
B0387 38,70 39,86 44,00 44,00
B0437 43,70 45,06 49,20 49,20
B0500 50,00 51,46 55,60 55,60
B0560 56,00 57,66 61,80 61,80
B0600 60,00 61,76 65,90 65,90
B0650 65,00 66,86 71,00 71,00
B0710 71,00 73,06 77,20 77,20
B0750 75,00 77,16 81,30 81,30
B0800 80,00 82,26 86,40 86,40
a
Size code corresponding to the codification of O-rings according to
ISO 3601-1.
b
See ISO 286-2.
4.1.2.4 Section diameter d = 3,55
Table 5
d d d d
1 3 4 9
+0,08
a b
Code nom. f7
−0,06
C0250 25,00 25,82 31,30 31,30
C0300 30,00 31,02 36,50 36,50
C0355 35,50 36,62 42,10 42,10
C0425 42,50 43,82 49,30 49,30
C0487 48,70 50,12 55,60 55,60
C0545 54,50 56,12 61,60 61,60
C0615 61,50 63,32 68,80 68,80
C0710 71,00 73,02 78,50 78,50
C0800 80,00 82,32 87,80 87,80
C0900 90,00 92,52 98,00 98,00
C1000 100,00 102,82 108,30 108,30
C1120 112,00 115,12 120,60 120,60
C1150 115,00 118,22 123,70 123,70
C1220 122,00 125,32 130,80 130,80
C1320 132,00 135,62 141,10 141,10
C1400 140,00 143,82 149,30 149,30
C1500 150,00 154,12 159,60 159,60
C1600 160,00 164,32 169,80 169,80
C1700 170,00 174,62 180,10 180,10
C1800 180,00 189,92 195,40 195,40
C1900 190,00 195,12 200,60 200,60
C2000 200,00 205,32 210,80 210,80
C2120 212,00 217,62 223,10 223,10
C2240 224,00 229,92 235,40 235,40
C2360 236,00 242,32 247,80 247,80
C2500 250,00 256,62 262,10 262,10
a
Size code corresponding to the codification of O-rings according to
ISO 3601-1.
b
See ISO 286-2.
6 © ISO 2016 – All rights reserved
4.1.2.5 Section diameter d = 5,30
Table 6
d d d d
1 3 4 9
+0,09
a b
Code nom. f7
−0,07
D0600 60,00 61,82 70,20 70,20
D0710 71,00 73,02 81,40 81,40
D0800 80,00 82,32 90,70 90,70
D0900 90,00 92,52 100,90 100,90
D1090 109,00 112,02 120,40 120,40
D1120 112,00 115,12 123,50 123,50
D1180 118,00 121,22 129,60 129,60
D1280 128,00 131,52 139,90 139,90
D1360 136,00 139,72 148,10 148,10
D1450 145,00 148,92 157,30 157,30
D1550 155,00 159,22 167,60 167,60
D1650 165,00 169,42 177,80 177,80
D1750 175,00 179,72 188,10 188,10
D1850 185,00 190,02 198,40 198,40
D1950 195,00 200,22 208,60 208,60
D2000 200,00 205,32 213,70 213,70
a
Size code corresponding to the codification of O-rings according to
ISO 3601-1.
b
See ISO 286-2.
4.1.2.6 Section diameter d = 7,00
Table 7
d d d d
1 3 4 9
+0,11
a b
Code nom. f7
−0,09
E1090 109,00 112,06 123,40 123,40
E1150 115,00 118,26 129,60 129,60
E1250 125,00 128,46 139,80 139,80
E1360 136,00 139,76 151,10 151,10
E1450 145,00 148,96 160,30 160,30
E1550 155,00 159,26 170,60 170,60
E1650 165,00 169,46 180,80 180,80
E1750 175,00 179,76 191,10 191,10
E1850 185,00 189,96 201,30 201,30
E1900 190,00 195,16 206,50 206,50
E2000 200,00 205,36 216,70 216,70
E2120 212,00 217,66 229,00 229,00
E2240 224,00 229,86 241,20 241,20
E2300 230,00 236,16 247,50 247,50
E2430 243,00 249,46 260,80 260,80
E2500 250,00 256,66 268,00 268,00
E2580 258,00 264,86 276,20 276,20
E2720 272,00 279,26 290,60 290,60
E2800 280,00 287,46 298,80 298,80
E2900 290,00 297,66 309,00 309,00
E3000 300,00 307,96 319,30 319,30
E3150 315,00 323,36 334,70 334,70
E3250 325,00 333,56 344,90 344,90
E3350 335,00 343,86 355,20 355,20
E3450 345,00 354,06 365,40 365,40
E3550 355,00 364,36 375,70 375,70
E3650 365,00 374,56 385,90 385,90
E3750 375,00 384,86 396,20 396,20
E3870 387,00 397,16 408,50 408,50
E4000 400,00 410,46 421,80 421,80
a
Size code corresponding to the codification of O-rings according to
ISO 3601-1.
b
See ISO 286-2.
8 © ISO 2016 – All rights reserved
4.1.3 Radial sealing — Bore housing: Configuration code B
4.1.3.1 General
This configuration (not recommended) corresponds to radial grooves in static applications, bore
mounted. See Figure 2 and Tables 8 to 14.
Key
1 rod
2 bore
a
See Table 8.
b
Groove diameter d ≤ 50: maximum run-out tolerance Y = 0,025.
Groove diameter d > 50: maximum run-out tolerance Y = 0,05.
c
No burrs permitted in this area.
Figure 2
Table 8
Roughness
R R
a
Surface
max.
continuous with pressure continuous with pressure
pressure variation pressure variation
≤5 MPa >5 MPa ≤5 MPa >5 MPa ≤5 MPa >5 MPa ≤5 MPa >5 MPa
Side
3,2 12,5
surfaces
Groove 1,6 1,6 1,6 6,3 6,3 6,3
Inside
1,6 6,3
diameter
Homologous surface 0,8 3,2
Table 9
d b Z r R
2 1
nom. max. min. min. max. min. max. min.
1,80 2,65 2,40 1,1
0,4 0,2
2,65 3,85 3,60 1,5
0,3 0,1
3,55 5,05 4,80 1,8
0,8 0,4
5,30 7,35 7,10 2,7
7,00 9,45 9,20 3,6 1,2 0,8
10 © ISO 2016 – All rights reserved
4.1.3.2 Section diameter d = 1,80
Table 10
d d d d
1 5 6 10
+0,06
a b
Code nom. H8
−0,04
A0040 4,00 4,29 7,13 4,37
A0048 4,87 5,15 7,99 5,23
A0056 5,60 5,84 8,68 5,92
A0067 6,70 6,86 9,70 6,94
A0080 8,00 8,16 11,00 8,24
A0087 8,75 8,86 11,70 8,94
A0100 10,00 10,06 12,90 10,14
A0118 11,80 11,86 14,70 11,94
A0140 14,00 13,96 16,80 14,04
A0160 16,00 15,96 18,80 16,04
A0180 18,00 17,86 20,70 17,94
A0200 20,00 19,86 22,70 19,94
A0224 22,40 22,16 25,00 22,24
A0250 25,00 24,66 27,50 24,74
A0280 28,00 27,66 30,50 27,74
A0325 32,50 32,06 34,90 32,14
A0365
...


Questions, Comments and Discussion
Ask us and Technical Secretary will try to provide an answer. You can facilitate discussion about the standard in here.
Loading comments...