ISO 24497-2:2020
(Main)Non-destructive testing — Metal magnetic memory — Part 2: Inspection of welded joints
Non-destructive testing — Metal magnetic memory — Part 2: Inspection of welded joints
This document specifies general requirements for the application of the non-destructive (NDT) metal magnetic memory (MMM) testing technique of the magnetic testing method for quality assurance of welded joints. This document can be applied to welded joints in any type of ferromagnetic products: pipelines, vessels, equipment, and metal constructions, as agreed with the purchaser.
Essais non destructifs — Mémoire magnétique des métaux — Partie 2: Examen des assemblages soudés
General Information
- Status
- Published
- Publication Date
- 10-Mar-2020
- Technical Committee
- IIW - International Institute of Welding
- Drafting Committee
- IIW - International Institute of Welding
- Parallel Committee
- ISO/TC 44/SC 5 - Testing and inspection of welds
- Current Stage
- 9093 - International Standard confirmed
- Start Date
- 08-Jan-2026
- Completion Date
- 12-Feb-2026
Relations
- Effective Date
- 23-Apr-2020
- Revised
ISO 24497-2:2007 - Non-destructive testing — Metal magnetic memory — Part 2: General requirements - Effective Date
- 13-Aug-2016
Overview: ISO 24497-2:2020 - Metal Magnetic Memory (MMM) for Welded Joints
ISO 24497-2:2020 defines requirements for applying the metal magnetic memory (MMM) technique as a non-destructive testing (NDT) method for quality assurance of welded joints. The part covers inspection principles, manual and scanning procedures, data processing and reporting for welded joints in ferromagnetic products (pipelines, vessels, equipment and metal constructions). It references ISO 24497‑1 for vocabulary, equipment and preparation and requires follow-up conventional NDT where stray field indications (SFIs) are detected.
Key topics and technical requirements
- Scope & materials: Applies to welds in ferromagnetic and metastable austenitic steels and cast irons (evaluation on ferromagnetic phases only).
- Basic principle: MMM measures distribution of magnetic stray fields (SF) caused by residual magnetization from welding; SF patterns indicate probable defect zones.
- Temperature range: Measurement range from −20 °C to +60 °C (limited by sensor/operator).
- Inspection modes:
- Manual scanning: Perimeter and perpendicular scans of weld, HAZ (typically 30–50 mm width), recording SF extrema and H = 0 crossings.
- Scanning systems: Multi‑channel sensor heads (e.g., flux‑gate transducers, gradiometer configurations) with position encoder for continuous mapping.
- Measurement parameters:
- Magnetic field gradients K = ΔH/Δx (along a line) and K = ΔH/Δy (between lines).
- Magnetic parameter m = K / K_med to quantify non‑uniformity; areas where m exceeds a threshold m_lim are identified as SFIs.
- Sampling distances must be set according to weld geometry and should not exceed wall thickness or sensor size.
- Post‑processing & reporting:
- Marking of segments with SFIs, calculation of K and m values, and preparation of test reports (Annex A) and logbooks.
- Mandatory follow-up with conventional NDT (e.g., UT, radiography) per ISO 17635 for confirmation.
Practical applications and users
ISO 24497-2 is intended for organizations that need early detection and localization of probable weld defects and for optimizing welding procedures:
- NDT engineers and technicians performing magnetic testing and weld inspection.
- Welding quality assurance (QA) teams in fabrication shops, pipeline and pressure‑vessel construction.
- Asset owners / operators conducting in‑service inspections and repair assessments.
- Third‑party inspection bodies and certification organizations verifying weld integrity.
Benefits include rapid surface/near‑surface screening over long weld runs, targeted follow-up inspections, and improved efficiency in maintenance and safety programs.
Related standards
- ISO 24497-1:2020 - Metal magnetic memory - Vocabulary and general requirements
- ISO 17635 - Non‑destructive testing of welds - General rules for metallic materials
Keywords: ISO 24497-2:2020, metal magnetic memory, MMM, NDT, welded joint inspection, magnetic stray field, flux-gate sensor, HAZ, weld inspection, stray field indication (SFI).
Get Certified
Connect with accredited certification bodies for this standard

National Aerospace and Defense Contractors Accreditation Program (NADCAP)
Global cooperative program for special process quality in aerospace.

CARES (UK Certification Authority for Reinforcing Steels)
UK certification for reinforcing steels and construction.

DVS-ZERT GmbH
German welding certification society.
Sponsored listings
Frequently Asked Questions
ISO 24497-2:2020 is a standard published by the International Organization for Standardization (ISO). Its full title is "Non-destructive testing — Metal magnetic memory — Part 2: Inspection of welded joints". This standard covers: This document specifies general requirements for the application of the non-destructive (NDT) metal magnetic memory (MMM) testing technique of the magnetic testing method for quality assurance of welded joints. This document can be applied to welded joints in any type of ferromagnetic products: pipelines, vessels, equipment, and metal constructions, as agreed with the purchaser.
This document specifies general requirements for the application of the non-destructive (NDT) metal magnetic memory (MMM) testing technique of the magnetic testing method for quality assurance of welded joints. This document can be applied to welded joints in any type of ferromagnetic products: pipelines, vessels, equipment, and metal constructions, as agreed with the purchaser.
ISO 24497-2:2020 is classified under the following ICS (International Classification for Standards) categories: 25.160.40 - Welded joints and welds. The ICS classification helps identify the subject area and facilitates finding related standards.
ISO 24497-2:2020 has the following relationships with other standards: It is inter standard links to ISO 24497-3:2007, ISO 24497-2:2007. Understanding these relationships helps ensure you are using the most current and applicable version of the standard.
ISO 24497-2:2020 is available in PDF format for immediate download after purchase. The document can be added to your cart and obtained through the secure checkout process. Digital delivery ensures instant access to the complete standard document.
Standards Content (Sample)
INTERNATIONAL ISO
STANDARD 24497-2
Second edition
2020-03
Non-destructive testing — Metal
magnetic memory —
Part 2:
Inspection of welded joints
Essais non destructifs — Mémoire magnétique des métaux —
Partie 2: Examen des assemblages soudés
Reference number
©
ISO 2020
© ISO 2020
All rights reserved. Unless otherwise specified, or required in the context of its implementation, no part of this publication may
be reproduced or utilized otherwise in any form or by any means, electronic or mechanical, including photocopying, or posting
on the internet or an intranet, without prior written permission. Permission can be requested from either ISO at the address
below or ISO’s member body in the country of the requester.
ISO copyright office
CP 401 • Ch. de Blandonnet 8
CH-1214 Vernier, Geneva
Phone: +41 22 749 01 11
Fax: +41 22 749 09 47
Email: copyright@iso.org
Website: www.iso.org
Published in Switzerland
ii © ISO 2020 – All rights reserved
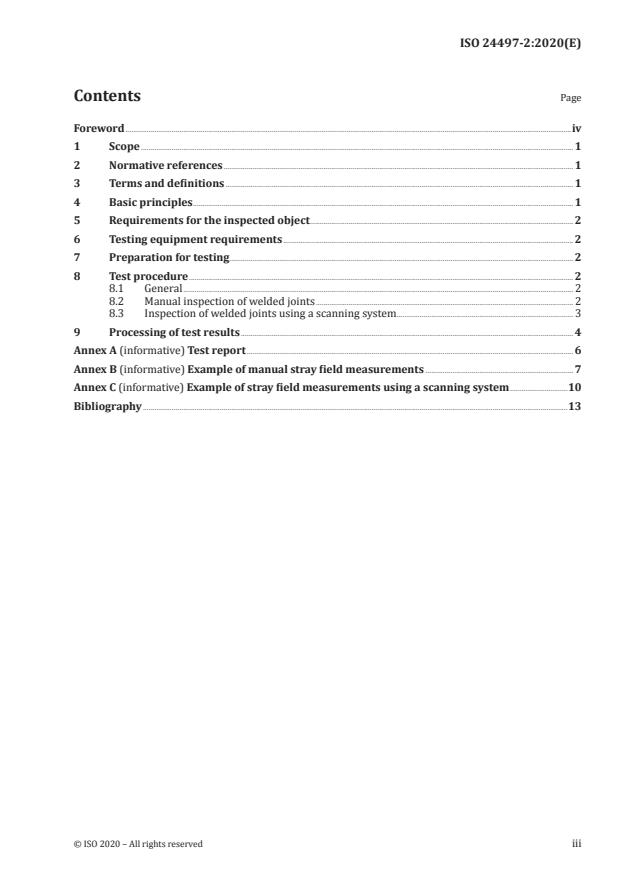
Contents Page
Foreword .iv
1 Scope . 1
2 Normative references . 1
3 Terms and definitions . 1
4 Basic principles . 1
5 Requirements for the inspected object . 2
6 Testing equipment requirements . 2
7 Preparation for testing . 2
8 Test procedure . 2
8.1 General . 2
8.2 Manual inspection of welded joints . 2
8.3 Inspection of welded joints using a scanning system . 3
9 Processing of test results . 4
Annex A (informative) Test report . 6
Annex B (informative) Example of manual stray field measurements . 7
Annex C (informative) Example of stray field measurements using a scanning system .10
Bibliography .13
Foreword
ISO (the International Organization for Standardization) is a worldwide federation of national standards
bodies (ISO member bodies). The work of preparing International Standards is normally carried out
through ISO technical committees. Each member body interested in a subject for which a technical
committee has been established has the right to be represented on that committee. International
organizations, governmental and non-governmental, in liaison with ISO, also take part in the work.
ISO collaborates closely with the International Electrotechnical Commission (IEC) on all matters of
electrotechnical standardization.
The procedures used to develop this document and those intended for its further maintenance are
described in the ISO/IEC Directives, Part 1. In particular, the different approval criteria needed for the
different types of ISO documents should be noted. This document was drafted in accordance with the
editorial rules of the ISO/IEC Directives, Part 2 (see www .iso .org/ directives).
Attention is drawn to the possibility that some of the elements of this document may be the subject of
patent rights. ISO shall not be held responsible for identifying any or all such patent rights. Details of
any patent rights identified during the development of the document will be in the Introduction and/or
on the ISO list of patent declarations received (see www .iso .org/ patents).
Any trade name used in this document is information given for the convenience of users and does not
constitute an endorsement.
For an explanation of the voluntary nature of standards, the meaning of ISO specific terms and
expressions related to conformity assessment, as well as information about ISO's adherence to the
World Trade Organization (WTO) principles in the Technical Barriers to Trade (TBT), see www .iso .org/
iso/ foreword .html.
This document was prepared by IIW, International Institute for Welding, Commission V, NDT and Quality
Assurance of Welded Products.
This second edition cancels and replaces ISO 24497-3:2007, which has been technically revised.
The main changes are as follows:
— Clauses 2 and 3 have been updated;
— the scope has been modified, MMM is a technique of the MT method;
— Clause 4 has been modified;
— Clauses 5, 6 and 7 have been replaced by references to ISO 24497-1;
— figures and annexes have been modified for more exact descriptions.
A list of all parts in the ISO 24497 series can be found on the ISO website.
Any feedback, question or request for official interpretation related to any aspect of this document
should be directed to IIW via your national standards body. A complete listing of these bodies can be
found at www .iso .org/ members .html.
iv © ISO 2020 – All rights reserved
INTERNATIONAL STANDARD ISO 24497-2:2020(E)
Non-destructive testing — Metal magnetic memory —
Part 2:
Inspection of welded joints
1 Scope
This document specifies general requirements for the application of the non-destructive (NDT) metal
magnetic memory (MMM) testing technique of the magnetic testing method for quality assurance of
welded joints.
This document can be applied to welded joints in any type of ferromagnetic products: pipelines, vessels,
equipment, and metal constructions, as agreed with the purchaser.
2 Normative references
The following documents are referred to in the text in such a way that some or all of their content
constitutes requirements of this document. For dated references, only the edition cited applies. For
undated references, the latest edition of the referenced document (including any amendments) applies.
ISO 17635, Non-destructive testing of welds — General rules for metallic materials
ISO 24497-1:2020, Non-destructive testing — Metal magnetic memory — Part 1: Vocabulary and general
requirements
3 Terms and definitions
For the purposes of this document, the terms and definitions given in ISO 24497-1 apply.
ISO and IEC maintain terminological databases for use in standardization at the following addresses:
— ISO Online browsing platform: available at https:// www .iso .org/ obp
— IEC Electropedia: available at http:// www .electropedia .org/
4 Basic principles
4.1 ММM testing is based on measurement and analysis of the distribution of stray fields (SF) on the
material of welded joints reflecting their technological past. Residual magnetization, induced during the
welding process, for example, is the main driving force for the SF inspection.
4.2 ММM testing permits the detection of stray field indications (SFI) and gives recommendations for
additional non-destructive testing in critical zones of vessels, pipelines, equipment, and construction
welded joints.
4.3 ММM testing allows the inspection of welded joints of any size and configuration (butt, tee, fillet,
lap, edge, intermittent, etc.) on all types of ferromagnetic and metastable austenitic steels and alloys, as
well as on cast irons.
NOTE The evaluation of SFI of metastable austenitic steels is restricted to ferromagnetic phases.
4.4 ММM testing can be carried out on the weld after construction, during operation, or after repair.
4.5 The following indications can be found during MMM testing:
— zones of probable location of all types of micro- and macro-defects (pores, slag inclusions,
discontinuities, cracks, ruptures);
— SFIs caused by the welding process and SFIs along the welded joints.
4.6 MMM testing can be used for inspection of the weld properties:
— the degree of quality degradation of welds by defects, and the presence of developing defects;
— the quality of welded joints for selection, acceptance and optimization of welding technology.
4.7 The MMM testing temperature range shall be from −20 °C to +60 °С, limited only by the conditions
of the operators and sensors operational range.
4.8 Following MMM testing, conventional non-destructive testing methods shall be applied in zones of
SFIs and probable locations containing micro- and macro-defects. ISO 17635 shall be used for selection
of suitable NDT methods.
4.9 Weld seams are sources of local SF due their geometry, welding process and changes of the
magnetic properties in the heat affected zone (HAZ), weld metal (WM) and parent metal (PM). For more
information, see Bibliographic references [1], [2], [3] as well as the bibliography of ISO 24497-1.
5 Requirements for the inspected object
The requirements for the inspected object (IO) are defined in ISO 24497-1.
6 Testing equipment requirements
The requirements for the test equipment are defined in ISO 24497-1.
7 Preparation for testing
Preparation for testing is described in ISO 24497-1.
8 Test procedure
8.1 General
The mathematical basics of the MMM technique are described in ISO 24497-1.
8.2 Manual inspection of welded joints
Sequences of manual scanning with the sensor of the instrument for evaluation of several types of
welded joints are shown in Figure 1.
2 © ISO 2020 – All rights reserved
Dimensions in millimetres
a) Scanning sequence parallel to the welded joint
b) Scanning sequence perpendicular to the welded joint
Key
1, 2, 3 inspection zones
4 parent metal
5 heat affected zone of welded joint
6 weld material
30-50 width (in mm) of HAZ to be inspected
Figure 1 — Manual scanning sequences of the sensor for evaluation of several types of
welded joints
The magnetic sensor (e.g. flux-gate transducer) is placed perpendicular to the inspection surface. It is
then moved by the operator manually and sequentially:
— first along the entire perimeter of a weld (separately along a weld material and along the heat-
affected zones on both sides of the weld);
— then perpendicular to the weld, with a distance from the edge of the weld of 30 mm to 50 mm on
both sides of the parent material of a pipe, see Figure 1.
The operator records the inspection data in a logbook: magnetic stray field indications with positive
or negative amplitudes of SF (H in A/m). The discontin
...


Questions, Comments and Discussion
Ask us and Technical Secretary will try to provide an answer. You can facilitate discussion about the standard in here.
Loading comments...