ISO/TS 4699:2022
(Main)Hard Coal — Determination of plastometric indices — Manual method
Hard Coal — Determination of plastometric indices — Manual method
This document specifies a manual method for the determination of plastometric indices. These indices are the maximum thickness of the plastic layer (Y, mm) and the final contraction value (X, mm). This document is applicable for hard coals with a determined ash level less than 15 % on a dry basis, as described in ISO 11722 and ISO 1171.
Houille — Détermination des indices plastométriques — Méthode manuelle
General Information
- Status
- Published
- Publication Date
- 16-Aug-2022
- Technical Committee
- ISO/TC 27/SC 5 - Methods of analysis
- Drafting Committee
- ISO/TC 27/SC 5/WG 10 - Plastic properties of coal
- Current Stage
- 9092 - International Standard to be revised
- Start Date
- 02-Feb-2026
- Completion Date
- 12-Feb-2026
Overview
ISO/TS 4699:2022 specifies a manual laboratory method for determination of plastometric indices of hard coal. The standard defines two key plastometric parameters: the maximum thickness of the plastic layer (Y, mm) and the final contraction value (X, mm). It applies to hard coals with ash content less than 15% on a dry basis (see ISO 11722 and ISO 1171). ISO/TS 4699:2022 serves as a reference method against which faster instrumental plastometers can be validated.
Key Topics and Requirements
- Test principle: Unidirectional heating of a packed coal bed from the base under a constant applied pressure while the evolution of a plastic layer is monitored and recorded.
- Measured indices:
- Y (maximum plastic layer thickness) - calculated as the maximum perpendicular distance between fitted upper and lower plastic-layer displacement curves.
- X (final contraction) - perpendicular distance from the displacement-curve endpoint at 730 °C to the zero line defined at 250 °C (note: the standard explains the numerical relationship between measured displacement and actual displacement).
- Apparatus and consumables: Manual plastometer assembly (retort, electric furnace, pressure plate, probe, thermocouples, recording device, rotary drum), balance masses (optional), refractory pads, paper tube (cigarette rolling paper), filter paper, abrasive cloth, ceramic wool/cord.
- Sample preparation and loading: Specific guidance on crushing, sieving (1.5 mm), retort packing, and aligning thermocouple and probe positions is provided.
- Data processing: Manual periodic probing of upper/lower interfaces, recording the displacement curve, and fitting layer curves using least-squares to compute Y and X.
- Quality and precision: Clause 11 provides repeatability and reproducibility limits; instrumental methods must be demonstrated free from bias relative to this manual reference.
Applications and Users
ISO/TS 4699:2022 is intended for:
- Coal testing laboratories performing rheological characterization of coking/hard coals.
- Coke producers and metallurgical plants needing to assess coal plasticity for coke-making performance and blending.
- Research organizations studying coal thermoplastic behavior.
- Manufacturers of plastometers and laboratory equipment validating new instrumental methods against a manual reference.
- Quality assurance teams requiring standardized, traceable methods for regulatory or contractual testing.
Practical uses include coal selection and blending for coke quality, process control in coke ovens, validation/calibration of automated plastometers, and research into coal thermoplastic properties.
Related Standards
Relevant cross-referenced documents include:
- ISO 11722 and ISO 1171 (ash determination)
- ISO 1213-2 (vocabulary for sampling/testing)
- ISO 3310-2 (test sieves)
- ISO 13909 series and ISO 18283 (sampling and sample preparation for coal and coke)
Keywords: ISO/TS 4699:2022, plastometric indices, hard coal testing, manual plastometer, plastic layer Y, final contraction X, coal laboratory method, coking coal.
Get Certified
Connect with accredited certification bodies for this standard

Bureau Veritas Chile
Bureau Veritas certification services in Chile.

Bureau Veritas Peru
Bureau Veritas certification services in Peru.

BVQI Peru
Bureau Veritas certification in Peru.
Sponsored listings
Frequently Asked Questions
ISO/TS 4699:2022 is a technical specification published by the International Organization for Standardization (ISO). Its full title is "Hard Coal — Determination of plastometric indices — Manual method". This standard covers: This document specifies a manual method for the determination of plastometric indices. These indices are the maximum thickness of the plastic layer (Y, mm) and the final contraction value (X, mm). This document is applicable for hard coals with a determined ash level less than 15 % on a dry basis, as described in ISO 11722 and ISO 1171.
This document specifies a manual method for the determination of plastometric indices. These indices are the maximum thickness of the plastic layer (Y, mm) and the final contraction value (X, mm). This document is applicable for hard coals with a determined ash level less than 15 % on a dry basis, as described in ISO 11722 and ISO 1171.
ISO/TS 4699:2022 is classified under the following ICS (International Classification for Standards) categories: 73.040 - Coals. The ICS classification helps identify the subject area and facilitates finding related standards.
ISO/TS 4699:2022 is available in PDF format for immediate download after purchase. The document can be added to your cart and obtained through the secure checkout process. Digital delivery ensures instant access to the complete standard document.
Standards Content (Sample)
TECHNICAL ISO/TS
SPECIFICATION 4699
First edition
2022-08
Hard Coal — Determination of
plastometric indices — Manual
method
Houille — Détermination des indices plastométriques — Méthode
manuelle
Reference number
© ISO 2022
All rights reserved. Unless otherwise specified, or required in the context of its implementation, no part of this publication may
be reproduced or utilized otherwise in any form or by any means, electronic or mechanical, including photocopying, or posting on
the internet or an intranet, without prior written permission. Permission can be requested from either ISO at the address below
or ISO’s member body in the country of the requester.
ISO copyright office
CP 401 • Ch. de Blandonnet 8
CH-1214 Vernier, Geneva
Phone: +41 22 749 01 11
Email: copyright@iso.org
Website: www.iso.org
Published in Switzerland
ii
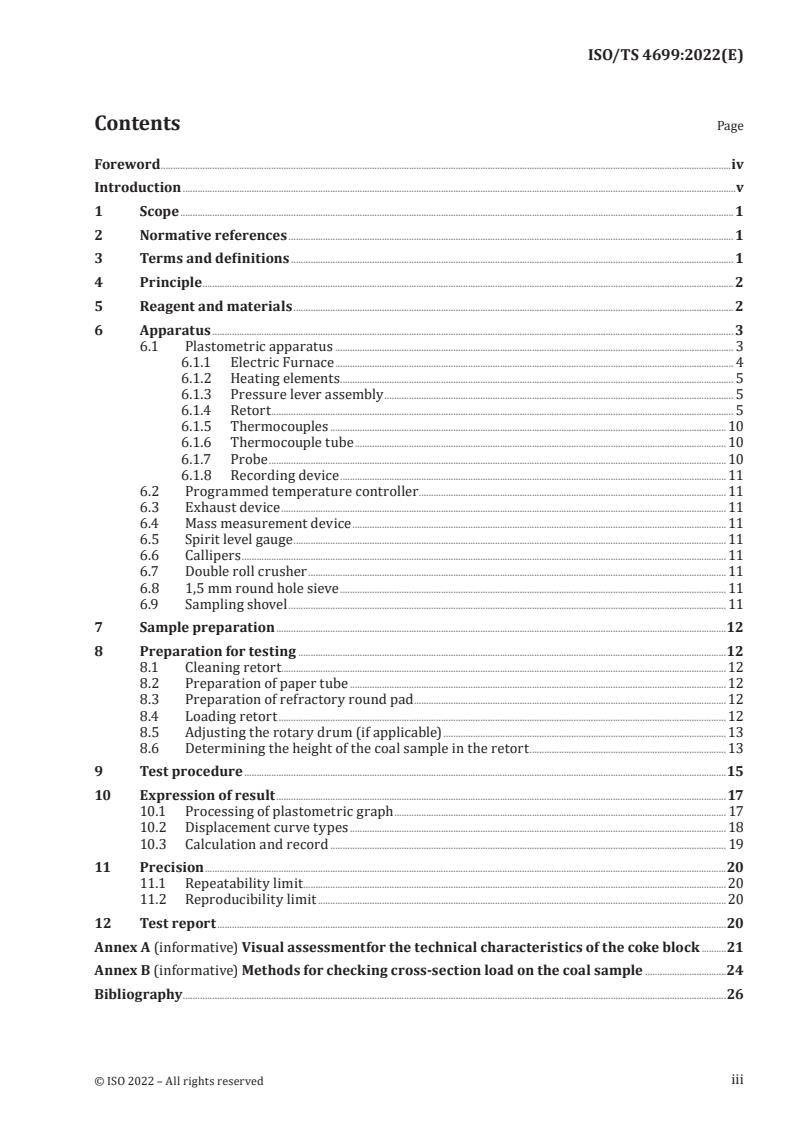
Contents Page
Foreword .iv
Introduction .v
1 Scope . 1
2 Normative references . 1
3 Terms and definitions . 1
4 Principle . 2
5 Reagent and materials .2
6 Apparatus . 3
6.1 Plastometric apparatus . 3
6.1.1 Electric Furnace . 4
6.1.2 Heating elements . 5
6.1.3 Pressure lever assembly . 5
6.1.4 Retort . 5
6.1.5 Thermocouples . 10
6.1.6 Thermocouple tube . 10
6.1.7 Probe . 10
6.1.8 Recording device . 11
6.2 Programmed temperature controller . 11
6.3 Exhaust device . 11
6.4 Mass measurement device . 11
6.5 Spirit level gauge . 11
6.6 Callipers . 11
6.7 Double roll crusher . 11
6.8 1,5 mm round hole sieve . 11
6.9 Sampling shovel . 11
7 Sample preparation .12
8 Preparation for testing .12
8.1 Cleaning retort. 12
8.2 Preparation of paper tube . 12
8.3 Preparation of refractory round pad .12
8.4 Loading retort . 12
8.5 Adjusting the rotary drum (if applicable) . 13
8.6 Determining the height of the coal sample in the retort .13
9 Test procedure .15
10 Expression of result .17
10.1 Processing of plastometric graph . 17
10.2 Displacement curve types . 18
10.3 Calculation and record . 19
11 Precision .20
11.1 Repeatability limit . 20
11.2 Reproducibility limit .20
12 Test report .20
Annex A (informative) Visual assessmentfor the technical characteristics of the coke block .21
Annex B (informative) Methods for checking cross-section load on the coal sample .24
Bibliography .26
iii
Foreword
ISO (the International Organization for Standardization) is a worldwide federation of national standards
bodies (ISO member bodies). The work of preparing International Standards is normally carried out
through ISO technical committees. Each member body interested in a subject for which a technical
committee has been established has the right to be represented on that committee. International
organizations, governmental and non-governmental, in liaison with ISO, also take part in the work.
ISO collaborates closely with the International Electrotechnical Commission (IEC) on all matters of
electrotechnical standardization.
The procedures used to develop this document and those intended for its further maintenance are
described in the ISO/IEC Directives, Part 1. In particular, the different approval criteria needed for the
different types of ISO documents should be noted. This document was drafted in accordance with the
editorial rules of the ISO/IEC Directives, Part 2 (see www.iso.org/directives).
Attention is drawn to the possibility that some of the elements of this document may be the subject of
patent rights. ISO shall not be held responsible for identifying any or all such patent rights. Details of
any patent rights identified during the development of the document will be in the Introduction and/or
on the ISO list of patent declarations received (see www.iso.org/patents).
Any trade name used in this document is information given for the convenience of users and does not
constitute an endorsement.
For an explanation of the voluntary nature of standards, the meaning of ISO specific terms and
expressions related to conformity assessment, as well as information about ISO's adherence to
the World Trade Organization (WTO) principles in the Technical Barriers to Trade (TBT), see
www.iso.org/iso/foreword.html.
This document was prepared by Technical Committee ISO/TC 27, Coal and coke, Subcommittee SC 5,
Methods of analysis.
Any feedback or questions on this document should be directed to the user’s national standards body. A
complete listing of these bodies can be found at www.iso.org/members.html.
iv
Introduction
[5] [6]
The determination of plastic layer indices has been performed in GB/T 479 and GOST 1186 for
many years. First, a manual detection of the height of the upper and lower interfaces of the plastic layer
is performed, then curves for the upper and lower layers are established and finally the maximum
thickness of plastic matter is calculated.
Instrumental methods for a more rapid determination of plastic layer indices are now available. If such
a method is to be used, it is important to demonstrate that the method is free from bias, when compared
to a reference method. In addition, it should give levels of repeatability and reproducibility which are
the same as, or better than, those quoted for the reference method (see Clause 11).
The objective of this document is to provide a reference method for determination of the plastometric
indices.
v
TECHNICAL SPECIFICATION ISO/TS 4699:2022(E)
Hard Coal — Determination of plastometric indices —
Manual method
1 Scope
This document specifies a manual method for the determination of plastometric indices. These indices
are the maximum thickness of the plastic layer (Y, mm) and the final contraction value (X, mm).
This document is applicable for hard coals with a determined ash level less than 15 % on a dry basis, as
described in ISO 11722 and ISO 1171.
2 Normative references
The following documents are referred to in the text in such a way that some or all of their content
constitutes requirements of this document. For dated references, only the edition cited applies. For
undated references, the latest edition of the referenced document (including any amendments) applies.
ISO 1213-2, Solid mineral fuels — Vocabulary — Part 2: Terms relating to sampling, testing and analysis
ISO 3310-2, Test sieves — Technical requirements and testing — Part 2: Test sieves of perforated metal
plate
ISO 13909-1, Hard coal and coke — Mechanical sampling — Part 1: General introduction
ISO 13909-2, Hard coal and coke — Mechanical sampling — Part 2: Coal — Sampling from moving streams
ISO 13909-3, Hard coal and coke — Mechanical sampling — Part 3: Coal — Sampling from stationary lots
ISO 13909-4, Hard coal and coke — Mechanical sampling — Part 4: Coal — Preparation of test samples
ISO 18283, Coal and coke — Manual sampling
3 Terms and definitions
For the purposes of this document, the terms and definitions given in ISO 1213-2 and the following
apply.
ISO and IEC maintain terminology databases for use in standardization at the following addresses:
— ISO Online browsing platform: available at https:// www .iso .org/ obp
— IEC Electropedia: available at https:// www .electropedia .org/
3.1
displacement curve of the plastic layer
curve of displacement of the packed coal bed changing with the temperature during the determination
of plastometric indices
3.2
maximum thickness of plastic layer
Y
maximum perpendicular distance between the upper and lower plastic layer
3.3
final contraction value
plastometric shrinkage
X
perpendicular distance from the end of the displacement curve at 730 °C to the zero line (at 250 °C)
Note 1 to entry: This distance is 3 times that of the actual displacement of the plastic layer.
3.4
zero line
original height curve of the packed coal bed paralleling the X-axis drawn at a temperature of 250 °C
4 Principle
The coal sample is heated unidirectionally from the base at a standard rate under constant pressure
whilst the plastic layer develops. The plastic layer thickness (referred to as Y') is manually measured
periodically throughout the test using a rounded end blunt probe. The displacement curve of the plastic
layer is recorded. The curves representing changes of the upper and lower layers are generated by the
least squares method. The maximum thickness of the plastic layer (referred to as Y) is calculated by the
maximum perpendicular distance between the upper and lower layers. The final contraction (referred
to as X) is calculated by the perpendicular distance from the end of the displacement curve at 730 °C to
the zero line (at 250 °C).
5 Reagent and materials
5.1 Cigarette rolling paper, (also known as blanks), which are small sheets, rolls, or leaves of paper
sold for rolling cigarettes either by hand or with a rolling machine.
5.2 Filter paper, qualitative filter paper, dimensions of at least 60 mm wide and 190 mm to 200 mm
long, used to line the inner wall of the retort (6.1.4).
NOTE The width of filter paper can be adjusted to keep bending the paper over the upper heat-resistant
refractory round pad.
5.3 Thin steel rod, 3 mm in diameter and at least 150 mm long. Cigarette rolling paper is wrapped
around the rod to make a tube. The resultant paper tube is then placed into the retort (6.1.4) and is
surrounded by the coal after loading.
5.4 Refractory round pad. Heat resistant refractory ceramic pads or other refractory and porous
pads, with thickness of 0,5 mm to 1,0 mm and diameter of 59 mm for use on the top and bottom of the
coal sample in the retort (6.1.4). The pads can be made by manual or mechanical means. Each base pad
requires a hole to allow the thermocouple tube (6.1.6) to fit through and a mark corresponding the
probe hole of the pressure plate. Each top pad requires two holes, one to allow the thermocouple tube
to fit through and one to allow the paper tube to fit through (see Figure 1).
Dimensions in millimetres
Key
1 top pad
2 base pad
Figure 1 — Refractory round pad
5.5 Abrasive cloth. Emery cloth P80 grade is suitable for removing coke residue from the retort
(6.1.4) and associated components.
5.6 Displacement curve recording paper. A type of standard millimetre coordinate paper, with a
height the same as the height of rotary drum (6.1.8) and length is slightly longer than the perimeter of
the rotary drum.
5.7 Ceramic cord and ceramic wool
6 Apparatus
6.1 Plastometric apparatus
Typically, two types of manual plastometers are used in daily analysis of plastometric indices, one of
which is with a balance mass (see Figure 2), the other is without a balance mass (the setup is the same
as Figure 2 except without the balance masses).
The pressure applied to the cross section of the loaded coal sample during the measurement of the
4 2
plastometric indices shall be 9,8 ×10 Pa (1 kg/cm ).
The pressure cross section on the loaded coal sample should be checked when the apparatus is newly
purchased, moved to a new location OR when major parts have been replaced. Annex B provides
guidance on how to check the cross-sectional load on the coal sample.
Key
1 pedestal 14 lever
2 horizontal screws 15 probe
3 upright column 16 pressure plate
4 refractory pad 17 articulated joint
5 lower brick layer 18 direction control panel
6 connecting clamp 19 direction pillar
7 silicon carbide rod 20 masses hook
8 upper brick layer 21 recording pen
9 retort 22 rotary drum (with a clockwork)
10 thermocouple tube 23 rotary drum support
11 steel clamping bar 24 loaded masses
12 balance masses 25 set screw
13 connecting shaft
Figure 2 — Schematic of a plastometric apparatus with balance masses
6.1.1 Electric Furnace
The furnace shall consist of two layers of rectangular furnace firebricks, each measuring 200 mm ×
290 mm × 110 mm. The lower layer has a longitudinal groove to allow for visual inspection, and four
latitudinal grooves that support the four heating elements. The upper firebrick layer sits over the lower
firebrick layer and has two cylindrical holes that accommodate the retorts (6.1.4). The upper firebricks
(Figure 3) surface shall be flat and very carefully positioned, to ensure the alignment of the rolling
paper tube, relative to the probe.
NOTE Typically the furnace firebrick has a refractoriness of 1 670 °C to 1 710 °C, in which the content of
Al O is not less than 40 %, and appearance porosity is not more than 26 %. Other refractory bricks can be used
2 3
provided the furnace can achieve these temperature specifications
Dimensions in millimetres
Key
1 upper firebrick layer
2 lower firebrick layer
Figure 3 — Sketch of electric furnace fire bricks
6.1.2 Heating elements
There are four silicon carbide elements each protected by a quartz glass tube of 200 mm × 20 mm. The
difference of resistance between the two series elements under each retort (6.1.4) is not more than
0,5 Ω. The elements shall have a resistance of 6 Ω to 8 Ω with an active length of 150 mm and diameter
of 8 mm, providing a limiting incandescence temperature of up to 1 200 °C to 1 400 °C. The length of
the cold end should be 60 mm long and diameter of 16 mm. The incandescence intensity of the heating
elements decreases at a distance of 15 mm from the cold end. The resistance of the heating elements
shall be checked at time intervals to ensure compliance with these temperature specifications.
NOTE Heating elements made from different materials can be used provided they can achieve these
temperature specifications.
6.1.3 Pressure lever assembly
The pressure lever assembly consists of lever, loaded masses and horizontal adjustor as shown in
Figure 2.
6.1.4 Retort
Component parts made with steel conforming to C45E4 in ISO 683-1 shall consist of 6.1.4.1 to 6.1.4.3.
6.1.4.1 Retort body
Specifications are shown in Figure 4. The external diameter is 70 mm. The height from the inside base
of the retort bottom to the top of the retort body shall be 110 mm. The retort body shall be tapered,
the internal diameter at the bottom shall be 59 mm and the internal diameter, at a height 50 mm from
the bottom and top, shall be 60 mm. The inner wall of the body should be smooth without scratches
and/or dents. The internal diameter of the working range of the retort body shall be measured for
conformance to specifications every 50 determinations. To check the diameter, measure six points
(every 10 mm from bottom) on the retort body. The variations between the average results of 6 points
and the average diameter (59,5 mm) should be within 0,5 mm. The gap between the retort base and
retort body should also not be more than 0,5 mm.
Dimensions in millimetres
Key
1 retort body
2 retort base
3 thin steel rod
4 thermocouple tube
5 steel clamping bar
6 screws for steel clamping bar
a
22 holes ϕ2.
Figure 4 — Retort body and other accessories
6.1.4.2 Retort base
Specifications and layout of gas ventilation holes are shown in Figure 5.
Dimensions in millimetres
a
These two holes are symmetrically on the opposite sides of the centre line at a distance of 11,5 mm and other
holes are equidistant.
b
22 holes ϕ2.
Figure 5 — retort base
6.1.4.3 Pressure plate
There is a 5 mm thick refractory insulating fibre disc between the upper and lower pressure discs of
the pressure plate. The dimensions and layout of 16 gas ventilation holes are shown in Figure 6.
Dimensions in millimetres
a
16 through holes ϕ2.
b
4 rivets.
Figure 6 — Pressure plate
6.1.5 Thermocouples
The thermocouple should be made from nickel-chromium and nickel-aluminium or nickel-chromium
and nickel-silicon. The thermocouple and associated temperature measurement system shall be
checked on a yearly basis to ensure accuracy of measurement.
NOTE Thermocouples made from different materials can be used provided they can achieve these
temperature specifications.
6.1.6 Thermocouple tube
A hollow, stainless steel tube, closed at one end, that sits in the retort base (6.1.4.2), used to house the
thermocouple. The dimensions are shown in Figure 4. Inspect the condition of the well frequently and
after 100 tests to check that it has not corroded.
6.1.7 Probe
An example of probes is shown in Figure 7. The probe consists of a steel needle fixed with a rod on the
top and a movable aluminium graduated scale. The steel needle with a rounded blunt end is 1 mm in
diameter. The minimum division value of the graduated scale is 1 mm. The scale marks with a thickness
of 0,1 mm to 0,2 mm should be straight and distinct.
The pointer should indicate the zero marks when measuring the bottom of the paper tube placed in
a loaded retort before testing. Before each test, the probe shall be cleaned and checked to ensure it is
straight. If it is not, it shall be replaced.
Dimensions in millimetres
Key
1 an aluminium graduated scale
2 pointer
3 steel needle
Figure 7 — An example of probes
6.1.8 Recording device
If a recording rotary drum with a clockwork is used, the rotary drum should operate at a smooth and
constant speed to ensure the recording pen is capable of drawing a line with a length of 160 mm ± 2 mm
over a period of 160 min. The rotating speed of the drum should be verified regularly to ensure it meets
these requirements. During verification, the segment length drawn in the period of at least 80 min
should be measured. Adjust the rotating speed of the drum to meet these requirements. Other types of
recorders can also be used.
6.2 Programmed temperature controller
The furnace shall be heated electrically with automatic controls to ensure a heating rate of 8 °C/min
until furnace temperature is 250 °C, after which the heating rate shall be 3,0 °C/min ± 0,1 °C/min from
250 °C to 730 °C.
The difference between the displayed temperature and the target temperature is not more than 5 °C
from 350 °C to 600 °C and 10 °C for other periods. The temperature is measured with the thermocouple
positioned in the thermocouple tube (6.1.6) in the retort (6.1.4).
6.3 Exhaust device
This device is used to exhaust fumes generated during measurement.
6.4 Mass measurement device
The mass measurement device is a top loading balance with a resolution of 0,1 % or less relative to the
test portion mass.
6.5 Spirit level gauge
The spirit leve
...


Questions, Comments and Discussion
Ask us and Technical Secretary will try to provide an answer. You can facilitate discussion about the standard in here.
Loading comments...