ISO 15590-1:2001
(Main)Petroleum and natural gas industries — Induction bends, fittings and flanges for pipeline transportation systems — Part 1: Induction bends
Petroleum and natural gas industries — Induction bends, fittings and flanges for pipeline transportation systems — Part 1: Induction bends
Industries du pétrole et du gaz naturel — Coudes d'induction, raccords et brides pour systèmes de transport par conduites — Partie 1: Coudes d'induction
General Information
- Status
- Withdrawn
- Publication Date
- 23-May-2001
- Withdrawal Date
- 23-May-2001
- Technical Committee
- ISO/TC 67/SC 2 - Pipeline transportation systems
- Drafting Committee
- ISO/TC 67/SC 2/WG 10 - Pipeline flanges, fittings and shopbends
- Current Stage
- 9599 - Withdrawal of International Standard
- Start Date
- 09-Nov-2009
- Completion Date
- 12-Feb-2026
Relations
- Effective Date
- 15-Apr-2008
Get Certified
Connect with accredited certification bodies for this standard

ABS Quality Evaluations Inc.
American Bureau of Shipping quality certification.

Element Materials Technology
Materials testing and product certification.

ABS Group Brazil
ABS Group certification services in Brazil.
Sponsored listings
Frequently Asked Questions
ISO 15590-1:2001 is a standard published by the International Organization for Standardization (ISO). Its full title is "Petroleum and natural gas industries — Induction bends, fittings and flanges for pipeline transportation systems — Part 1: Induction bends". This standard covers: Petroleum and natural gas industries — Induction bends, fittings and flanges for pipeline transportation systems — Part 1: Induction bends
Petroleum and natural gas industries — Induction bends, fittings and flanges for pipeline transportation systems — Part 1: Induction bends
ISO 15590-1:2001 is classified under the following ICS (International Classification for Standards) categories: 75.200 - Petroleum products and natural gas handling equipment. The ICS classification helps identify the subject area and facilitates finding related standards.
ISO 15590-1:2001 has the following relationships with other standards: It is inter standard links to ISO 15590-1:2009. Understanding these relationships helps ensure you are using the most current and applicable version of the standard.
ISO 15590-1:2001 is available in PDF format for immediate download after purchase. The document can be added to your cart and obtained through the secure checkout process. Digital delivery ensures instant access to the complete standard document.
Standards Content (Sample)
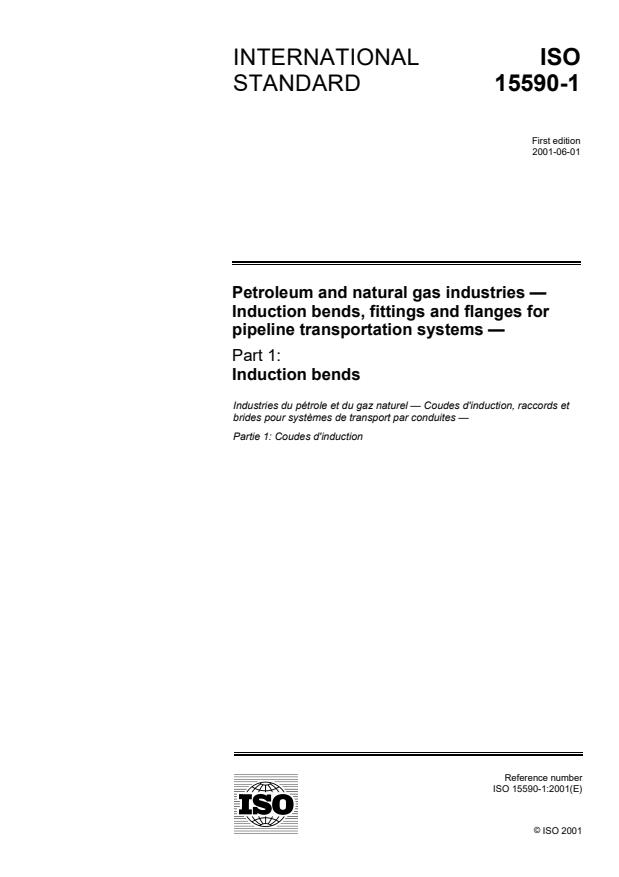
INTERNATIONAL ISO
STANDARD 15590-1
First edition
2001-06-01
Petroleum and natural gas industries —
Induction bends, fittings and flanges for
pipeline transportation systems —
Part 1:
Induction bends
Industries du pétrole et du gaz naturel — Coudes d'induction, raccords et
brides pour systèmes de transport par conduites —
Partie 1: Coudes d'induction
Reference number
©
ISO 2001
PDF disclaimer
This PDF file may contain embedded typefaces. In accordance with Adobe's licensing policy, this file may be printed or viewed but shall not
be edited unless the typefaces which are embedded are licensed to and installed on the computer performing the editing. In downloading this
file, parties accept therein the responsibility of not infringing Adobe's licensing policy. The ISO Central Secretariat accepts no liability in this
area.
Adobe is a trademark of Adobe Systems Incorporated.
Details of the software products used to create this PDF file can be found in the General Info relative to the file; the PDF-creation parameters
were optimized for printing. Every care has been taken to ensure that the file is suitable for use by ISO member bodies. In the unlikely event
that a problem relating to it is found, please inform the Central Secretariat at the address given below.
All rights reserved. Unless otherwise specified, no part of this publication may be reproduced or utilized in any form or by any means, electronic
or mechanical, including photocopying and microfilm, without permission in writing from either ISO at the address below or ISO's member body
in the country of the requester.
ISO copyright office
Case postale 56 � CH-1211 Geneva 20
Tel. + 41 22 749 01 11
Fax + 41 22 749 09 47
E-mail copyright@iso.ch
Web www.iso.ch
Printed in Switzerland
ii © ISO 2001 – All rights reserved
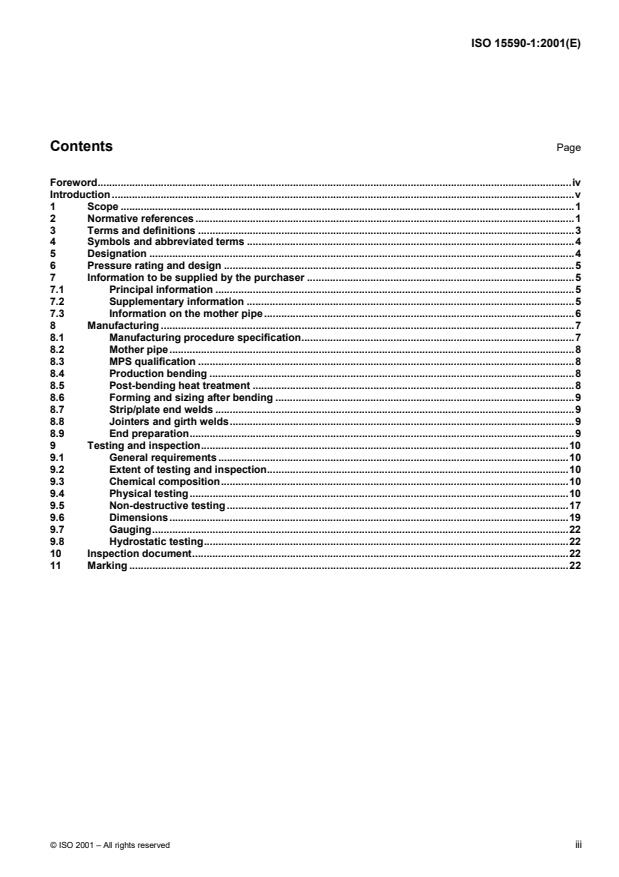
Contents Page
Foreword.iv
Introduction.v
1 Scope .1
2 Normative references .1
3 Terms and definitions .3
4 Symbols and abbreviated terms .4
5 Designation .4
6 Pressure rating and design .5
7 Information to be supplied by the purchaser .5
7.1 Principal information .5
7.2 Supplementary information .5
7.3 Information on the mother pipe.6
8 Manufacturing .7
8.1 Manufacturing procedure specification.7
8.2 Mother pipe.8
8.3 MPS qualification .8
8.4 Production bending .8
8.5 Post-bending heat treatment .8
8.6 Forming and sizing after bending .9
8.7 Strip/plate end welds .9
8.8 Jointers and girth welds.9
8.9 End preparation.9
9 Testing and inspection.10
9.1 General requirements .10
9.2 Extent of testing and inspection.10
9.3 Chemical composition.10
9.4 Physical testing.10
9.5 Non-destructive testing .17
9.6 Dimensions.19
9.7 Gauging.22
9.8 Hydrostatic testing.22
10 Inspection document.22
11 Marking .22
Foreword
ISO (the International Organization for Standardization) is a worldwide federation of national standards bodies (ISO
member bodies). The work of preparing International Standards is normally carried out through ISO technical
committees. Each member body interested in a subject for which a technical committee has been established has
the right to be represented on that committee. International organizations, governmental and non-governmental, in
liaison with ISO, also take part in the work. ISO collaborates closely with the International Electrotechnical
Commission (IEC) on all matters of electrotechnical standardization.
International Standards are drafted in accordance with the rules given in the ISO/IEC Directives, Part 3.
Draft International Standards adopted by the technical committees are circulated to the member bodies for voting.
Publication as an International Standard requires approval by at least 75 % of the member bodies casting a vote.
Attention is drawn to the possibility that some of the elements of this part of ISO 15590 may be the subject of
patent rights. ISO shall not be held responsible for identifying any or all such patent rights.
International Standard ISO 15590-1 was prepared by Technical Committee ISO/TC 67, Materials, equipment and
offshore structures for petroleum and natural gas industries, Subcommittee SC 2, Pipeline transportation systems.
ISO 15590 consists of the following parts, under the general title Petroleum and natural gas industries — Induction
bends, fittings and flanges for pipeline transportation systems:
� Part 1: Induction bends
� Part 2: Fittings
� Part 3: Flanges
iv © ISO 2001 – All rights reserved
Introduction
Users of this part of ISO 15590 should be aware that further or differing requirements may be needed for individual
applications. This part of ISO 15590 is not intended to inhibit a manufacturer from offering, or the purchaser from
accepting, alternative equipment or engineering solutions for the individual application. This can be particularly
applicable where there is innovative or developing technology. Where an alternative is offered, the manufacturer
should identify any variations from this part of ISO 15590 and provide details.
INTERNATIONAL STANDARD ISO 15590-1:2001(E)
Petroleum and natural gas industries — Induction bends, fittings
and flanges for pipeline transportation systems —
Part 1:
Induction bends
1 Scope
This part of ISO 15590 specifies the technical delivery conditions for bends made by the induction bending process
for use in pipeline transportation systems for the petroleum and natural gas industries as defined in ISO 13623.
This part of ISO 15590 is applicable to induction bends made from seamless and welded pipe of unalloyed or low-
alloy steels.
This part of ISO 15590 specifies three classes of induction bend corresponding to increasing quality requirements
in accordance with the technical delivery conditions of ISO 3183 for pipe as indicated in Table 1 (see also
ISO 3183-3:1999, Introduction).
Table 1 — Induction bend class and corresponding pipe standard
Induction bend class Corresponding pipe standard
Class A ISO 3183-1
Class B ISO 3183-2
Class C ISO 3183-3
This part of ISO 15590 is not applicable to the selection of the induction bend class.
This part of ISO 15590 is not applicable to pipeline bends made by other manufacturing processes.
2 Normative references
The following normative documents contain provisions which, through reference in this text, constitute provisions of
this part of ISO 15590. For dated references, subsequent amendments to, or revisions of, any of these publications
do not apply. However, parties to agreements based on this International Standard are encouraged to investigate
the possibility of applying the most recent editions of the normative documents indicated below. For undated
references, the latest edition of the normative document referred to applies. Members of ISO and IEC maintain
registers of currently valid International Standards.
ISO 148, Steel — Charpy impact test (V-notch).
ISO 377, Steel and steel products — Location and preparation of samples and test pieces for mechanical testing.
ISO 783, Metallic materials — Tensile testing at elevated temperature.
ISO 2566-1, Steel — Conversion of elongation values — Part 1: Carbon and low alloy steels.
ISO 3183-1, Petroleum and natural gas industries — Steel pipe for pipelines — Technical delivery conditions —
Part 1: Pipes of requirement class A.
ISO 3183-2, Petroleum and natural gas industries — Steel pipe for pipelines — Technical delivery conditions —
Part 2: Pipes of requirement class B.
ISO 3183-3:1999, Petroleum and natural gas industries — Steel pipe for pipelines — Technical delivery
conditions — Part 3: Pipes of requirement class C.
ISO 6507-1, Metallic materials — Vickers hardness test — Part 1: Test method.
ISO 6892, Metallic materials — Tensile testing at ambient temperature.
ISO 7438, Metallic materials — Bend test.
ISO/TR 7705:1991, Guidelines for specifying Charpy V-notch impact prescriptions in steel specifications.
ISO 8501-1, Preparation of steel substrates before application of paints and related products — Visual assessment
of surface cleanliness — Part 1: Rust grades and preparation grades of uncoated steel substrates and of steel
substrates after overall removal of previous coatings.
ISO 9305, Seamless steel tubes for pressure purposes — Full peripheral ultrasonic testing for the detection of
transverse imperfections.
ISO 9712, Non-destructive testing — Qualification and certification of personnel.
ISO 10124, Seamless and welded (except submerged arc-welded) steel tubes for pressure purposes — Ultrasonic
testing for the detection of laminar imperfections.
ISO 10474, Steel and steel products — Inspection documents.
ISO 11496, Seamless and welded steel tubes for pressure purposes — Ultrasonic testing of tube ends for the
detection of laminar imperfections.
ISO 12094, Welded steel tubes for pressure purposes — Ultrasonic testing for the detection of laminar
imperfections in strips/plates used in the manufacture of welded tubes.
ISO 12095, Seamless and welded steel tubes for pressure purposes — Liquid penetrant testing.
ISO 13623, Petroleum and natural gas industries — Pipeline transportation systems.
ISO 13664, Seamless and welded steel tubes for pressure purposes — Magnetic particle inspection of the tube
ends for the detection of laminar imperfections.
ISO 13665, Seamless and welded steel tubes for pressure purposes — Magnetic particle inspection of the tube
body for the detection of surface imperfections.
ASTM E 112, Standard test methods for determining average grain size.
ASTM E 340, Standard test method for macroetching metals and alloys.
ASTM E 797, Standard practice for measuring thickness by manual ultrasonic pulse-echo contact method.
European Federation of Corrosion, Publication No. 16:1995, Guidelines on materials requirements for carbon and
low alloy steels for H S containing environments in oil and gas production.
2 © ISO 2001 – All rights reserved
3 Terms and definitions
For the purposes of this part of ISO 15590, the following terms and definitions apply.
3.1
arc
curved portion of a bend
3.2
bend angle
amount of directional change through the bend
3.3
bend radius
distance from the centre of curvature to the centreline axis of the bent pipe
3.4
by agreement
agreed between manufacturer and purchaser
3.5
extrados
outer curved section of the bend arc
3.6
heat
batch of steel prepared in one steel-making operation
3.7
induction bending
continuous bending process which utilizes induction heating to create a narrow, circumferential, heated band
around the material being bent
3.8
intrados
inner curved section of the bend arc
3.9
manufacturing procedure specification
MPS
document which specifies the properties and description of the mother pipe, the bending procedure, the post-
bending heat treatment equipment and cycle, the qualification bend testing results, the non-destructive testing
procedures and the weld end bevel details used for the manufacture of the bends
3.10
mother pipe
straight section of pipe from which an induction bend is made
3.11
tangent
straight section at the ends of an induction bend
3.12
transition zone
areas at the start and stop points of bending which include material that extends from the unheated mother pipe to
the material that has been heated to the full bending temperature
3.13
wall thinning
amount of reduction from the original wall thickness of the pipe to the wall thickness in the extrados after bending
4 Symbols and abbreviated terms
For the purpose of this part of ISO 15590, the following symbols and abbreviations apply.
A Percentage of elongation of tensile test specimen after fracture
CE Carbon equivalent
CTOD Crack tip opening displacement testing
D Specified diameter (outside or inside)
D Maximum measured diameter (outside or inside)
max
D Minimum measured diameter (outside or inside)
min
DWT Drop-weight tear testing
HAZ Heat-affected zone
HIC Hydrogen-induced cracking
HFW High-frequency welded
MT Magnetic particle testing
NDT Non-destructive testing
PT Liquid penetrant testing
R Bend centreline radius
r Mean radius of the mother pipe
R Ultimate tensile strength
m
R Yield strength for 0,5 % total elongation
t0,5
RT Radiographic testing
SAW Submerged arc welding
SAWH Helical seam SAW pipe
Initial cross-sectional area of the gauge length of a tensile test specimen
S
o
SSC Sulfide stress-cracking
T Minimum design temperature specified by the purchaser
dmin
Minimum wall thickness at the bend intrados
t
i
t Minimum wall thickness required in accordance with ISO 13623 for the straight pipe adjacent to the
min
bend
UT Ultrasonic testing
WPS Welding procedure specification
5 Designation
Designation of induction bends shall take the form IB xxx-A or B or C or CS,where:
� xxx is the specified minimum yield strength, expressed in megapascals;
� the suffix A, B, C identifies the technical delivery conditions class for induction bends in non-sour service;
� the suffix CS identifies class C bends for use in sour-service conditions.
4 © ISO 2001 – All rights reserved
6 Pressure rating and design
The hoop stress in the induction bend due to internal fluid pressure shall not exceed the hoop stress permitted in
ISO 13623 for the adjacent straight pipe.
Compliance with this requirement shall be demonstrated either by calculations or by satisfying both of the following
requirements.
a) The wall thickness of the bend extrados shall be at least t .
min
b) The wall thickness at the bend intrados shall be at least:
2R� r
tt� �
imin
2(R� r)
For pipelines not designed in accordance with ISO 13623, it may be permitted for the wall thickness of the bend
extrados to be less than t .
min
The requirements in this clause address the design of a bend against internal pressure. Other loads, both static
and dynamic, and pipeline test conditions also need to be considered by the designer to demonstrate compliance
with the strength requirements of ISO 13623.
7 Information to be supplied by the purchaser
7.1 Principal information
The purchaser shall provide the following information, in the order given below:
a) bend designation of each bend;
b) quantity of bends;
c) supply of mother pipe by the purchaser or the manufacturer;
d) required bend dimensions, including:
1) diameter (inside or outside),
2) minimum wall thickness,
3) radius,
4) bend angle,
5) tangent lengths;
e) end preparation if different from square ends.
7.2 Supplementary information
If applicable, the purchaser should specify the following supplementary information:
a) minimum design temperature;
b) maximum design temperature;
c) maximum wall thickness;
d) special dimensional requirements;
e) requirements for supplementary inspection and testing;
f) requirements for gauging and other measurements of dimensions if different from this part of ISO 15590;
g) pipeline design standard or design factors, if different from ISO 13623;
h) pipeline operating conditions;
i) whether post-bending heat treatment is to be applied;
j) mechanical property requirements at the maximum design temperature;
k) requirements for proof, burst or hydrostatic testing;
l) hold-points for witness and approval by purchaser;
m) surface condition;
n) coating or painting requirements;
o) marking requirements if different from this part of ISO 15590;
p) packaging and shipping instructions;
q) third-party inspection organization;
r) standard designation in accordance with ISO 10474 of inspection document required;
s) requirements for format and additional content of the inspection document.
7.3 Information on the mother pipe
If the mother pipe is supplied by the purchaser, the following information on the mother pipe shall be provided to
the manufacturer:
a) purchasing specification;
b) pipe diameter (inside or outside);
c) pipe wall thickness (nominal or minimum);
d) pipe lengths;
e) pipe manufacturer;
f) inspection documents with complete chemical composition, mechanical properties, results of NDT and
dimensions;
g) welding procedure specification and weld metal chemical composition for SAW and SAWH pipe;
h) weld seam repair welding procedure specification for SAW and SAWH pipe.
6 © ISO 2001 – All rights reserved
8 Manufacturing
8.1 Manufacturing procedure specification
Test bends shall be manufactured in accordance with a preliminary MPS documented before commencement of
test bending. The preliminary MPS shall be modified as necessary, based on the parameters recorded during test
bending, prior to commencing production bending. If specified by the purchaser, manufacturing shall not proceed
until the MPS has been accepted by the purchaser.
The MPS shall specify the following details.
a) Information on the mother pipe:
1) name of manufacturer;
2) steel class and name;
3) pipe forming process;
4) pipe dimensions;
5) chemical composition;
6) mechanical properties;
7) welding procedure and weld metal chemical composition for welded pipe;
8) inspection technique and reports for weld seam;
9) weld seam repair procedures;
10) heat treatment conditions.
b) Testing and inspection requirements for:
1) qualification test bend;
2) production bends.
c) Bending process details:
1) pipe cleaning method prior to bending;
2) identification of the bending machine;
3) method of temperature measurement and control during bending;
4) values of bending parameters (see Table 2);
5) heating and quenching of tangent ends.
d) Details of post-bending heat treatment:
1) type of post-bending heat treatment;
2) heating rate, soaking time and temperature, cooling rate;
3) type and location of thermocouples.
e) Sizing and rounding processes.
f) Additional purchaser requirements (such as end preparation, coating and marking).
8.2 Mother pipe
The mother pipe may be supplied by either the purchaser or the manufacturer.
If the mother pipe is supplied by the purchaser, the manufacturer should be consulted as to the required chemical
composition, properties and dimensions of the mother pipe (including seam weld and seam repair weld) regarding
suitability for induction bending.
Permissible welding processes for the mother pipe shall be as allowed in the corresponding part of ISO 3183. The
mother pipe should not contain weld repairs to the pipe body.
The wall thickness of the mother pipe shall have adequate allowance for wall thinning at the extrados due to
induction bending.
The surface of the mother pipe shall be free of contamination by low-melting temperature metals, such as copper,
brass and aluminium.
8.3 MPS qualification
Bend manufacture shall be carried out in accordance with an MPS which shall be qualified in accordance with this
clause before commencement of production.
A test bend with a sufficient arc length to allow extraction of the necessary test specimens shall be manufactured in
accordance with each preliminary MPS. The inspection and testing of the test bend shall include tangents and
transition zones if included in the produced bends.
The test bend shall be tested and inspected in accordance with clause 9.
The MPS to be used for production shall, for each of the essential variables in Table 2, specify:
� the values recorded during the manufacturing of the test bend;
� the permissible range during production bending.
The variation in essential variables shall not exceed the permissible limits shown in Table 2.
8.4 Production bending
Induction bending shall be carried out in accordance with a qualified MPS as specified in 8.3.
Interruption of the induction bending operation shall result in rejection of the bend.
8.5 Post-bending heat treatment
Post-bending heat treatment of bends is not mandatory for compliance with this part of ISO 15590.
Post-bending heat treatment may
...


Questions, Comments and Discussion
Ask us and Technical Secretary will try to provide an answer. You can facilitate discussion about the standard in here.
Loading comments...