EN 13232-7:2006
(Main)Railway applications - Track - Switches and crossings - Part 7: Crossings with moveable parts
Railway applications - Track - Switches and crossings - Part 7: Crossings with moveable parts
The scope of this part is:
¾ to establish a working terminology for crossings with moveable parts, which means crossings with moveable parts to close the gap of the running edge, and their constituent parts, and identify the main types;
¾ to list the minimum informative requirements for the manufacture of crossings with moveable parts and/or their constituent parts;
¾ to formulate codes of practice for inspection and tolerances for crossings with moveable parts and/or their constituent parts;
¾ to establish the limits and extent of supply;
¾ to list the method by which crossings with moveable parts and their constructional parts should be identified and traced;
¾ to list the different and varying ways by which crossings with moveable parts can be described, using the following parameters:
¾ geometry of crossings;
¾ types of construction;
¾ performance requirements;
¾ design criteria;
¾ tolerances and inspection.
Bahnanwendungen - Oberbau - Weichen und Kreuzungen - Teil 7: Herzstücke mit beweglichen Bauteilen
Der Anwendungsbereich dieses Teiles ist:
- eine Grundterminologie für Herzstücke mit beweglichen Bauteilen aufzustellen, das heißt, Herzstücke mit beweglichen Bauteilen, die die (führungslose) Lücke der Fahrkante zwischen den einzelnen Bauteilen schließen, und die wesentlichen Bauarten zu definieren;
- ein Minimum an informativen Erfordernissen für die Herstellung der Herzstücke mit beweglichen und/oder ihren einzelnen Bauteilen aufzustellen;
- Verfahrensweisen und Vorschriften für die Abnahme und die Toleranzen von Herzstücken mit beweglichen Bauteilen und/oder den einzelnen Bauteilen festzulegen;
- den Lieferumfang festzulegen;
- die Methodik aufzustellen, nach der Herzstücke mit beweglichen Bauteilen und/oder ihre einzelnen Bauteile gekennzeichnet und rückzuverfolgen sind;
- die unterschiedlichen Wege und Möglichkeiten aufzulisten, nach der Herzstücke mit beweglichen Bauteilen beschrieben werden können unter der Verwendung der nachfolgenden Parameter:
- Geometrie der Herzstücke;
- Bauarten der Herzstücke;
- Leistungsanforderungen;
- Konstruktions-Kriterien;
- Toleranzen und Abnahme.
Applications ferroviaires - Voie - Appareils de voie - Partie 7: Coeurs à parties mobiles
Le domaine d’application de la présente norme est :
- d’établir une terminologie pour les coeurs à parties mobiles, ce qui sous-entend les coeurs comprenant
des parties mobiles destinées à combler la lacune de la file de roulement, leurs constituants, et d’en
identifier les principaux types ;
- de lister les exigences d‘information minimale pour la fabrication des coeurs à parties mobiles et/ou leurs
constituants ;
- de formuler les règles de l’art pour le contrôle ainsi que les tolérances pour les coeurs à parties mobiles
et/ou leurs constituants ;
- d’établir les limites et extension de la fourniture ;
- de lister les méthodes d’identification et de traçabilité des coeurs à partie mobiles et leurs constituants
qu’il convient d’utiliser ;
- de lister les différentes manières permettant la description des coeurs à parties mobiles en utilisant les
paramètres suivants :
- géométrie des coeurs ;
- types de construction ;
- exigences de performances ;
- critères de conception ;
- tolérances et contrôle.
Železniške naprave – Zgornji ustroj – Kretnice in križišča – 7. del: Kretniška srca s premičnimi deli
General Information
- Status
- Withdrawn
- Publication Date
- 07-Mar-2006
- Withdrawal Date
- 18-Oct-2011
- Technical Committee
- CEN/TC 256 - Railway applications
- Current Stage
- 9960 - Withdrawal effective - Withdrawal
- Start Date
- 19-Oct-2011
- Completion Date
- 19-Oct-2011
Relations
- Effective Date
- 19-Jan-2023
- Effective Date
- 28-Jan-2026
- Effective Date
- 12-Dec-2009
Get Certified
Connect with accredited certification bodies for this standard

Bureau Veritas Railway Certification
Railway and transportation certification.

Deutsch Quality Systems (India) Pvt. Ltd. (DQS India)
Subsidiary of DQS Holding GmbH, founding member of IQNet. CDSCO Notified Body.

Excellence Ireland Quality Association (EIQA)
Irish quality certification organization.
Sponsored listings
Frequently Asked Questions
EN 13232-7:2006 is a standard published by the European Committee for Standardization (CEN). Its full title is "Railway applications - Track - Switches and crossings - Part 7: Crossings with moveable parts". This standard covers: The scope of this part is: ¾ to establish a working terminology for crossings with moveable parts, which means crossings with moveable parts to close the gap of the running edge, and their constituent parts, and identify the main types; ¾ to list the minimum informative requirements for the manufacture of crossings with moveable parts and/or their constituent parts; ¾ to formulate codes of practice for inspection and tolerances for crossings with moveable parts and/or their constituent parts; ¾ to establish the limits and extent of supply; ¾ to list the method by which crossings with moveable parts and their constructional parts should be identified and traced; ¾ to list the different and varying ways by which crossings with moveable parts can be described, using the following parameters: ¾ geometry of crossings; ¾ types of construction; ¾ performance requirements; ¾ design criteria; ¾ tolerances and inspection.
The scope of this part is: ¾ to establish a working terminology for crossings with moveable parts, which means crossings with moveable parts to close the gap of the running edge, and their constituent parts, and identify the main types; ¾ to list the minimum informative requirements for the manufacture of crossings with moveable parts and/or their constituent parts; ¾ to formulate codes of practice for inspection and tolerances for crossings with moveable parts and/or their constituent parts; ¾ to establish the limits and extent of supply; ¾ to list the method by which crossings with moveable parts and their constructional parts should be identified and traced; ¾ to list the different and varying ways by which crossings with moveable parts can be described, using the following parameters: ¾ geometry of crossings; ¾ types of construction; ¾ performance requirements; ¾ design criteria; ¾ tolerances and inspection.
EN 13232-7:2006 is classified under the following ICS (International Classification for Standards) categories: 45.080 - Rails and railway components. The ICS classification helps identify the subject area and facilitates finding related standards.
EN 13232-7:2006 has the following relationships with other standards: It is inter standard links to EN 13232-7:2006+A1:2011, EN 15689:2009, EN 13232-7:2006/FprA1. Understanding these relationships helps ensure you are using the most current and applicable version of the standard.
EN 13232-7:2006 is associated with the following European legislation: EU Directives/Regulations: 93/38/EEC, 96/48/EC; Standardization Mandates: M/024, M/275. When a standard is cited in the Official Journal of the European Union, products manufactured in conformity with it benefit from a presumption of conformity with the essential requirements of the corresponding EU directive or regulation.
EN 13232-7:2006 is available in PDF format for immediate download after purchase. The document can be added to your cart and obtained through the secure checkout process. Digital delivery ensures instant access to the complete standard document.
Standards Content (Sample)
2003-01.Slovenski inštitut za standardizacijo. Razmnoževanje celote ali delov tega standarda ni dovoljeno.Railway applications - Track - Switches and crossings - Part 7: Crossings with moveable partsApplications ferroviaires - Voie - Appareils de voie - Partie 7: Coeurs a parties mobilesBahnanwendungen - Oberbau - Weichen und Kreuzungen - Teil 7: Herzstücke mit beweglichen BauteilenTa slovenski standard je istoveten z:EN 13232-7:2006SIST EN 13232-7:2006en45.080ICS:SLOVENSKI
STANDARDSIST EN 13232-7:200601-maj-2006
EUROPEAN STANDARDNORME EUROPÉENNEEUROPÄISCHE NORMEN 13232-7March 2006ICS 45.080 English VersionRailway applications - Track - Switches and crossings - Part 7:Crossings with moveable partsApplications ferroviaires - Voie - Appareils de voie - Partie7: Coeurs à parties mobilesBahnanwendungen - Oberbau - Weichen und Kreuzungen -Teil 7: Herzstücke mit beweglichen BauteilenThis European Standard was approved by CEN on 9 January 2006.CEN members are bound to comply with the CEN/CENELEC Internal Regulations which stipulate the conditions for giving this EuropeanStandard the status of a national standard without any alteration. Up-to-date lists and bibliographical references concerning such nationalstandards may be obtained on application to the Central Secretariat or to any CEN member.This European Standard exists in three official versions (English, French, German). A version in any other language made by translationunder the responsibility of a CEN member into its own language and notified to the Central Secretariat has the same status as the officialversions.CEN members are the national standards bodies of Austria, Belgium, Cyprus, Czech Republic, Denmark, Estonia, Finland, France,Germany, Greece, Hungary, Iceland, Ireland, Italy, Latvia, Lithuania, Luxembourg, Malta, Netherlands, Norway, Poland, Portugal, Romania,Slovakia, Slovenia, Spain, Sweden, Switzerland and United Kingdom.EUROPEAN COMMITTEE FOR STANDARDIZATIONCOMITÉ EUROPÉEN DE NORMALISATIONEUROPÄISCHES KOMITEE FÜR NORMUNGManagement Centre: rue de Stassart, 36
B-1050 Brussels© 2006 CENAll rights of exploitation in any form and by any means reservedworldwide for CEN national Members.Ref. No. EN 13232-7:2006: E
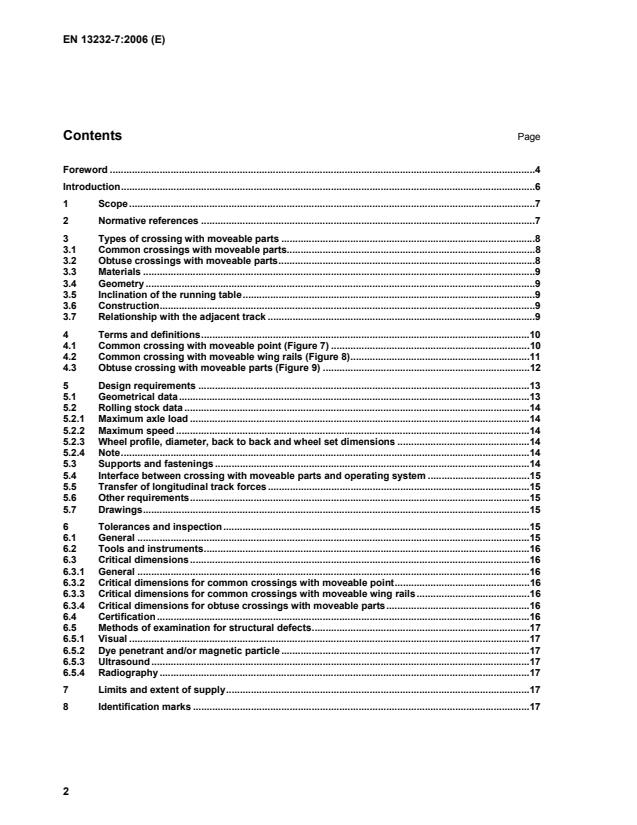
Relationship between this European Standard and the Essential Requirements of EU Directive 96/48/EC of 23 July 1996 on the interoperability of the trans-European high-speed rail system amended by Directive 2004/50/EC of 29 April 2004.63 Bibliography.65
flange way width and the check gauge if non-active checkrails are requested. 5.2.4 Note For detail requirements, see EN 13232-2 and EN 13232-3. 5.3 Supports and fastenings The relationship of the crossing to the adjacent track and the closure panel, the fastening and supporting systems shall be agreed between supplier and customer. EN 13145, EN 13146, EN 13230 and EN 13481 shall be taken into account. It shall be specified if the crossing is to be welded to the track or joined by fishplates. In the latter case, the type and details of the fishplates to be used shall be specified by the customer, i.e. section details, length, size and number of holes, bolt centre line height above base of rail and material of fishplates. The customer shall specify the details of fastenings to be used, direct or indirect.
- 1 b5 Distance between running edge to running edge at various positions (measured in the gauge reference plane) (Figure 13) ± 1 a ± 2 b b6 Crossing foot width at bearers positions (for indirect fastening) (Figure 27) For direct fastening this dimension is to be checked between the centreline of the hole for the fastening + 1
- 2 b7 Relative position foot edge / running edge at bearers positions (for indirect fastening) (Figure 27) For direct fastening this dimension is to be checked between the centreline of the hole for the fastening and the running edge ± 1 CH Contact point rail / splice rail to saddle or wing rail (Figure 21) max. 1 CH1 Contact point rail to splice rail (to be checked when the crossing is set in diverging track) (Figure 23) max. 1 CH2 Contact splice rail to extended splice rail (to be checked when the crossing is set in diverging track) (Figure 24) max. 1 CS Contact point rail to studs (Figure 19) max. 1 CS Contact splice rail to studs (Figure 20) max. 1 SR Alignment of running edge (straight track) (Figure 28) ± 1 SR Alignment of running edge (curved track) (Figure 29) ± 1 SR1 Local alignment of running edge (Straight track) (Figure 30) 0,5/1 500 SR1 Local alignment of running edge (Curved track) (Figure 30) 0,5/1 500 CP Flatness/max allowance between point rail/splice rail and base plates (Figure 22) 1 HM1 Relative position between the top of base plates and the machining reference plane (in case of a saddle) (Figure 17) ± 0,5 HM2 Relative position between the top of baseplates and the running plane (in case of a saddle) (Figure 17) ± 0,5 TF Thickness of the crossing foot (for indirect fastening) (Figure 27) ± 1 h1 Running table flatness (Figure 25) 1 h2 Intermediate running table flatness (Figure 25) 0,2/1 000 h3 Underside flatness at bearer positions, every support shall not deviate more than
1 mm from the reference plane formed between the two end bearer positions (Figure 26) 1 h4 Underside transverse flatness at bearer positions. Reference plane is formed between the two outer positions of the bearing surface (Figure 27) 1 a Monoblock crossings only. b Other then monoblock crossings. c Cast vee
± 1,5 (for temporary fishplating ± 3) SR Alignment of running edge (straight track) (Figure 28) ± 1 SR Alignment of running edge (curved track) (Figure 29) ± 1 SR1 Local alignment of running edge (straight track) (Figure 30) 0,5/1 500 SR1 Local alignment of running edge (curved track) (Figure 30) 0,5/1 500 HM Height at machined area (Figure 14 to Figure 16) ± 0,5 (+ tolerance of height of rail) TM Thickness at machined area (Figure 14 and Figure 16) ± 0,5 IM Inclination of machined area (Figure 14 to Figure 16) ± 0,5° d1 Diameter of fish bolt holes (Figure 31) + 1
- 0,5 Not shown Chamfer of holes minimum 0,5 h1 Running table flatness (Figure 25) 1 h2 Intermediate running table flatness (Figure 25) 0,2/1 000 h5 Hole position relative to rail foot (Figure 31) ± 1 Not shown Roughness of machined running surface areas Ra 6.3a a
value 6.3 given in µm
± 1,5 (for temporary fishplating ± 3) SR Alignment of running edge (straight track) (Figure 28) ± 1 SR Alignment of running edge (curved track) (Figure 29) ± 1 SR1 Local alignment of running edge (straight track) (Figure 30) 0,5/1 500 SR1 Local alignment of running edge (curved track) (Figure 30) 0,5/1 500 HM Height at machined area (Figure 18) ± 0,5 (+ tolerance of height of rail) HM1 Relative position between the top of baseplates and the machining reference plane (in case of a saddle) (Figure 17) ± 0,5 HM2 Relative position between the top of baseplates and the running plane (in case of a saddle) (Figure 17) ± 0,5 IM Inclination of machined area (Figure 17 and Figure 18) ± 0,5° d1 Diameter of fish bolt holes (Figure 31) + 1
- 0,5 Not shown Chamfer of holes minimum 0,5 h1 Running table flatness (Figure 25) 1 h2 Intermediate running table flatness (Figure 25) 0,2/1 000 h5 Hole position relative to rail foot (Figure 31) ± 1 Not shown Roughness of machined running surface areas Ra 6.3a a
value 6.3 given in µm
- 4 b4 Flange way width at drive positions (measured in the gauge reference plane) (Figure 33) + 3
- 4 b5 Distance between running edge to running edge at various positions (measured in the gauge reference plane) (Figure 33) ± 1 a ± 2 b b6 Crossing foot width at bearers positions (for indirect fastening) (Figure 41) For direct fastening this dimension is to be checked between the centreline of the hole for the fastening + 1
- 2 b7 Relative position foot edge / running edge at bearers positions (for indirect fastening) (Figure 41). For direct fastening this dimension is to be checked between the centreline of the hole for the fastening and the running edge. This dimension is to be checked in closed position ± 1 CH Contact wing rail to vee rail (Figure 36) max. 1 CS Contact wing rail stops to supporting bar (Figure 38) max. 1 SR Alignment of running edge (straight track) (Figure 42) ± 1 SR Alignment of running edge (curved track) (Figure 43) ± 1 SR1 Local alignment of running edge (straight track) (Figure 44) 0,5/1 500 SR1 Local alignment of running edge (curved track) (Figure 44) 0,5/1 500 CP Flatness/max allowance between wing rail and base plates (Figure 37) 1 TF Thickness of the crossing foot (for indirect fastening) (Figure 41) ± 1 h1 Running table flatness (Figure 39) 1 h2 Intermediate running table flatness (Figure 39) 0,2/1 000 h3 Underside flatness at bearer positions, every support shall not deviate more than 1 mm from the reference plane formed between the two end bearer positions (Figure 40) 1 h4 Underside transverse flatness at bearer positions. Reference plane is formed between the two outer positions of the bearing surface (Figure 41) 1 a Cast vee only. b Other than cast vee.
- 0,5 Not shown Chamfer of holes minimum 0,5 h1 Running table flatness (Figure 39) 1 h2 Intermediate running table flatness (Figure 39) 0,2/1 000
h5 Hole position relative to rail foot (Figure 45) ± 1 Not shown Roughness of machined running surface areas Ra 6.3a a
value 6.3 given in µm Table 7 — Critical dimensions for common crossings with moveable wing rails – Wing rail Dimensions in millimetres Dimension Description Tolerance Not shown Overall length of wing rail ± 5 Not shown Wing rail knuckle to end ± 3 l11 Hole position relative to end of rail (Figure 45) ± 1,5 (for temporary fishplating ± 3) SR Alignment of running edge (straight track) (Figure 42) ± 1 SR Alignment of running edge (curved track) (Figure 43) ± 1 SR1 Local alignment of running edge (straight track) (Figure 44) 0,5/1 500 SR1 Local alignment of running edge (curved track) (Figure 44) 0,5/1 500 HM Height at machined area (Figure 35) ± 0,5 (+ tolerance of height of rail) IM Inclination of machined area (Figure 35) ± 0,5° d1 Diameter of fish bolt holes (Figure 45) + 1
- 0,5 Not shown Chamfer of holes minimum 0,5 h1 Running table flatness (Figure 39) 1 h2 Intermediate running table flatness (Figure 39) 0,2/1 000 h5 Hole position relative to rail foot (Figure 45) ± 1 Not shown Roughness of machined running surface areas Ra 6.3a a
value 6.3 given in µm
...


Questions, Comments and Discussion
Ask us and Technical Secretary will try to provide an answer. You can facilitate discussion about the standard in here.
Loading comments...