EN 1006:2009
(Main)Advanced technical ceramics - Monolithic ceramics - Guidance on the selection of test pieces for the evaluation of properties
Advanced technical ceramics - Monolithic ceramics - Guidance on the selection of test pieces for the evaluation of properties
This European standard gives guidance on selection of test-pieces for the evaluation of properties. Important factors requiring attention in the preparation of test samples from large components or blocks of material are also described.
Hochleistungskeramik - Monolithische Keramik - Leitlinie zur Auswahl von Proben für die Beurteilung von Eigenschaften
Diese Europäische Norm gibt eine Leitlinie zur Auswahl von Proben für die Bewertung von Eigenschaften. Es werden auch auf zu achtende, wichtige Faktoren in Bezug auf die Vorbereitung von Proben, die großen Bau-teilen oder Blöcken entnommen werden, beschrieben.
Céramiques techniques avancées - Céramiques monolithiques - Guide de sélection des éprouvettes pour l'évaluation des propriétés
La présente Norme européenne fournit un guide de sélection des éprouvettes pour l’évaluation des propriétés. Elle décrit également des facteurs importants à prendre en compte lors de la préparation des échantillons pour essai prélevés sur de gros composants ou sur des blocs de matériau.
Sodobna tehnična keramika - Monolitna keramika - Navodilo za izbiro vzorcev pri vrednotenju lastnosti
General Information
- Status
- Published
- Publication Date
- 14-Jul-2009
- Withdrawal Date
- 30-Jan-2010
- Technical Committee
- CEN/TC 184 - Advanced technical ceramics
- Drafting Committee
- CEN/TC 184/WG 3 - Monolithic ceramics
- Current Stage
- 9060 - Closure of 2 Year Review Enquiry - Review Enquiry
- Start Date
- 02-Sep-2025
- Completion Date
- 02-Sep-2025
Relations
- Effective Date
- 08-Jun-2022
- Effective Date
- 28-Jan-2026
- Effective Date
- 28-Jan-2026
- Effective Date
- 28-Jan-2026
- Referred By
ENV 12923-2:2001 - Advanced technical ceramics - Monolithic ceramics - Part 2: Oxidation test - Effective Date
- 28-Jan-2026
- Effective Date
- 28-Jan-2026
- Effective Date
- 28-Jan-2026
- Effective Date
- 28-Jan-2026
- Effective Date
- 28-Jan-2026
- Effective Date
- 28-Jan-2026
- Effective Date
- 28-Jan-2026
- Effective Date
- 28-Jan-2026
Overview
EN 1006:2009 - published by CEN - provides guidance for the selection and preparation of test-pieces used to evaluate properties of advanced technical ceramics (monolithic ceramics). The standard focuses on how to obtain representative samples from batches, large components or blocks, how to account for material inhomogeneity and anisotropy, and how to treat measurement uncertainty. It is a guidance standard (does not itself define fitness-for-purpose limits) and supersedes ENV 1006:2003.
Key topics and requirements
- Selection of test-pieces: Principles for choosing representative specimens from a batch or from large units, with emphasis on random sampling and documented cutting schemes.
- Material homogeneity and anisotropy: Guidance on recognizing and accounting for variations in density, grain size and composition that can occur within or between components and affect measured properties.
- Test method accuracy and uncertainty: Consideration of measurement uncertainty when interpreting results; when test scatter approaches method uncertainty, alternative or more accurate tests should be used.
- Sampling schemes: Advice on using inspection-by-attributes (e.g., ISO 2859-1) or inspection-by-variables (e.g., ISO 3951) sampling plans, and on choosing schemes appropriate to criticality and production stability.
- Large units and cutting effects: Recommendations to agree cutting positions/methods, to record preparation details, and to account for surface “skins” or cutting-introduced flaws that may bias results.
- Evaluation criteria: Lists typical acceptance attributes (dimensions, surface defects, mechanical properties, etc.) and stresses that sampling rules and acceptance criteria should be agreed between parties.
- Mechanical proof-testing (Annex A): Informative guidance on proof testing to remove flawed units, with cautions about loading distribution, test procedures, and limitations if service degradation can change flaw distributions.
Practical applications
EN 1006:2009 is practical for:
- Quality and process engineers establishing sampling and test-piece preparation protocols for ceramic components.
- Test laboratories preparing specimens for density, strength, dielectric or surface- defect tests.
- Manufacturers and purchasers agreeing acceptance criteria and sampling plans for batches or large ceramic blocks.
- Design and reliability engineers assessing how laboratory tests relate to in-service performance.
Use cases include setting up sampling for density or flexural strength checks, defining cutting/sectioning procedures for large blanks, and implementing proof-testing programs where mechanical reliability is critical.
Related standards
- EN 843-1 / EN 843-5 (strength testing references)
- EN 623-1 / EN 623-2 / EN 623-4 (inspection and density/finish methods referenced)
- ISO 2859-1 (sampling by attributes)
- ISO 3951 (sampling by variables)
- ISO 5725, ISO 5022 (statistical and sampling references)
Keywords: EN 1006:2009, advanced technical ceramics, monolithic ceramics, test-piece selection, sampling schemes, material homogeneity, anisotropy, test method uncertainty, mechanical proof-testing, CEN.
Frequently Asked Questions
EN 1006:2009 is a standard published by the European Committee for Standardization (CEN). Its full title is "Advanced technical ceramics - Monolithic ceramics - Guidance on the selection of test pieces for the evaluation of properties". This standard covers: This European standard gives guidance on selection of test-pieces for the evaluation of properties. Important factors requiring attention in the preparation of test samples from large components or blocks of material are also described.
This European standard gives guidance on selection of test-pieces for the evaluation of properties. Important factors requiring attention in the preparation of test samples from large components or blocks of material are also described.
EN 1006:2009 is classified under the following ICS (International Classification for Standards) categories: 81.060.30 - Advanced ceramics. The ICS classification helps identify the subject area and facilitates finding related standards.
EN 1006:2009 has the following relationships with other standards: It is inter standard links to ENV 1006:2003, EN 623-1:2006, EN 623-4:2004, EN 623-5:2009, ENV 12923-2:2001, EN 14425-3:2010, EN 820-2:2003, EN 12923-1:2006, CEN/TS 14425-5:2004, EN 843-7:2010, EN 623-3:2001, EN 820-4:2009. Understanding these relationships helps ensure you are using the most current and applicable version of the standard.
EN 1006:2009 is available in PDF format for immediate download after purchase. The document can be added to your cart and obtained through the secure checkout process. Digital delivery ensures instant access to the complete standard document.
Standards Content (Sample)
2003-01.Slovenski inštitut za standardizacijo. Razmnoževanje celote ali delov tega standarda ni dovoljeno.Hochleistungskeramik - Monolithische Keramik - Leitlinie zur Auswahl von Proben für die Beurteilung von EigenschaftenCéramiques techniques avancées - Céramiques monolithiques - Guide de sélection des éprouvettes pour l'évaluation des propriétésAdvanced technical ceramics - Monolithic ceramics - Guidance on the selection of test pieces for the evaluation of properties81.060.30Sodobna keramikaAdvanced ceramicsICS:Ta slovenski standard je istoveten z:EN 1006:2009SIST EN 1006:2009en,fr,de01-november-2009SIST EN 1006:2009SLOVENSKI
STANDARDSIST ENV 1006:20041DGRPHãþD
EUROPEAN STANDARDNORME EUROPÉENNEEUROPÄISCHE NORMEN 1006July 2009ICS 81.060.30Supersedes ENV 1006:2003
English VersionAdvanced technical ceramics - Monolithic ceramics - Guidanceon the selection of test pieces for the evaluation of propertiesCéramiques techniques avancées - Céramiquesmonolithiques - Guide de sélection des éprouvettes pourl'évaluation des propriétésHochleistungskeramik - Monolithische Keramik - Leitliniezur Auswahl von Proben für die Beurteilung vonEigenschaftenThis European Standard was approved by CEN on 19 June 2009.CEN members are bound to comply with the CEN/CENELEC Internal Regulations which stipulate the conditions for giving this EuropeanStandard the status of a national standard without any alteration. Up-to-date lists and bibliographical references concerning such nationalstandards may be obtained on application to the CEN Management Centre or to any CEN member.This European Standard exists in three official versions (English, French, German). A version in any other language made by translationunder the responsibility of a CEN member into its own language and notified to the CEN Management Centre has the same status as theofficial versions.CEN members are the national standards bodies of Austria, Belgium, Bulgaria, Cyprus, Czech Republic, Denmark, Estonia, Finland,France, Germany, Greece, Hungary, Iceland, Ireland, Italy, Latvia, Lithuania, Luxembourg, Malta, Netherlands, Norway, Poland, Portugal,Romania, Slovakia, Slovenia, Spain, Sweden, Switzerland and United Kingdom.EUROPEAN COMMITTEE FOR STANDARDIZATIONCOMITÉ EUROPÉEN DE NORMALISATIONEUROPÄISCHES KOMITEE FÜR NORMUNGManagement Centre:
Avenue Marnix 17,
B-1000 Brussels© 2009 CENAll rights of exploitation in any form and by any means reservedworldwide for CEN national Members.Ref. No. EN 1006:2009: ESIST EN 1006:2009
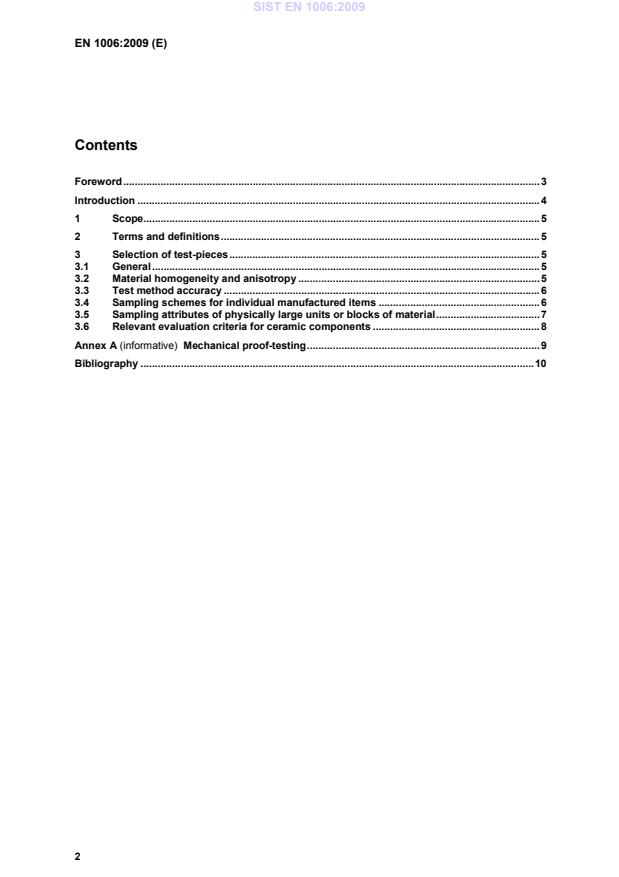
2 Contents Foreword . 3 Introduction . 4 1 Scope. 5 2 Terms and definitions . 5 3 Selection of test-pieces . 5 3.1 General . 5 3.2 Material homogeneity and anisotropy . 5 3.3 Test method accuracy . 6 3.4 Sampling schemes for individual manufactured items . 6 3.5 Sampling attributes of physically large units or blocks of material . 7 3.6 Relevant evaluation criteria for ceramic components . 8 Annex A (informative)
Mechanical proof-testing . 9 Bibliography . 10 SIST EN 1006:2009
3Foreword This document (EN 1006:2009) has been prepared by Technical Committee CEN/TC 184 “Advanced technical ceramics”, the secretariat of which is held by BSI. This European Standard shall be given the status of a national standard, either by publication of an identical text or by endorsement, at the latest by January 2010, and conflicting national standards shall be withdrawn at the latest by January 2010. Attention is drawn to the possibility that some of the elements of this document may be the subject of patent rights. CEN [and/or CENELEC] shall not be held responsible for identifying any or all such patent rights. This document supersedes ENV 1006:2003. According to the CEN/CENELEC Internal Regulations, the national standards organizations of the following countries are bound to implement this European Standard: Austria, Belgium, Bulgaria, Cyprus, Czech Republic, Denmark, Estonia, Finland, France, Germany, Greece, Hungary, Iceland, Ireland, Italy, Latvia, Lithuania, Luxembourg, Malta, Netherlands, Norway, Poland, Portugal, Romania, Slovakia, Slovenia, Spain, Sweden, Switzerland and the United Kingdom. .SIST EN 1006:2009
4 Introduction Advanced technical ceramics have a wide range of applications and functions and, in the as-manufactured condition, have characteristics which require inspection by a variety of techniques not commonly adopted for other classes of material, e.g. mechanical proof testing. SIST EN 1006:2009
51 Scope This European standard gives guidance on selection of test-pieces for the evaluation of properties. Important factors requiring attention in the preparation of test samples from large components or blocks of material are also described. 2 Terms and definitions For the purposes of this European standard, the following terms and definitions apply. 2.1 batch population of manufactured units of a single type, grade, size and composition, manufactured under essentially the same conditions at the same time, from which a sample is to be taken for inspection and/or testing to determine the conformance with acceptability criteria NOTE Sometimes referred to as a 'lot'. 2.2 sample sample consists of one or more manufactured units taken from a batch, these being selected at random without regard for their quality 2.3 sample size number of units in a sample 3 Selection of test-pieces 3.1 General The basis of any inspection of any material or batch of manufactured units is to obtain sound information on their fitness for purpose (quality). Advanced technical ceramics are diverse in material, format and application as are the methods devised to test their fitness for purpose. Before arranging any inspection or testing scheme it is wise to consider in depth the nature of the material, its final format in relation to test-pieces required for tests, the accuracy of test methods and the failure criticality in its application. NOTE It is not the purpose of this European standard to define criteria for fitness for purpose. This is subject to agreement between parties. 3.2 Material homogeneity and anisotropy 3.2.1 Most advanced technical ceramic materials are made by powder technology processes involving the formation of a rigidized powder mass (e.g. pressing, slip casting, etc.) before subjecting this to a densification process (e.g. sintering, reaction bonding, hot pressing). The homogeneity and isotropy of the rigidized powder mass and the control imposed during the subsequent densification process can exert a considerable influence on the homogeneity of the final densified product. Consequently, attributes can vary from one place to another within a component or between components of the same batch.
3.2.2 One of the principal sources of a variation of attributes is density, arising from inhomogeneity of unfired (green) density, which has a subsequent significant effect on many mechanical properties. Large localised variations in unfired density are usually manifest as excessive distortion in firing, porous regions, or cracking. Other varying attributes are grain size (usually resulting from varying heat SIST EN 1006:2009
6 treatment conditions between components) and chemical composition (usually resulting from inhomogeneous interaction between initial powder particles or between particles and the atmosphere, perhaps involving the migration of species).
3.2.3 Material inhomogeneity is most prevalent in large components or blocks of material, or in components requiring special firing conditions. It is frequently met with during material development, but is usually minimised during commercial product development.
Material anisotropy is sometimes encountered in materials which have some form of directional microstructure. This may result, for example, from a combination of the initial powder particle shape and the rigidizing process to make a green shape, or during firing if uniaxial hot pressing is employed. Attributes subsequently determined can be dependent on the direction in which a test-piece is cut and in which the property or characteristic is determined. 3.3 Test method accuracy 3.3.1 Most test methods specifically developed for advanced technical ceramics have associated with them a possible uncertainty of result determined by the accuracy of individual contributions from each parameter involved in the measurement. The potential uncertainties arising shall be taken into account when examining the consistency of a parameter within a batch of units or between batches, or examining whether it meets a given specification level. 3.3.2 It should be noted that in cases where the scatter of results of a test is similar to or less than that attributable to the accuracy of test method, the test is clearly unable to distinguish between individual test-pieces or samples. An improvement of the accuracy level of the chosen test or an alternative test method should be sought.
3.3.3 Certain tests for advanced technical ceramics produce a wide scatter of results as a consequence, for example, of the influence of occasional flaws or other defects, e.g. a strength test or dielectric breakdown test. The results from such tests shall be treated statistically (see e.g. EN 843-5 for strength tests), and the confidence level of the mean result or other parameters should be calculated such that the degree of discrimination between results from different batches, or between a set of results and a specification value, is clearly understood. 3.4 Sampling schemes for individual manufactured items 3.4.1 Sampling schemes are conventionally divided into those for inspection by attributes, e.g. ISO 2859-1, or by variables, e.g. ISO 3951 (all parts).
NOTE See the Bibliography for these and other ISO standards on statistics. The selection of an appropriate scheme should be subject to agreement between parties. 3.4.2 Inspection by attributes consists of examining a sampled unit and deciding whether or not it achieves an appropriate criterion. A decision on the fitness for purpose of a batch is by counting the number of non-achieving units in the batch sample. An example might be the presence of cracks (see EN 623-1) or surface b
...


Questions, Comments and Discussion
Ask us and Technical Secretary will try to provide an answer. You can facilitate discussion about the standard in here.
Loading comments...