ASTM E77-98
(Test Method)Standard Test Method for Inspection and Verification of Thermometers
Standard Test Method for Inspection and Verification of Thermometers
SCOPE
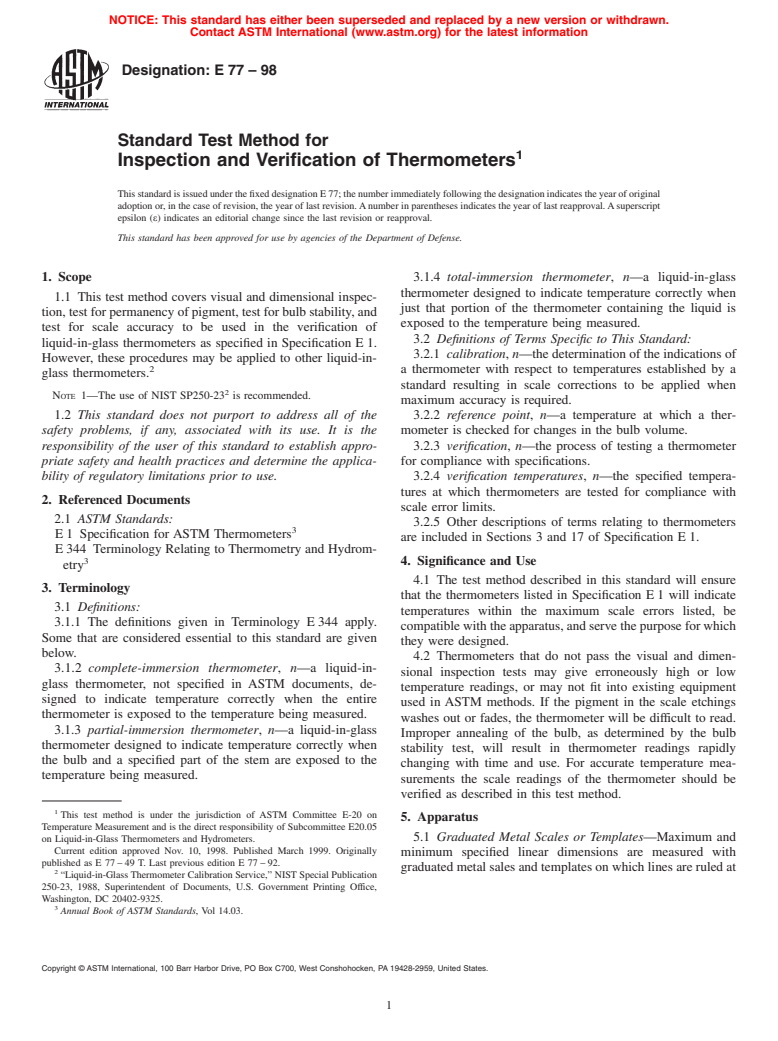
1.1 This test method covers visual and dimensional inspection, test for permanency of pigment, test for bulb stability, and test for scale accuracy to be used in the verification of liquid-in-glass thermometers as specified in Specification E1. However, these procedures may be applied to other liquid-in-glass thermometers. Note 1-The use of NIST SP250-23 is recommended.
1.2 This standard does not purport to address all of the safety problems, if any, associated with its use. It is the responsibility of the user of this standard to establish appropriate safety and health practices and determine the applicability of regulatory limitations prior to use.
General Information
Relations
Standards Content (Sample)
NOTICE: This standard has either been superseded and replaced by a new version or withdrawn.
Contact ASTM International (www.astm.org) for the latest information
Designation: E 77 – 98
Standard Test Method for
1
Inspection and Verification of Thermometers
ThisstandardisissuedunderthefixeddesignationE77;thenumberimmediatelyfollowingthedesignationindicatestheyearoforiginal
adoptionor,inthecaseofrevision,theyearoflastrevision.Anumberinparenthesesindicatestheyearoflastreapproval.Asuperscript
epsilon (ε) indicates an editorial change since the last revision or reapproval.
This standard has been approved for use by agencies of the Department of Defense.
1. Scope 3.1.4 total-immersion thermometer, n—a liquid-in-glass
thermometer designed to indicate temperature correctly when
1.1 This test method covers visual and dimensional inspec-
just that portion of the thermometer containing the liquid is
tion,testforpermanencyofpigment,testforbulbstability,and
exposed to the temperature being measured.
test for scale accuracy to be used in the verification of
3.2 Definitions of Terms Specific to This Standard:
liquid-in-glass thermometers as specified in Specification E1.
3.2.1 calibration, n—thedeterminationoftheindicationsof
However, these procedures may be applied to other liquid-in-
2
a thermometer with respect to temperatures established by a
glass thermometers.
standard resulting in scale corrections to be applied when
2
NOTE 1—The use of NIST SP250-23 is recommended.
maximum accuracy is required.
1.2 This standard does not purport to address all of the 3.2.2 reference point, n—a temperature at which a ther-
safety problems, if any, associated with its use. It is the mometer is checked for changes in the bulb volume.
responsibility of the user of this standard to establish appro- 3.2.3 verification, n—the process of testing a thermometer
priate safety and health practices and determine the applica- for compliance with specifications.
bility of regulatory limitations prior to use. 3.2.4 verification temperatures, n—the specified tempera-
tures at which thermometers are tested for compliance with
2. Referenced Documents
scale error limits.
2.1 ASTM Standards:
3.2.5 Other descriptions of terms relating to thermometers
3
E1 Specification for ASTM Thermometers
are included in Sections 3 and 17 of Specification E1.
E344 Terminology Relating to Thermometry and Hydrom-
3
4. Significance and Use
etry
4.1 The test method described in this standard will ensure
3. Terminology
that the thermometers listed in Specification E1 will indicate
3.1 Definitions:
temperatures within the maximum scale errors listed, be
3.1.1 The definitions given in Terminology E344 apply.
compatiblewiththeapparatus,andservethepurposeforwhich
Some that are considered essential to this standard are given
they were designed.
below.
4.2 Thermometers that do not pass the visual and dimen-
3.1.2 complete-immersion thermometer, n—a liquid-in-
sional inspection tests may give erroneously high or low
glass thermometer, not specified in ASTM documents, de-
temperature readings, or may not fit into existing equipment
signed to indicate temperature correctly when the entire
used in ASTM methods. If the pigment in the scale etchings
thermometer is exposed to the temperature being measured.
washes out or fades, the thermometer will be difficult to read.
3.1.3 partial-immersion thermometer, n—a liquid-in-glass
Improper annealing of the bulb, as determined by the bulb
thermometer designed to indicate temperature correctly when
stability test, will result in thermometer readings rapidly
the bulb and a specified part of the stem are exposed to the
changing with time and use. For accurate temperature mea-
temperature being measured.
surements the scale readings of the thermometer should be
verified as described in this test method.
1
This test method is under the jurisdiction of ASTM Committee E-20 on
5. Apparatus
Temperature Measurement and is the direct responsibility of Subcommittee E20.05
5.1 Graduated Metal Scales or Templates—Maximum and
on Liquid-in-Glass Thermometers and Hydrometers.
Current edition approved Nov. 10, 1998. Published March 1999. Originally
minimum specified linear dimensions are measured with
published as E 77–49 T. Last previous edition E 77–92.
graduatedmetalsalesandtemplatesonwhichlinesareruledat
2
“Liquid-in-GlassThermometer Calibration Service,” NISTSpecial Publication
250-23, 1988, Superintendent of Documents, U.S. Government Printing Office,
Washington, DC 20402-9325.
3
Annual Book of ASTM Standards, Vol 14.03.
Copyright © ASTM International, 100 Barr Harbor Drive, PO Box C700, West Conshohocken, PA 19428-2959, United States.
1
---------------------- Page: 1 ----------------------
E77–98
suitable distances from reference points corresponding to the examples of the type of equipment that has been found to be
maximumandminimumvaluesoftheseveralspecifieddimen- suitable for this purpose.
sions. 5.6 Primary Standard Thermometer—The primary standard
thermometer in th
...


Questions, Comments and Discussion
Ask us and Technical Secretary will try to provide an answer. You can facilitate discussion about the standard in here.