ASTM E572-94(2000)e1
(Test Method)Standard Test Method for X-Ray Emission Spectrometric Analysis of Stainless Steel
Standard Test Method for X-Ray Emission Spectrometric Analysis of Stainless Steel
SCOPE
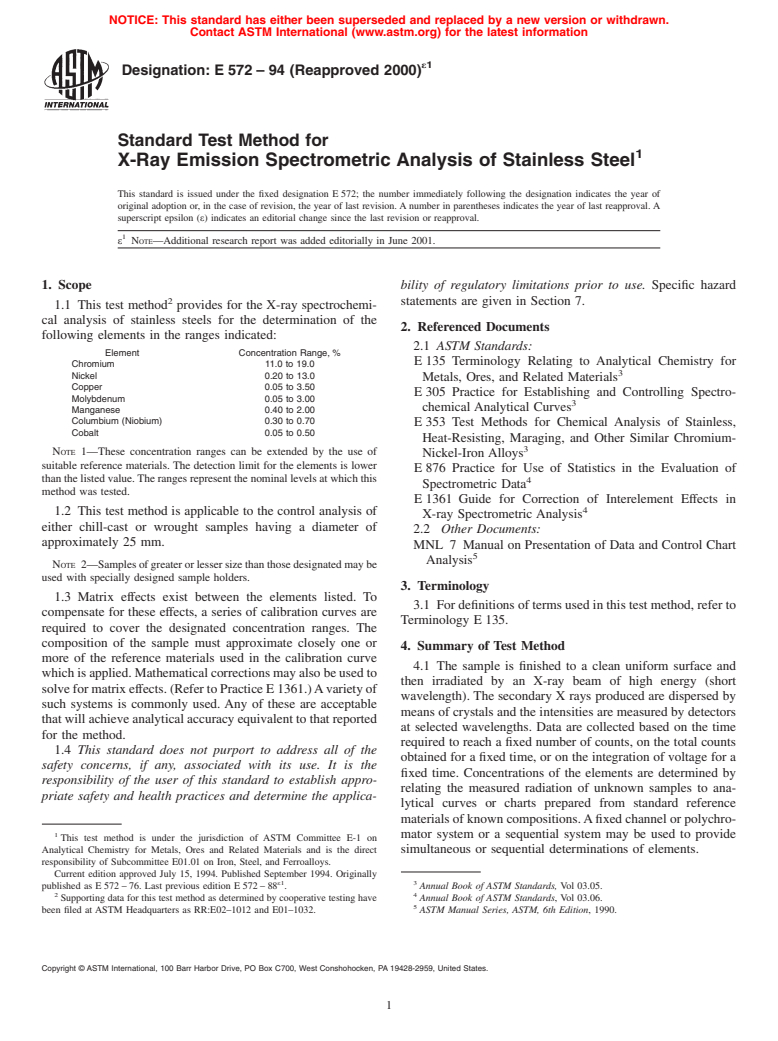
1.1 This test method provides for the X-ray spectrochemical analysis of stainless steels for the determination of the following elements in the ranges indicated:ElementConcentration Range, %Chromium11.0 to 19.0Nickel0.20 to 13.0Copper0.05 to 3.50Molybdenum0.05 to 3.00Manganese0.40 to 2.00Columbium (Niobium)0.30 to 0.70Cobalt0.05 to 0.50
Note 1--These concentration ranges can be extended by the use of suitable reference materials. The detection limit for the elements is lower than the listed value. The ranges represent the nominal levels at which this method was tested.
1.2 This test method is applicable to the control analysis of either chill-cast or wrought samples having a diameter of approximately 25 mm.
Note 2--Samples of greater or lesser size than those designated may be used with specially designed sample holders.
1.3 Matrix effects exist between the elements listed. To compensate for these effects, a series of calibration curves are required to cover the designated concentration ranges. The composition of the sample must approximate closely one or more of the reference materials used in the calibration curve which is applied. Mathematical corrections may also be used to solve for matrix effects. (Refer to Practice E1361.) A variety of such systems is commonly used. Any of these are acceptable that will achieve analytical accuracy equivalent to that reported for the method.
1.4 This standard does not purport to address all of the safety concerns, if any, associated with its use. It is the responsibility of the user of this standard to establish appropriate safety and health practices and determine the applicability of regulatory limitations prior to use. Specific hazard statements are given in Section 7.
General Information
Relations
Standards Content (Sample)
NOTICE: This standard has either been superseded and replaced by a new version or withdrawn.
Contact ASTM International (www.astm.org) for the latest information
ε1
Designation:E572–94 (Reapproved 2000)
Standard Test Method for
X-Ray Emission Spectrometric Analysis of Stainless Steel
This standard is issued under the fixed designation E 572; the number immediately following the designation indicates the year of
original adoption or, in the case of revision, the year of last revision. A number in parentheses indicates the year of last reapproval. A
superscript epsilon (ε) indicates an editorial change since the last revision or reapproval.
ε NOTE—Additional research report was added editorially in June 2001.
1. Scope bility of regulatory limitations prior to use. Specific hazard
2 statements are given in Section 7.
1.1 This test method provides for the X-ray spectrochemi-
cal analysis of stainless steels for the determination of the
2. Referenced Documents
following elements in the ranges indicated:
2.1 ASTM Standards:
Element Concentration Range, %
E 135 Terminology Relating to Analytical Chemistry for
Chromium 11.0 to 19.0
Nickel 0.20 to 13.0
Metals, Ores, and Related Materials
Copper 0.05 to 3.50
E 305 Practice for Establishing and Controlling Spectro-
Molybdenum 0.05 to 3.00
chemical Analytical Curves
Manganese 0.40 to 2.00
Columbium (Niobium) 0.30 to 0.70
E 353 Test Methods for Chemical Analysis of Stainless,
Cobalt 0.05 to 0.50
Heat-Resisting, Maraging, and Other Similar Chromium-
NOTE 1—These concentration ranges can be extended by the use of
Nickel-Iron Alloys
suitable reference materials. The detection limit for the elements is lower
E 876 Practice for Use of Statistics in the Evaluation of
than the listed value.The ranges represent the nominal levels at which this
Spectrometric Data
method was tested.
E 1361 Guide for Correction of Interelement Effects in
1.2 This test method is applicable to the control analysis of
X-ray Spectrometric Analysis
either chill-cast or wrought samples having a diameter of
2.2 Other Documents:
approximately 25 mm.
MNL 7 Manual on Presentation of Data and Control Chart
Analysis
NOTE 2—Samplesofgreaterorlessersizethanthosedesignatedmaybe
used with specially designed sample holders.
3. Terminology
1.3 Matrix effects exist between the elements listed. To
3.1 For definitions of terms used in this test method, refer to
compensate for these effects, a series of calibration curves are
Terminology E 135.
required to cover the designated concentration ranges. The
composition of the sample must approximate closely one or
4. Summary of Test Method
more of the reference materials used in the calibration curve
4.1 The sample is finished to a clean uniform surface and
whichisapplied.Mathematicalcorrectionsmayalsobeusedto
then irradiated by an X-ray beam of high energy (short
solveformatrixeffects.(RefertoPracticeE 1361.)Avarietyof
wavelength). The secondary X rays produced are dispersed by
such systems is commonly used. Any of these are acceptable
means of crystals and the intensities are measured by detectors
thatwillachieveanalyticalaccuracyequivalenttothatreported
at selected wavelengths. Data are collected based on the time
for the method.
required to reach a fixed number of counts, on the total counts
1.4 This standard does not purport to address all of the
obtained for a fixed time, or on the integration of voltage for a
safety concerns, if any, associated with its use. It is the
fixed time. Concentrations of the elements are determined by
responsibility of the user of this standard to establish appro-
relating the measured radiation of unknown samples to ana-
priate safety and health practices and determine the applica-
lytical curves or charts prepared from standard reference
materials of known compositions.Afixed channel or polychro-
mator system or a sequential system may be used to provide
This test method is under the jurisdiction of ASTM Committee E-1 on
Analytical Chemistry for Metals, Ores and Related Materials and is the direct simultaneous or sequential determinations of elements.
responsibility of Subcommittee E01.01 on Iron, Steel, and Ferroalloys.
Current edition approved July 15, 1994. Published September 1994. Originally
ε1 3
published as E 572 – 76. Last previous edition E 572 – 88 . Annual Book of ASTM Standards, Vol 03.05.
2 4
Supporting data for this test method as determined by cooperative testing have Annual Book of ASTM Standards, Vol 03.06.
been filed at ASTM Headquarters as RR:E02–1012 and E01–1032. ASTM Manual Series, ASTM, 6th Edition, 1990.
Copyright © ASTM International, 100 Barr Harbor Drive, PO Box C700, West Conshohocken, PA 19428-2959, United States.
E572
TABLE 1 Typical Operating Voltages and Currents
7. Hazards
Element Voltage, kV (Current, mA)
7.1 Guidelines on ionizing radiation given in Occupational
Chromium 60 (45) 60 (24) 50 (40) 20 (8) 40 (8)
Health and Safety Standards shall be observed at all X-ray
Nickel 60 (45) 60 (32) 50 (40) 60 (32) 40 (16)
emission spectrometer installations. It is also recommended
Copper 60 (45) 60 (32) 50 (40) 60 (32) 40 (24)
that personnel follow the guidelines of safe operating proce-
Molybdenum 60 (45) 60 (32) 50 (40) 60 (32) 40 (24)
Manganese 60 (45) 60 (32) 50 (40) 60 (32) 40 (24)
dures given in the NIST Handbook X-Ray Protection, HB76,
Columbium (Niobium) 60 (45) 60 (32) 50 (40) 60 (32) 40 (24)
the booklet Radiation Safety Recommendations for X-Ray
Cobalt 60 (45) 60 (32) 50 (40) 60 (32) 40 (24)
Diffraction and Spectrographic Equipment, #MORP68-14,by
T. M. Moore and D. J. McDonald, 1968, and the U.S.
Government Handbook 93, Safety Standard for Non-Medical
X-Ray and Sealed Gamma-Ray Sources, Part 1, general, or
5. Apparatus
similar handbooks of latest issue.
NOTE 3—It is not within the scope of this test method to prescribe all
7.2 X-ray equipment should be used only under the guid-
details of equipment to be used. Equipment varies between laboratories.
ance and supervision of a responsible, qualified person.
5.1 Sample Preparation Equipment: 7.3 Suitable monitoring devices, either film badges or do-
simeters, shall be worn by all personnel using the equipment.
5.1.1 Surface Grinder, with 60 to 600-grit aluminum oxide
belts or disks capable of providing test specimens with a To meet local, state, and federal radiation standards, periodic
radiation surveys of the equipment for leaks and excessive
uniform flat finish.
5.2 Excitation Source: scatteredradiationshallbemadebyaqualifiedpersonusingan
ionization-chamber detector. The personal film badge survey
5.2.1 X-Ray Generator, providing constant potential or
rectified power of sufficient energy to produce secondary record, the radiation survey records, and a maintenance record
shall be available upon request.
radiation of the sample for the elements specified. The genera-
tor may be equipped with a line voltage regulator and a current 7.4 Special precautions for the operator shall be posted.
7.5 X-ray caution signs shall be posted near the X-ray
stabilizer.
equipment and at all entrances to the radiation area.
5.2.2 X-Ray Tubes, with targets of various high-purity
7.6 Fail-safe “X-ray On” warning lights shall be used at the
elements, that are capable of continuous operation up to the
X-ray tube.
potentials and currents shown in Table 1.
NOTE 4—X-ray tubes with tungsten, gold, and rhodium targets were
8. Preparation of Reference Materials and Samples
used in the testing of this method.
8.1 Grind the samples to provide a flat, clean area over the
5.3 Spectrometer, designed for X-ray emission analysis,
entire surface to be exposed to the X-ray beam. Adhere
using air or vacuum, and equipped with specimen holders and
rigorously to the preparation technique established.
specimen chamber. The chamber should contain a sample
spinner. 9. Reference Materials
5.3.1 Analyzing Crystal, flat or curved lithium fluoride
9.1 Certified Reference Materials are available from the
LiF(200) or LiF(220).
National Institute of Standards and Technology and other
5.3.2 Collimator, for limiting the characteristic X-rays to a
sources.
parallel bundle when flat crystals are used in the instrument.
9.2 Reference Materials can be used, provided they are
For curved crystal optics, no collimator is necessary.
analyzed in accordance with Test Methods E 353.
5.3.3 Detectors—Sealed or gas-flow proportional counters
or equivalent.
10. Preparation of Apparatus
5.3.4 Vacuum System, if used, should consist of a vacuum
10.1 Start-up—Energize the power supply and electronic
pump, gage, and electrical controls to provide automatic
circuits for at least ⁄2h prior to taking measurements.
pumpdown of the optical path and to start the analysis at a
10.2 Power Supply—Adjustthevoltageofthepowersupply
pressure of 100 µm or less, controllable to 6 20 µm.
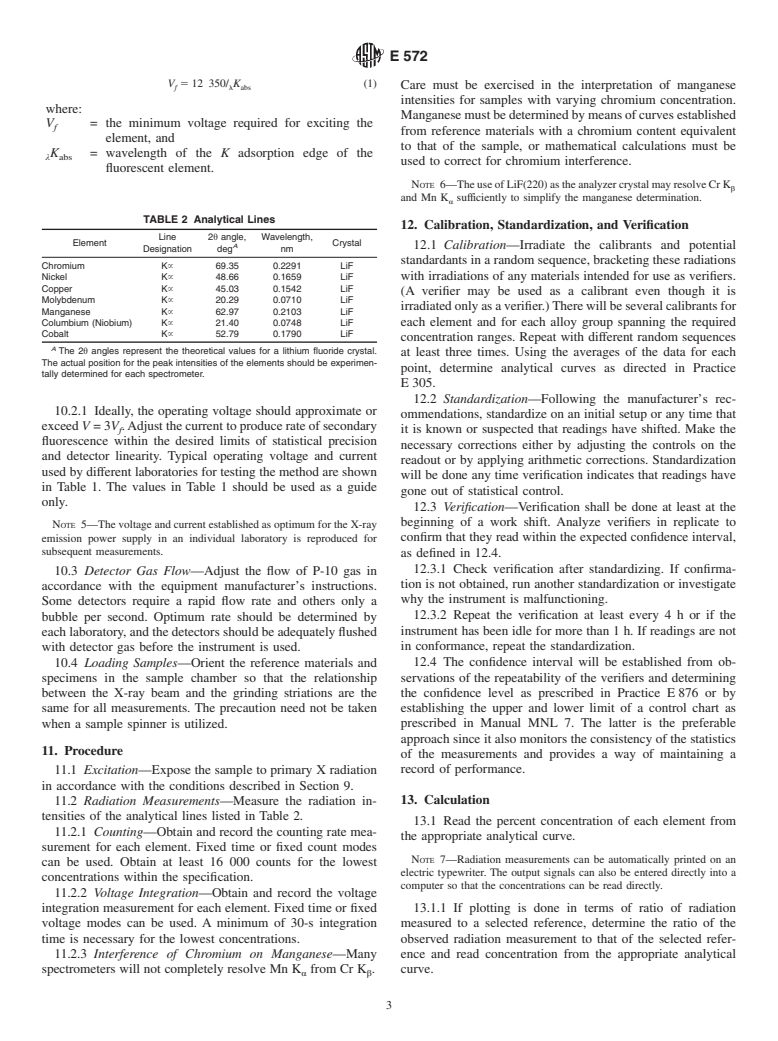
toproducesecondaryfluorescenceaccordingtotheexpression:
5.4 Measuring System—An electronic circuit capable of
amplifying and integrating pulses received from the detector
tube.Thesystemshouldbeequippedwithvisualandautomatic
Federal Register, Vol. 36, No. 105, May 29, 1971, Section 1910.96 or of latest
recording devices.
issue of Subpart G, available from Superintendent of Documents, U.S. Government
PrintingOffice,Washington,DC20025;or National Bureau of Standards Handbook
111, ANSI N43.2-1971.
6. Reagents
Available from Superintendent of Documents, U.S. Government Printing
6.1 Detector Gas (P-10), consisting of 90 % argon and Office, Washington, DC 20025.
Available from U.S. Department of Health, Education, and Welfare, Rockville,
10 % methane.
MD 20850.
AvailablefromSiemensGammasonics,Inc.,2000NuclearDrive,DesPlaines,
IL 60018.
A survey meter called Cutie-Pie has been found satisfactory for this purpose
Atwo-stagemechanicalpumpmeetingtherequirementscanbepurchasedfrom and is available from Nuclear Associates, Westbury, Long Island, NY 11590.
Precision Scientific Co., Chicago, IL 60647, or Sargent-Welch Scientific Co., Available from National Institute of Standards and Technology, U.S. Depart-
Skokie, IL 60076. ment of C
...


Questions, Comments and Discussion
Ask us and Technical Secretary will try to provide an answer. You can facilitate discussion about the standard in here.