ASTM C1279-09
(Test Method)Standard Test Method for Non-Destructive Photoelastic Measurement of Edge and Surface Stresses in Annealed, Heat-Strengthened, and Fully Tempered Flat Glass
Standard Test Method for Non-Destructive Photoelastic Measurement of Edge and Surface Stresses in Annealed, Heat-Strengthened, and Fully Tempered Flat Glass
SIGNIFICANCE AND USE
The strength and performance of heat-strengthened and fully-tempered glass is greatly affected by the surface and edge stress induced during the heat-treating process.
The edge and surface stress levels are specified in Specification C1048, in the Engineering Standards Manual of GANA Tempering Division and in foreign specifications.
This test method offers a direct and convenient way to non-destructively determine the residual state of stress on the surface and at the edge of annealed and heat-treated glass.
SCOPE
1.1 This test method covers the determination of edge stresses and surface stresses in annealed, heat-strengthened, and fully tempered flat glass products.
1.2 This test method is non-destructive.
1.3 This test method uses transmitted light and is, therefore, applicable to light-transmitting glasses.
1.4 The test method is not applicable to chemically-tempered glass.
1.5 Using the procedure described, surface stresses can be measured only on the “tin” side of float glass.
1.6 Surface-stress measuring instruments are designed for a specific range of surface index of refraction.
1.7 The values stated in SI units are to be regarded as standard. No other units of measurement are included in this standard.
1.8 This standard does not purport to address all of the safety concerns, if any, associated with its use. It is the responsibility of the user of this standard to establish appropriate safety and health practices and determine the applicability of regulatory limitations prior to use.
General Information
Relations
Buy Standard
Standards Content (Sample)
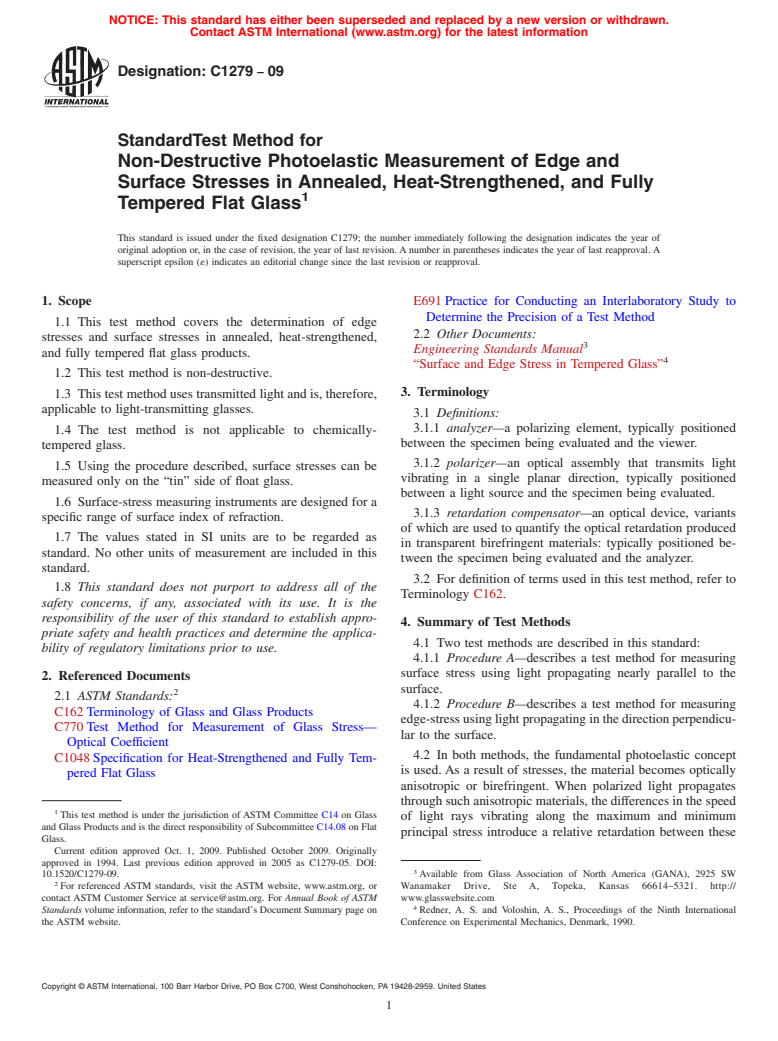
NOTICE: This standard has either been superseded and replaced by a new version or withdrawn.
Contact ASTM International (www.astm.org) for the latest information
Designation: C1279 − 09
StandardTest Method for
Non-Destructive Photoelastic Measurement of Edge and
Surface Stresses in Annealed, Heat-Strengthened, and Fully
1
Tempered Flat Glass
This standard is issued under the fixed designation C1279; the number immediately following the designation indicates the year of
original adoption or, in the case of revision, the year of last revision.Anumber in parentheses indicates the year of last reapproval.A
superscript epsilon (´) indicates an editorial change since the last revision or reapproval.
1. Scope E691Practice for Conducting an Interlaboratory Study to
Determine the Precision of a Test Method
1.1 This test method covers the determination of edge
2.2 Other Documents:
stresses and surface stresses in annealed, heat-strengthened,
3
Engineering Standards Manual
and fully tempered flat glass products.
4
“Surface and Edge Stress in Tempered Glass”
1.2 This test method is non-destructive.
3. Terminology
1.3 This test method uses transmitted light and is, therefore,
applicable to light-transmitting glasses.
3.1 Definitions:
3.1.1 analyzer—a polarizing element, typically positioned
1.4 The test method is not applicable to chemically-
between the specimen being evaluated and the viewer.
tempered glass.
3.1.2 polarizer—an optical assembly that transmits light
1.5 Using the procedure described, surface stresses can be
vibrating in a single planar direction, typically positioned
measured only on the “tin” side of float glass.
between a light source and the specimen being evaluated.
1.6 Surface-stress measuring instruments are designed for a
3.1.3 retardation compensator—an optical device, variants
specific range of surface index of refraction.
of which are used to quantify the optical retardation produced
1.7 The values stated in SI units are to be regarded as
in transparent birefringent materials: typically positioned be-
standard. No other units of measurement are included in this
tween the specimen being evaluated and the analyzer.
standard.
3.2 For definition of terms used in this test method, refer to
1.8 This standard does not purport to address all of the
Terminology C162.
safety concerns, if any, associated with its use. It is the
responsibility of the user of this standard to establish appro-
4. Summary of Test Methods
priate safety and health practices and determine the applica-
4.1 Two test methods are described in this standard:
bility of regulatory limitations prior to use.
4.1.1 Procedure A—describes a test method for measuring
surface stress using light propagating nearly parallel to the
2. Referenced Documents
surface.
2
2.1 ASTM Standards:
4.1.2 Procedure B—describes a test method for measuring
C162Terminology of Glass and Glass Products
edge-stressusinglightpropagatinginthedirectionperpendicu-
C770Test Method for Measurement of Glass Stress—
lar to the surface.
Optical Coefficient
4.2 In both methods, the fundamental photoelastic concept
C1048Specification for Heat-Strengthened and Fully Tem-
is used. As a result of stresses, the material becomes optically
pered Flat Glass
anisotropic or birefringent. When polarized light propagates
throughsuchanisotropicmaterials,thedifferencesinthespeed
1
This test method is under the jurisdiction of ASTM Committee C14 on Glass
of light rays vibrating along the maximum and minimum
and Glass Products and is the direct responsibility of Subcommittee C14.08 on Flat
principal stress introduce a relative retardation between these
Glass.
Current edition approved Oct. 1, 2009. Published October 2009. Originally
approved in 1994. Last previous edition approved in 2005 as C1279-05. DOI:
3
10.1520/C1279-09. Available from Glass Association of North America (GANA), 2925 SW
2
For referenced ASTM standards, visit the ASTM website, www.astm.org, or Wanamaker Drive, Ste A, Topeka, Kansas 66614–5321. http://
contact ASTM Customer Service at service@astm.org. For Annual Book of ASTM www.glasswebsite.com
4
Standards volume information, refer to the standard’s Document Summary page on Redner, A. S. and Voloshin, A. S., Proceedings of the Ninth International
the ASTM website. Conference on Experimental Mechanics, Denmark, 1990.
Copyright © ASTM International, 100 Barr Harbor Drive, PO Box C700, West Conshohocken, PA 19428-2959. United States
1
---------------------- Page: 1 ----------------------
C1279 − 09
rays. This relative retardation is proportional to the measured
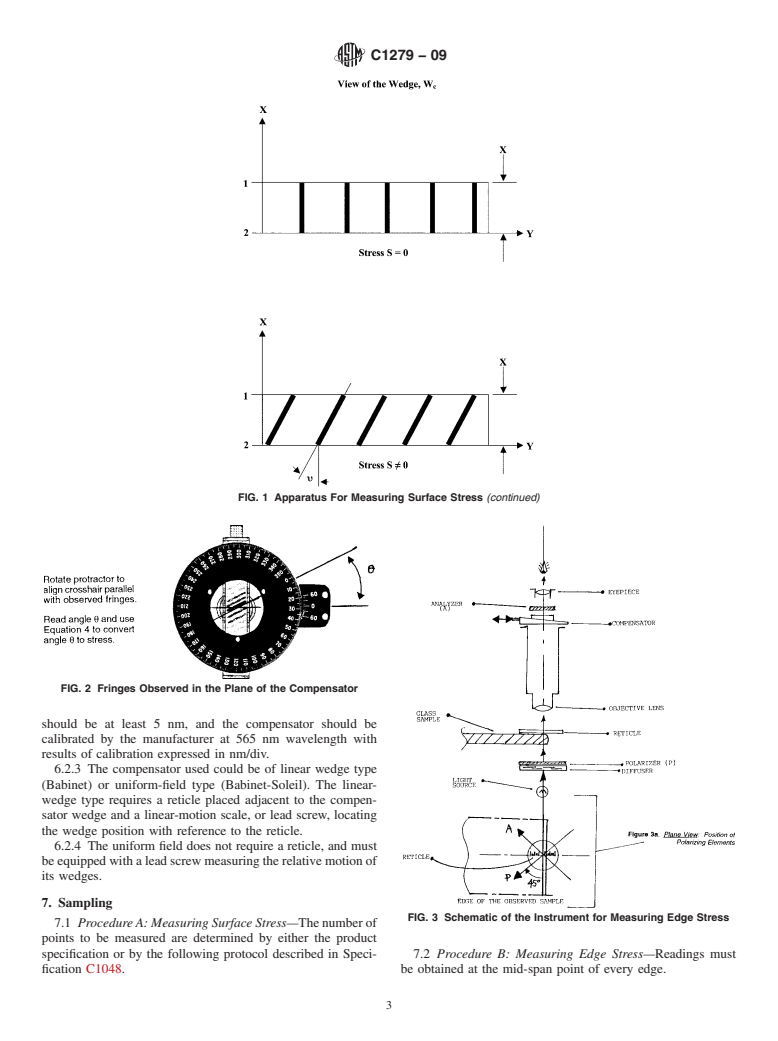
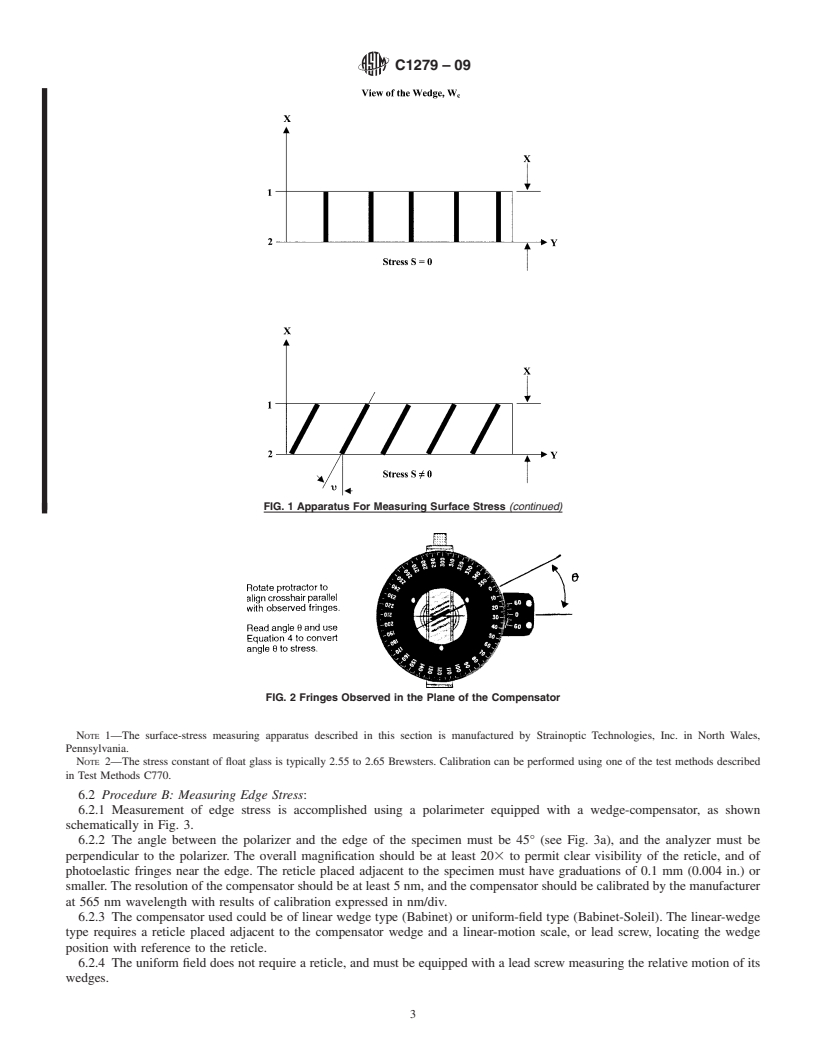
t = path of light traveling between the entrance and exit
stresses,andcanbeaccuratelydeterminedusingcompensators.
points 1, 2 (Fig. 1),
For additional background see “Surface and Edge Stress in
a = Geometrical factor, (depending upon the prism design)
4
Tempered Glass” .
a = t/x . This constant is determined by the
manufacturer.
5. Significance and Use
6.1.3 The compensator adds its own retardation. It is lin-
5.1 The
...
This document is not an ASTM standard and is intended only to provide the user of an ASTM standard an indication of what changes have been made to the previous version. Because
it may not be technically possible to adequately depict all changes accurately, ASTM recommends that users consult prior editions as appropriate. In all cases only the current version
of the standard as published by ASTM is to be considered the official document.
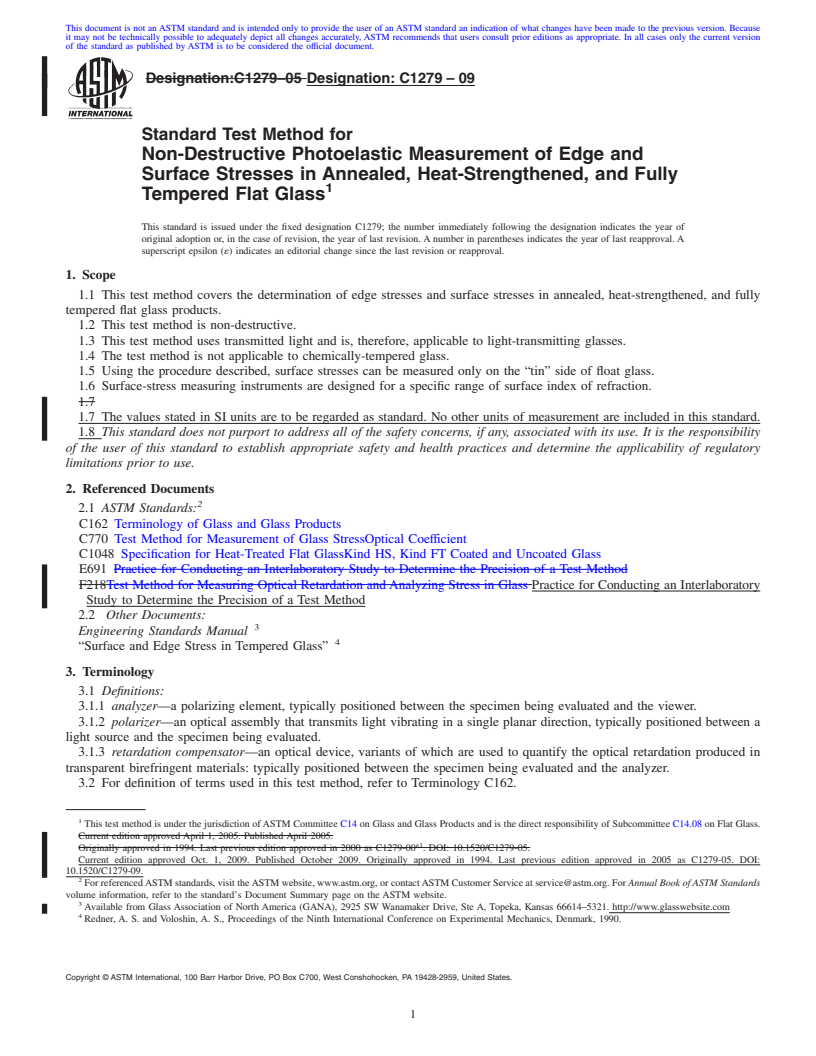
Designation:C1279–05 Designation:C1279–09
Standard Test Method for
Non-Destructive Photoelastic Measurement of Edge and
Surface Stresses in Annealed, Heat-Strengthened, and Fully
1
Tempered Flat Glass
This standard is issued under the fixed designation C1279; the number immediately following the designation indicates the year of
original adoption or, in the case of revision, the year of last revision. A number in parentheses indicates the year of last reapproval. A
superscript epsilon (´) indicates an editorial change since the last revision or reapproval.
1. Scope
1.1 This test method covers the determination of edge stresses and surface stresses in annealed, heat-strengthened, and fully
tempered flat glass products.
1.2 This test method is non-destructive.
1.3 This test method uses transmitted light and is, therefore, applicable to light-transmitting glasses.
1.4 The test method is not applicable to chemically-tempered glass.
1.5 Using the procedure described, surface stresses can be measured only on the “tin” side of float glass.
1.6 Surface-stress measuring instruments are designed for a specific range of surface index of refraction.
1.7
1.7 The values stated in SI units are to be regarded as standard. No other units of measurement are included in this standard.
1.8 This standard does not purport to address all of the safety concerns, if any, associated with its use. It is the responsibility
of the user of this standard to establish appropriate safety and health practices and determine the applicability of regulatory
limitations prior to use.
2. Referenced Documents
2
2.1 ASTM Standards:
C162 Terminology of Glass and Glass Products
C770 Test Method for Measurement of Glass StressOptical Coefficient
C1048 Specification for Heat-Treated Flat GlassKind HS, Kind FT Coated and Uncoated Glass
E691 Practice for Conducting an Interlaboratory Study to Determine the Precision of a Test Method
F218Test Method for Measuring Optical Retardation and Analyzing Stress in Glass Practice for Conducting an Interlaboratory
Study to Determine the Precision of a Test Method
2.2 Other Documents:
3
Engineering Standards Manual
4
“Surface and Edge Stress in Tempered Glass”
3. Terminology
3.1 Definitions:
3.1.1 analyzer—a polarizing element, typically positioned between the specimen being evaluated and the viewer.
3.1.2 polarizer—an optical assembly that transmits light vibrating in a single planar direction, typically positioned between a
light source and the specimen being evaluated.
3.1.3 retardation compensator—an optical device, variants of which are used to quantify the optical retardation produced in
transparent birefringent materials: typically positioned between the specimen being evaluated and the analyzer.
3.2 For definition of terms used in this test method, refer to Terminology C162.
1
This test method is under the jurisdiction ofASTM Committee C14 on Glass and Glass Products and is the direct responsibility of Subcommittee C14.08 on Flat Glass.
Current edition approved April 1, 2005. Published April 2005.
´1
Originally approved in 1994. Last previous edition approved in 2000 as C1279-00 . DOI: 10.1520/C1279-05.
Current edition approved Oct. 1, 2009. Published October 2009. Originally approved in 1994. Last previous edition approved in 2005 as C1279-05. DOI:
10.1520/C1279-09.
2
For referencedASTM standards, visit theASTM website, www.astm.org, or contactASTM Customer Service at service@astm.org. For Annual Book of ASTM Standards
volume information, refer to the standard’s Document Summary page on the ASTM website.
3
Available from Glass Association of North America (GANA), 2925 SW Wanamaker Drive, Ste A, Topeka, Kansas 66614–5321. http://www.glasswebsite.com
4
Redner, A. S. and Voloshin, A. S., Proceedings of the Ninth International Conference on Experimental Mechanics, Denmark, 1990.
Copyright © ASTM International, 100 Barr Harbor Drive, PO Box C700, West Conshohocken, PA 19428-2959, United States.
1
---------------------- Page: 1 ----------------------
C1279–09
4. Summary of Test Methods
4.1 Two test methods are described in this standard:
4.1.1 Procedure A—describes a test method for measuring surface stress using light propagating nearly parallel to the surface.
4.1.2 Procedure B—describes a test method for measuring edge-stress using light propagating in the direction perpendicular to
the surface.
4.2 In both methods, the fundamental photoelastic concept is used. As a result of stresses, the material becomes optically
anisotropicorbirefringent.Whenpolarizedlightpropagatesthroughsu
...


Questions, Comments and Discussion
Ask us and Technical Secretary will try to provide an answer. You can facilitate discussion about the standard in here.