ASTM C230/C230M-98E1
(Specification)Standard Specification for Flow Table for Use in Tests of Hydraulic Cement
Standard Specification for Flow Table for Use in Tests of Hydraulic Cement
SCOPE
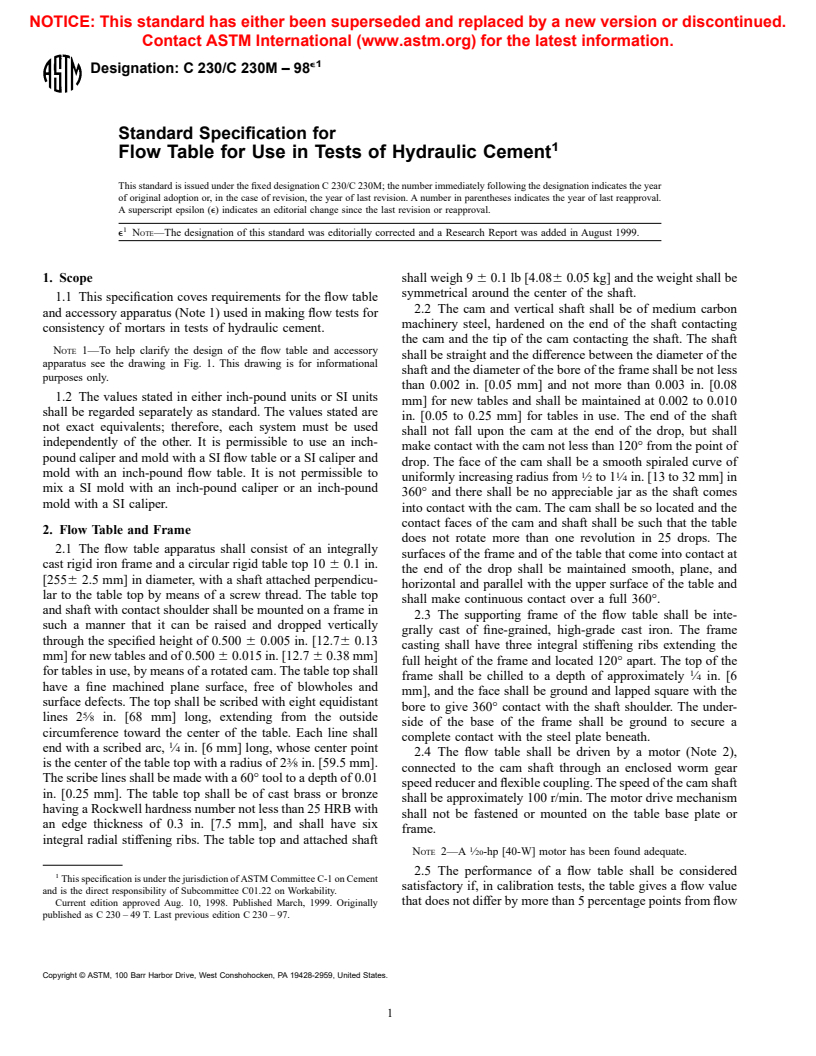
1.1 This specification coves requirements for the flow table and accessory apparatus (Note 1) used in making flow tests for consistency of mortars in tests of hydraulic cement.
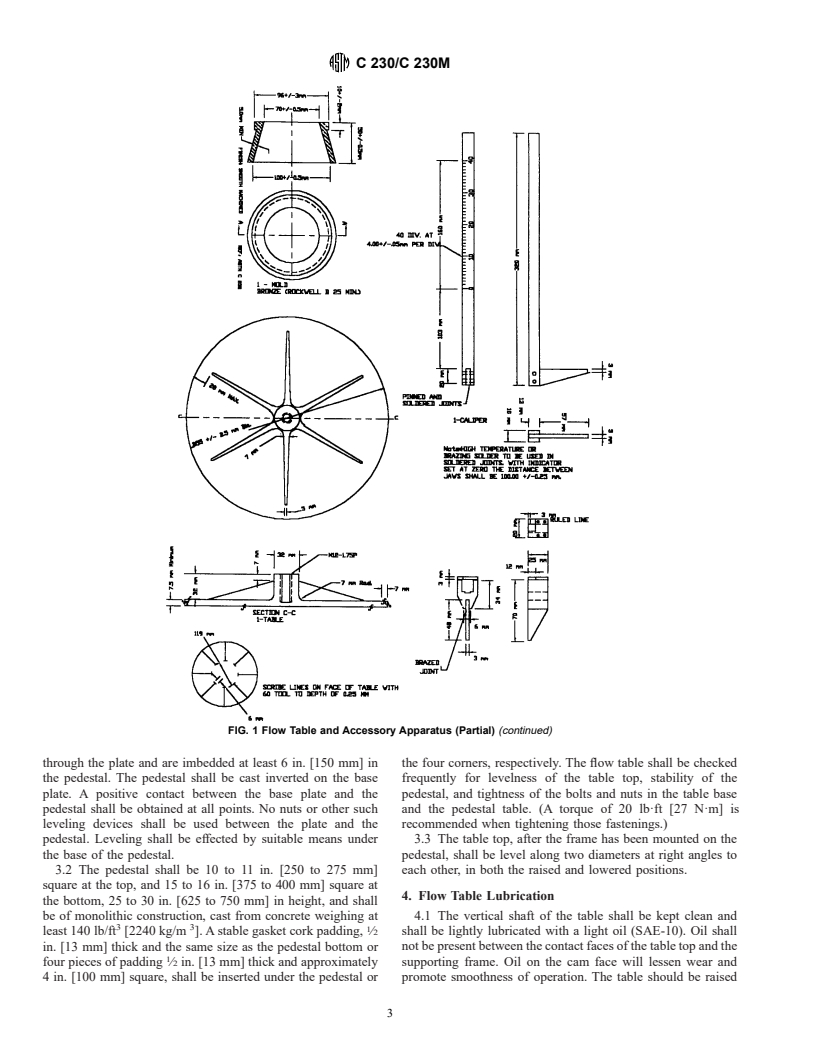
Note 1--To help clarify the design of the flow table and accessory apparatus see the drawing in Fig. 1 [Fig. 2]. This drawing is for informational purposes only.
1.2 The values stated in either inch-pound units or SI units shall be regarded separately as standard. The values stated are not exact equivalents; therefore, each system must be used independently of the other. It is permissible to use an inch-pound caliper and mold with a SI flow table or a SI caliper and mold with an inch-pound flow table. It is not permissible to mix a SI mold with an inch-pound caliper or an inch-pound mold with a SI caliper.
General Information
Relations
Standards Content (Sample)
NOTICE: This standard has either been superseded and replaced by a new version or discontinued.
Contact ASTM International (www.astm.org) for the latest information.
e1
Designation: C 230/C 230M – 98
Standard Specification for
Flow Table for Use in Tests of Hydraulic Cement
This standard is issued under the fixed designation C 230/C 230M; the number immediately following the designation indicates the year
of original adoption or, in the case of revision, the year of last revision. A number in parentheses indicates the year of last reapproval.
A superscript epsilon (e) indicates an editorial change since the last revision or reapproval.
e NOTE—The designation of this standard was editorially corrected and a Research Report was added in August 1999.
1. Scope shall weigh 9 6 0.1 lb [4.086 0.05 kg] and the weight shall be
symmetrical around the center of the shaft.
1.1 This specification coves requirements for the flow table
2.2 The cam and vertical shaft shall be of medium carbon
and accessory apparatus (Note 1) used in making flow tests for
machinery steel, hardened on the end of the shaft contacting
consistency of mortars in tests of hydraulic cement.
the cam and the tip of the cam contacting the shaft. The shaft
NOTE 1—To help clarify the design of the flow table and accessory
shall be straight and the difference between the diameter of the
apparatus see the drawing in Fig. 1. This drawing is for informational
shaft and the diameter of the bore of the frame shall be not less
purposes only.
than 0.002 in. [0.05 mm] and not more than 0.003 in. [0.08
1.2 The values stated in either inch-pound units or SI units
mm] for new tables and shall be maintained at 0.002 to 0.010
shall be regarded separately as standard. The values stated are
in. [0.05 to 0.25 mm] for tables in use. The end of the shaft
not exact equivalents; therefore, each system must be used
shall not fall upon the cam at the end of the drop, but shall
independently of the other. It is permissible to use an inch-
make contact with the cam not less than 120° from the point of
pound caliper and mold with a SI flow table or a SI caliper and
drop. The face of the cam shall be a smooth spiraled curve of
mold with an inch-pound flow table. It is not permissible to
1 1
uniformly increasing radius from ⁄2 to 1 ⁄4 in. [13 to 32 mm] in
mix a SI mold with an inch-pound caliper or an inch-pound
360° and there shall be no appreciable jar as the shaft comes
mold with a SI caliper.
into contact with the cam. The cam shall be so located and the
contact faces of the cam and shaft shall be such that the table
2. Flow Table and Frame
does not rotate more than one revolution in 25 drops. The
2.1 The flow table apparatus shall consist of an integrally
surfaces of the frame and of the table that come into contact at
cast rigid iron frame and a circular rigid table top 10 6 0.1 in.
the end of the drop shall be maintained smooth, plane, and
[2556 2.5 mm] in diameter, with a shaft attached perpendicu-
horizontal and parallel with the upper surface of the table and
lar to the table top by means of a screw thread. The table top
shall make continuous contact over a full 360°.
and shaft with contact shoulder shall be mounted on a frame in
2.3 The supporting frame of the flow table shall be inte-
such a manner that it can be raised and dropped vertically
grally cast of fine-grained, high-grade cast iron. The frame
through the specified height of 0.500 6 0.005 in. [12.76 0.13
casting shall have three integral stiffening ribs extending the
mm] for new tables and of 0.500 6 0.015 in. [12.7 6 0.38 mm]
full height of the frame and located 120° apart. The top of the
for tables in use, by means of a rotated cam. The table top shall
frame shall be chilled to a depth of approximately ⁄4 in. [6
have a fine machined plane surface, free of blowholes and
mm], and the face shall be ground and lapped square with the
surface defects. The top shall be scribed with eight equidistant
bore to give 360° contact with the shaft shoulder. The under-
lines 2 ⁄8 in. [68 mm] long, extending from the outside
side of the base of the frame shall be ground to secure a
circumference toward the center of the table. Each line shall
complete contact with the steel plate beneath.
end with a scribed arc, ⁄4 in. [6 mm] long, whose center point
2.4 The flow table shall be driven by a motor (Note 2),
is the center of the table top with a radius of 2 ⁄8 in. [59.5 mm].
connected to the cam shaft through an enclosed worm gear
The scribe lines shall be made with a 60° tool to a depth of 0.01
speed reducer and flexible coupling. The speed of the cam shaft
in. [0.25 mm]. The table top shall be of cast brass or bronze
shall be approximately 100 r/min. The motor drive mechanism
having a Rockwell hardness number not less than 25 HRB with
shall not be fastened or mounted on the table base plate or
an edge thickness of 0.3 in. [7.5 mm], and shall have six
frame.
integral radial stiffening ribs. The table top and attached shaft
NOTE 2—A ⁄20-hp [40-W] motor has been found adequate.
2.5 The performance of a flow table shall be considered
This specification is under the jurisdiction of ASTM Committee C-1 on Cement
satisfactory if, in calibration tests, the table gives a flow value
and is the direct responsibility of Subcommittee C01.22 on Workability.
Current edition approved Aug. 10, 1998. Published March, 1999. Originally that does not differ by more than 5 percentage points from flow
published as C 230 – 49 T. Last previous edition C 230 – 97.
Copyright © ASTM, 100 Barr Harbor Drive, West Conshohocken, PA 19428-2959, United States.
C 230/C 230M
FIG. 1 Flow Table and Accessory Apparatus (Partial)
FIG. 1 Flow Table and Accessory Apparatus (Partial) (continued)
2,3
values obtained with a suitable calibration material. 3. Flow Table Mounting
3.1 The flow table frame shall be tightly bolted to a c
...


Questions, Comments and Discussion
Ask us and Technical Secretary will try to provide an answer. You can facilitate discussion about the standard in here.