SIST ISO 3547-1:2020
(Main)Plain bearings - Wrapped bushes - Part 1: Dimensions
Plain bearings - Wrapped bushes - Part 1: Dimensions
This document specifies the dimensions and designations of cylindrical and flanged wrapped bushes made of mono and multi-layer bearing material for plain bearing applications.
Paliers lisses - Bagues roulées
Drsni ležaji - Zvite puše - 1. del: Mere
General Information
- Status
- Published
- Publication Date
- 19-Jul-2020
- Technical Committee
- ISEL - Mechanical elements
- Current Stage
- 6060 - National Implementation/Publication (Adopted Project)
- Start Date
- 24-Jun-2020
- Due Date
- 29-Aug-2020
- Completion Date
- 20-Jul-2020
Relations
- Effective Date
- 19-Dec-2015
Overview
ISO 3547-1:2018 - Plain bearings - Wrapped bushes - Part 1: Dimensions specifies the dimensional system, designations and tolerancing principles for cylindrical and flanged wrapped bushes made from mono- and multi‑layer bearing materials. It is the third edition (2018) of the standard and defines how wrapped bushes are sized, checked (e.g., ring gauge testing), and documented for plain bearing applications.
Key topics and technical requirements
- Scope and materials: Applies to wrapped bushes (cylindrical and flanged) made from single- or multi-layer bearing materials for plain bearings.
- Dimensional tables: Preferred nominal dimensions and tolerances for inside diameter, outside diameter, wall thickness, bush width and flange geometry are provided in detailed tables.
- Wall thickness and inside diameter: Methods for specifying either wall thickness or inside diameter are given (but not both simultaneously); wall‑thickness tolerance series (A–E) and Series W (machined bores) are defined.
- Ring gauge testing: The standard references gauging (Test C in ISO 3547-2) and gives tolerances for the bush inside diameter when checked in a ring gauge (Series W).
- Housing bore and press‑fit: Rules to derive minimum/maximum inside diameters from housing bore and wall thickness are included. A formula and guidance for calculating housing bore expansion due to pressing-in of the bush are added in this edition.
- Chamfers and radii: Recommended outside and inside chamfers, and flange radii, including machined vs rolled edge options.
- Design guidance: Notes on butt-joint types, allowable distortion from wrapping, machining allowances, lubrication holes/grooves/indents and finish requirements (no loose burrs).
- Inspection and tolerances: Concentricity guidance and recommended tolerance classes for housing bores (e.g., H6/H7 ranges) are included, plus reference to quality-control methods.
Practical applications and users
ISO 3547-1 is used to:
- Specify wrapped bush dimensions and tolerances for engineering drawings and procurement.
- Guide manufacturers in producing standard cylindrical and flanged wrapped bushes.
- Support quality inspectors and laboratory testing (gauging, dimensional inspection).
- Help designers and OEMs ensure correct press‑fit, bore tolerances and assembly performance in rotating machinery, automotive components, industrial gearboxes, pumps and other plain bearing applications. Typical users: bearing manufacturers, component designers, procurement engineers, maintenance teams and test laboratories.
Related standards
- ISO 3547 series (other parts cover tests and requirements, e.g., ISO 3547-2)
- ISO 4378‑1 and ISO 4378‑4 (terms, definitions, symbols for plain bearings)
- ISO 12301 (quality control techniques for plain bearings)
Keywords: ISO 3547-1, wrapped bushes, plain bearings, dimensions, tolerances, ring gauge, wall thickness, press-fit, housing bore, flanged bush, bearing material.
Frequently Asked Questions
SIST ISO 3547-1:2020 is a standard published by the Slovenian Institute for Standardization (SIST). Its full title is "Plain bearings - Wrapped bushes - Part 1: Dimensions". This standard covers: This document specifies the dimensions and designations of cylindrical and flanged wrapped bushes made of mono and multi-layer bearing material for plain bearing applications.
This document specifies the dimensions and designations of cylindrical and flanged wrapped bushes made of mono and multi-layer bearing material for plain bearing applications.
SIST ISO 3547-1:2020 is classified under the following ICS (International Classification for Standards) categories: 21.100.10 - Plain bearings. The ICS classification helps identify the subject area and facilitates finding related standards.
SIST ISO 3547-1:2020 has the following relationships with other standards: It is inter standard links to SIST ISO 3547-1:2008. Understanding these relationships helps ensure you are using the most current and applicable version of the standard.
SIST ISO 3547-1:2020 is available in PDF format for immediate download after purchase. The document can be added to your cart and obtained through the secure checkout process. Digital delivery ensures instant access to the complete standard document.
Standards Content (Sample)
SLOVENSKI STANDARD
01-oktober-2020
Drsni ležaji - Zvite puše - 1. del: Mere
Plain bearings - Wrapped bushes - Part 1: Dimensions
Paliers lisses - Bagues roulées
Ta slovenski standard je istoveten z: ISO 3547-1:2018
ICS:
21.100.10 Drsni ležaji Plain bearings
2003-01.Slovenski inštitut za standardizacijo. Razmnoževanje celote ali delov tega standarda ni dovoljeno.
INTERNATIONAL ISO
STANDARD 3547-1
Third edition
2018-07
Plain bearings — Wrapped bushes —
Part 1:
Dimensions
Paliers lisses — Bagues roulées —
Partie 1: Dimensions
Reference number
©
ISO 2018
© ISO 2018
All rights reserved. Unless otherwise specified, or required in the context of its implementation, no part of this publication may
be reproduced or utilized otherwise in any form or by any means, electronic or mechanical, including photocopying, or posting
on the internet or an intranet, without prior written permission. Permission can be requested from either ISO at the address
below or ISO’s member body in the country of the requester.
ISO copyright office
CP 401 • Ch. de Blandonnet 8
CH-1214 Vernier, Geneva
Phone: +41 22 749 01 11
Fax: +41 22 749 09 47
Email: copyright@iso.org
Website: www.iso.org
Published in Switzerland
ii © ISO 2018 – All rights reserved
Contents Page
Foreword .iv
1 Scope . 1
2 Normative references . 1
3 Terms and definitions . 1
4 Symbols and units . 1
5 Dimensions . 2
6 Design . 9
7 Example for calculation of inside diameter, D .10
i
8 Designation .10
Bibliography .11
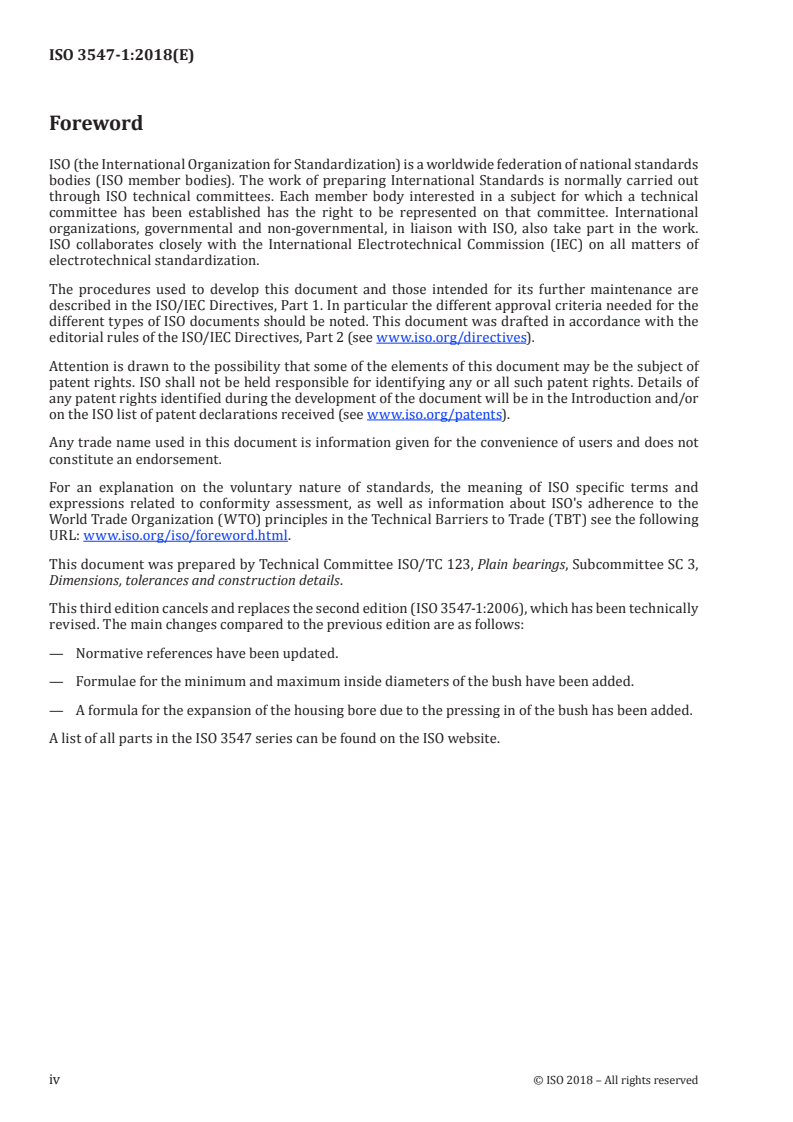
Foreword
ISO (the International Organization for Standardization) is a worldwide federation of national standards
bodies (ISO member bodies). The work of preparing International Standards is normally carried out
through ISO technical committees. Each member body interested in a subject for which a technical
committee has been established has the right to be represented on that committee. International
organizations, governmental and non-governmental, in liaison with ISO, also take part in the work.
ISO collaborates closely with the International Electrotechnical Commission (IEC) on all matters of
electrotechnical standardization.
The procedures used to develop this document and those intended for its further maintenance are
described in the ISO/IEC Directives, Part 1. In particular the different approval criteria needed for the
different types of ISO documents should be noted. This document was drafted in accordance with the
editorial rules of the ISO/IEC Directives, Part 2 (see www .iso .org/directives).
Attention is drawn to the possibility that some of the elements of this document may be the subject of
patent rights. ISO shall not be held responsible for identifying any or all such patent rights. Details of
any patent rights identified during the development of the document will be in the Introduction and/or
on the ISO list of patent declarations received (see www .iso .org/patents).
Any trade name used in this document is information given for the convenience of users and does not
constitute an endorsement.
For an explanation on the voluntary nature of standards, the meaning of ISO specific terms and
expressions related to conformity assessment, as well as information about ISO's adherence to the
World Trade Organization (WTO) principles in the Technical Barriers to Trade (TBT) see the following
URL: www .iso .org/iso/foreword .html.
This document was prepared by Technical Committee ISO/TC 123, Plain bearings, Subcommittee SC 3,
Dimensions, tolerances and construction details.
This third edition cancels and replaces the second edition (ISO 3547-1:2006), which has been technically
revised. The main changes compared to the previous edition are as follows:
— Normative references have been updated.
— Formulae for the minimum and maximum inside diameters of the bush have been added.
— A formula for the expansion of the housing bore due to the pressing in of the bush has been added.
A list of all parts in the ISO 3547 series can be found on the ISO website.
iv © ISO 2018 – All rights reserved
INTERNATIONAL STANDARD ISO 3547-1:2018(E)
Plain bearings — Wrapped bushes —
Part 1:
Dimensions
1 Scope
This document specifies the dimensions and designations of cylindrical and flanged wrapped bushes
made of mono and multi-layer bearing material for plain bearing applications.
2 Normative references
The following documents are referred to in the text in such a way that some or all of their content
constitutes requirements of this document. For dated references, only the edition cited applies. For
undated references, the latest edition of the referenced document (including any amendments) applies.
ISO 4378-1, Plain bearings — Terms, definitions, classification and symbols — Part 1: Design, bearing
materials and their properties
ISO 4378-4, Plain bearings — Terms, definitions, classification and symbols — Part 4: Basic symbols
ISO 12301, Plain bearings — Quality control techniques and inspection of geometrical and material quality
characteristics
3 Terms and definitions
For the purposes of this document, the terms and definitions given in ISO 4378-1 and ISO 4378-4 apply.
ISO and IEC maintain terminological databases for use in standardization at the following addresses:
— ISO Online browsing platform: available at https: //www .iso .org/obp
— IEC Electropedia: available at http: //www .electropedia .org/
4 Symbols and units
See Table 1.
Table 1 — Symbols and units
Symbol Description Unit
B Width of the bush mm
C Inside chamfer mm
i
C Outside chamfer mm
o
D Inside diameter of the bush mm
i
D Minimum inside diameter of the bush mm
i,min
D Maximum inside diameter of the bush mm
i,max
D Inside diameter of the bush in the ring gauge mm
i, ch
D Flange diameter mm
fl
a
For bushes which are made of a single material, s = s or s = s .
1 3 2 3
Table 1 (continued)
Symbol Description Unit
D Housing bore diameter mm
H
D Minimum housing bore diameter mm
H,min
D Maximum housing bore diameter mm
H,max
D Outside diameter of the bush mm
o
D Mean diameter of the bush mm
o,m
D Mean housing bore diameter mm
H,m
D Shaft diameter mm
S
d Diameter of the checking block or ring gauge mm
ch, 1
E Expansion of the housing bore mm
Ra Surface roughness µm
r Flange radius mm
a
s Thickness of the bearing backing mm
a
s Thickness of the bearing material layer mm
a
s Wall thickness mm
s Minimum wall thickness mm
3,min
s Maximum wall thickness mm
3,max
s Flange thickness mm
fl
a
For bushes which are made of a single material, s = s or s = s .
1 3 2 3
5 Dimensions
See Figure 1 and Tables 2 to 4.
DD=− 2⋅s (1)
im,,ax Hmax 3,min
DD=− 2⋅s (2)
im,,in Hmin 3,max
This assumes that there is no expansion of the bore in the housing caused by pressing in the bush. In
reality, the expansion depends on several factors, such as the stiffness of the housing and the bush. An
example of the calculation is given in Clause 7.
The wall thickness tolerance depends on whether or not there is a machining allowance in the bush
bore and on the material type, as specified in ISO 3547-4. The preferred tolerance series (A to E) is
specified in Table 5.
Instead of the wall thickness, the inside diameter, D , of the bush may be specified. D is the inside
i, ch i, ch
diameter of the bush, when this is pressed into a ring gauge (Test C — gauging — in accordance with
ISO 3547-2; see also ISO 3547-6).
For bushes which are supplied with a machined bore (Series W), the tolerances of the inside diameter of
the bush, D , checked in a ring gauge, are given in Table 6.
i, ch
In no case shall wall thickness and inside diameter be given at the same time as the dimensions that are
to be checked.
The tolerance for the inside diameter, D , of the bush in the ring gauge is given in Table 6. The tolerance
i, ch
of the inside diameter of a bush pressed into a housing is found from the sum of the tolerance for, D ,
i, ch
and the tolerance of the housing bore. As in the case of the calculation of the inside diameter from the
wall thickness, it is assumed that there is no expansion of the housing bore.
Dimensions for the outside diameter, D , of the bush are given in Table 7.
o
2 © ISO 2018 – All rights reserved
a) Type C cylindrical bush
b) Type F flanged bush
Key
1 butt joint
a
Thickness of the bearing material layer: only valid as a basis for calculation in accordance with ISO 3547-2.
b
C may be a chamfer or break edge, in accordance with ISO 13715.
i
c
0,2 mm min. for nominal wall thickness 0,5 mm.
d
r = s
max 3.
Figure 1 — Cylindrical and flanged bush
Table 2 — Preferred nominal dimensions for inside diameter, D , outside diameter, D , wall
i o
thickness, s , and bush width, B
Dimensions and tolerances in millimetres
s = 0,5
a
B
D D s
i o 3
3 4 5 6 8 10 12
2 3 0,5 a a
3 4 0,5 a a a
4 5 0,5 a a a
5 6 0,5 a a a
6 7 0,5 a a a a
8 9 0,5 a a a a
10 11 0,5 a a a
s = 0,75
a
B
D D s
i o 3
3 4 5 6 7 8 10
2 3,5 0,75 a a
3 4,5 0,75 a a a
4 5,5 0,75
...
INTERNATIONAL ISO
STANDARD 3547-1
Third edition
2018-07
Plain bearings — Wrapped bushes —
Part 1:
Dimensions
Paliers lisses — Bagues roulées —
Partie 1: Dimensions
Reference number
©
ISO 2018
© ISO 2018
All rights reserved. Unless otherwise specified, or required in the context of its implementation, no part of this publication may
be reproduced or utilized otherwise in any form or by any means, electronic or mechanical, including photocopying, or posting
on the internet or an intranet, without prior written permission. Permission can be requested from either ISO at the address
below or ISO’s member body in the country of the requester.
ISO copyright office
CP 401 • Ch. de Blandonnet 8
CH-1214 Vernier, Geneva
Phone: +41 22 749 01 11
Fax: +41 22 749 09 47
Email: copyright@iso.org
Website: www.iso.org
Published in Switzerland
ii © ISO 2018 – All rights reserved
Contents Page
Foreword .iv
1 Scope . 1
2 Normative references . 1
3 Terms and definitions . 1
4 Symbols and units . 1
5 Dimensions . 2
6 Design . 9
7 Example for calculation of inside diameter, D .10
i
8 Designation .10
Bibliography .11
Foreword
ISO (the International Organization for Standardization) is a worldwide federation of national standards
bodies (ISO member bodies). The work of preparing International Standards is normally carried out
through ISO technical committees. Each member body interested in a subject for which a technical
committee has been established has the right to be represented on that committee. International
organizations, governmental and non-governmental, in liaison with ISO, also take part in the work.
ISO collaborates closely with the International Electrotechnical Commission (IEC) on all matters of
electrotechnical standardization.
The procedures used to develop this document and those intended for its further maintenance are
described in the ISO/IEC Directives, Part 1. In particular the different approval criteria needed for the
different types of ISO documents should be noted. This document was drafted in accordance with the
editorial rules of the ISO/IEC Directives, Part 2 (see www .iso .org/directives).
Attention is drawn to the possibility that some of the elements of this document may be the subject of
patent rights. ISO shall not be held responsible for identifying any or all such patent rights. Details of
any patent rights identified during the development of the document will be in the Introduction and/or
on the ISO list of patent declarations received (see www .iso .org/patents).
Any trade name used in this document is information given for the convenience of users and does not
constitute an endorsement.
For an explanation on the voluntary nature of standards, the meaning of ISO specific terms and
expressions related to conformity assessment, as well as information about ISO's adherence to the
World Trade Organization (WTO) principles in the Technical Barriers to Trade (TBT) see the following
URL: www .iso .org/iso/foreword .html.
This document was prepared by Technical Committee ISO/TC 123, Plain bearings, Subcommittee SC 3,
Dimensions, tolerances and construction details.
This third edition cancels and replaces the second edition (ISO 3547-1:2006), which has been technically
revised. The main changes compared to the previous edition are as follows:
— Normative references have been updated.
— Formulae for the minimum and maximum inside diameters of the bush have been added.
— A formula for the expansion of the housing bore due to the pressing in of the bush has been added.
A list of all parts in the ISO 3547 series can be found on the ISO website.
iv © ISO 2018 – All rights reserved
INTERNATIONAL STANDARD ISO 3547-1:2018(E)
Plain bearings — Wrapped bushes —
Part 1:
Dimensions
1 Scope
This document specifies the dimensions and designations of cylindrical and flanged wrapped bushes
made of mono and multi-layer bearing material for plain bearing applications.
2 Normative references
The following documents are referred to in the text in such a way that some or all of their content
constitutes requirements of this document. For dated references, only the edition cited applies. For
undated references, the latest edition of the referenced document (including any amendments) applies.
ISO 4378-1, Plain bearings — Terms, definitions, classification and symbols — Part 1: Design, bearing
materials and their properties
ISO 4378-4, Plain bearings — Terms, definitions, classification and symbols — Part 4: Basic symbols
ISO 12301, Plain bearings — Quality control techniques and inspection of geometrical and material quality
characteristics
3 Terms and definitions
For the purposes of this document, the terms and definitions given in ISO 4378-1 and ISO 4378-4 apply.
ISO and IEC maintain terminological databases for use in standardization at the following addresses:
— ISO Online browsing platform: available at https: //www .iso .org/obp
— IEC Electropedia: available at http: //www .electropedia .org/
4 Symbols and units
See Table 1.
Table 1 — Symbols and units
Symbol Description Unit
B Width of the bush mm
C Inside chamfer mm
i
C Outside chamfer mm
o
D Inside diameter of the bush mm
i
D Minimum inside diameter of the bush mm
i,min
D Maximum inside diameter of the bush mm
i,max
D Inside diameter of the bush in the ring gauge mm
i, ch
D Flange diameter mm
fl
a
For bushes which are made of a single material, s = s or s = s .
1 3 2 3
Table 1 (continued)
Symbol Description Unit
D Housing bore diameter mm
H
D Minimum housing bore diameter mm
H,min
D Maximum housing bore diameter mm
H,max
D Outside diameter of the bush mm
o
D Mean diameter of the bush mm
o,m
D Mean housing bore diameter mm
H,m
D Shaft diameter mm
S
d Diameter of the checking block or ring gauge mm
ch, 1
E Expansion of the housing bore mm
Ra Surface roughness µm
r Flange radius mm
a
s Thickness of the bearing backing mm
a
s Thickness of the bearing material layer mm
a
s Wall thickness mm
s Minimum wall thickness mm
3,min
s Maximum wall thickness mm
3,max
s Flange thickness mm
fl
a
For bushes which are made of a single material, s = s or s = s .
1 3 2 3
5 Dimensions
See Figure 1 and Tables 2 to 4.
DD=− 2⋅s (1)
im,,ax Hmax 3,min
DD=− 2⋅s (2)
im,,in Hmin 3,max
This assumes that there is no expansion of the bore in the housing caused by pressing in the bush. In
reality, the expansion depends on several factors, such as the stiffness of the housing and the bush. An
example of the calculation is given in Clause 7.
The wall thickness tolerance depends on whether or not there is a machining allowance in the bush
bore and on the material type, as specified in ISO 3547-4. The preferred tolerance series (A to E) is
specified in Table 5.
Instead of the wall thickness, the inside diameter, D , of the bush may be specified. D is the inside
i, ch i, ch
diameter of the bush, when this is pressed into a ring gauge (Test C — gauging — in accordance with
ISO 3547-2; see also ISO 3547-6).
For bushes which are supplied with a machined bore (Series W), the tolerances of the inside diameter of
the bush, D , checked in a ring gauge, are given in Table 6.
i, ch
In no case shall wall thickness and inside diameter be given at the same time as the dimensions that are
to be checked.
The tolerance for the inside diameter, D , of the bush in the ring gauge is given in Table 6. The tolerance
i, ch
of the inside diameter of a bush pressed into a housing is found from the sum of the tolerance for, D ,
i, ch
and the tolerance of the housing bore. As in the case of the calculation of the inside diameter from the
wall thickness, it is assumed that there is no expansion of the housing bore.
Dimensions for the outside diameter, D , of the bush are given in Table 7.
o
2 © ISO 2018 – All rights reserved
a) Type C cylindrical bush
b) Type F flanged bush
Key
1 butt joint
a
Thickness of the bearing material layer: only valid as a basis for calculation in accordance with ISO 3547-2.
b
C may be a chamfer or break edge, in accordance with ISO 13715.
i
c
0,2 mm min. for nominal wall thickness 0,5 mm.
d
r = s
max 3.
Figure 1 — Cylindrical and flanged bush
Table 2 — Preferred nominal dimensions for inside diameter, D , outside diameter, D , wall
i o
thickness, s , and bush width, B
Dimensions and tolerances in millimetres
s = 0,5
a
B
D D s
i o 3
3 4 5 6 8 10 12
2 3 0,5 a a
3 4 0,5 a a a
4 5 0,5 a a a
5 6 0,5 a a a
6 7 0,5 a a a a
8 9 0,5 a a a a
10 11 0,5 a a a
s = 0,75
a
B
D D s
i o 3
3 4 5 6 7 8 10
2 3,5 0,75 a a
3 4,5 0,75 a a a
4 5,5 0,75 a a a a
s = 1,0
a
B
D D s
i o 3
3 4 5 6 7 8 10 12 15 20 25
3 5 1,0 a a a a
4 6 1,0 a a a
6 8 1,0 a a a a a
7 9 1,0 a a a a
8 10 1,0 a a a a a a
9 11 1,0 a
10 12 1,0 a a a a a b b
12 14 1,0 a a a a a b b b
13 15 1,0 a b b
14 16 1,0 a a b b b
15 17 1,0 a a b b b
16 18 1,0 a a
...



Questions, Comments and Discussion
Ask us and Technical Secretary will try to provide an answer. You can facilitate discussion about the standard in here.
Loading comments...