SIST EN 2002-002:2006
(Main)Aerospace series - Metallic materials - Test methods - Part 2: Tensile testing at elevated temperature
Aerospace series - Metallic materials - Test methods - Part 2: Tensile testing at elevated temperature
This standard specifies the requirements for the tensile testing of metallic materials at elevated temperature for aerospace applications.
It shall be applied when referred to in the EN technical specification or material standard unless otherwise specified on the drawing, order or inspection schedule.
Luft- und Raumfahrt - Metallische Werkstoffe - Prüfverfahren - Teil 2: Zugversuch bei Hochtemperatur
Diese Norm legt die Anforderungen für den Zugversuch bei Hochtemperatur von metallischen Werkstoffen für Anwendungen in der Luft- und Raumfahrt fest.
Diese Norm ist anzuwenden, wenn in den technischen Lieferbedingungen einer EN-Norm oder in einer EN Werkstoffnorm darauf verwiesen wird, sofern nicht anders in der Zeichnung, Auftrags- oder Prüfliste fest¬gelegt.
Série aérospatiale - Matériaux métalliques - Méthodes d'essais applicables - Partie 2 : Essais de traction a temperature élevée
Aeronavtika – Kovinski materiali – Preskusne metode – 2. del: Natezni preskus pri povišani temperaturi
General Information
- Status
- Published
- Publication Date
- 30-Jun-2006
- Technical Committee
- I13 - Imaginarni 13
- Current Stage
- 6060 - National Implementation/Publication (Adopted Project)
- Start Date
- 01-Jul-2006
- Due Date
- 01-Jul-2006
- Completion Date
- 01-Jul-2006
Relations
- Effective Date
- 19-Jan-2023
Overview
EN 2002-002:2005 - Aerospace series: Metallic materials - Test methods - Part 2: Tensile testing at elevated temperature specifies requirements for performing tensile tests on metallic materials at elevated temperatures for aerospace applications. It applies when cited in an EN technical specification or material standard, unless a drawing, order or inspection schedule states otherwise. The standard ensures consistent, reproducible determination of properties such as Young’s modulus, proof stress, tensile strength, elongation and reduction of area at temperature.
Key topics and technical requirements
- Scope and purpose: Defines the principle of tensile testing at elevated temperature and when the standard must be applied for aerospace materials.
- Test machines and verification: Testing machines must be verified at intervals ≤ 12 months per EN ISO 7500-1 and be certified to class 1 or better; automatic alignment is required or alignment checks performed annually (ASTM E-1012 referenced).
- Extensometers: Use devices suitable for elevated temperatures, verified ≤ 12 months per EN ISO 9513. Calibration classes: 0.5 for Young’s modulus, 1 for proof stress.
- Heating and temperature control: Furnaces/heating devices must maintain indicated temperature (θi) within specified tolerances along the original gauge length:
- θ ≤ 600 °C: ±3 °C
- 600 °C < θ ≤ 800 °C: ±4 °C
- 800 °C < θ ≤ 1 000 °C: ±5 °C
- θ > 1 000 °C: ±1 %
Thermocouples type R or S (Class 1, EN 60584-2) are required and must be verified annually. Recording equipment accuracy and resolution requirements are specified.
- Test pieces and preparation: Detailed forms, dimensions and tolerances are given in Annexes A–D depending on product form:
- Annex A: sheet/strip ≤ 8 mm
- Annex B: non-machined bar, section, wire ≤ 8 mm
- Annex C: machined pieces for bars, plates, forgings, castings (> 8 mm)
- Annex D: tubes
- Grips and fixtures: Grips must apply axial load; screwed holders are recommended and mandatory in disputes. Tube plugs and grip geometry are addressed to avoid affecting gauge deformation.
- Personnel and safety: Tests must be performed or supervised by suitably qualified personnel and conform to health & safety regulations. Test report contents are specified (see section 7).
Applications
- Qualification and batch testing of aerospace metallic alloys at service or elevated temperatures.
- Material specification verification for structural components, engine parts, hot-section hardware and high-temperature alloys.
- Comparative research and development testing where temperature-dependent tensile properties are required.
Who should use this standard
- Aerospace material engineers and metallurgists
- Test laboratories performing high-temperature mechanical testing
- OEMs and suppliers specifying material acceptance criteria
- Quality and certification bodies validating material properties for aerospace components
Related standards (normative)
- EN ISO 7500-1 (verification of testing machines)
- EN ISO 9513 (extensometer calibration)
- EN 4258 / EN 4259 (aerospace metallic materials series)
- EN 60584-2 (thermocouples)
- ASTM E-1012 (alignment verification method)
Keywords: EN 2002-002:2005, tensile testing at elevated temperature, aerospace, metallic materials, test methods, high-temperature tensile test, extensometer, temperature tolerances.
Frequently Asked Questions
SIST EN 2002-002:2006 is a standard published by the Slovenian Institute for Standardization (SIST). Its full title is "Aerospace series - Metallic materials - Test methods - Part 2: Tensile testing at elevated temperature". This standard covers: This standard specifies the requirements for the tensile testing of metallic materials at elevated temperature for aerospace applications. It shall be applied when referred to in the EN technical specification or material standard unless otherwise specified on the drawing, order or inspection schedule.
This standard specifies the requirements for the tensile testing of metallic materials at elevated temperature for aerospace applications. It shall be applied when referred to in the EN technical specification or material standard unless otherwise specified on the drawing, order or inspection schedule.
SIST EN 2002-002:2006 is classified under the following ICS (International Classification for Standards) categories: 49.025.05 - Ferrous alloys in general. The ICS classification helps identify the subject area and facilitates finding related standards.
SIST EN 2002-002:2006 has the following relationships with other standards: It is inter standard links to kSIST FprEN 2002-002:2025. Understanding these relationships helps ensure you are using the most current and applicable version of the standard.
SIST EN 2002-002:2006 is available in PDF format for immediate download after purchase. The document can be added to your cart and obtained through the secure checkout process. Digital delivery ensures instant access to the complete standard document.
Standards Content (Sample)
2003-01.Slovenski inštitut za standardizacijo. Razmnoževanje celote ali delov tega standarda ni dovoljeno.Aeronavtika – Kovinski materiali – Preskusne metode – 2. del: Natezni preskus pri povišani temperaturiLuft- und Raumfahrt - Metallische Werkstoffe - Prüfverfahren - Teil 2: Zugversuch bei HochtemperaturSérie aérospatiale - Matériaux métalliques - Méthodes d'essais applicables - Partie 2 : Essais de traction a temperature élevéeAerospace series - Metallic materials - Test methods - Part 2: Tensile testing at elevated temperature49.025.05Železove zlitine na splošnoFerrous alloys in generalICS:Ta slovenski standard je istoveten z:EN 2002-002:2005SIST EN 2002-002:2006en01-julij-2006SIST EN 2002-002:2006SLOVENSKI
STANDARD
EUROPEAN STANDARDNORME EUROPÉENNEEUROPÄISCHE NORMEN 2002-002November 2005ICS 49.025.05; 49.025.15 English VersionAerospace series - Metallic materials - Test methods - Part 2:Tensile testing at elevated temperatureSérie aérospatiale - Matériaux métalliques - Méthodesd'essais applicables - Partie 2 : Essais de traction àtemperature élevéeLuft- und Raumfahrt - Metallische Werkstoffe -Prüfverfahren - Teil 2: Zugversuch bei HochtemperaturThis European Standard was approved by CEN on 19 September 2005.CEN members are bound to comply with the CEN/CENELEC Internal Regulations which stipulate the conditions for giving this EuropeanStandard the status of a national standard without any alteration. Up-to-date lists and bibliographical references concerning such nationalstandards may be obtained on application to the Central Secretariat or to any CEN member.This European Standard exists in three official versions (English, French, German). A version in any other language made by translationunder the responsibility of a CEN member into its own language and notified to the Central Secretariat has the same status as the officialversions.CEN members are the national standards bodies of Austria, Belgium, Cyprus, Czech Republic, Denmark, Estonia, Finland, France,Germany, Greece, Hungary, Iceland, Ireland, Italy, Latvia, Lithuania, Luxembourg, Malta, Netherlands, Norway, Poland, Portugal, Slovakia,Slovenia, Spain, Sweden, Switzerland and United Kingdom.EUROPEAN COMMITTEE FOR STANDARDIZATIONCOMITÉ EUROPÉEN DE NORMALISATIONEUROPÄISCHES KOMITEE FÜR NORMUNGManagement Centre: rue de Stassart, 36
B-1050 Brussels© 2005 CENAll rights of exploitation in any form and by any means reservedworldwide for CEN national Members.Ref. No. EN 2002-002:2005: ESIST EN 2002-002:2006
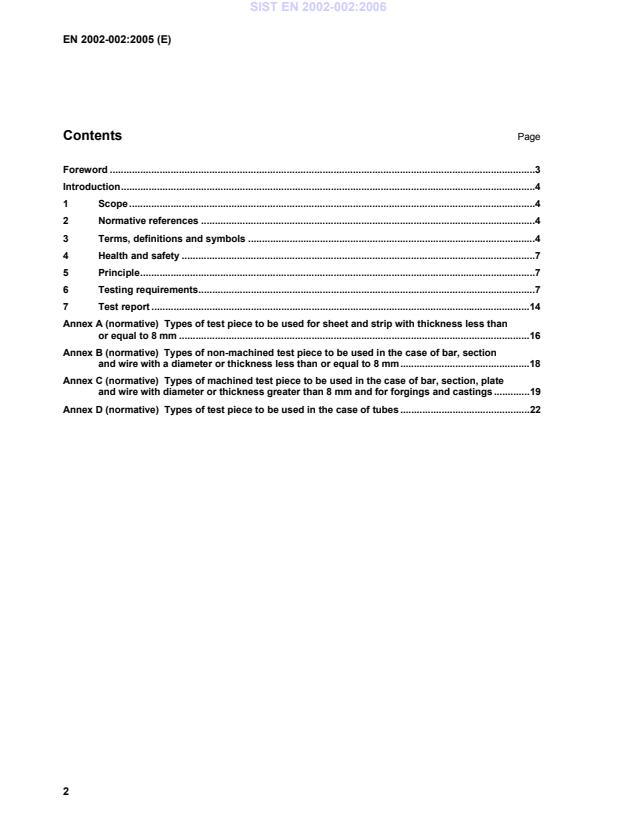
Types of test piece to be used for sheet and strip with thickness less than or equal to 8 mm.16 Annex B (normative)
Types of non-machined test piece to be used in the case of bar, section and wire with a diameter or thickness less than or equal to 8 mm.18 Annex C (normative)
Types of machined test piece to be used in the case of bar, section, plate and wire with diameter or thickness greater than 8 mm and for forgings and castings.19 Annex D (normative)
Types of test piece to be used in the case of tubes.22
Metallic materials – Verification of static uniaxial testing machines – Part 1: Tension/ compression testing machines – Verification and calibration of the force-measuring system. EN ISO 9513,
Metallic materials – Calibration of extensometers used in uniaxial testing. EN 4258,
Aerospace series – Metallic materials – General organization of standardization – Links between types of EN standards and their use. EN 4259,
Aerospace series – Metallic materials – Definition of general terms. 1) EN 60584-2,
Thermocouples – Part 2: Tolerances. ASTM E-1012,
Standard practice for verification of specimen alignment under tensile loading. 2)
3 Terms, definitions and symbols For the purposes of this standard, the terms, definitions and symbols given in EN 4259 and the following given in Table 1 apply.
1) Published as AECMA Prestandard at the date of publication of this standard. 2) This standard is published by: American Society for Testing and Materials (ASTM), 100 Barr Harbor Drive, West Conshohocken, PA 19428-2959, USA. SIST EN 2002-002:2006
NOTE For non-standard proportional test piece, see Ax. Elongation after fracture expressed as a percentage of the original gauge length (L0) for a proportional test piece with an original gauge length of L0 = 5,650S. A = 00uLLL−× 100 AL0 % Percentage elongation (non-proportional test piece) Elongation after fracture expressed as a percentage of the original gauge length (L0) for a non-proportional test piece with an original gauge length of L0. For a non-proportional test piece, the original gauge length is given in millimetres, e.g. A50mm. AL0 = 00uLLL−× 100 Ax % Percentage elongation (non standard proportional test piece) Elongation after fracture expressed as a percentage of original gauge length (L0) for a non-standard proportional test piece with an original gauge length of L0 = x (e.g.: A4D) A non-standard proportional test piece is one in which the proportionality coefficient has a value other than 5,65. In the example above the gauge length is four times the diameter, equivalent to a proportionality coefficient of 4,51. a mm Test piece thickness Thickness of a test piece of rectangular cross-section or wall thickness of a tube b mm Test piece width Width of test pieces of rectangular cross-section, average width of the longitudinal strip taken from a tube or width of a flat wire D mm Tube external diameter External diameter of a tube D mm Test piece diameter Diameter of the parallel length of a circular test piece or diameter of round wire or internal diameter of a tube continued SIST EN 2002-002:2006
The permitted deviation in temperature along the original gauge length (L0) shall comply with the above at least until the point corresponding to the proof stress of non-proportional elongation is reached. The heating characteristics of the furnace and temperature control system shall prevent the limits specified above being exceeded during the heating of the test piece. 6.1.1.5 Temperature measurements Platinum/platinum-rhodium thermocouples of type R or type S to Class 1 according to EN 60584-2 shall be used. They shall be verified over the working temperature range by a method traceable to the international unit (SI) of temperature, at intervals not exceeding one year. 6.1.1.6 Recording A recorder/data logger, accurate to ± 1,0 °C and with a resolution of 0,5 °C, shall be verified at intervals not exceeding 12 months. Verification shall be performed using a thermocouple measuring/simulating instrument, accurate to ± 0,5 °C and with a resolution of 0,2 °C, it self verified at intervals not exceeding 12 months. Verification errors shall be recorded in a report. SIST EN 2002-002:2006
...


Questions, Comments and Discussion
Ask us and Technical Secretary will try to provide an answer. You can facilitate discussion about the standard in here.
Loading comments...