ISO 19685:2017
(Main)Vacuum technology — Vacuum gauges — Specifications, calibration and measurement uncertainties for Pirani gauges
Vacuum technology — Vacuum gauges — Specifications, calibration and measurement uncertainties for Pirani gauges
ISO 19685:2017 identifies parameters of Pirani gauges, their calibration procedure, and describes measurement uncertainties to be considered when operating these gauges. ISO 19685:2017 applies to Pirani vacuum gauges operating over a pressure range of 0,01 Pa to 150 kPa. ISO 19685:2017 complements ISO 3567 and ISO 27893 when calibrating Pirani gauges and using them as reference standards. In addition, ISO 19685:2017 defines procedures to characterize Pirani gauges for response time and hysteresis.
Technique du vide — Manomètres à vide — Spécifications, étalonnage et incertitudes de mesure pour les jauges Pirani
General Information
- Status
- Published
- Publication Date
- 19-Sep-2017
- Technical Committee
- ISO/TC 112 - Vacuum technology
- Drafting Committee
- ISO/TC 112/WG 2 - Vacuum instrumentation
- Current Stage
- 9093 - International Standard confirmed
- Start Date
- 05-Dec-2022
- Completion Date
- 12-Feb-2026
Overview - ISO 19685:2017 (Pirani gauges, calibration & uncertainties)
ISO 19685:2017 is an international standard for Pirani vacuum gauges used in vacuum technology. It defines the parameters, calibration procedures and the measurement uncertainties to be considered when operating Pirani gauges over the pressure range 0.01 Pa to 150 kPa. The standard complements general vacuum‑gauge guidance (ISO 3567 and ISO 27893) and provides additional procedures to characterize response time and hysteresis of Pirani gauges.
Key topics and technical requirements
Scope and definitions
- Applies to thermal‑conductivity type Pirani gauges (including convection‑enhanced variants noted in the standard).
- Defines physical parameters such as internal volume, thermal accommodation coefficient, long‑term instability, response time (τ) and hysteresis.
Specifications for gauge design and operation
- Expected measurement range, full scale and output types (pressure, voltage or current).
- Requirements for materials exposed to gas, connecting flange, interface/pin‑connections, warm‑up period, compatibility between gauge tube and controller, normal operating conditions, power supply, cable length, maximum bake‑out temperature, mounting orientation and dimensions.
Optional (additional) specifications
- Long‑term instability, relative sensitivity factor, hysteresis, response time, inspection record, configuration, weight, storage/transport conditions, photographs, maximum power consumption and set points.
Calibration and measurement procedures
- Conditions for calibration, assembly/adjustments of the calibration item, direct‑comparison calibration procedures, uncertainty evaluation during calibration, and content required in a calibration certificate.
- Specific measurement procedures for determining hysteresis and response time.
Measurement uncertainty
- Guidance on evaluating measurement uncertainties both during calibration and at the point of use, following methods consistent with ISO 27893 and ISO 3567.
Practical applications and who uses ISO 19685:2017
Who benefits
- Calibration laboratories and metrology institutes performing traceable calibrations.
- Manufacturers of Pirani gauges and vacuum gauge controllers.
- Engineers and technicians responsible for vacuum systems in research labs and industrial vacuum processing.
- Quality managers ensuring instrument performance and traceability.
Practical uses
- Establishing traceable calibration procedures for Pirani gauges.
- Characterizing gauge dynamic behavior (response time, hysteresis) for process control.
- Defining uncertainty budgets when Pirani gauges are used as reference or process monitors.
- Ensuring compatibility and safe operating conditions (bake‑out, power, mounting) for reliable vacuum measurement.
Related standards
- ISO 3567 - Vacuum gauges: calibration by direct comparison with a reference gauge
- ISO 27893 - Evaluation of uncertainties for calibrations by direct comparison
- ISO/IEC 17025 - General requirements for competence of testing and calibration laboratories
Keywords: ISO 19685:2017, Pirani gauge, vacuum gauges, calibration, measurement uncertainties, vacuum technology, response time, hysteresis, thermal conductivity gauge, pressure range.
Get Certified
Connect with accredited certification bodies for this standard

Institut za varilstvo d.o.o. (Welding Institute)
Slovenia's leading welding institute since 1952. ISO 3834, EN 1090, pressure equipment certification, NDT personnel, welder qualification. Only IIW Au
Sponsored listings
Frequently Asked Questions
ISO 19685:2017 is a standard published by the International Organization for Standardization (ISO). Its full title is "Vacuum technology — Vacuum gauges — Specifications, calibration and measurement uncertainties for Pirani gauges". This standard covers: ISO 19685:2017 identifies parameters of Pirani gauges, their calibration procedure, and describes measurement uncertainties to be considered when operating these gauges. ISO 19685:2017 applies to Pirani vacuum gauges operating over a pressure range of 0,01 Pa to 150 kPa. ISO 19685:2017 complements ISO 3567 and ISO 27893 when calibrating Pirani gauges and using them as reference standards. In addition, ISO 19685:2017 defines procedures to characterize Pirani gauges for response time and hysteresis.
ISO 19685:2017 identifies parameters of Pirani gauges, their calibration procedure, and describes measurement uncertainties to be considered when operating these gauges. ISO 19685:2017 applies to Pirani vacuum gauges operating over a pressure range of 0,01 Pa to 150 kPa. ISO 19685:2017 complements ISO 3567 and ISO 27893 when calibrating Pirani gauges and using them as reference standards. In addition, ISO 19685:2017 defines procedures to characterize Pirani gauges for response time and hysteresis.
ISO 19685:2017 is classified under the following ICS (International Classification for Standards) categories: 23.160 - Vacuum technology. The ICS classification helps identify the subject area and facilitates finding related standards.
ISO 19685:2017 is available in PDF format for immediate download after purchase. The document can be added to your cart and obtained through the secure checkout process. Digital delivery ensures instant access to the complete standard document.
Standards Content (Sample)
INTERNATIONAL ISO
STANDARD 19685
First edition
2017-09
Vacuum technology — Vacuum
gauges — Specifications, calibration
and measurement uncertainties for
Pirani gauges
Technique du vide — Manomètres à vide — Spécifications, étalonnage
et incertitudes de mesure pour les jauges Pirani
Reference number
©
ISO 2017
© ISO 2017, Published in Switzerland
All rights reserved. Unless otherwise specified, no part of this publication may be reproduced or utilized otherwise in any form
or by any means, electronic or mechanical, including photocopying, or posting on the internet or an intranet, without prior
written permission. Permission can be requested from either ISO at the address below or ISO’s member body in the country of
the requester.
ISO copyright office
Ch. de Blandonnet 8 • CP 401
CH-1214 Vernier, Geneva, Switzerland
Tel. +41 22 749 01 11
Fax +41 22 749 09 47
copyright@iso.org
www.iso.org
ii © ISO 2017 – All rights reserved
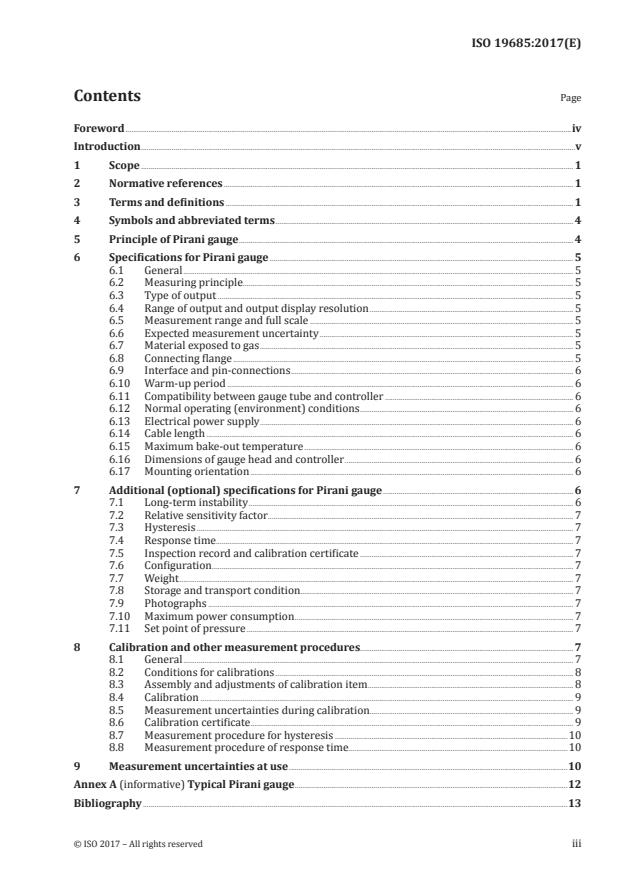
Contents Page
Foreword .iv
Introduction .v
1 Scope . 1
2 Normative references . 1
3 Terms and definitions . 1
4 Symbols and abbreviated terms . 4
5 Principle of Pirani gauge . 4
6 Specifications for Pirani gauge . 5
6.1 General . 5
6.2 Measuring principle . 5
6.3 Type of output . 5
6.4 Range of output and output display resolution . 5
6.5 Measurement range and full scale . 5
6.6 Expected measurement uncertainty . 5
6.7 Material exposed to gas . 5
6.8 Connecting flange . 5
6.9 Interface and pin-connections . 6
6.10 Warm-up period . 6
6.11 Compatibility between gauge tube and controller . 6
6.12 Normal operating (environment) conditions . 6
6.13 Electrical power supply . 6
6.14 Cable length . 6
6.15 Maximum bake-out temperature . 6
6.16 Dimensions of gauge head and controller . 6
6.17 Mounting orientation . 6
7 Additional (optional) specifications for Pirani gauge . 6
7.1 Long-term instability . 6
7.2 Relative sensitivity factor . 7
7.3 Hysteresis . 7
7.4 Response time. 7
7.5 Inspection record and calibration certificate . 7
7.6 Configuration . 7
7.7 Weight . 7
7.8 Storage and transport condition . 7
7.9 Photographs . 7
7.10 Maximum power consumption . 7
7.11 Set point of pressure . 7
8 Calibration and other measurement procedures. 7
8.1 General . 7
8.2 Conditions for calibrations . 8
8.3 Assembly and adjustments of calibration item . 8
8.4 Calibration . 9
8.5 Measurement uncertainties during calibration . 9
8.6 Calibration certificate . 9
8.7 Measurement procedure for hysteresis .10
8.8 Measurement procedure of response time.10
9 Measurement uncertainties at use .10
Annex A (informative) Typical Pirani gauge .12
Bibliography .13
Foreword
ISO (the International Organization for Standardization) is a worldwide federation of national standards
bodies (ISO member bodies). The work of preparing International Standards is normally carried out
through ISO technical committees. Each member body interested in a subject for which a technical
committee has been established has the right to be represented on that committee. International
organizations, governmental and non-governmental, in liaison with ISO, also take part in the work.
ISO collaborates closely with the International Electrotechnical Commission (IEC) on all matters of
electrotechnical standardization.
The procedures used to develop this document and those intended for its further maintenance are
described in the ISO/IEC Directives, Part 1. In particular the different approval criteria needed for the
different types of ISO documents should be noted. This document was drafted in accordance with the
editorial rules of the ISO/IEC Directives, Part 2 (see www.iso.org/directives).
Attention is drawn to the possibility that some of the elements of this document may be the subject of
patent rights. ISO shall not be held responsible for identifying any or all such patent rights. Details of
any patent rights identified during the development of the document will be in the Introduction and/or
on the ISO list of patent declarations received (see www.iso.org/patents).
Any trade name used in this document is information given for the convenience of users and does not
constitute an endorsement.
For an explanation on the voluntary nature of standards, the meaning of ISO specific terms and
expressions related to conformity assessment, as well as information about ISO's adherence to the
World Trade Organization (WTO) principles in the Technical Barriers to Trade (TBT) see the following
URL: www.iso.org/iso/foreword.html.
This document was prepared by Technical Committee ISO/TC 112, Vacuum technology.
iv © ISO 2017 – All rights reserved
Introduction
ISO 3567 and ISO 27893 are basic standards with no specific guidelines of a special type of vacuum
gauge and are generally applicable. Detailed guidance for a specific gauge is intended to be given in
separate technical specifications for the calibration of special types of gauges.
This document complements ISO 3567 and ISO 27893 when characterizing or calibrating Pirani gauges
or using them as reference gauges.
Pirani gauges are widely used to measure pressures in the medium vacuum up to atmospheric pressure.
The relevant parameters, calibration guidelines and uncertainties for the dissemination of the pressure
scale and measurement of low and medium vacuum pressures by a Pirani gauge are described in this
document.
INTERNATIONAL STANDARD ISO 19685:2017(E)
Vacuum technology — Vacuum gauges — Specifications,
calibration and measurement uncertainties for Pirani
gauges
1 Scope
This document identifies parameters of Pirani gauges, their calibration procedure, and describes
measurement uncertainties to be considered when operating these gauges.
This document applies to Pirani vacuum gauges operating over a pressure range of 0,01 Pa to 150 kPa.
This document complements ISO 3567 and ISO 27893 when calibrating Pirani gauges and using them as
reference standards.
In addition, this document defines procedures to characterize Pirani gauges for response time and
hysteresis.
2 Normative references
The following documents are referred to in the text in such a way that some or all of their content
constitutes requirements of this document. For dated references, only the edition cited applies. For
undated references, the latest edition of the referenced document (including any amendments) applies.
ISO 3567:2011, Vacuum gauges — Calibration by direct comparison with a reference gauge
ISO 27893, Vacuum technology — Vacuum gauges — Evaluation of the uncertainties of results of
calibrations by direct comparison with a reference gauge
ISO/IEC 17025, General requirements for the competence of testing and calibration laboratories
3 Terms and definitions
For the purposes of this document, the following terms and definitions apply.
ISO and IEC maintain terminological databases for use in standardization at the following addresses:
— ISO Online browsing platform: available at http://www.iso.org/obp
— IEC Electropedia: available at http://www.electropedia.org/
3.1 Definitions of components
3.1.1
thermal conductivity gauge
vacuum gauge in which the pressure is determined in relation to the transfer of thermal energy between
the surfaces of two fixed elements maintained at different temperatures
Note 1 to entry: This gauge is based on the thermal conductivity of a gas being pressure dependent.
[SOURCE: ISO 3529-3:2014, 2.4.2.2, modified — Example has been deleted.]
3.1.2
Pirani gauge
thermal conductivity gauge in which the heated element is part of a Wheatstone bridge that supplies
the energy to the element and by which the electrical resistance or the dissipated power of the element
is being measured
Note 1 to entry: Some types of Pirani gauges have an extended upper limit of measurement range by using the
heat convection inside the tube. This type is often called convection-enhanced Pirani gauge.
Note 2 to entry: See Annex A.
[SOURCE: ISO 3529-3:2014, 2.4.2.2.2, modified — Note 1 to entry has been replaced.]
3.2 Definitions of physical parameters
3.2.1
internal volume
volume of the gauge that is exposed to the vacuum system where it is attached to, counted from the
connecting flange plane
3.2.2
thermal accommodation coefficient
ratio of the absolute temperature of the molecule after a hit with the heated element in a Pirani gauge
and the absolute temperature of the heated element
3.2.3
long-term instability
p pp−
D
UUC
quantity characterizing the typical change of relative measurement error e== over time
p p
where the period needs to be specified
Note 1 to entry: Measurement errors to determine long-term instability of this gauge type are taken for nitrogen
at a pressure of p=±()10 1 Pa (nitrogen) after a specified period. This quantity δ shall be a relative quantity
t
and may be determined in two ways:
a) as the relative standard deviation of measurement error e obtained from at least three calibrations each
i
being separated by the specified period
n
δ = ee−
ti∑( )
n−1
i=1
with n being the number of calibrations i, and
n
e= e
∑ i
n
i=1
b) as the mean of absolute (non-negative) changes of measurement error Δp between recalibrations
i
separated by the specified period
n−1
ee−
∑ ii+1
i=1
δ =
t
n−1
and n as described above
Note 2 to entry: The formula in a) is recommended when the measurement error does not show a significant drift
but random variations, and the formula in b) when the measurement error shows a systematic and monotonic drift.
2 © ISO 2017 – All rights reserved
Note 3 to entry: If the output signal of the gauge is not pressure (e.g. voltage or current), this signal shall be
converted to pressure based on the manufacturer's specification, before the measurement error is calculated.
Note 4 to entry: Long term instability can be determined by recalibrations with a more accurate gauge or a
primary standard. This often requires a transport which itself can lead to an instability of the calibrated value.
For this reason, it is not reasonable to assume a linear relationship of instability with time (e.g. δ for a period of
t
2 years is not 2 times δ for a period of 1 year).
t
Note 5 to entry: If not specified otherwise, it is recommended to determine δ over a period of 1 year. This is
t
usually a reasonable compromise between costs and influence of transport on the one hand and a possible drift
and lowest possible measurement uncertainty on the other hand.
EXAMPLE If δ was determined to 6,5 % according to the formula in b), where the period of recalibration
t
was 1 year, the report will be “δ = 6,5 % for a period of one year”.
t
3.2.4
response time
τ
time that elapses when the Pirani gauge is exposed to a sudden pressure change of nitrogen between
1 kPa to 100 Pa (up or down to be specified), until the Pirani shows 90 % of the pressure change
difference
Note 1 to entry: See Figure 1.
Figure 1 — Illustration to explain definition of response time τ
3.2.5
hysteresis
relative difference of indication of a Pirani gauge when exposed to the same pressure in a rising and
decreasing sequence
4 Symbols and abbreviated terms
Symbol Designation Unit
e Relative measurement error 1 or in %
p Pressure, traceable to SI Pa
Measurement error (measured pressure p
UUC
Δ p Pa
minus reference pressure p)
Measured pressure by unit under calibra-
p Pa
UUC
tion (UUC)
δ Long-term instability as defined in 3.2.3 1 or in %
t
τ Response time ms
UUC Unit under calibration
5 Principle of Pirani gauge
The Pirani gauge is one type of a thermal conductivity vacuum gauge. In the Pirani gauge, gas molecules
conduct heat away from a heated element to a surrounding wall that is usually at room temperature
(see Figure A.1). In a certain pressure range, the heat taken away by the molecules is proportional to
molecular density and hence pressure. The corresponding temperature change of the heated element,
which is often a filament, causes a change in resistance. The resistance is part of a Wheatstone type
bridge circuit that supplies the energy to the element and by which the electrical resistance or the
dissipated power of the element is being measured. The bridge circuit may keep constant either the
temperature of the heated element, or the heating power, or voltage or current. The linear measurement
range is highest, when the temperature is kept constant. More detailed information i
...


Questions, Comments and Discussion
Ask us and Technical Secretary will try to provide an answer. You can facilitate discussion about the standard in here.
Loading comments...