ISO 16063-45:2017
(Main)Methods for the calibration of vibration and shock transducers — Part 45: In-situ calibration of transducers with built in calibration coil
Methods for the calibration of vibration and shock transducers — Part 45: In-situ calibration of transducers with built in calibration coil
ISO 16063-45:2017 specifies the calibration of vibration transducers with built-in calibration coils in laboratory and in situ. In laboratory, the method described can be applied to calibrate the vibration sensitivity and electrical sensitivity, and to obtain the coefficient of calibration coil. In situ, it can be used to calibrate the electrical sensitivity and vibration sensitivity using electrical instrumentation. ISO 16063-45:2017 specifies the instrumentation and procedure for performing calibrations of vibration transducers with built-in calibration coils in the frequency range typically from 0,1 Hz to 100 Hz. The expanded uncertainty can be evaluated using the method given in this document.
Méthodes pour l'étalonnage des transducteurs de vibrations et de chocs — Partie 45: Partie 45: Étalonnage sur site des transducteurs munis d'une bobine d'étalonnage intégrée
General Information
- Status
- Published
- Publication Date
- 16-May-2017
- Technical Committee
- ISO/TC 108 - Mechanical vibration, shock and condition monitoring
- Drafting Committee
- ISO/TC 108/WG 34 - Calibration of vibration and shock transducers
- Current Stage
- 9093 - International Standard confirmed
- Start Date
- 24-Oct-2022
- Completion Date
- 12-Feb-2026
Overview
ISO 16063-45:2017 - Methods for the calibration of vibration and shock transducers - Part 45 describes laboratory and in‑situ calibration procedures for vibration transducers that have a built‑in calibration coil. The standard covers instrumentation, measurement procedures and evaluation of expanded uncertainty for calibrations typically in the frequency range 0.1 Hz to 100 Hz. It defines how to obtain and use electrical sensitivity, vibration sensitivity, and the coefficient of calibration coil to transfer laboratory calibration into field (in‑situ) use.
Key Topics
- Scope and purpose
- Calibrate vibration transducers with integrated calibration coils in laboratory and on site.
- Provide procedures to measure electrical sensitivity, vibration sensitivity and coil coefficient.
- Measurements and equations
- Electrical sensitivity S = E / Ue (output voltage per exciting coil voltage).
- Vibration sensitivity Sv = E / X (output voltage per mechanical input).
- Coefficient of calibration coil c = Selectrical / Sv and relation Sc = Sv · c (as given in the standard).
- Instrumentation
- Frequency generator and indicator, voltage measuring instrumentation and appropriate measuring systems for 0.1 Hz–100 Hz.
- Calibration workflow
- Laboratory: determine sensitivity by primary or comparison methods; measure electrical sensitivity and compute coil coefficient.
- In‑situ: measure electrical sensitivity with field instrumentation and compute vibration sensitivity using the laboratory coil coefficient.
- Preferred amplitudes and frequencies
- Use amplitude steps in 1–2–5 series and frequencies from the one‑third‑octave series (ISO 266).
- Uncertainty
- Annex A/B provide methods and examples for uncertainty budgets and expanded uncertainty (coverage factor k=2).
- Example attainable expanded uncertainties are given (e.g., laboratory sensitivity ~1–2%, in‑situ sensitivity ~5–10%, depending on conditions).
Applications
- Calibration and verification of seismometers, pendulum transducers, and electromagnetic vibration transducers used in:
- Seismic monitoring and geophysical networks.
- Structural health monitoring of bridges and buildings.
- Condition monitoring in industry (rotating machinery, civil infrastructure).
- Calibration laboratories and on‑site maintenance teams needing traceable in‑situ calibration.
- Beneficiaries include metrology labs, calibration service providers, instrument manufacturers, system integrators and field technicians.
Related Standards
- ISO 16063‑1 (Basic concepts for vibration and shock transducer calibration) - normative reference.
- ISO 266 (preferred frequency series - one‑third‑octave).
- ISO/TS 10811‑2 (environmental vibration classes referenced in uncertainty examples).
ISO 16063-45:2017 is a practical, traceability‑focused standard for converting laboratory coil calibrations into reliable in‑situ sensitivity measurements for transducers with built‑in calibration coils.
Get Certified
Connect with accredited certification bodies for this standard

BSMI (Bureau of Standards, Metrology and Inspection)
Taiwan's standards and inspection authority.
Sponsored listings
Frequently Asked Questions
ISO 16063-45:2017 is a standard published by the International Organization for Standardization (ISO). Its full title is "Methods for the calibration of vibration and shock transducers — Part 45: In-situ calibration of transducers with built in calibration coil". This standard covers: ISO 16063-45:2017 specifies the calibration of vibration transducers with built-in calibration coils in laboratory and in situ. In laboratory, the method described can be applied to calibrate the vibration sensitivity and electrical sensitivity, and to obtain the coefficient of calibration coil. In situ, it can be used to calibrate the electrical sensitivity and vibration sensitivity using electrical instrumentation. ISO 16063-45:2017 specifies the instrumentation and procedure for performing calibrations of vibration transducers with built-in calibration coils in the frequency range typically from 0,1 Hz to 100 Hz. The expanded uncertainty can be evaluated using the method given in this document.
ISO 16063-45:2017 specifies the calibration of vibration transducers with built-in calibration coils in laboratory and in situ. In laboratory, the method described can be applied to calibrate the vibration sensitivity and electrical sensitivity, and to obtain the coefficient of calibration coil. In situ, it can be used to calibrate the electrical sensitivity and vibration sensitivity using electrical instrumentation. ISO 16063-45:2017 specifies the instrumentation and procedure for performing calibrations of vibration transducers with built-in calibration coils in the frequency range typically from 0,1 Hz to 100 Hz. The expanded uncertainty can be evaluated using the method given in this document.
ISO 16063-45:2017 is classified under the following ICS (International Classification for Standards) categories: 17.160 - Vibrations, shock and vibration measurements. The ICS classification helps identify the subject area and facilitates finding related standards.
ISO 16063-45:2017 is available in PDF format for immediate download after purchase. The document can be added to your cart and obtained through the secure checkout process. Digital delivery ensures instant access to the complete standard document.
Standards Content (Sample)
INTERNATIONAL ISO
STANDARD 16063-45
First edition
2017-05
Methods for the calibration of
vibration and shock transducers —
Part 45:
In-situ calibration of transducers with
built in calibration coil
Méthodes pour l’étalonnage des transducteurs de vibrations et de
chocs —
Partie 45: Partie 45: Étalonnage sur site des transducteurs munis
d’une bobine d’étalonnage intégrée
Reference number
©
ISO 2017
© ISO 2017, Published in Switzerland
All rights reserved. Unless otherwise specified, no part of this publication may be reproduced or utilized otherwise in any form
or by any means, electronic or mechanical, including photocopying, or posting on the internet or an intranet, without prior
written permission. Permission can be requested from either ISO at the address below or ISO’s member body in the country of
the requester.
ISO copyright office
Ch. de Blandonnet 8 • CP 401
CH-1214 Vernier, Geneva, Switzerland
Tel. +41 22 749 01 11
Fax +41 22 749 09 47
copyright@iso.org
www.iso.org
ii © ISO 2017 – All rights reserved
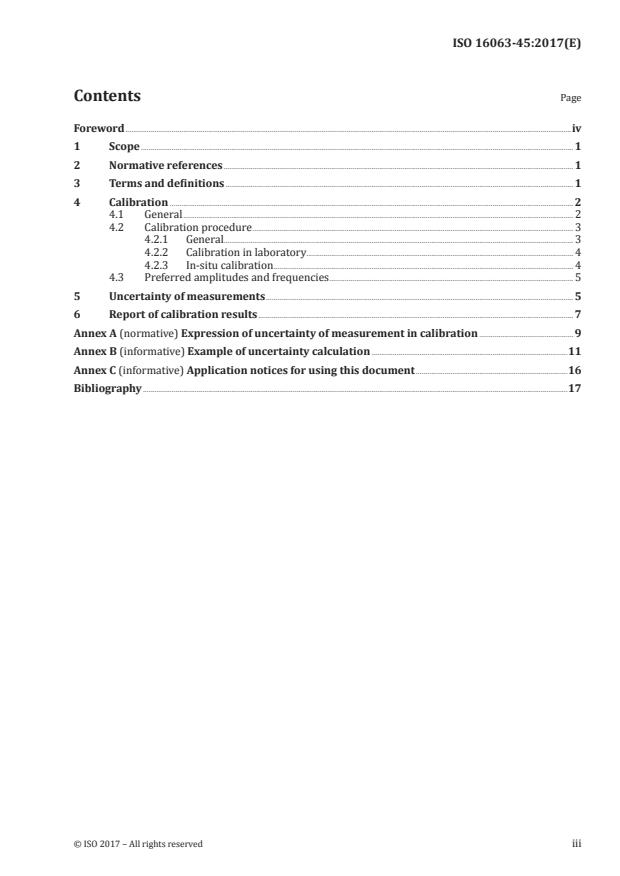
Contents Page
Foreword .iv
1 Scope . 1
2 Normative references . 1
3 Terms and definitions . 1
4 Calibration . 2
4.1 General . 2
4.2 Calibration procedure . 3
4.2.1 General. 3
4.2.2 Calibration in laboratory. 4
4.2.3 In-situ calibration . 4
4.3 Preferred amplitudes and frequencies . 5
5 Uncertainty of measurements . 5
6 Report of calibration results . 7
Annex A (normative) Expression of uncertainty of measurement in calibration .9
Annex B (informative) Example of uncertainty calculation .11
Annex C (informative) Application notices for using this document .16
Bibliography .17
Foreword
ISO (the International Organization for Standardization) is a worldwide federation of national standards
bodies (ISO member bodies). The work of preparing International Standards is normally carried out
through ISO technical committees. Each member body interested in a subject for which a technical
committee has been established has the right to be represented on that committee. International
organizations, governmental and non-governmental, in liaison with ISO, also take part in the work.
ISO collaborates closely with the International Electrotechnical Commission (IEC) on all matters of
electrotechnical standardization.
The procedures used to develop this document and those intended for its further maintenance are
described in the ISO/IEC Directives, Part 1. In particular the different approval criteria needed for the
different types of ISO documents should be noted. This document was drafted in accordance with the
editorial rules of the ISO/IEC Directives, Part 2 (see www .iso .org/ directives).
Attention is drawn to the possibility that some of the elements of this document may be the subject of
patent rights. ISO shall not be held responsible for identifying any or all such patent rights. Details of
any patent rights identified during the development of the document will be in the Introduction and/or
on the ISO list of patent declarations received (see www .iso .org/ patents).
Any trade name used in this document is information given for the convenience of users and does not
constitute an endorsement.
For an explanation on the voluntary nature of standards, the meaning of ISO specific terms and
expressions related to conformity assessment, as well as information about ISO’s adherence to the
World Trade Organization (WTO) principles in the Technical Barriers to Trade (TBT) see the following
URL: w w w . i s o .org/ iso/ foreword .html.
This document was prepared by Technical Committee ISO/TC 108, Mechanical vibration, shock and
condition monitoring.
A list of all parts in the ISO 16063 series can be found on the ISO website.
iv © ISO 2017 – All rights reserved
INTERNATIONAL STANDARD ISO 16063-45:2017(E)
Methods for the calibration of vibration and shock
transducers —
Part 45:
In-situ calibration of transducers with built in
calibration coil
1 Scope
This document specifies the calibration of vibration transducers with built-in calibration coils in
laboratory and in situ. In laboratory, the method described can be applied to calibrate the vibration
sensitivity and electrical sensitivity, and to obtain the coefficient of calibration coil. In situ, it can be
used to calibrate the electrical sensitivity and vibration sensitivity using electrical instrumentation.
This document specifies the instrumentation and procedure for performing calibrations of vibration
transducers with built-in calibration coils in the frequency range typically from 0,1 Hz to 100 Hz.
The expanded uncertainty can be evaluated using the method given in this document.
2 Normative references
The following documents are referred to in the text in such a way that some or all of their content
constitutes requirements of this document. For dated references, only the edition cited applies. For
undated references, the latest edition of the referenced document (including any amendments) applies.
ISO 16063-1, Methods for the calibration of vibration and shock transducers — Part 1: Basic concepts
3 Terms and definitions
For the purposes of this document, the following terms and definitions apply.
ISO and IEC maintain terminological databases for use in standardization at the following addresses:
— ISO Online browsing platform: available at www .iso .org/ obp
— IEC Electropedia: available at www .electropedia .org
3.1
vibration transducer with built-in calibration coils
vibration transducer employing calibration coils as internal exciting elements for which seismic mass is
excited to vibrate by electromagnetic force produced by the exciting electrical signal of the calibration coil
EXAMPLE 1 Pendulum.
EXAMPLE 2 Seismometers and electromagnetic transducers with built-in calibration coils.
3.2
electrical sensitivity
ratio of the electrical output of the vibration
transducer to the exciting electrical signal of the calibration coil in the absence of mechanical excitation
parallel to a specified axis of sensitivity (3.3) at the mounting surface
3.3
sensitivity
ratio of the transducer electrical output to its mechanical input during
sinusoidal excitation applied parallel to a specified axis of sensitivity at the mounting surface
3.4
coefficient of calibration coil
ratio of the electrical sensitivity (3.2) to
sensitivity (3.3)
Note 1 to entry: The coefficient of calibration coil is frequency dependent.
4 Calibration
4.1 General
The principle of a vibration transducer with built-in calibration coils is illustrated in Figure 1. The
pendulum vibrates under the inertia force produced by measured vibration. A calibration coil can be
used to produce the equivalent electromagnetic force to simulate the inertial force required to vibrate
the pendulum.
Key
1 pendulum Ue exciting electrical signal of the calibration coil
2 sensing element E output electrical signal of the transducer
3 calibration coil X vibration measured by the transducer
4 measured vibration
Figure 1 — Principle of a vibration transducer with built-in calibration coils
The signals and instrumentations used in the calibration of vibration transducers with built-in
calibration coils are shown in Figure 2.
2 © ISO 2017 – All rights reserved
Key
1 frequency generator and indicator c coefficient of calibration coil
2 vibration transducer with built-in calibration coils Sv sensitivity
3 voltage measuring instrumentation E output electrical signal of the transducer
Ue exciting electrical signal of the calibration coil X vibration measured by the transducer
Figure 2 — Measuring system for calibration of a vibration transducer with built-in
calibration coils
The electrical sensitivity of the vibration transducer with built-in calibration coils is given in
Formula (1):
E
S = (1)
Ue
The sensitivity of the vibration transducer with built-in calibration coil is given in Formula (2):
E
Sv= (2)
X
The coefficient of calibration coil is given in Formula (3):
S
c= (3)
Sv
According to Formula (1) to Formula (3), the electric sensitivity of the vibration transducer with built-
in calibration coil can described as given in Formula (4):
Sc= Sv (4)
NOTE Further information on the application of calibration coils is given in Annex C.
4.2 Calibration procedure
4.2.1 General
Calibration of vibration transducers with built-in calibration coils comprises two parts: calibration in
laboratory and in-situ calibration.
Before the transducers are employed in situ, calibration can be made in laboratory: the sensitivity
can be calibrated by primary or comparison methods; the electrical sensitivity can be calibrated by
the frequency generator and indicator and voltage measuring instrumentation; and the coefficient of
calibration coil can be calculated according to Formula (3).
After the transducers are employed in situ, the electrical sensitivity can be calibrated by the frequency
generator and indicator and voltage measuring instrumentation and the sensitivity can be calculated
according to Formula (4) using the coefficient of calibration coil obtained in laboratory.
4.2.2 Calibration in laboratory
4.2.2.1 Calibration of the sensitivity
Determine the sensitivity at the reference frequency ( f ) and acceleration ( X ) using primary or
ref ref
comparison methods. The amplitude of output electrical signal of the transducer is E .
ref
E
ref
Sv =
ref
X
ref
Then, determine the sensitivities at other calibration frequencies and accelerations using primary or
comparison methods.
4.2.2.2 Calibration of the electrical sensitivity
At the reference frequency ( f ), adjust the exciting electrical signal of the calibration coil so that the
ref
amplitude of output electrical signal of the transducer equals E . The amplitude of exciting electrical
ref
signal (Ue ) is being measured simultaneously. The electrical sensitivity at the reference point is
ref
given as follows:
E
ref
S =
ref
Ue
ref
Then, determine the electrical sensitivities at other calibration points using the frequency generator
and indicator and voltage measuring instrumentation.
4.2.2.3 Calibration of the coefficient of calibration coil
The coefficient of calibration coil at the reference point is calculated according to Formula (3):
S
ref
c =
ref
Sv
ref
Then, calculate the coefficient of calibration coil at other calibration points.
4.2.3 In-situ calibration
4.2.3.1 In-situ calibration of the electrical sensitivity
At the reference frequency ( f ), adjust the exciting electrical signal of the calibration coil so that the
ref
amplitude of output electrical signal of the transducer equals E . The amplitude of exciting electrical
ref
signal (Ue ) is being measured simultaneously. The electrical sensitivity at the reference point is
2ref
given as follows:
E
ref
S =
2ref
Ue
2ref
Then, determine the electrical sensitivities at other calibration points using the frequency generator
and indicator and voltage measuring instrumentation.
4 © ISO 2017 – All rights reserved
4.2.3.2 In-situ calibration of the sensitivity
At the reference point, according to Formula (4), the sensitivity is calculated using the coefficient of
calibration coil calibrated in laboratory.
S
2ref
Sv =
2ref
c
ref
Then, calculate the sensitivities at other calibration points.
4.3 Preferred amplitudes and frequencies
The frequencies, each with associated accelerations, velocities or displacements (amplitude or r.m.s.
value) equally covering the transducer range, should preferably be chosen from the following series.
a) Accelerations (m/s ), velocities (m/s) and displacements (mm):
Magnitude values should be selected in 1 – 2 – 5 steps, e.g. 0,01; 0,02; 0,05; 0,1; 0,2; 0,5; 1; 2; 5; 10 …
NOTE The selected amplitudes depend on the measurement type and range of the transducer calibrated.
b) Frequency (Hz):
Selected from the standardized one-third-octave-frequency series (see ISO 266) between 0,1 Hz
and 100 Hz (or the series of radian frequencies evolving from ω = 1 000 rad/s).
5 Uncertainty of measurements
5.1 All users of this document shall make uncertainty budgets in accordance with Annex A to document
their level of uncertainty. An example is given in Annex B.
To help set up systems fulfilling different requirements and environmental conditions, two examples
are given in a) and b) below. For each, system requirements are set up and the attainable uncertainty is
given. These two examples are used throughout this document.
a) Example 1
The sensitivity is calibrated by primary means and documented uncertainty. In the primary
vibration calibration laboratory, the electrical sensitivity and coefficient of calibration coil are
measured. In situ (for example, cave with seismometers), the electrical sensitivity and sensitivity
are measured. The environmental conditions are well controlled within the limits given in Table 1.
The electrical instrumentations fulfil the requirements given in Table 2 and Table 3.
Table 1 — Environmental conditions for Example 1
Site Parameter Limit
Temperature (23 ± 3) °C
Vibration calibration laboratory Relative humidity 75 % m
...


Questions, Comments and Discussion
Ask us and Technical Secretary will try to provide an answer. You can facilitate discussion about the standard in here.
Loading comments...