ASTM B639-97
(Specification)Standard Specification for Precipitation Hardening Cobalt-Containing Alloys (UNSR30155 and UNS R30816) Rod, Bar, Forgings, and Forging Stock for High-Temperature Service
Standard Specification for Precipitation Hardening Cobalt-Containing Alloys (UNSR30155 and UNS R30816) Rod, Bar, Forgings, and Forging Stock for High-Temperature Service
SCOPE
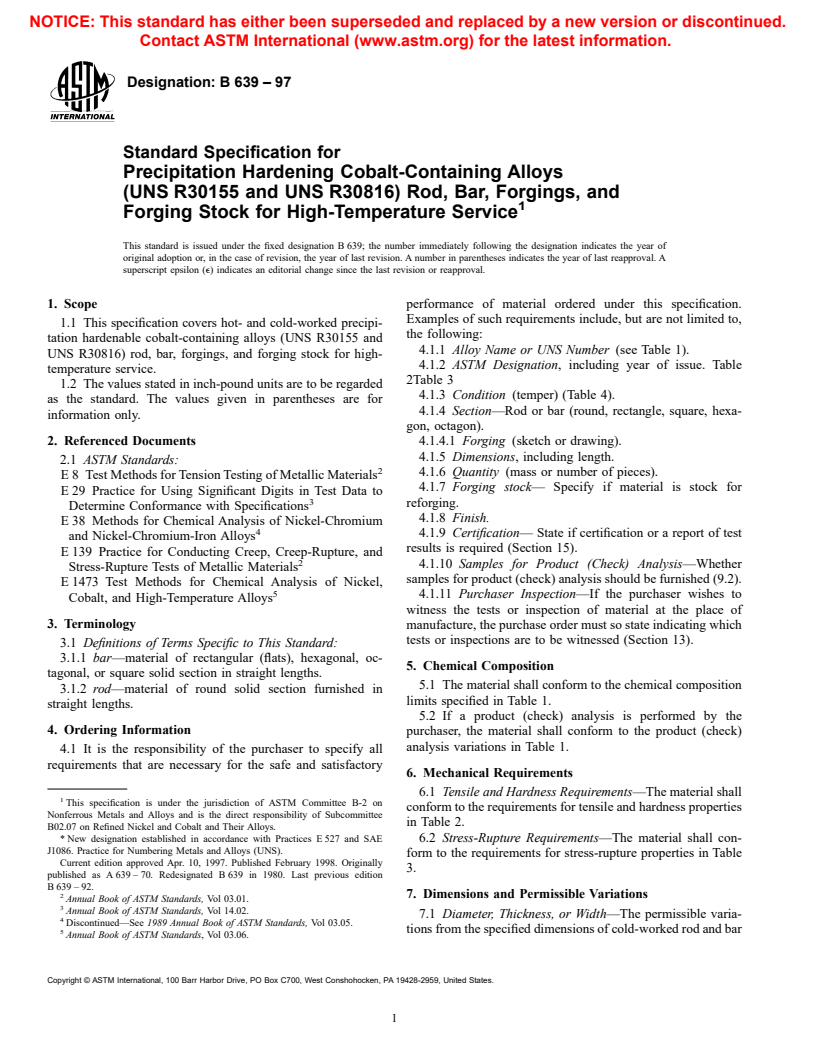
1.1 This specification covers hot- and cold-worked precipitation hardenable cobalt-containing alloys (UNS R30155 and UNS R30816) rod, bar, forgings, and forging stock for high-temperature service.
1.2 The values stated in inch-pound units are to be regarded as the standard. The values given in parentheses are for information only.
General Information
Relations
Standards Content (Sample)
NOTICE: This standard has either been superseded and replaced by a new version or discontinued.
Contact ASTM International (www.astm.org) for the latest information.
Designation: B 639 – 97
Standard Specification for
Precipitation Hardening Cobalt-Containing Alloys
(UNS R30155 and UNS R30816) Rod, Bar, Forgings, and
Forging Stock for High-Temperature Service
This standard is issued under the fixed designation B 639; the number immediately following the designation indicates the year of
original adoption or, in the case of revision, the year of last revision. A number in parentheses indicates the year of last reapproval. A
superscript epsilon (e) indicates an editorial change since the last revision or reapproval.
1. Scope performance of material ordered under this specification.
Examples of such requirements include, but are not limited to,
1.1 This specification covers hot- and cold-worked precipi-
the following:
tation hardenable cobalt-containing alloys (UNS R30155 and
4.1.1 Alloy Name or UNS Number (see Table 1).
UNS R30816) rod, bar, forgings, and forging stock for high-
4.1.2 ASTM Designation, including year of issue. Table
temperature service.
2Table 3
1.2 The values stated in inch-pound units are to be regarded
4.1.3 Condition (temper) (Table 4).
as the standard. The values given in parentheses are for
4.1.4 Section—Rod or bar (round, rectangle, square, hexa-
information only.
gon, octagon).
2. Referenced Documents 4.1.4.1 Forging (sketch or drawing).
4.1.5 Dimensions, including length.
2.1 ASTM Standards:
4.1.6 Quantity (mass or number of pieces).
E 8 Test Methods for Tension Testing of Metallic Materials
4.1.7 Forging stock— Specify if material is stock for
E 29 Practice for Using Significant Digits in Test Data to
reforging.
Determine Conformance with Specifications
4.1.8 Finish.
E 38 Methods for Chemical Analysis of Nickel-Chromium
4.1.9 Certification— State if certification or a report of test
and Nickel-Chromium-Iron Alloys
results is required (Section 15).
E 139 Practice for Conducting Creep, Creep-Rupture, and
4.1.10 Samples for Product (Check) Analysis—Whether
Stress-Rupture Tests of Metallic Materials
samples for product (check) analysis should be furnished (9.2).
E 1473 Test Methods for Chemical Analysis of Nickel,
4.1.11 Purchaser Inspection—If the purchaser wishes to
Cobalt, and High-Temperature Alloys
witness the tests or inspection of material at the place of
3. Terminology
manufacture, the purchase order must so state indicating which
tests or inspections are to be witnessed (Section 13).
3.1 Definitions of Terms Specific to This Standard:
3.1.1 bar—material of rectangular (flats), hexagonal, oc-
5. Chemical Composition
tagonal, or square solid section in straight lengths.
5.1 The material shall conform to the chemical composition
3.1.2 rod—material of round solid section furnished in
limits specified in Table 1.
straight lengths.
5.2 If a product (check) analysis is performed by the
4. Ordering Information
purchaser, the material shall conform to the product (check)
analysis variations in Table 1.
4.1 It is the responsibility of the purchaser to specify all
requirements that are necessary for the safe and satisfactory
6. Mechanical Requirements
6.1 Tensile and Hardness Requirements—The material shall
This specification is under the jurisdiction of ASTM Committee B-2 on
conform to the requirements for tensile and hardness properties
Nonferrous Metals and Alloys and is the direct responsibility of Subcommittee
in Table 2.
B02.07 on Refined Nickel and Cobalt and Their Alloys.
* New designation established in accordance with Practices E 527 and SAE 6.2 Stress-Rupture Requirements—The material shall con-
J1086. Practice for Numbering Metals and Alloys (UNS).
form to the requirements for stress-rupture properties in Table
Current edition approved Apr. 10, 1997. Published February 1998. Originally
3.
published as A 639 – 70. Redesignated B 639 in 1980. Last previous edition
B 639 – 92.
2 7. Dimensions and Permissible Variations
Annual Book of ASTM Standards, Vol 03.01.
Annual Book of ASTM Standards, Vol 14.02.
7.1 Diameter, Thickness, or Width—The permissible varia-
Discontinued—See 1989 Annual Book of ASTM Standards, Vol 03.05.
tions from the specified dimensions of cold-worked rod and bar
Annual Book of ASTM Standards, Vol 03.06.
Copyright © ASTM International, 100 Barr Harbor Drive, PO Box C700, West Conshohocken, PA 19428-2959, United States.
NOTICE: This standard has either been superseded and replaced by a new version or discontinued.
Contact ASTM International (www.astm.org) for the latest information.
B 639
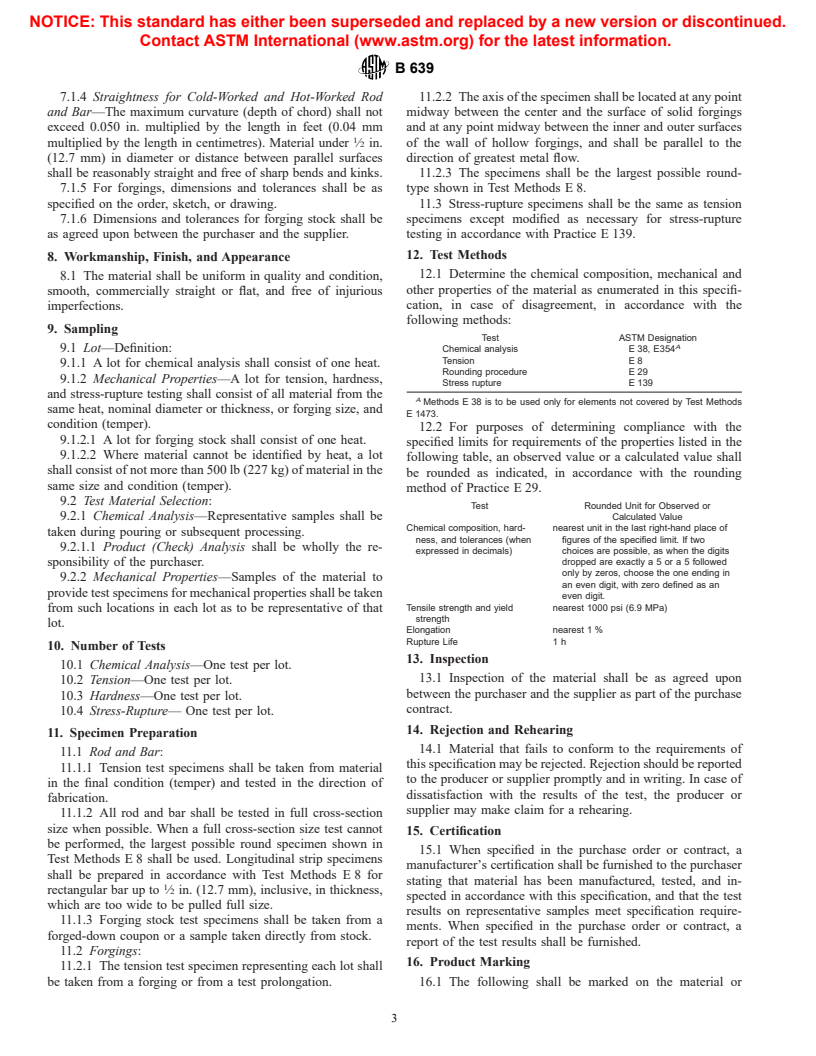
TABLE 1 Chemical Requirements
Product (Check) Analysis Variations, Product (Check) Analysis Variations,
Element Composition Limits, % under min or over max, of the Composition Limits, % under min or over max, of the
Specified Limit of Element Specified Limit of Element
UNS R30155 (Formerly Grade 661) UNS R30816 (Formerly Grade 671)
Carbon 0.08 to 0.16 0.01 0.32 to 0.42 0.02
Manganese 1.00 to 2.00 0.03 under min—0.04 over max 1.00 to 2.00 0.03 under min—0.04 over max
Silicon 1.00 max 0.05 1.00 max 0.05
Phosphorus 0.040 max 0.005 0.040 max 0.005
Sulfur 0.030 max 0.005 0.030 max 0.005
Chromium 20.00 to 22.50 0.25 19.00 to 21.00 0.25
Nickel 19.00 to 21.00 0.20 under min—0.25 over max 19.00 to 21.00 0.20 under min—0.25 over max
Molybdenum 2.50 to 3.50 0.05 under min—0.10 over max 3.50 to 4.50 0.10
Tungsten 2.00 to 3.00 0.10 3.50 to 4.50 0.15
Columbium + tantalum 0.75 to 1.25 0.05 3.50 to 4.50 0.15
A
Iron remainder 5.00 max 0.07
Cobalt 18.50 to 21.00 0.20 under min—0.25 over max 40.00 min 0.50
Nitrogen 0.20 max 0.01 . .
A
Element shall be determined arithmetically by difference.
A
TABLE 2 Tensile and Hardness Requirements
Elongation in 2 in. Reduction Brinell
Tensile Strength, Yield Strength (0.2 %
Alloy Heat Treatment or 50.8 mm or 4D, of Area, Hardness,
min, psi (MPa) offset), min, psi (MPa)
min, % min, % min
R30155 solution + precipitation harden 110 000 (760) 50 000 (345) 30 30 192
R30816 solution + precipitation harden 130 000 (895) 60 000 (415) 20 20 248
A
The supplier shall demonstrate that the material will meet fully heat-treated properties after full heat treatment in accordance with Table 4.
A
TABLE 3 Stress-Rupture Requirements
Test Temperature, °F Elongation in 2 in. or 50.8
B
Alloy Heat Treatment Stress, psi (MPa) Minimum, h
(°C) mm, or 4D, min, %
R30155 solution + precipitation harden 1350 (732) 24 000 (165) 100 10
R30816 solution + precipitation harden 1350 (732) 38 000 (260) 100 8
A
The supplier shall demonstrate that material will meet fully heat-treated properties after full heat treatment in accordance with Table 4.
B
Test specimens meeting minimum requirements may be overloaded to produce rupture in a reasonable and practical time period.
A
TABLE 4 Heat Treatment
as prescribed in Table 6.
Recommended Solution 7.1.1 Out-of-Round— Cold-worked and hot-worked rod, all
Alloy Precipitation Hardening Treatment
Treatment
sizes, in straight lengths, shall not be out-of-round by more
R30155 2125 to 2175°F (1162 to 1475 to 1525°F (801 to 829°C)
than one half the total permissible variations in diameter shown
1190°C) hold 30 min, hold 4 h, air cool or furnace
minimum, water quench cool in Table 5 and Table 6, except for hot-worked rod ⁄2 in. (12.7
R30816 2130 to 2170°F (1165 to 1390 to 1410°F (754 to 765°C)
mm) and under, which may be out-of-round by the total
1187°C), hold 1 h, water hold 12 h, air cool or furnace
permissible variations in diameter shown in Table 6.
quench cool
7.1.2 Corners—Cold-worked bar shall have practically ex-
A
The purchaser shall designate on the purchase order or inquiry any partial
stage of heat treatment required on the material to be shipped. act angles and sharp corners.
7.1.3 Cut Lengths— A specified length to which all rod and
bar will be cut with a permissible variation of + ⁄8in. (3.18
shall be as prescribed in Table 5, and of hot-worked rod and bar
mm), − 0 for sizes 8 in. (203 mm) and less in diameter or
distance between parallel surfaces. For larger sizes, the per-
TABLE 5 Permissible Variations in Diameter or Distance
missible variation shall be + ⁄4in. (6.35 mm), − 0.
Between Parallel Surfaces of Cold-Worked Rod and Bar
Permissible Variations from
TABLE 6 Permissible Variations in Diameter or Distance
A Specified Dimension, in. (mm)
Specified Dimension, in. (mm)
Between Parallel Surfaces of Hot-Worked Rods and Bars
+−
Permissible Va
...


Questions, Comments and Discussion
Ask us and Technical Secretary will try to provide an answer. You can facilitate discussion about the standard in here.