SIST EN 3727:2009
(Main)Aerospace series - Bearings, airframe rolling rigid with flanged alignment housing - Technical specification
Aerospace series - Bearings, airframe rolling rigid with flanged alignment housing - Technical specification
This standard specifies the required characteristics, inspection and test methods, qualification and acceptance conditions for airframe bearings with flanged alignment housing.
This standard applies whenever referenced.
Luft- und Raumfahrt - Flugwerklager Rillenkugellager mit selbsteinstellendem Flansch - Technische Lieferbedingungen
Diese Norm legt die Anforderungen, Prüfverfahren, Qualifikations- und Ablieferungsbedingungen für Flug¬werk¬lager mit selbsteinstellendem Flansch fest.
Sie ist anzuwenden, wenn auf sie Bezug genommen wird.
Série aérospatiale - Roulements pour structures d'aéronefs rigides, avec bague d'alignement à collerette - Spécification technique
Aeronavtika - Kotalni ležaji za letala, žlebasti kroglični ležaji s samonastavljivo prirobnico - Tehnična specifikacija
General Information
- Status
- Published
- Publication Date
- 14-Jun-2009
- Technical Committee
- I13 - Imaginarni 13
- Current Stage
- 6060 - National Implementation/Publication (Adopted Project)
- Start Date
- 29-May-2009
- Due Date
- 03-Aug-2009
- Completion Date
- 15-Jun-2009
Overview
EN 3727:2006 is a CEN (AECMA-STAN) aerospace standard that specifies the technical requirements, inspection and test methods, qualification and acceptance conditions for airframe rolling bearings mounted in a flanged alignment housing. Approved in 2006, the standard applies wherever EN 3727:2006 is referenced and sets mandatory procedures for manufacturers, purchasers and qualification authorities involved with aerospace bearings.
Key topics and technical requirements
- Scope and description: Covers full‑complement rigid ball bearings for airframe applications, mounted in flanged alignment housings (shielded or sealed configurations).
- Materials and traceability: Chemical analysis or an EN 10204 certificate from the semi‑finished product manufacturer is required.
- Dimensions & tolerances: Verification procedures for bore, outer diameter, ring widths, pitch circle of flange holes and flange flatness.
- Lubrication: At least 80% of the free internal volume must be filled with the specified grease (Annex F lists lubricant characteristics).
- Seals and shields: Requirements for retention, grease retention and exclusion of foreign bodies; includes sand/dust and temperature tests (Annex A, B).
- Runout and clearances: Radial and axial runout, flange hole circle runout, and internal radial/axial clearances are specified and verified (Annex C, D, H).
- Mechanical performance: Tests and acceptance criteria for behaviour in rotation, starting torque, permissible and ultimate static radial and axial loads, and tilting torque (Annex E, G).
- Qualification & acceptance:
- Qualification per EN 9133 with sample sizes (nine bearings for first qualification, seven for subsequent).
- Manufacturer acceptance inspection and batch sampling plans are defined (Table 4).
- Every delivery must be accompanied by an EN 10204 certificate of compliance.
- Packaging: Individual packaging to protect against moisture, corrosion and contamination; marking and batch information requirements.
Practical applications and users
- Who uses it: Aerospace component manufacturers, bearing suppliers, quality/inspection engineers, procurement teams and airframe OEMs and MRO organizations specifying or verifying airframe bearings with flanged alignment housings.
- Why it matters: Ensures interchangeability, performance, durability and traceability of critical airframe bearings - reducing risk of in‑service failure and simplifying procurement and qualification processes.
- Where applied: Design and production of landing gear, flight control linkages, actuators and other airframe systems that require rolling bearings with a flanged housing and precise alignment.
Related standards
- EN 3059, EN 3060, EN 3061, EN 4041 (product/dimension standards for airframe bearings)
- EN 9133 (qualification procedure for aerospace standard parts)
- EN 10204 (inspection documents)
- ISO 1132-1 and TR 4475 (terms and vocabulary)
Keywords: EN 3727:2006, aerospace bearings, airframe bearings, flanged alignment housing, qualification, test methods, seals, runout, tilting torque, EN 10204.
Frequently Asked Questions
SIST EN 3727:2009 is a standard published by the Slovenian Institute for Standardization (SIST). Its full title is "Aerospace series - Bearings, airframe rolling rigid with flanged alignment housing - Technical specification". This standard covers: This standard specifies the required characteristics, inspection and test methods, qualification and acceptance conditions for airframe bearings with flanged alignment housing. This standard applies whenever referenced.
This standard specifies the required characteristics, inspection and test methods, qualification and acceptance conditions for airframe bearings with flanged alignment housing. This standard applies whenever referenced.
SIST EN 3727:2009 is classified under the following ICS (International Classification for Standards) categories: 49.035 - Components for aerospace construction. The ICS classification helps identify the subject area and facilitates finding related standards.
SIST EN 3727:2009 is available in PDF format for immediate download after purchase. The document can be added to your cart and obtained through the secure checkout process. Digital delivery ensures instant access to the complete standard document.
Standards Content (Sample)
2003-01.Slovenski inštitut za standardizacijo. Razmnoževanje celote ali delov tega standarda ni dovoljeno.Luft- und Raumfahrt - Flugwerklager Rillenkugellager mit selbsteinstellendem Flansch - Technische LieferbedingungenSérie aérospatiale - Roulements pour structures d'aéronefs rigides, avec bague d'alignement à collerette - Spécification techniqueAerospace series - Bearings, airframe rolling rigid with flanged alignment housing - Technical specification49.035Sestavni deli za letalsko in vesoljsko gradnjoComponents for aerospace constructionICS:Ta slovenski standard je istoveten z:EN 3727:2006SIST EN 3727:2009en,de01-september-2009SIST EN 3727:2009SLOVENSKI
STANDARD
EUROPEAN STANDARDNORME EUROPÉENNEEUROPÄISCHE NORMEN 3727June 2006ICS 49.035 English VersionAerospace series - Bearings, airframe rolling rigid with flangedalignment housing - Technical specificationSérie aérospatiale - Roulements pour structures d'aéronefsrigides, avec bague d'alignement à collerette - SpécificationtechniqueLuft- und Raumfahrt - Flugwerklager Rillenkugellager mitselbsteinstellendem Flansch - TechnischeLieferbedingungenThis European Standard was approved by CEN on 20 April 2006.CEN members are bound to comply with the CEN/CENELEC Internal Regulations which stipulate the conditions for giving this EuropeanStandard the status of a national standard without any alteration. Up-to-date lists and bibliographical references concerning such nationalstandards may be obtained on application to the Central Secretariat or to any CEN member.This European Standard exists in three official versions (English, French, German). A version in any other language made by translationunder the responsibility of a CEN member into its own language and notified to the Central Secretariat has the same status as the officialversions.CEN members are the national standards bodies of Austria, Belgium, Cyprus, Czech Republic, Denmark, Estonia, Finland, France,Germany, Greece, Hungary, Iceland, Ireland, Italy, Latvia, Lithuania, Luxembourg, Malta, Netherlands, Norway, Poland, Portugal, Romania,Slovakia, Slovenia, Spain, Sweden, Switzerland and United Kingdom.EUROPEAN COMMITTEE FOR STANDARDIZATIONCOMITÉ EUROPÉEN DE NORMALISATIONEUROPÄISCHES KOMITEE FÜR NORMUNGManagement Centre: rue de Stassart, 36
B-1050 Brussels© 2006 CENAll rights of exploitation in any form and by any means reservedworldwide for CEN national Members.Ref. No. EN 3727:2006: ESIST EN 3727:2009
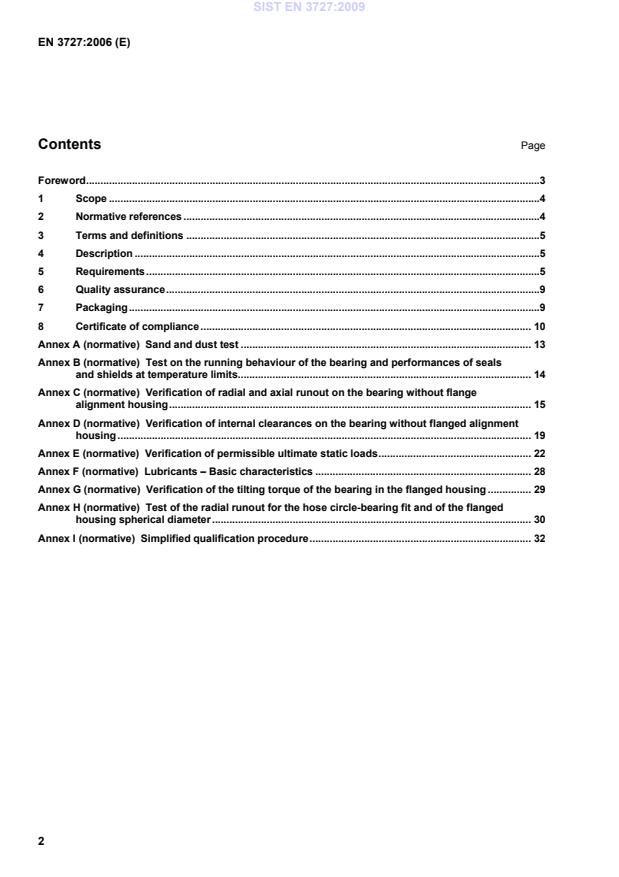
Sand and dust test.13 Annex B (normative)
Test on the running behaviour of the bearing and performances of seals and shields at temperature limits.14 Annex C (normative)
Verification of radial and axial runout on the bearing without flange alignment housing.15 Annex D (normative)
Verification of internal clearances on the bearing without flanged alignment housing.19 Annex E (normative)
Verification of permissible ultimate static loads.22 Annex F (normative)
Lubricants – Basic characteristics.28 Annex G (normative)
Verification of the tilting torque of the bearing in the flanged housing.29 Annex H (normative)
Test of the radial runout for the hose circle-bearing fit and of the flanged housing spherical diameter.30 Annex I (normative)
Simplified qualification procedure.32
EN 3060, Aerospace series — Bearings, airframe rolling — Rigid single row ball bearings in steel, cadmium plated, with flanged alignment housing, cadmium plated — Dimensions and loads.
EN 3061, Aerospace series — Bearings, airframe rolling — Rigid single row ball bearings in corrosion resisting steel, with flanged alignment bush — Dimensions and loads.
EN 4041, Aerospace series — Bearings, airframe rolling — Rigid single row ball bearings in corrosion resisting steel, with extended inner ring and flanged alignment bush – Dimensions and loads.
EN 9100, Aerospace series — Quality management systems — Requirements (based on ISO 9001:2000) and Quality systems — Model for quality assurance in design, development, production, installation and servicing (based on ISO 9001:1994). EN 9133, Aerospace series — Quality management systems — Qualification Procedure for aerospace standard parts. EN 10204, Metallic products — Types of inspection documents. TR 4475, Aerospace series — Bearings and mechanical transmissions for airframe applications — Vocabulary. 1)
AS7949, Bearing, ball, airframe, antifriction. 2)
1) Published as AECMA Technical Report at the date of publication of this standard. 2) Published by: Society of Automotive Engineers, Inc. (SAE), 400 Commonwealth Drive, Warrendale, PA 15096-0001 USA. SIST EN 3727:2009
Material In accordance with the product standard or design documentation Chemical analysis or certificate 2.1 according to EN 10204 issued by the semi-finished product manufacturer X X 5.2
Dimensions, tolerances In accordance with the product standard or design documentation Suitable measuring instruments Measurement of bore and outer diameter: – Rings with a width of ≤ 10 mm: in the centre plane – Rings with a width of > 10 mm: in two planes parallel to the outer faces and at a distance from these faces of twice the maximum value of the ring chamfer. The minimum and maximum diameters are determined in each measuring plane Measurement of ring width: – The width of each ring (distance between the two faces) is verified at a minimum of four points. Measurement of the pitch circle diameter of the mounting holes: – Measurement of holes with a tightly secured gauge, so that the flange can be verified in any position – Measurement of flatness of flange X X 5.3
Masses In accordance with the product standard or design documentation Suitable methods X
5.4
Marking In accordance with the product standard or design documentation It shall be legible and shall not adversely affect the material or the operation of the airframe bearing. Visual examination X X 5.5
Surface appearance
5.5.1
Assembled bearings Visual inspection of the mounted airframe bearings using suitable methods X X 5.5.2
Unassembled rings and balls The bearings shall be free of surface discontinuities liable to have an adverse effect on their characteristics and endurance. Magnetic or dye penetrant inspection of rings and balls and of the flanged housing X X continued SIST EN 3727:2009
Hardness In accordance with the product standard or design documentation Suitable processes and measuring instruments c X X 5.7
Surface roughness In accordance with the product standard or design documentation Suitable measuring instruments or visual-tactile samples c X X 5.8
Surface treatment In accordance with the product standard or design documentation Visual inspection In accordance with the standard on surface treatment X X 5.9
Lubrication At least 80 % of the free space in the airframe bearing shall be filled with the grease specified in the product standards or design documentation (see Annex F). Visual examination after removal of seals and shields Visual inspection during manufacture X X 5.10
Seals (for sealed bearings) and shields (for shielded bearings)
5.10.1
Retention The seals and shields shall be fitted correctly on the outer ring, in such a way that operation of the bearing is not affected. Visual inspection X X 5.10.2
Sealing
5.10.2.1
against grease leakage The seals shall slide on the inner ring and retain the grease. Visual inspection after the rings have been manually turned in relation to each other
5.10.2.2
against penetration of foreign bodies The seals prevent the penetration of foreign bodies. After the test, the running behaviour of the bearings shall conform with 5.10.1. According to Annex A X
5.10.3
Temperature test After the test, the behaviour shall conform with 5.10.1 According to Annex B X
5.11
Runout
5.11.1
Radial: Kia' Kea Axial: Sia' Sea In accordance with the product standard or design documentation According to Annex C X X 5.11.2
Radial runout of flange hole circle In accordance with the product standard or design documentation According to Annex H X X continued SIST EN 3727:2009
Internal clearances – radial: Gr – axial: Ga In accordance with the product standard or design documentation According to Annex D X X 5.13
Behaviour in rotation
5.13.1
At ambient temperature No tight spots, e.g. rolling elements catching in the filling slots According to Annex E Figures E.2 and E.4 X X 5.13.2
At extreme temperatures After the test, the mean starting torque shall not exceed 1,5 times the mean value recorded before the test.According to Annex B X
No tight spots According to Figures E.2 and E.4
5.14
Starting torques without load In accordance with the product standard or design documentation Suitable measuring instruments and procedures – Rotate one of the two rings at least four times to distribute the lubricant uniformly; – Measure the torque gradually applied to the inner ring, at least five times with the flange of the housing held in place; – The highest value shall be taken into account. X X 5.15
Permissible static loads: – radial: Cs – axial: Fa max. In accordance with the product standard or design documentation After removing the loads, there shall be no permanent deformations. According to Annex E X
5.16
Ultimate static loads
5.16.1
Radial After the removal of the loads, no cracks or deterioration of the airframe bearing According to Annex E X
5.16.2
Axial When this load is applied, the ball bearing shall not be pushed out of the flange. According to Annex E X
5.17
Tilting torque In accordance with the product standard or design documentation According to Annex G X X a Q: Qualification test b A: Acceptance test c This inspection shall be made in the absence of surface treatment which, for the purpose of qualification, may be removed by a chemical process. SIST EN 3727:2009
Defined in subclause1 2 3 4 5 6 7 8 9 Materials 5.1 X X X X X X X X
Dimensions and tolerances 5.2 X X X X X X X
Masses 5.3 X X X X X X X
Marking 5.4 X X X X X X X X X Surface appearance (Assembled bearings) 5.5.1 X X X X X X X X X Surface treatment (if required) 5.8 X X X X X X X X X Retention of seals and shields 5.10.1
X X
Runout radial Kia, Kea; axial Sia, Sea 5.11.1 X X X X X X X
Radial runout of flange hole circle 5.11.2 X
...


Questions, Comments and Discussion
Ask us and Technical Secretary will try to provide an answer. You can facilitate discussion about the standard in here.
Loading comments...