ISO/PRF 179-1
(Main)Plastics — Determination of Charpy impact properties — Part 1: Non-instrumented impact test
Plastics — Determination of Charpy impact properties — Part 1: Non-instrumented impact test
This document specifies a method for determining the Charpy impact strength of plastics under defined conditions. A number of different types of specimen and test configurations are defined. Different test parameters are specified according to the type of material, the type of test specimen and the type of notch. The method can be used to investigate the behaviour of specified types of specimen under the impact conditions defined and for estimating the brittleness or toughness of specimens within the limitations inherent in the test conditions. It can also be used for the determination of comparative data from similar types of material.
Plastiques — Détermination des caractéristiques au choc Charpy — Partie 1: Essai de choc non instrumenté
Le présent document spécifie une méthode de détermination de la résistance au choc Charpy des plastiques dans des conditions définies. De nombreux types d’éprouvettes et de configurations d’essai différents sont définis. Divers paramètres d’essai sont spécifiés selon le type de matière, le type d’éprouvette et le type d’entaille. La présente méthode peut être utilisée pour l’étude du comportement des types d’éprouvettes spécifiés soumises à des conditions de choc définies et pour l’estimation de la fragilité ou de la ténacité des éprouvettes dans les limites inhérentes aux conditions d’essai. Elle peut également être utilisée pour déterminer des résultats comparatifs propres à des types similaires de matériaux.
General Information
- Status
- Not Published
- Technical Committee
- ISO/TC 61/SC 2 - Mechanical behavior
- Drafting Committee
- ISO/TC 61/SC 2/WG 3 - Impact and high speed properties
- Current Stage
- 5020 - FDIS ballot initiated: 2 months. Proof sent to secretariat
- Start Date
- 23-Jan-2026
- Completion Date
- 12-Feb-2026
Relations
- Effective Date
- 12-Feb-2026
- Effective Date
- 07-Jan-2025
- Effective Date
- 07-Jan-2025
Overview
ISO/PRF 179-1: Plastics - Determination of Charpy Impact Properties - Part 1: Non-instrumented Impact Test provides a standardized method for determining the Charpy impact strength of plastics. Published by the International Organization for Standardization (ISO), this standard outlines procedures to assess how plastics behave under sudden impact, supporting quality control, product development, and material comparison across the plastics industry.
The Charpy impact test involves striking a notched or unnotched specimen of plastic with a controlled pendulum, allowing the absorption of impact energy to be measured. This method is fundamental for estimating the brittleness or toughness of plastics and composites under defined conditions.
Key Topics
- Types of Specimens and Configuration: The standard defines various specimen types and associated test configurations to accommodate a wide range of plastic materials, including thermoplastics, thermosets, and composites.
- Unnotched specimens: For general toughness.
- Notched specimens: For sensitivity to crack initiation.
- Test Parameters: Test settings are established according to material type, specimen geometry, and notch design to ensure reliable, reproducible results.
- Impact Directions: Specifies edgewise and flatwise impact directions, as well as orientation concerning reinforcement in fiber-reinforced plastics.
- Data Analysis: Outlines calculation methods for impact strength, statistical evaluation, and reporting of results.
- Comparative Testing: Facilitates comparative studies of similar or variant materials for research, development, and quality assurance.
Applications
Implementing ISO/PRF 179-1 brings practical value to various sectors in the plastics and composite materials industry:
- Quality Control: Manufacturers use Charpy impact testing to verify the mechanical reliability and impact resistance of products such as automotive parts, household goods, and industrial components.
- Material Selection and Development: The standard provides critical data for engineers and designers choosing between plastic grades or evaluating new formulations based on quantified impact performance.
- Research and Development: Laboratories and research centers employ the Charpy method to investigate fracture mechanics, optimize plastic and composite blends, and study the effects of environmental exposure or aging.
- Compliance and Certification: Meeting ISO 179-1 standards demonstrates conformity to international best practices, facilitating market access, regulatory approval, and customer confidence.
- Comparative Analysis: Organizations can compare product offerings or benchmark new materials against industry norms using standardized impact strength data.
Related Standards
ISO/PRF 179-1 is closely aligned with several other ISO standards for plastics testing, ensuring comprehensive material characterization:
- ISO 291: Plastics - Standard atmospheres for conditioning and testing
- ISO 293: Plastics - Compression moulding of test specimens of thermoplastic materials
- ISO 294-1/294-3: Plastics - Injection moulding of test specimens of thermoplastic materials
- ISO 295: Plastics - Compression moulding of test specimens of thermosetting materials
- ISO 2818: Plastics - Preparation of test specimens by machining
- ISO 1268-11: Fibre-reinforced plastics - Methods of producing test plates
- ISO 13802: Plastics - Verification of pendulum impact-testing machines
By adhering to ISO/PRF 179-1 and its related standards, organizations ensure their plastics products meet rigorous mechanical testing requirements, supporting robust performance, innovation, and international trade.
Keywords: ISO 179-1, Charpy impact test, plastics, impact strength, mechanical testing, toughness, brittleness, standard, material properties, quality control.
ISO/PRF 179-1 - Plastics — Determination of Charpy impact properties — Part 1: Non-instrumented impact test Released:23. 01. 2026
REDLINE ISO/PRF 179-1 - Plastics — Determination of Charpy impact properties — Part 1: Non-instrumented impact test Released:23. 01. 2026
Get Certified
Connect with accredited certification bodies for this standard

Smithers Quality Assessments
US management systems and product certification.

DIN CERTCO
DIN Group product certification.
Sponsored listings
Frequently Asked Questions
ISO/PRF 179-1 is a draft published by the International Organization for Standardization (ISO). Its full title is "Plastics — Determination of Charpy impact properties — Part 1: Non-instrumented impact test". This standard covers: This document specifies a method for determining the Charpy impact strength of plastics under defined conditions. A number of different types of specimen and test configurations are defined. Different test parameters are specified according to the type of material, the type of test specimen and the type of notch. The method can be used to investigate the behaviour of specified types of specimen under the impact conditions defined and for estimating the brittleness or toughness of specimens within the limitations inherent in the test conditions. It can also be used for the determination of comparative data from similar types of material.
This document specifies a method for determining the Charpy impact strength of plastics under defined conditions. A number of different types of specimen and test configurations are defined. Different test parameters are specified according to the type of material, the type of test specimen and the type of notch. The method can be used to investigate the behaviour of specified types of specimen under the impact conditions defined and for estimating the brittleness or toughness of specimens within the limitations inherent in the test conditions. It can also be used for the determination of comparative data from similar types of material.
ISO/PRF 179-1 is classified under the following ICS (International Classification for Standards) categories: 83.080.01 - Plastics in general. The ICS classification helps identify the subject area and facilitates finding related standards.
ISO/PRF 179-1 has the following relationships with other standards: It is inter standard links to prEN ISO 179-1, ISO/TR 14799-1:2022, ISO 179-1:2023. Understanding these relationships helps ensure you are using the most current and applicable version of the standard.
ISO/PRF 179-1 is available in PDF format for immediate download after purchase. The document can be added to your cart and obtained through the secure checkout process. Digital delivery ensures instant access to the complete standard document.
Standards Content (Sample)
International
Standard
ISO 179-1
Fourth edition
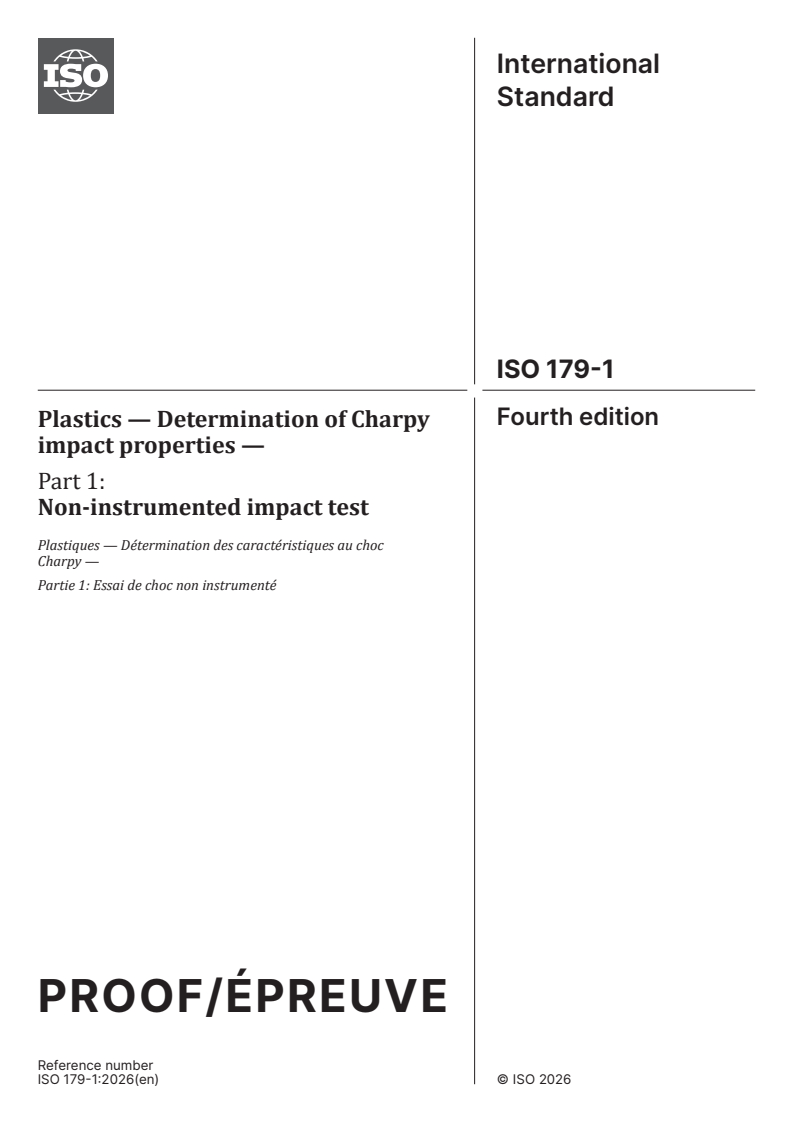
Plastics — Determination of Charpy
impact properties —
Part 1:
Non-instrumented impact test
Plastiques — Détermination des caractéristiques au choc
Charpy —
Partie 1: Essai de choc non instrumenté
PROOF/ÉPREUVE
Reference number
ISO 179-1:2026(en) © ISO 2026
ISO 179-1:2026(en)
© ISO 2026
All rights reserved. Unless otherwise specified, or required in the context of its implementation, no part of this publication may
be reproduced or utilized otherwise in any form or by any means, electronic or mechanical, including photocopying, or posting on
the internet or an intranet, without prior written permission. Permission can be requested from either ISO at the address below
or ISO’s member body in the country of the requester.
ISO copyright office
CP 401 • Ch. de Blandonnet 8
CH-1214 Vernier, Geneva
Phone: +41 22 749 01 11
Email: copyright@iso.org
Website: www.iso.org
Published in Switzerland
PROOF/ÉPREUVE
ii
ISO 179-1:2026(en)
Contents Page
Foreword .iv
Introduction .v
1 Scope . 1
2 Normative references . 1
3 Terms and definitions . 1
4 Principle . 2
5 Apparatus . 3
5.1 Test machine .3
5.2 Micrometers and gauges .3
6 Test specimens . 4
6.1 Preparation .4
6.1.1 Moulding and extrusion compounds .4
6.1.2 Sheets .4
6.1.3 Long-fibre-reinforced materials . .4
6.1.4 Checking . .6
6.1.5 Notching .7
6.2 Anisotropy .7
6.3 Shape and dimensions .7
6.3.1 Materials not exhibiting interlaminar shear fracture .7
6.3.2 Materials exhibiting interlaminar shear fracture (e.g. long-fibre-reinforced
materials) .9
6.4 Number of test specimens .9
6.5 Span between specimen supports, L . .10
6.6 Conditioning.10
7 Procedure .10
8 Calculation and expression of results .11
8.1 Unnotched specimens .11
8.2 Notched specimens .11
8.3 Statistical parameters. 12
8.4 Significant figures. 12
9 Precision .12
10 Test report .12
Annex A (informative) Additional methods for investigating the influence of surface effects . 14
Annex B (informative) Precision data .16
Annex C (informative) Determining the notch tip radius using a CCD microscope .18
Bibliography .21
PROOF/ÉPREUVE
iii
ISO 179-1:2026(en)
Foreword
ISO (the International Organization for Standardization) is a worldwide federation of national standards
bodies (ISO member bodies). The work of preparing International Standards is normally carried out through
ISO technical committees. Each member body interested in a subject for which a technical committee
has been established has the right to be represented on that committee. International organizations,
governmental and non-governmental, in liaison with ISO, also take part in the work. ISO collaborates closely
with the International Electrotechnical Commission (IEC) on all matters of electrotechnical standardization.
The procedures used to develop this document and those intended for its further maintenance are described
in the ISO/IEC Directives, Part 1. In particular, the different approval criteria needed for the different types
of ISO document should be noted. This document was drafted in accordance with the editorial rules of the
ISO/IEC Directives, Part 2 (see www.iso.org/directives).
ISO draws attention to the possibility that the implementation of this document may involve the use of (a)
patent(s). ISO takes no position concerning the evidence, validity or applicability of any claimed patent
rights in respect thereof. As of the date of publication of this document, ISO had not received notice of (a)
patent(s) which may be required to implement this document. However, implementers are cautioned that
this may not represent the latest information, which may be obtained from the patent database available at
www.iso.org/patents. ISO shall not be held responsible for identifying any or all such patent rights.
Any trade name used in this document is information given for the convenience of users and does not
constitute an endorsement.
For an explanation of the voluntary nature of standards, the meaning of ISO specific terms and expressions
related to conformity assessment, as well as information about ISO's adherence to the World Trade
Organization (WTO) principles in the Technical Barriers to Trade (TBT), see www.iso.org/iso/foreword.html.
This document was prepared by Technical Committee ISO/TC 61, Plastics, Subcommittee SC 2, Mechanical
behavior, in collaboration with the European Committee for Standardization (CEN) Technical Committee
CEN/TC 249, Plastics, in accordance with the Agreement on technical cooperation between ISO and CEN
(Vienna Agreement).
This fourth edition cancels and replaces the third edition (ISO 179-1:2023), which has been technically
revised.
The main change is as follow:
— replaced the correct dimensions of specimen type 3 in Table 1 (see 6.3.1.1).
A list of all parts in the ISO 179 series can be found on the ISO website.
Any feedback or questions on this document should be directed to the user’s national standards body. A
complete listing of these bodies can be found at www.iso.org/members.html.
PROOF/ÉPREUVE
iv
ISO 179-1:2026(en)
Introduction
The Charpy impact properties determination method described in the ISO 179 series has a greater range of
applicability than that given in ISO 180 and is more suitable for the testing of materials showing interlaminar
shear fracture or of materials exhibiting surface effects due to environmental factors.
The method is suitable for use with the following range of materials:
— rigid thermoplastic moulding and extrusion materials (including filled and reinforced compounds in
addition to unfilled types) and rigid thermoplastics sheets;
— rigid thermosetting moulding materials (including filled and reinforced compounds) and rigid
thermosetting sheets (including laminates);
— fibre-reinforced thermosetting and thermoplastic composites incorporating unidirectional or multi-
directional reinforcements (such as mats, woven fabrics, woven rovings, chopped strands, combination
and hybrid reinforcements, rovings and milled fibres) or incorporating sheets made from pre-impregnated
materials (prepregs), including filled and reinforced compounds;
— thermotropic liquid-crystal polymers.
Notched samples are not normally suitable for use with rigid cellular materials, long-fibre-reinforced
composites or thermotropic liquid-crystal polymers. In these cases, unnotched samples may be used.
The method is suited to the use of specimens moulded to the chosen dimensions, machined from the central
portion of a standard multipurpose test specimen (see ISO 20753) or machined from finished or semi-
finished products such as mouldings, laminates and extruded or cast sheet.
PROOF/ÉPREUVE
v
International Standard ISO 179-1:2026(en)
Plastics — Determination of Charpy impact properties —
Part 1:
Non-instrumented impact test
1 Scope
This document specifies a method for determining the Charpy impact strength of plastics under defined
conditions. It defines a number of different types of specimen and test configurations. It also specifies
different test parameters according to the type of material, the type of test specimen and the type of notch.
The method described in this document can be used to investigate the behaviour of specified types of
specimen under the impact conditions defined and for estimating the brittleness or toughness of specimens
within the limitations inherent in the test conditions. It can also be used for the determination of comparative
data from similar types of material.
2 Normative references
The following documents are referred to in the text in such a way that some or all of their content constitutes
requirements of this document. For dated references, only the edition cited applies. For undated references,
the latest edition of the referenced document (including any amendments) applies.
ISO 291, Plastics — Standard atmospheres for conditioning and testing
ISO 293, Plastics — Compression moulding of test specimens of thermoplastic materials
ISO 294-1, Plastics — Injection moulding of test specimens of thermoplastic materials — Part 1: General
principles, and moulding of multipurpose and bar test specimens
ISO 294-3, Plastics — Injection moulding of test specimens of thermoplastic materials — Part 3: Small plates
ISO 295, Plastics — Compression moulding of test specimens of thermosetting materials
ISO 1268-11, Fibre-reinforced plastics — Methods of producing test plates — Part 11: Injection moulding of BMC
and other long-fibre moulding compounds — Small plates
ISO 2818, Plastics — Preparation of test specimens by machining
ISO 10724-1, Plastics — Injection moulding of test specimens of thermosetting powder moulding compounds
(PMCs) — Part 1: General principles and moulding of multipurpose test specimens
ISO 13802, Plastics — Verification of pendulum impact-testing machines — Charpy, Izod and tensile impact-
testing
3 Terms and definitions
For the purposes of this document, the following terms and definitions apply.
ISO and IEC maintain terminology databases for use in standardization at the following addresses:
— ISO Online browsing platform: available at https://www.iso.org/obp
— IEC Electropedia: available at https://www.electropedia.org/
PROOF/ÉPREUVE
ISO 179-1:2026(en)
3.1
Charpy impact strength of unnotched specimen
a
cU
impact energy absorbed in breaking an unnotched specimen, referred to the original cross-sectional area of
the specimen
Note 1 to entry: It is expressed in kilojoules per square metre (kJ/m ).
3.2
Charpy impact strength of notched specimen
a
cN
impact energy absorbed in breaking a notched specimen, referred to the original cross-sectional area of the
specimen at the notch, where N = A, B or C, depending on the notch type
Note 1 to entry: See 6.3.1.1.2.
Note 2 to entry: It is expressed in kilojoules per square metre (kJ/m ).
3.3
edgewise impact
e
direction of blow parallel to the dimension b, with impact on the narrow longitudinal surface h × l of the
specimen
Note 1 to entry: See Figure 1 a) and Figures 2 and 4.
3.4
flatwise impact
f
direction of blow parallel to the dimension h, with impact on the broad longitudinal surface b × l of the
specimen
Note 1 to entry: See Figure 1 b) and Figures 3 and 4.
3.5
normal direction of blow
n
impact with the direction of blow normal to the plane of reinforcement
Note 1 to entry: See Figure 4.
3.6
parallel direction of blow
p
impact with the direction of blow parallel to the plane of reinforcement
Note 1 to entry: See Figure 4.
4 Principle
The test specimen, supported near its ends as a horizontal beam, is impacted by a single blow of a striker,
with the line of impact midway between the supports, and bent at a high, nominally constant, velocity.
In the case of edgewise impact with notched specimens, the line of impact is directly opposite the single
notch [see Figure 1 a) and Figure 2].
The method specifies preferred dimensions for the test specimen. Tests which are carried out on specimens of
different dimensions or with different notches, or specimens which are prepared under different conditions,
can produce results which are not comparable. Other factors, such as the energy capacity of the apparatus,
the impact velocity and the conditioning of the specimens can also influence the results. Consequently, when
comparative data are required, these factors shall be carefully controlled and recorded.
PROOF/ÉPREUVE
ISO 179-1:2026(en)
The method is not intended to be used as a source of data for design calculations. Information on the typical
behaviour of a material can be obtained, however, by testing at different temperatures, by varying the notch
radius and/or the specimen thickness and by testing specimens prepared under different conditions.
5 Apparatus
5.1 Test machine
The principles, characteristics and verification of suitable test machines are detailed in ISO 13802.
ISO 13802 describes partial verification and full verification. In the case of full verification, some items are
difficult to verify when the apparatus is assembled. Such verifications are assumed to be incumbent on the
manufacturer.
5.2 Micrometers and gauges
Micrometers and gauges shall allow to determine the relevant dimensions of the test specimens with an
uncertainty not larger than 0,02 mm. For the determination of the dimension b of notched test specimens
N
measuring tips appropriate for the contour of the notch shall be used. For general information on the
determination of test specimen dimensions, see ISO 16012.
a) Edgewise impact b) Flatwise impact
Key
1 direction of blow
2 rod of pendulum
3 test specimen
4 notch
5 support
Figure 1 — Striking edge and support blocks for type 1 test specimen at moment of impact
PROOF/ÉPREUVE
ISO 179-1:2026(en)
6 Test specimens
6.1 Preparation
6.1.1 Moulding and extrusion compounds
Specimens shall be prepared in accordance with the relevant material specification. The specimens shall be
either directly compression moulded in accordance with ISO 293 or ISO 295 or injection moulded from the
material in accordance with ISO 294-1, ISO 294-3 or ISO 10724-1, as appropriate, or machined in accordance
with ISO 2818 from sheet that has been compression or injection moulded from the compound. Type 1
specimens may be cut from multipurpose test specimens conforming with ISO 20753:2023, type A1.
6.1.2 Sheets
Specimens shall be machined from sheets in accordance with ISO 2818.
6.1.3 Long-fibre-reinforced materials
A panel shall be prepared in accordance with ISO 1268-11 or another specified or agreed upon preparation
procedure. Specimens shall be machined in accordance with ISO 2818.
Key
1 direction of blow
Figure 2 — Charpy edgewise impact (e) with single-notched specimen
PROOF/ÉPREUVE
ISO 179-1:2026(en)
Key
1 direction of blow
Figure 3 — Charpy flatwise impact (f)
PROOF/ÉPREUVE
ISO 179-1:2026(en)
Key
1 direction of blow
e edgewise
f flatwise
n normal direction of blow
p parallel direction of blow
NOTE 1 Edgewise (e) and flatwise (f) indicate the direction of the blow with respect to the specimen thickness,
h, and specimen width, b. Normal (n) and parallel (p) indicate the direction of the blow with respect to the laminate
plane.
NOTE 2 The Charpy “fn” and “ep” tests are used for laminates, while both the Charpy “en” and “ep” tests are used
for other materials. The Charpy “fn” and “fp” tests are used for testing materials exhibiting surface effects.
Figure 4 — Scheme of designations describing the direction of blow
6.1.4 Checking
The specimens shall be free of twist and shall have mutually perpendicular parallel surfaces. The surfaces
and edges shall be free from scratches, pits, sink marks and flash.
The specimens shall be checked for conformity with these requirements by visual observation against
straightedges, set squares and flat plates, and by measuring with micrometer callipers.
PROOF/ÉPREUVE
ISO 179-1:2026(en)
Specimens showing measurable or observable departure from one or more of these requirements shall be
rejected or machined to proper size and shape before testing.
6.1.5 Notching
6.1.5.1 Machined notches shall be prepared in accordance with ISO 2818. The profile of the cutting tooth
shall be such as to produce in the specimen a notch of the contour and depth as defined in Table 2 and shown
in Figure 5, at right angles to its principal axes (see Note).
NOTE The radius of the notch tip can be measured by the method given in Annex C.
6.1.5.2 Specimens with moulded-in notches may be used if specified for the material being tested
(see Note).
NOTE Specimens with moulded-in notches do not give results comparable to those obtained from specimens with
machined notches.
a) Type A b) Type B c) Type C
Radius of notch tip Radius of notch tip Radius of notch tip
r = (0,25 ± 0,05) mm r = (1,00 ± 0,05) mm r = (0,10 ± 0,02) mm
N N N
Figure 5 — Notch types
6.2 Anisotropy
Certain types of sheet or panel material or specimen taken from injection-moulded plates can show
different impact properties, depending on the direction in the plane of the sheet or panel. In such cases, it is
customary to cut groups of test specimens with their major axes respectively parallel and perpendicular to
the direction of some feature of the sheet or panel which is either visible or inferred from knowledge of the
method of manufacture.
6.3 Shape and dimensions
6.3.1 Materials not exhibiting interlaminar shear fracture
...
ISO /TC 61/SC 2
Secretariat: KATS
Date: 2026-xx-xx01-23
Plastics — Determination of Charpy impact properties —
Part 1:
Non-instrumented impact test
Plastiques — Détermination des caractéristiques au choc Charpy —
Partie 1: Essai de choc non instrumenté
This draftThis draftThis draftThis draftThis draftThis draft is is is is is is submitted tsubmitted tsubmitted tsubmitted tsubmitted tsubmitted toooooo a a a a a a p p p p p parallel arallel arallel arallel arallel arallel vovovovovovote in ISOte in ISOte in ISOte in ISOtte in ISOe in ISO,, CE, CE, CE, CE, CE CENN.N.N.N.N.
PROOF
All rights reserved. Unless otherwise specified, or required in the context of its implementation, no part of this publication
may be reproduced or utilized otherwise in any form or by any means, electronic or mechanical, including photocopying,
or posting on the internet or an intranet, without prior written permission. Permission can be requested from either ISO
at the address below or ISO’s member body in the country of the requester.
ISO copyright office
CP 401 • Ch. de Blandonnet 8
CH-1214 Vernier, Geneva
Phone: + 41 22 749 01 11
E-mail: copyright@iso.org
Website: www.iso.org
Published in Switzerland
© ISO 2026 – All rights reserved
iii
ISO/DISPRF 179-1:2025(E2026(en)
Contents
Foreword . vi
Introduction . vii
1 Scope . 1
2 Normative references . 1
3 Terms and definitions . 1
4 Principle . 3
5 Apparatus . 3
6 Test specimens . 5
7 Procedure . 15
8 Calculation and expression of results . 15
9 Precision . 16
10 Test report . 16
Annex A (informative) Additional methods for investigating the influence of surface effects. 19
Annex B (informative) Precision data . 22
Annex C (informative) Determining the notch tip radius using a CCD microscope . 24
Bibliography . 29
Foreword . iv
Introduction . v
1 Scope . 1
2 Normative references . 1
3 Terms and definitions . 1
4 Principle . 2
5 Apparatus . 3
5.1 Test machine . 3
5.2 Micrometers and gauges . 3
6 Test specimens . 4
6.1 Preparation . 4
6.1.1 Moulding and extrusion compounds . 4
6.1.2 Sheets . 4
6.1.3 Long-fibre-reinforced materials . 4
6.1.4 Checking . 6
6.1.5 Notching . 7
6.2 Anisotropy . 7
6.3 Shape and dimensions . 7
6.3.1 Materials not exhibiting interlaminar shear fracture . 7
6.3.2 Materials exhibiting interlaminar shear fracture (e.g. long-fibre-reinforced materials) . 9
6.4 Number of test specimens . 9
6.5 Span between specimen supports, L .10
6.6 Conditioning .10
iv © ISO 20252026 – All rights reserved
iv
7 Procedure .10
8 Calculation and expression of results .11
8.1 Unnotched specimens.11
8.2 Notched specimens .12
8.3 Statistical parameters .12
8.4 Significant figures .12
9 Precision .12
10 Test report .12
Annex A (informative) Additional methods for investigating the influence of surface effects .15
Annex B (informative) Precision data .17
Annex C (informative) Determining the notch tip radius using a CCD microscope .19
Bibliography .22
© ISO 2026 – All rights reserved
v
ISO/DISPRF 179-1:2025(E2026(en)
Foreword
ISO (the International Organization for Standardization) is a worldwide federation of national standards
bodies (ISO member bodies). The work of preparing International Standards is normally carried out through
ISO technical committees. Each member body interested in a subject for which a technical committee has been
established has the right to be represented on that committee. International organizations, governmental and
non-governmental, in liaison with ISO, also take part in the work. ISO collaborates closely with the
International Electrotechnical Commission (IEC) on all matters of electrotechnical standardization.
The procedures used to develop this document and those intended for its further maintenance are described
in the ISO/IEC Directives, Part 1. In particular, the different approval criteria needed for the different types of
ISO document should be noted. This document was drafted in accordance with the editorial rules of the
ISO/IEC Directives, Part 2 (see www.iso.org/directives).
ISO draws attention to the possibility that the implementation of this document may involve the use of (a)
patent(s). ISO takes no position concerning the evidence, validity or applicability of any claimed patent rights
in respect thereof. As of the date of publication of this document, ISO had not received notice of (a) patent(s)
which may be required to implement this document. However, implementers are cautioned that this may not
represent the latest information, which may be obtained from the patent database available at
www.iso.org/patents. ISO shall not be held responsible for identifying any or all such patent rights.
Any trade name used in this document is information given for the convenience of users and does not
constitute an endorsement.
For an explanation of the voluntary nature of standards, the meaning of ISO specific terms and expressions
related to conformity assessment, as well as information about ISO's adherence to the World Trade
Organization (WTO) principles in the Technical Barriers to Trade (TBT), see www.iso.org/iso/foreword.html.
This document was prepared by Technical Committee ISO/TC 61, Plastics, Subcommittee SC 2, Mechanical
behavior, in collaboration with the European Committee for Standardization (CEN) Technical Committee
CEN/TC 249, Plastics, in accordance with the Agreement on technical cooperation between ISO and CEN
(Vienna Agreement).
This fourth edition cancels and replaces the third edition (ISO 179-1:2023), which has been technically
revised.
The main change is as follow:
— — replaced the correct dimensions of specimen type 3 in Table 10 (see 6.3.1.1).6.3.1.1).
A list of all parts in the ISO 179 series can be found on the ISO website.
Any feedback or questions on this document should be directed to the user’s national standards body. A
complete listing of these bodies can be found at www.iso.org/members.html.
vi © ISO 20252026 – All rights reserved
vi
Introduction
The Charpy impact properties determination method described in the ISO 179 series has a greater range of
applicability than that given in ISO 180 and is more suitable for the testing of materials showing interlaminar
shear fracture or of materials exhibiting surface effects due to environmental factors.
The method is suitable for use with the following range of materials:
— — rigid thermoplastic moulding and extrusion materials (including filled and reinforced compounds in
addition to unfilled types) and rigid thermoplastics sheets;
— — rigid thermosetting moulding materials (including filled and reinforced compounds) and rigid
thermosetting sheets (including laminates);
— — fibre-reinforced thermosetting and thermoplastic composites incorporating unidirectional or multi-
directional reinforcements (such as mats, woven fabrics, woven rovings, chopped strands, combination
and hybrid reinforcements, rovings and milled fibres) or incorporating sheets made from pre-
impregnated materials (prepregs), including filled and reinforced compounds;
— — thermotropic liquid-crystal polymers.
Notched samples are not normally suitable for use with rigid cellular materials, long-fibre-reinforced
composites or thermotropic liquid-crystal polymers. In these cases, unnotched samples may be used.
The method is suited to the use of specimens moulded to the chosen dimensions, machined from the central
portion of a standard multipurpose test specimen (see ISO 20753) or machined from finished or
semifinishedsemi-finished products such as mouldings, laminates and extruded or cast sheet.
© ISO 2026 – All rights reserved
vii
International Standard ISO/DIS 179-1:2026(en)
Plastics — Determination of Charpy impact properties —
Part 1:
Non-instrumented impact test
1 Scope
This document specifies a method for determining the Charpy impact strength of plastics under defined
conditions. It defines a number of different types of specimen and test configurations. It also specifies different
test parameters according to the type of material, the type of test specimen and the type of notch.
The method described in this document can be used to investigate the behaviour of specified types of specimen
under the impact conditions defined and for estimating the brittleness or toughness of specimens within the
limitations inherent in the test conditions. It can also be used for the determination of comparative data from
similar types of material.
2 Normative references
The following documents are referred to in the text in such a way that some or all of their content constitutes
requirements of this document. For dated references, only the edition cited applies. For undated references,
the latest edition of the referenced document (including any amendments) applies.
ISO 291, Plastics — Standard atmospheres for conditioning and testing
ISO 293, Plastics — Compression moulding of test specimens of thermoplastic materials
ISO 294--1, Plastics — Injection moulding of test specimens of thermoplastic materials — Part 1: General
principles, and moulding of multipurpose and bar test specimens
ISO 294--3, Plastics — Injection moulding of test specimens of thermoplastic materials — Part 3: Small plates
ISO 295, Plastics — Compression moulding of test specimens of thermosetting materials
ISO 1268--11, Fibre-reinforced plastics — Methods of producing test plates — Part 11: Injection moulding of
BMC and other long-fibre moulding compounds — Small plates
ISO 2818, Plastics — Preparation of test specimens by machining
ISO 10724--1, Plastics — Injection moulding of test specimens of thermosetting powder moulding compounds
(PMCs) — Part 1: General principles and moulding of multipurpose test specimens
ISO 13802, Plastics — Verification of pendulum impact-testing machines — Charpy, Izod and tensile impact-
testing
3 Terms and definitions
For the purposes of this document, the following terms and definitions apply.
ISO/DISPRF 179-1:2025(E2026(en)
ISO and IEC maintain terminology databases for use in standardization at the following addresses:
— — ISO Online browsing platform: available at https://www.iso.org/obp
— — IEC Electropedia: available at https://www.electropedia.org/
3.1 3.1
Charpy impact strength of unnotched specimen
a
cU
impact energy absorbed in breaking an unnotched specimen, referred to the original cross-sectional area of
the specimen
Note 1 to entry: It is expressed in kilojoules per square metre (kJ/m ).
3.2 3.2
Charpy impact strength of notched specimen
a
cN
impact energy absorbed in breaking a notched specimen, referred to the original cross-sectional area of the
specimen at the notch, where N = A, B or C, depending on the notch type
Note 1 to entry: See 6.3.1.1.2. See 6.3.1.1.2.
Note 2 to entry: It is expressed in kilojoules per square metre (kJ/m ).
3.3 3.3
edgewise impact
e
direction of blow parallel to the dimension b, with impact on the narrow longitudinal surface h × l of the
specimen
Note 1 to entry: See Figure 1 a) and Figures 2 and 4.
3.4Note 1 to entry: See 0 a) and 0 and 0.
3.4
flatwise impact
f
direction of blow parallel to the dimension h, with impact on the broad longitudinal surface b × l of the
specimen
Note 1 to entry: See Figure 1 b) and Figures 3 and 4.
3.5Note 1 to entry: See 0 b) and 0 and 0.
3.5
normal direction of blow
n
impact with the direction of blow normal to the plane of reinforcement
Note 1 to entry: See Figure 4. See 0.
3.6 3.6
parallel direction of blow
p
impact with the direction of blow parallel to the plane of reinforcement
2 © ISO 20252026 – All rights reserved
ISO/DISPRF 179-1:2026(en)
Note 1 to entry: See Figure 4. See 0.
4 Principle
The test specimen, supported near its ends as a horizontal beam, is impacted by a single blow of a striker, with
the line of impact midway between the supports, and bent at a high, nominally constant, velocity.
In the case of edgewise impact with notched specimens, the line of impact is directly opposite the single notch
[see Figure 1 a) and Figure 2].0 a) and 0].
The method specifies preferred dimensions for the test specimen. Tests which are carried out on specimens
of different dimensions or with different notches, or specimens which are prepared under different conditions,
can produce results which are not comparable. Other factors, such as the energy capacity of the apparatus, the
impact velocity and the conditioning of the specimens can also influence the results. Consequently, when
comparative data are required, these factors shall be carefully controlled and recorded.
The method is not intended to be used as a source of data for design calculations. Information on the typical
behaviour of a material can be obtained, however, by testing at different temperatures, by varying the notch
radius and/or the specimen thickness and by testing specimens prepared under different conditions.
5 Apparatus
5.1 Test machine
The principles, characteristics and verification of suitable test machines are detailed in ISO 13802.
ISO 13802 describes partial verification and full verification. In the case of full verification, some items are
difficult to verify when the apparatus is assembled. Such verifications are assumed to be incumbent on the
manufacturer.
5.2 Micrometers and gauges
Micrometers and gauges shall allow to determine the relevant dimensions of the test specimens with an
uncertainty not larger than 0,02 mm. For the determination of the dimension b of notched test specimens
N
measuring tips appropriate for the contour of the notch shall be used. For general information on the
determination of test specimen dimensions, see ISO 16012.
© ISO 2026 – All rights reserved
ISO/DISPRF 179-1:2025(E2026(en)
a) Edgewise impact b) Flatwise impact
Key
1 direction of blow
2 rod of pendulum
3 test specimen
4 notch
5 support
1 direction of blow
2 rod of pendulum
3 test specimen
4 notch
5 support
Figure 1 — Striking edge and support blocks for type 1 test specimen at moment of impact
4 © ISO 20252026 – All rights reserved
ISO/DISPRF 179-1:2026(en)
6 Test specimens
6.1 Preparation
6.1.1 Moulding and extrusion compounds
Specimens shall be prepared in accordance with the relevant material specification. The specimens shall be
either directly compression moulded in accordance with ISO 293 or ISO 295 or injection moulded from the
material in accordance with ISO 294-1, ISO 294-3 or ISO 10724-1, as appropriate, or machined in accordance
with ISO 2818 from sheet that has been compression or injection moulded from the compound. Type 1
specimens may be cut from multipurpose test specimens conforming with ISO 20753:2023, type A1.
6.1.2 Sheets
Specimens shall be machined from sheets in accordance with ISO 2818.
6.1.3 Long-fibre-reinforced materials
A panel shall be prepared in accordance with ISO 1268-11 or another specified or agreed upon preparation
procedure. Specimens shall be machined in accordance with ISO 2818.
© ISO 2026 – All rights reserved
ISO/DISPRF 179-1:2025(E2026(en)
Key
1 direction of blow
1 direction of blow
Figure 2 — Charpy edgewise impact (e) with single-notched specimen
6 © ISO 20252026 – All rights reserved
ISO/DISPRF 179-1:2026(en)
Key
1 direction of blow
1 direction of blow
Figure 3 — Charpy flatwise impact (f)
© ISO 2026 – All rights reserved
ISO/DISPRF 179-1:2025(E2026(en)
8 © ISO 20252026 – All rights reserved
ISO/DISPRF 179-1:2026(en)
Key
1 direction of blow
e edgewise
f flatwise
n normal
p parallel
1 direction of blow
e edgewise
f flatwise
n normal direction of blow
p parallel direction of blow
NOTE 1 Edgewise (e) and flatwise (f) indicate the direction of the blow with respect to the specimen thickness, h, and
specimen width, b. Normal (n) and parallel (p) indicate the direction of the blow with respect to the laminate plane.
NOTE 2 The Charpy “fn” and “ep” tests are used for laminates, while both the Charpy “en” and “ep” tests are used for
other materials. The Charpy “fn” and “fp” tests are used for testing materials exhibiting surface effects.
Figure 4 — Scheme of designations describing the direction of blow
© ISO 2026 – All rights reserved
ISO/DISPRF 179-1:2025(E2026(en)
6.1.4 Checking
The specimens shall be free of twist and shall have mutually perpendicular parallel surfaces. The surfaces and
edges shall be free from scratches, pits, sink marks and flash.
The specimens shall be checked for conformity with these requirements by visual observation against
straightedges, set squares and flat plates, and by measuring with micrometer callipers.
Specimens showing measurable or observable departure from one or more of these requirements shall be
rejected or machined to proper size and shape before testing.
6.1.5 Notching
6.1.5.1 6.1.5.1 Machined notches shall be prepared in accordance with ISO 2818. The profile
of the cutting tooth shall be such as to produce in the specimen a notch of the contour and depth as defined in
Table 2 and shown in Figure 5,0 and shown in 0, at right angles to its principal axes (see Note).
NOTE The radius of the notch tip can be measured by the method given in Annex C.Annex C.
6.1.5.2 6.1.5.2 Specimens with moulded-in notches may be used if specified for the material
being tested (see Note).
NOTE Specimens with moulded-in notches do not give results comparable to those obtained from specimens with
machined notches.
a) Type A b) Type B c) Type C
Radius of notch tip Radius of notch tip Radius of notch tip
rN = (0,25 ± 0,05) mm rN = (1,00 ± 0,05) mm rN = (0,10 ± 0,02) mm
Figure 5 — Notch types
6.2 Anisotropy
Certain types of sheet or panel material or specimen taken from injection-moulded plates can show different
impact properties, depending on the direction in the plane of the sheet or panel. In such cases, it is customary
to cut groups of test specimens with their major axes respectively parallel and perpendicular to the direction
of some feature of the sheet or panel which is either visible or inferred from knowledge of the method of
manufacture.
10 © ISO 20252026 – All rights reserved
ISO/DISPRF 179-1:2026(en)
6.3 Shape and dimensions
6.3.1 Materials not exhibiting interlaminar shear fracture
6.3.1.1 Moulding
...

Questions, Comments and Discussion
Ask us and Technical Secretary will try to provide an answer. You can facilitate discussion about the standard in here.
Loading comments...