ASTM B807-95
(Practice)Standard Practice for Extrusion Press Solution Heat Treatment for Aluminum Alloys
Standard Practice for Extrusion Press Solution Heat Treatment for Aluminum Alloys
SCOPE
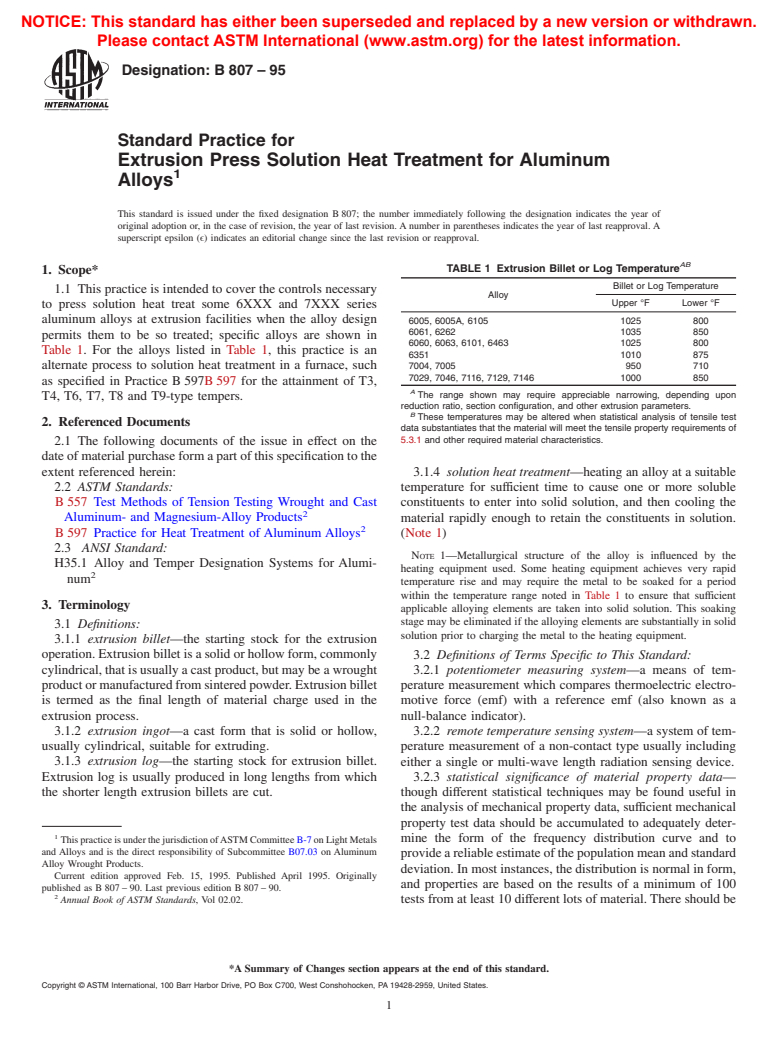
1.1 This practice is intended to cover the controls necessary to press solution heat treat some 6XXX and 7XXX series aluminum alloys at extrusion facilities when the alloy design permits them to be so treated; specific alloys are shown in Table 1. For the alloys listed in Table 1, this practice is an alternate process to solution heat treatment in a furnace, such as specified in Practice B597 for the attainment of T3, T4, T6, T7, T8 and T9-type tempers.
General Information
Relations
Standards Content (Sample)
NOTICE: This standard has either been superseded and replaced by a new version or withdrawn.
Please contact ASTM International (www.astm.org) for the latest information.
Designation:B807–95
Standard Practice for
Extrusion Press Solution Heat Treatment for Aluminum
Alloys
This standard is issued under the fixed designation B 807; the number immediately following the designation indicates the year of
original adoption or, in the case of revision, the year of last revision. A number in parentheses indicates the year of last reapproval. A
superscript epsilon (ϵ) indicates an editorial change since the last revision or reapproval.
AB
TABLE 1 Extrusion Billet or Log Temperature
1. Scope*
Billet or Log Temperature
1.1 This practice is intended to cover the controls necessary
Alloy
Upper °F Lower °F
to press solution heat treat some 6XXX and 7XXX series
aluminum alloys at extrusion facilities when the alloy design
6005, 6005A, 6105 1025 800
6061, 6262 1035 850
permits them to be so treated; specific alloys are shown in
6060, 6063, 6101, 6463 1025 800
Table 1. For the alloys listed in Table 1, this practice is an
6351 1010 875
alternate process to solution heat treatment in a furnace, such 7004, 7005 950 710
7029, 7046, 7116, 7129, 7146 1000 850
as specified in Practice B 597B 597 for the attainment of T3,
A
The range shown may require appreciable narrowing, depending upon
T4, T6, T7, T8 and T9-type tempers.
reduction ratio, section configuration, and other extrusion parameters.
B
These temperatures may be altered when statistical analysis of tensile test
2. Referenced Documents
data substantiates that the material will meet the tensile property requirements of
5.3.1 and other required material characteristics.
2.1 The following documents of the issue in effect on the
dateofmaterialpurchaseformapartofthisspecificationtothe
extent referenced herein: 3.1.4 solution heat treatment—heating an alloy at a suitable
2.2 ASTM Standards: temperature for sufficient time to cause one or more soluble
B 557 Test Methods of Tension Testing Wrought and Cast constituents to enter into solid solution, and then cooling the
Aluminum- and Magnesium-Alloy Products material rapidly enough to retain the constituents in solution.
B 597 Practice for Heat Treatment of Aluminum Alloys (Note 1)
2.3 ANSI Standard:
NOTE 1—Metallurgical structure of the alloy is influenced by the
H35.1 Alloy and Temper Designation Systems for Alumi-
heating equipment used. Some heating equipment achieves very rapid
num
temperature rise and may require the metal to be soaked for a period
within the temperature range noted in Table 1 to ensure that sufficient
3. Terminology
applicable alloying elements are taken into solid solution. This soaking
stage may be eliminated if the alloying elements are substantially in solid
3.1 Definitions:
solution prior to charging the metal to the heating equipment.
3.1.1 extrusion billet—the starting stock for the extrusion
operation.Extrusionbilletisasolidorhollowform,commonly 3.2 Definitions of Terms Specific to This Standard:
cylindrical,thatisusuallyacastproduct,butmaybeawrought 3.2.1 potentiometer measuring system—a means of tem-
productormanufacturedfromsinteredpowder.Extrusionbillet perature measurement which compares thermoelectric electro-
is termed as the final length of material charge used in the motive force (emf) with a reference emf (also known as a
extrusion process. null-balance indicator).
3.1.2 extrusion ingot—a cast form that is solid or hollow, 3.2.2 remote temperature sensing system—a system of tem-
usually cylindrical, suitable for extruding. perature measurement of a non-contact type usually including
3.1.3 extrusion log—the starting stock for extrusion billet. either a single or multi-wave length radiation sensing device.
Extrusion log is usually produced in long lengths from which 3.2.3 statistical significance of material property data—
the shorter length extrusion billets are cut. though different statistical techniques may be found useful in
the analysis of mechanical property data, sufficient mechanical
property test data should be accumulated to adequately deter-
mine the form of the frequency distribution curve and to
ThispracticeisunderthejurisdictionofASTMCommitteeB-7onLightMetals
and Alloys and is the direct responsibility of Subcommittee B07.03 on Aluminum
provideareliableestimateofthepopulationmeanandstandard
Alloy Wrought Products.
deviation. In most instances, the distribution is normal in form,
Current edition approved Feb. 15, 1995. Published April 1995. Originally
and properties are based on the results of a minimum of 100
published as B 807 – 90. Last previous edition B 807 – 90.
Annual Book of ASTM Standards, Vol 02.02. tests from at least 10 different lots of material. There should be
*ASummary of Changes section appears at the end of this standard.
Copyright © ASTM International, 100 Barr Harbor Drive, PO Box C700, West Conshohocken, PA 19428-2959, United States.
NOTICE: This standard has either been superseded and replaced by a new version or withdrawn.
Please contact ASTM International (www.astm.org) for the latest information.
B807–95
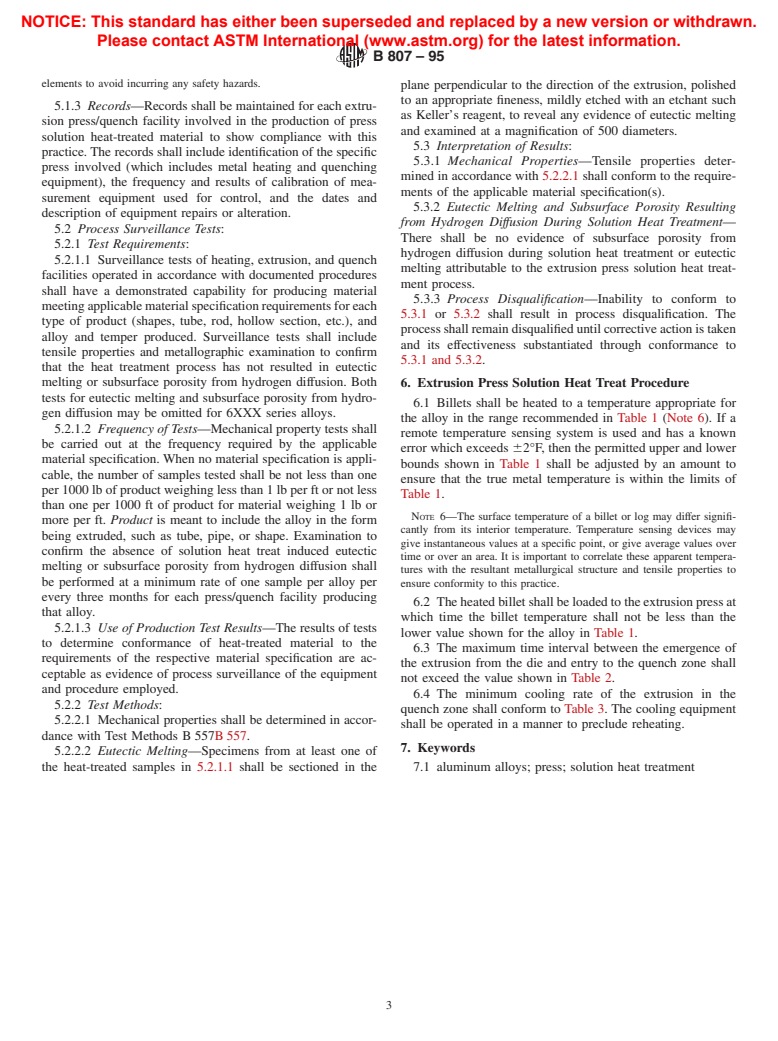
TABLE 2 Maximum Time Interval Between Extrusion Emergence
a 95 % confidence that at least 99 % of the distribution
A
From the Extrusion Die and Entry to the Quench Zone
conforms to material specifications.
Element Thickness Range, Time Interval,
B C
in. s
4. Apparatus
Up through 0.062 45
4.1 Prior to being extruded, aluminum alloys are heated to Over 0.062 through 0.150 50
Over 0.150 through 0.250 60
thetemperaturerangeshowninTable1.Usualheatingmethods
Over 0.250 90
include, but are not limited to, induction, flame impingement,
A
The boundaries of the quench zone are the extremities over which the
or forced air. Controls shall be adequate to ensure that the
minimum cooling rate in Table 3 applies.
B
equipment can be operated in a manner which precludes metal
The thinnest element of the extruded profile generally governs the thickness
range for the maximum permitted time interval. If the thinnest element is not a main
overheating or deleterious contamination of the metal by the
feature of the extrusion, it generally may be disregarded unless it represents the
furnace environment. (Note 2)
fastest cooling portion of the profile.
C
Longer time intervals may be used only when complete extrusion press
NOTE 2—Induction equipment requires measurement of thermal gradi-
solution heat treatment documentation, including statistically supporting mechani-
ents along the billet. Flame impingement devices require assessment of
cal properties, substantiate that the increased time interval will not have a
thermocouple placement relative to burner location because of the
deleterious effect.
possibility of nonuniform surface temperature.
A
TABLE 3 Minimum Cooling Rate in the Quench Zone
4.1.1 Metal temperature shall be monitored and controlled
Cooling Rate,
to the extent that the entire metal charge (Note 2) is within the
Alloy
BC
°F/s
required range prior to extrusion.
6005, 6005A, 6105 4
4.1.2 Automatic control and recording devices used to
6061, 6262, 6351 15
measure temperature at pertinent points in the heating equip-
6060, 6063, 6101, 6463, 7004, 7005 2
7029, 7046, 7116, 7129, 7146 10
ment shall be calibrated as specified in 5.1.1.
A
The cooling rate is defined as the average temperature drop when subjected
4.1.2.1 Pertinent measuring points include, but are not
to a constant cooling system from initial extrudate temperature, down to 400°F.
limited to: (Note 3)
B
Cooling with still air from 400°F to ambient temperature is permissible.
C
(1) Metal temperature in the heating equipment, and A lower quench rate may be used when supported by a documented process
and statistical confirmation that the material specification requirements are met.
(2) Metal temperature after heating, and before charging to
the extrusion press.
5. Calibration and Standardization
NOTE 3—The intent is to minimize the time period between discharge
5.1 Calibration of Equipment:
of the metal, at the desired temperature, from the heating equipment and
5.1.1 Temperature Measuring System Accuracy Test for
the initiation of the extrusion process. Some of these time or temperature
measurementsmaybeomittedifithasbeendemonstratedthattheyarenot
Remote Sensing Systems—The accuracy of remote sensing
essential to achieving an appropriate degree of process control.
systems shall be within66°F of true temperature, and calibra-
tions shall be traceable to a National Institute of Standards and
4.2 During extrusion, pertinent temperature measuring
Technology reference standard. This test shall be performed
points include, but are not limited to (Notes 3 and 4):
under operating conditions at least once during each week that
4.2.1 Metal temperature at quench entry, and
the facility is used. When the measured temperature of the
4.2.2 Metal temperature at completion of quench.
system differs by more than 62°F from that of the NIST
NOTE 4—When the design of the quench equipment does not permit standard, the system ma
...


Questions, Comments and Discussion
Ask us and Technical Secretary will try to provide an answer. You can facilitate discussion about the standard in here.