ASTM F1005-91(2002)
(Practice)Standard Practice for HVAC Duct Shapes; Identification and Description of Design Configuration
Standard Practice for HVAC Duct Shapes; Identification and Description of Design Configuration
SIGNIFICANCE AND USE
Standard nomenclature shall be used to facilitate communication between designers, suppliers, and users of HVAC ventilation ductwork components.
Standard design parameters shall be used to define ventilation ductwork shapes.
Standard variables for design parameters (see 2.2) are useful in writing CAD/CAM software for automatic fabrication of ventilation ductwork shapes.
SCOPE
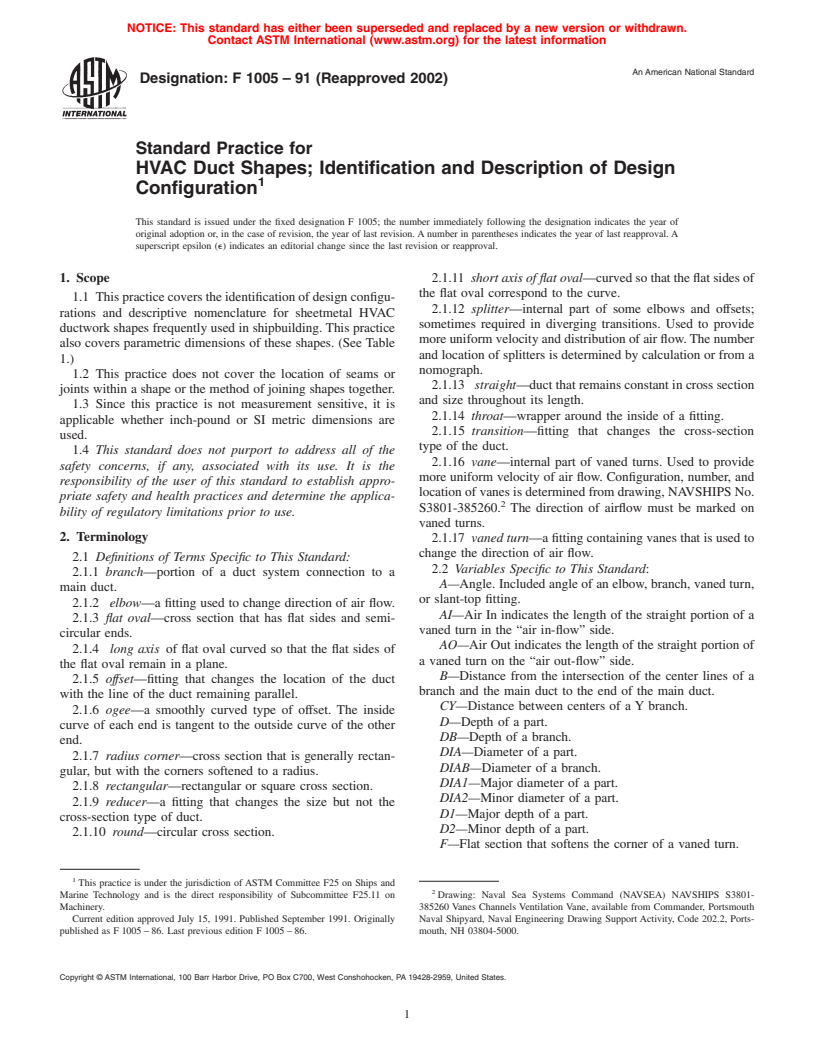
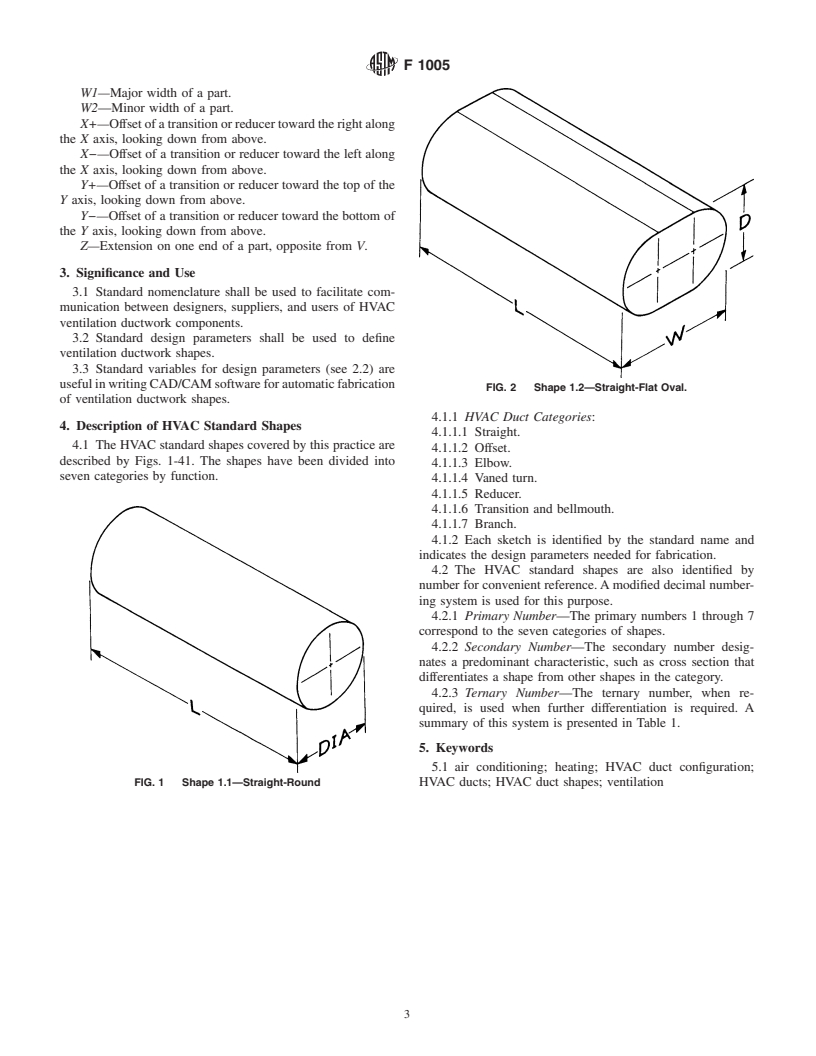
1.1 This practice covers the identification of design configurations and descriptive nomenclature for sheetmetal HVAC ductwork shapes frequently used in shipbuilding. This practice also covers parametric dimensions of these shapes. (See Table 1.)
1.2 This practice does not cover the location of seams or joints within a shape or the method of joining shapes together.
1.3 Since this practice is not measurement sensitive, it is applicable whether inch-pound or SI metric dimensions are used.
1.4 This standard does not purport to address all of the safety concerns, if any, associated with its use. It is the responsibility of the user of this standard to establish appropriate safety and health practices and determine the applicability of regulatory limitations prior to use.
General Information
Relations
Standards Content (Sample)
NOTICE: This standard has either been superseded and replaced by a new version or withdrawn.
Contact ASTM International (www.astm.org) for the latest information
An American National Standard
Designation: F 1005 – 91 (Reapproved 2002)
Standard Practice for
HVAC Duct Shapes; Identification and Description of Design
Configuration
This standard is issued under the fixed designation F 1005; the number immediately following the designation indicates the year of
original adoption or, in the case of revision, the year of last revision. A number in parentheses indicates the year of last reapproval. A
superscript epsilon (e) indicates an editorial change since the last revision or reapproval.
1. Scope 2.1.11 shortaxisofflatoval—curved so that the flat sides of
the flat oval correspond to the curve.
1.1 This practice covers the identification of design configu-
2.1.12 splitter—internal part of some elbows and offsets;
rations and descriptive nomenclature for sheetmetal HVAC
sometimes required in diverging transitions. Used to provide
ductwork shapes frequently used in shipbuilding. This practice
more uniform velocity and distribution of air flow.The number
also covers parametric dimensions of these shapes. (See Table
and location of splitters is determined by calculation or from a
1.)
nomograph.
1.2 This practice does not cover the location of seams or
2.1.13 straight—duct that remains constant in cross section
joints within a shape or the method of joining shapes together.
and size throughout its length.
1.3 Since this practice is not measurement sensitive, it is
2.1.14 throat—wrapper around the inside of a fitting.
applicable whether inch-pound or SI metric dimensions are
2.1.15 transition—fitting that changes the cross-section
used.
type of the duct.
1.4 This standard does not purport to address all of the
2.1.16 vane—internal part of vaned turns. Used to provide
safety concerns, if any, associated with its use. It is the
more uniform velocity of air flow. Configuration, number, and
responsibility of the user of this standard to establish appro-
location of vanes is determined from drawing, NAVSHIPS No.
priate safety and health practices and determine the applica-
S3801-385260. The direction of airflow must be marked on
bility of regulatory limitations prior to use.
vaned turns.
2. Terminology 2.1.17 vaned turn—a fitting containing vanes that is used to
change the direction of air flow.
2.1 Definitions of Terms Specific to This Standard:
2.2 Variables Specific to This Standard:
2.1.1 branch—portion of a duct system connection to a
A—Angle. Included angle of an elbow, branch, vaned turn,
main duct.
or slant-top fitting.
2.1.2 elbow—a fitting used to change direction of air flow.
AI—Air In indicates the length of the straight portion of a
2.1.3 flat oval—cross section that has flat sides and semi-
vaned turn in the “air in-flow” side.
circular ends.
AO—Air Out indicates the length of the straight portion of
2.1.4 long axis of flat oval curved so that the flat sides of
a vaned turn on the “air out-flow” side.
the flat oval remain in a plane.
B—Distance from the intersection of the center lines of a
2.1.5 offset—fitting that changes the location of the duct
branch and the main duct to the end of the main duct.
with the line of the duct remaining parallel.
CY—Distance between centers of a Y branch.
2.1.6 ogee—a smoothly curved type of offset. The inside
D—Depth of a part.
curve of each end is tangent to the outside curve of the other
DB—Depth of a branch.
end.
DIA—Diameter of a part.
2.1.7 radius corner—cross section that is generally rectan-
DIAB—Diameter of a branch.
gular, but with the corners softened to a radius.
DIA1—Major diameter of a part.
2.1.8 rectangular—rectangular or square cross section.
DIA2—Minor diameter of a part.
2.1.9 reducer—a fitting that changes the size but not the
D1—Major depth of a part.
cross-section type of duct.
D2—Minor depth of a part.
2.1.10 round—circular cross section.
F—Flat section that softens the corner of a vaned turn.
This practice is under the jurisdiction of ASTM Committee F25 on Ships and
Marine Technology and is the direct responsibility of Subcommittee F25.11 on Drawing: Naval Sea Systems Command (NAVSEA) NAVSHIPS S3801-
Machinery. 385260 Vanes Channels Ventilation Vane, available from Commander, Portsmouth
Current edition approved July 15, 1991. Published September 1991. Originally Naval Shipyard, Naval Engineering Drawing Support Activity, Code 202.2, Ports-
published as F 1005 – 86. Last previous edition F 1005 – 86. mouth, NH 03804-5000.
Copyright © ASTM International, 100 Barr Harbor Drive, PO Box C700, West Conshohocken, PA 19428-2959, United States.
F 1005
TABLE 1 HVAC Standard Nomenclature and Numbering System
1. Straight:
1.1 Straight-round
1.2 Straight-flat oval
1.3 Straight-rectangular
2. Offset:
2.1 Offset-round
2.2.1 Offset-flat oval-long axis
2.2.2 Offset-flat oval-short axis
2.3.1 Offset-rectangular-without splitters
2.3.2 Offset-rectangular-with splitters
2.4.1 Offset-ogee-without splitters
2.4.2 Offset-ogee-with splitters
2.5.1 Offset-rectangular reducing-without
splitters
2.5.2 Offset-rectangular reducing-with splitters
3. Elbow:
3.1 Elbow-round
3.2.1 Elbow-flat oval-long axis
3.2.2 Elbow-flat oval-short axis
3.3.1 Elbow-rectangular-without splitters
3.3.2 Elbow-rectangular-with splitters
3.4.1 Elbow-rectangular reducing-without
splitters
3.4.2 Elbow-rectangular reducing-with splitters
3.5.1 Elbow-rectangular transition-without
splitters
3.5.2 Elbow-rectangular transition-with splitters
4. Vaned Turn:
4.1 Vaned turn
5. Reducer:
5.1 Reducer-round
5.2 Reducer-flat oval
5.3 Reducer-rectangular
6. Transition and Bellmouth:
6.1 Transition-flat oval to round
6.2 Transition-rectangular to round
6.3 Transition-rectangular to flat oval
6.4 Transition-rectangular to radius corner
6.5 Transition-radius corner to flat oval
6.6.1 Bellmouth-round
6.6.2 Bellmouth-rectangular
7. Branch:
7.1.1 Branch-round-on equal diameter round
7.1.2 Branch-round-on larger diameter round
7.1.3 Branch-round-on round reducer
7.1.4 Branch-round-on rectangular straight
7.1.5 Branch-round-on rectangular reducer
7.1.6 Branch-round “Y”
7.1.7 Branch-rectangular to round-“Y”
7.2.1 Branch-rectangular-on rectangular straight
7.2.2 Branch-rectangular-on rectangular reducer
L—Length of a part. R2—Radius of second splitter.
LB—Length of a branch from the end of the branch to the R3—Radius of third splitter.
point where the centerline of the branch intersects the center- S1—Distance of first splitter from the outside curve of an
line of the main duct. ogee offset.
1.1—Major length of a Y branch. S2—Distance of second splitter from the outside curve of
1.2—Minor length of a Y branch. an ogee offset.
O—Offset in one direction. S3—Distance of third splitter from the outside curve of an
R—Radius of a bellmouth. ogee offset.
RC—Radius corner. TR—Throat radius is the radius of the inside surface of an
RV1—Radius of first splitter at V extension. elbow or offset. Normally TR is equal to the width (of a
RV2—Radius of second splitter at V extension. rectangular elbow).
RV3—Radius of third splitter at V extension. TR1—Major throat radius of a reducing offset.
RZ1—Radius of first splitter at Z extension. TR2—Minor throat radius of a reducing offset.
RZ2—Radius of second splitter at Z extension. V—Extension on one end of a part, opposite from Z.
RZ3—Radius of thir
...


Questions, Comments and Discussion
Ask us and Technical Secretary will try to provide an answer. You can facilitate discussion about the standard in here.