ASTM E675-02(2007)
(Specification)Standard Specification for Interchangeable Taper-Ground Stopcocks And Stoppers
Standard Specification for Interchangeable Taper-Ground Stopcocks And Stoppers
ABSTRACT
The specification provides the standard dimensional requirements for obtaining, within practical limits, interchangeability in stopcocks and stoppers for ordinary laboratory and industrial applications. It solely covers ground surfaces dimensional interchangeability, and does not involve design characteristics of the item except where specified. Materials shall be tested and shall conform to the specified values of design, dimension, designation, tolerances, taper, and master gages; as stated in the requirements for Single Straight-Bore Taper-Ground Stopcocks, Single Oblique-Bore Stopcocks, Double Oblique-Bore (Three-Way) Stopcocks, T-Bore and 120-deg Bore Stopcocks, Taper-Ground Flask Stoppers, and Taper-Ground Bottle Stoppers.
SCOPE
1.1 The specification provides standard dimensional requirements for obtaining, within practical limits, interchangeability in stopcocks and stoppers for ordinary laboratory and industrial applications. It covers dimensional interchangeability of the ground surfaces only and does not involve design characteristics of the item except where specified.
Note 1—The dimensions pertaining to stopcocks and stoppers were taken from the Commercial Standard CS 21 of the U.S. Department of Commerce.
Note 2—Although glass is the most commonly used material for stopcocks and stoppers, other materials may be used as specified. Stopcocks and stoppers constructed from glass should conform to Specifications E 438 and E 671.
General Information
Relations
Buy Standard
Standards Content (Sample)
NOTICE: This standard has either been superseded and replaced by a new version or withdrawn.
Contact ASTM International (www.astm.org) for the latest information
Designation:E675 −02(Reapproved 2007)
Standard Specification for
Interchangeable Taper-Ground Stopcocks And Stoppers
This standard is issued under the fixed designation E675; the number immediately following the designation indicates the year of
original adoption or, in the case of revision, the year of last revision. A number in parentheses indicates the year of last reapproval. A
superscript epsilon (´) indicates an editorial change since the last revision or reapproval.
1. Scope 3. Requirements for Single Straight-Bore Taper-Ground
Stopcocks
1.1 The specification provides standard dimensional re-
3.1 The designations and dimensions for single straight-
quirements for obtaining, within practical limits, interchange-
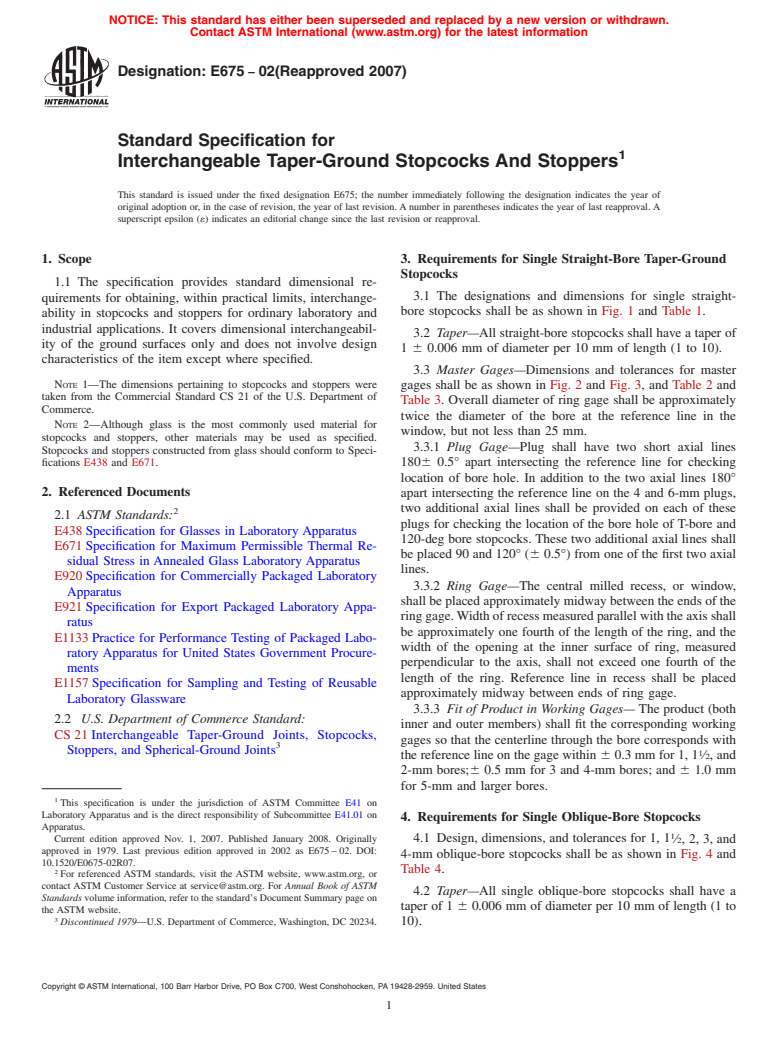
bore stopcocks shall be as shown in Fig. 1 and Table 1.
ability in stopcocks and stoppers for ordinary laboratory and
industrial applications. It covers dimensional interchangeabil-
3.2 Taper—All straight-bore stopcocks shall have a taper of
ity of the ground surfaces only and does not involve design
1 6 0.006 mm of diameter per 10 mm of length (1 to 10).
characteristics of the item except where specified.
3.3 Master Gages—Dimensions and tolerances for master
NOTE 1—The dimensions pertaining to stopcocks and stoppers were
gages shall be as shown in Fig. 2 and Fig. 3, and Table 2 and
taken from the Commercial Standard CS 21 of the U.S. Department of
Table 3. Overall diameter of ring gage shall be approximately
Commerce.
twice the diameter of the bore at the reference line in the
NOTE 2—Although glass is the most commonly used material for
window, but not less than 25 mm.
stopcocks and stoppers, other materials may be used as specified.
3.3.1 Plug Gage—Plug shall have two short axial lines
Stopcocks and stoppers constructed from glass should conform to Speci-
fications E438 and E671. 1806 0.5° apart intersecting the reference line for checking
location of bore hole. In addition to the two axial lines 180°
2. Referenced Documents
apart intersecting the reference line on the 4 and 6-mm plugs,
two additional axial lines shall be provided on each of these
2.1 ASTM Standards:
plugs for checking the location of the bore hole of T-bore and
E438 Specification for Glasses in Laboratory Apparatus
120-deg bore stopcocks. These two additional axial lines shall
E671 Specification for Maximum Permissible Thermal Re-
be placed 90 and 120° (6 0.5°) from one of the first two axial
sidual Stress in Annealed Glass Laboratory Apparatus
lines.
E920 Specification for Commercially Packaged Laboratory
3.3.2 Ring Gage—The central milled recess, or window,
Apparatus
shall be placed approximately midway between the ends of the
E921 Specification for Export Packaged Laboratory Appa-
ring gage.Width of recess measured parallel with the axis shall
ratus
be approximately one fourth of the length of the ring, and the
E1133 Practice for Performance Testing of Packaged Labo-
width of the opening at the inner surface of ring, measured
ratory Apparatus for United States Government Procure-
perpendicular to the axis, shall not exceed one fourth of the
ments
length of the ring. Reference line in recess shall be placed
E1157 Specification for Sampling and Testing of Reusable
approximately midway between ends of ring gage.
Laboratory Glassware
3.3.3 Fit of Product in Working Gages— The product (both
2.2 U.S. Department of Commerce Standard:
inner and outer members) shall fit the corresponding working
CS 21 Interchangeable Taper-Ground Joints, Stopcocks,
gages so that the centerline through the bore corresponds with
Stoppers, and Spherical-Ground Joints
the reference line on the gage within 6 0.3 mm for 1, 1 ⁄2, and
2-mm bores;6 0.5 mm for 3 and 4-mm bores; and 6 1.0 mm
for 5-mm and larger bores.
This specification is under the jurisdiction of ASTM Committee E41 on
Laboratory Apparatus and is the direct responsibility of Subcommittee E41.01 on
4. Requirements for Single Oblique-Bore Stopcocks
Apparatus.
Current edition approved Nov. 1, 2007. Published January 2008. Originally
4.1 Design, dimensions, and tolerances for 1, 1 ⁄2,2,3,and
approved in 1979. Last previous edition approved in 2002 as E675 – 02. DOI:
4-mm oblique-bore stopcocks shall be as shown in Fig. 4 and
10.1520/E0675-02R07.
Table 4.
For referenced ASTM standards, visit the ASTM website, www.astm.org, or
contact ASTM Customer Service at service@astm.org. For Annual Book of ASTM
4.2 Taper—All single oblique-bore stopcocks shall have a
Standards volume information, refer to the standard’s Document Summary page on
taper of 1 6 0.006 mm of diameter per 10 mm of length (1 to
the ASTM website.
Discontinued 1979—U.S. Department of Commerce, Washington, DC 20234. 10).
Copyright © ASTM International, 100 Barr Harbor Drive, PO Box C700, West Conshohocken, PA 19428-2959. United States
E675−02 (2007)
FIG. 1 Stopcock
FIG. 2 Master Plug Gage for Single Straight-Bore Stopcocks
TABLE 1 Single Straight-Bore Stopcocks
Diameter of Plug Length of Diameter of
Stopcock at Center-Line Shell, ±0.5 Bore Hole in
Designation of Bore, mm mm Plug, mm
D E F
A
1-M 720 1
112 30 1
1 1
1 ⁄2 12 30 1 ⁄2
212 30 2
317 40 3
417 40 4
520 44 5
620 44 6
825 52 8
10 35 56 10
A
Micro size.
4.3 MasterGages—The dimensions and tolerances for mas-
ter gages shall be as shown in Fig. 5 and Fig. 6 and Table 5 and
Table 6. The overall diameter of the ring gage shall be
approximately twice the diameter of the bore at its midpoint,
but not less than 25 mm.
4.3.1 Plug Gage—The upper circumferential reference line
shall be the gaging point. Each reference line shall have a short
FIG. 3 Master Ring Gage for Single Straight-Bore Stopcocks
axial line intersecting it, the two axial lines being on opposite
sidesoftheplugandinthesameplanerunningthroughtheaxis
(180 6 0.5° apart) for checking location of bore holes.
5. Requirements for Double Oblique-Bore (Three-Way)
4.3.2 Ring Gage—The width of the milled recesses, or
windows, measured parallel with the axis shall be approxi- Stopcocks
mately one fourth of the length of the ring, and the width of the
5.1 Design, dimensions, and tolerances for 1, 1 ⁄2,2,3,and
opening at the inner surface of ring, measured perpendicular to
4-mm, three-way bore stopcocks shall be as shown in Fig. 7
the axis, shall not exceed one fourth of the length of the ring.
and Table 7.
The recesses shall be so placed that the reference lines fall
5.2 Taper—All double oblique-bore stopcocks shall have a
approximately midway in the recess.
taper of 1 6 0.006 mm of diameter per 10 mm of length (1 to
4.3.3 Fit of Product in Working Gages— The product (both
10).
inner and outer members) shall fit the corresponding working
gages so that the centerlines through the openings correspond 5.3 Master Gages—Dimensions and tolerances for master
with the reference lines on the gages within 6 0.3 mm for 1, gages shall be as shown in Fig. 8 and Fig. 9 and Table 8 and
1 ⁄2, and 2-mm bores, and 6 0.5 mm for 3 and 4-mm bores. Table 9. The overall diameter of the ring gage shall be
E675−02 (2007)
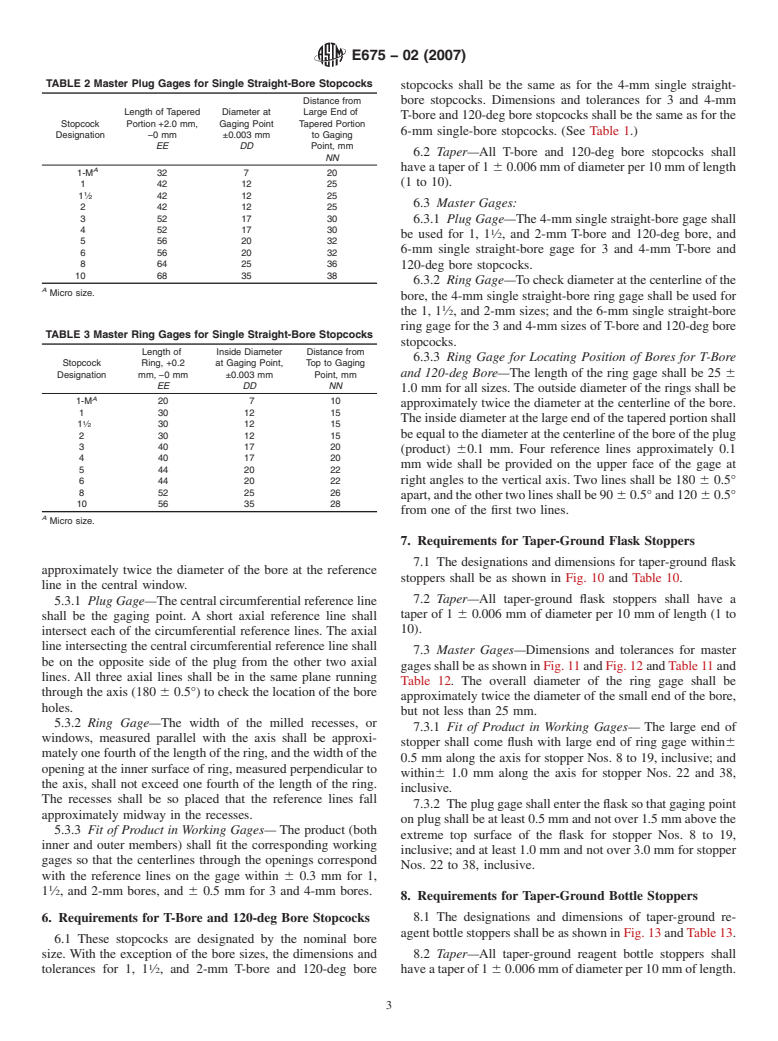
TABLE 2 Master Plug Gages for Single Straight-Bore Stopcocks
stopcocks shall be the same as for the 4-mm single straight-
Distance from bore stopcocks. Dimensions and tolerances for 3 and 4-mm
Length of Tapered Diameter at Large End of
T-bore and 120-deg bore stopcocks shall be the same as for the
Stopcock Portion +2.0 mm, Gaging Point Tapered Portion
6-mm single-bore stopcocks. (See Table 1.)
Designation −0 mm ±0.003 mm to Gaging
EE DD Point, mm
6.2 Taper—All T-bore and 120-deg bore stopcocks shall
NN
have a taper of 1 6 0.006 mm of diameter per 10 mm of length
A
1-M 32 7 20
(1 to 10).
142 12 25
1 ⁄2 42 12 25
6.3 Master Gages:
242 12 25
352 17 30
6.3.1 Plug Gage—The 4-mm single straight-bore gage shall
452 17 30
be used for 1, 1 ⁄2, and 2-mm T-bore and 120-deg bore, and
556 20 32
6-mm single straight-bore gage for 3 and 4-mm T-bore and
656 20 32
864 25 36
120-deg bore stopcocks.
10 68 35 38
6.3.2 RingGage—To check diameter at the centerline of the
A
Micro size.
bore, the 4-mm single straight-bore ring gage shall be used for
the 1, 1 ⁄2, and 2-mm sizes; and the 6-mm single straight-bore
ring gage for the 3 and 4-mm sizes of T-bore and 120-deg bore
TABLE 3 Master Ring Gages for Single Straight-Bore Stopcocks
stopcocks.
Length of Inside Diameter Distance from
6.3.3 Ring Gage for Locating Position of Bores for T-Bore
Stopcock Ring, +0.2 at Gaging Point, Top to Gaging
and 120-deg Bore—The length of the ring gage shall be 25 6
Designation mm, −0 mm ±0.003 mm Point, mm
EE DD NN
1.0 mm for all sizes. The outside diameter of the rings shall be
A
1-M 20 7 10
approximately twice the diameter at the centerline of the bore.
1 301215
The inside diameter at the large end of the tapered portion shall
1 ⁄2 30 12 15
be equal to the diameter at the centerline of the bore of the plug
2 301215
3 401720
(product) 60.1 mm. Four reference lines approximately 0.1
4 401720
mm wide shall be provided on the upper face of the gage at
5 442022
6 442022 right angles to the vertical axis. Two lines shall be 180 6 0.5°
8 522526
apart,andtheothertwolinesshallbe90 60.5°and120 60.5°
10 56 35 28
from one of the first two lines.
A
Micro size.
7. Requirements for Taper-Ground Flask Stoppers
7.1 The designations and dimensions for taper-ground flask
approximately twice the diameter of the bore at the reference
stoppers shall be as shown in Fig. 10 and Table 10.
line in the central window.
7.2 Taper—All taper-ground flask stoppers shall have a
5.3.1 PlugGage—The central circumferential reference line
taper of 1 6 0.006 mm of diameter per 10 mm of length (1 to
shall be the gaging point. A short axial reference line shall
10).
intersect each of the circumferential reference lines. The axial
line intersecting the central circumferential reference line shall
7.3 Master Gages—Dimensions and tolerances for master
be on the opposite side of the plug from the other two axial
gages shall be as shown in Fig. 11 and Fig. 12 and Table 11 and
lines. All three axial lines shall be in the same plane running
Table 12. The overall diameter of the ring gage shall be
through the axis (180 6 0.5°) to check the location of the bore
approximately twice the diameter of the sma
...
This document is not an ASTM standard and is intended only to provide the user of an ASTM standard an indication of what changes have been made to the previous version. Because
it may not be technically possible to adequately depict all changes accurately, ASTM recommends that users consult prior editions as appropriate. In all cases only the current version
of the standard as published by ASTM is to be considered the official document.
Designation:E675–94 (Reapproved 1998) Designation: E 675 – 02 (Reapproved 2007)
Standard Specification for
Interchangeable Taper-Ground Stopcocks And Stoppers
This standard is issued under the fixed designation E 675; the number immediately following the designation indicates the year of
original adoption or, in the case of revision, the year of last revision. A number in parentheses indicates the year of last reapproval. A
superscript epsilon (e) indicates an editorial change since the last revision or reapproval.
1. Scope
1.1 The specification provides standard dimensional requirements for obtaining, within practical limits, interchangeability in
stopcocks and stoppers for ordinary laboratory and industrial applications. It covers dimensional interchangeability of the ground
surfaces only and does not involve design characteristics of the item except where specified.
NOTE 1—The dimensions pertaining to stopcocks and stoppers were taken from the Commercial Standard CS 21 of the U.S. Department of Commerce.
NOTE 2—Although glass is the most commonly used material for stopcocks and stoppers, other materials may be used as specified. Stopcocks and
stoppers constructed from glass should conform to Specifications E 438 and E 671.
2. Referenced Documents
2.1 ASTM Standards:
E 438 Specification for Glasses in Laboratory Apparatus
E 671 Specification for Maximum Permissible Thermal Residual Stress in Annealed Glass Laboratory Apparatus
E 920 Specification for Commercially Packaged Laboratory Apparatus
E 921Practice Specification for Export Packaged Laboratory Apparatus
E 1133 Practice for Performance Testing of Packaged Laboratory Apparatus for United States Government Procurements
E 1157 Specification for Sampling and Testing of Reusable Laboratory Glassware
2.2 U.S. Department of Commerce Standard:
CS 21 Interchangeable Taper-Ground Joints, Stopcocks, Stoppers, and Spherical-Ground Joints
3. Requirements for Single Straight-Bore Taper-Ground Stopcocks
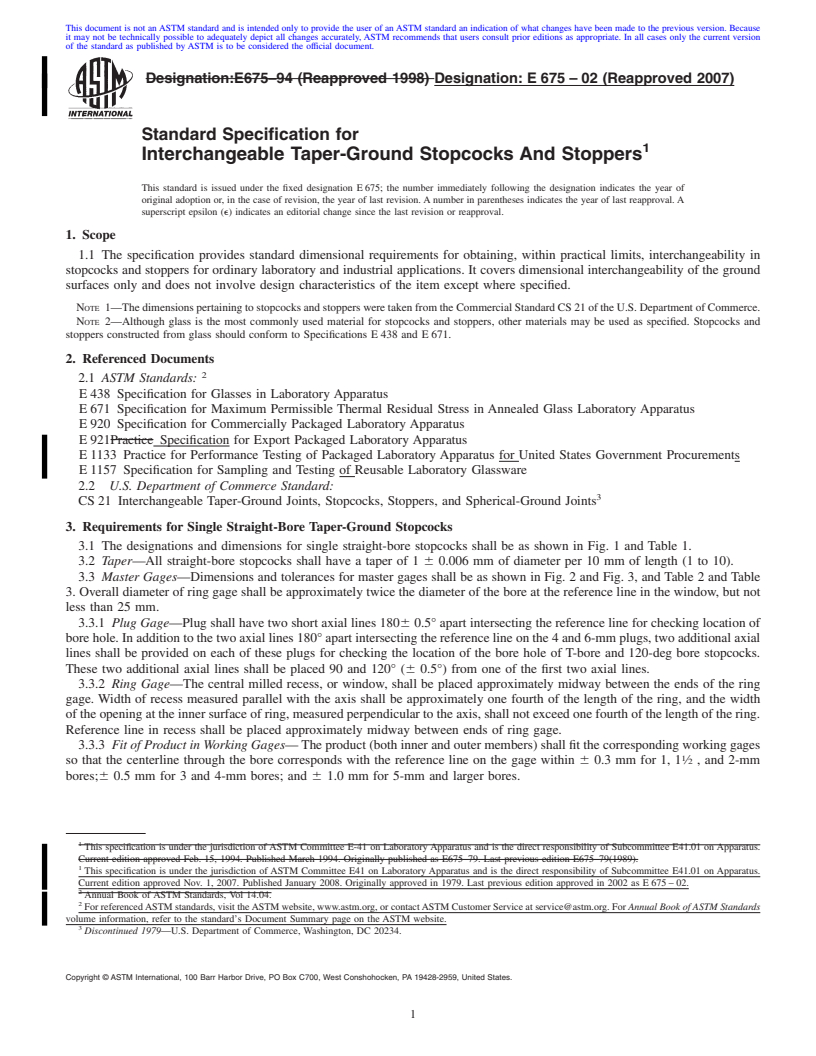
3.1 The designations and dimensions for single straight-bore stopcocks shall be as shown in Fig. 1 and Table 1.
3.2 Taper—All straight-bore stopcocks shall have a taper of 1 6 0.006 mm of diameter per 10 mm of length (1 to 10).
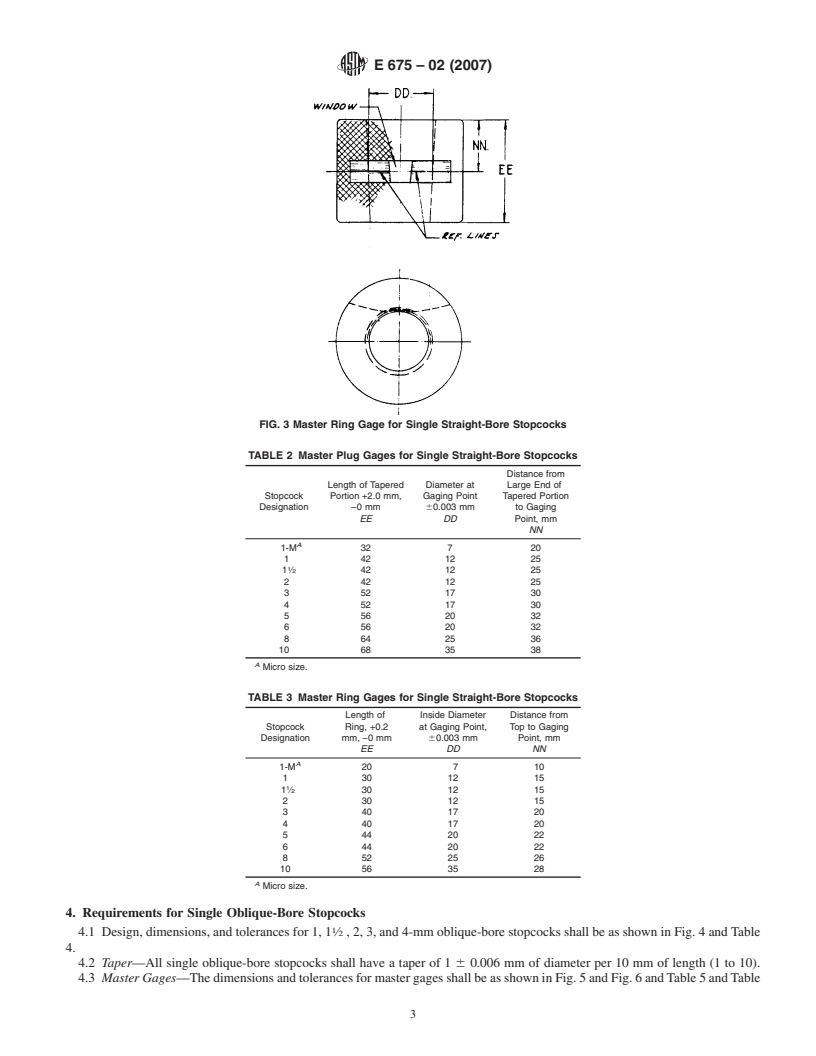
3.3 Master Gages—Dimensions and tolerances for master gages shall be as shown in Fig. 2 and Fig. 3, and Table 2 and Table
3. Overall diameter of ring gage shall be approximately twice the diameter of the bore at the reference line in the window, but not
less than 25 mm.
3.3.1 Plug Gage—Plug shall have two short axial lines 1806 0.5° apart intersecting the reference line for checking location of
bore hole. In addition to the two axial lines 180° apart intersecting the reference line on the 4 and 6-mm plugs, two additional axial
lines shall be provided on each of these plugs for checking the location of the bore hole of T-bore and 120-deg bore stopcocks.
These two additional axial lines shall be placed 90 and 120° (6 0.5°) from one of the first two axial lines.
3.3.2 Ring Gage—The central milled recess, or window, shall be placed approximately midway between the ends of the ring
gage. Width of recess measured parallel with the axis shall be approximately one fourth of the length of the ring, and the width
of the opening at the inner surface of ring, measured perpendicular to the axis, shall not exceed one fourth of the length of the ring.
Reference line in recess shall be placed approximately midway between ends of ring gage.
3.3.3 FitofProductinWorkingGages—The product (both inner and outer members) shall fit the corresponding working gages
so that the centerline through the bore corresponds with the reference line on the gage within 6 0.3 mm for 1, 1 ⁄2 , and 2-mm
bores;6 0.5 mm for 3 and 4-mm bores; and 6 1.0 mm for 5-mm and larger bores.
This specification is under the jurisdiction of ASTM Committee E-41 on Laboratory Apparatus and is the direct responsibility of Subcommittee E41.01 on Apparatus.
Current edition approved Feb. 15, 1994. Published March 1994. Originally published as E675–79. Last previous edition E675–79(1989).
This specification is under the jurisdiction of ASTM Committee E41 on Laboratory Apparatus and is the direct responsibility of Subcommittee E41.01 on Apparatus.
Current edition approved Nov. 1, 2007. Published January 2008. Originally approved in 1979. Last previous edition approved in 2002 as E 675 – 02.
Annual Book of ASTM Standards, Vol 14.04.
For referencedASTM standards, visit theASTM website, www.astm.org, or contactASTM Customer Service at service@astm.org. ForAnnualBookofASTMStandards
volume information, refer to the standard’s Document Summary page on the ASTM website.
Discontinued 1979—U.S. Department of Commerce, Washington, DC 20234.
Copyright © ASTM International, 100 Barr Harbor Drive, PO Box C700, West Conshohocken, PA 19428-2959, United States.
E 675 – 02 (2007)
FIG. 1 Stopcock
TABLE 1 Single Straight-Bore Stopcocks
Diameter of Plug Length of Diameter of
Stopcock at Center-Line Shell, 60.5 Bore Hole in
Designation of Bore, mm mm Plug, mm
D E F
A
1-M 720 1
112 30 1 ⁄2
1 1
1 ⁄2 12 30 1 ⁄2
212 30 2
317 40 3
417 40 4
520 44 5
620 44 6
825 52 8
10 35 56 10
A
Micro size.
FIG. 2 Master Plug Gage for Single Straight-Bore Stopcocks
E 675 – 02 (2007)
FIG. 3 Master Ring Gage for Single Straight-Bore Stopcocks
TABLE 2 Master Plug Gages for Single Straight-Bore Stopcocks
Distance from
Length of Tapered Diameter at Large End of
Stopcock Portion +2.0 mm, Gaging Point Tapered Portion
Designation −0 mm 60.003 mm to Gaging
EE DD Point, mm
NN
A
1-M 32 7 20
142 12 25
1 ⁄2 42 12 25
242 12 25
352 17 30
452 17 30
556 20 32
656 20 32
864 25 36
10 68 35 38
A
Micro size.
TABLE 3 Master Ring Gages for Single Straight-Bore Stopcocks
Length of Inside Diameter Distance from
Stopcock Ring, +0.2 at Gaging Point, Top to Gaging
Designation mm, −0 mm 60.003 mm Point, mm
EE DD NN
A
1-M 20 7 10
1 301215
1 ⁄2 30 12 15
2 301215
3 401720
4 401720
5 442022
6 442022
8 522526
10 56 35 28
A
Micro size.
4. Requirements for Single Oblique-Bore Stopcocks
4.1 Design, dimensions, and tolerances for 1, 1 ⁄2 , 2, 3, and 4-mm oblique-bore stopcocks shall be as shown in Fig. 4 andTable
4.
4.2 Taper—All single oblique-bore stopcocks shall have a taper of 1 6 0.006 mm of diameter per 10 mm of length (1 to 10).
4.3 MasterGages—ThedimensionsandtolerancesformastergagesshallbeasshowninFig.5andFig.6andTable5andTable
E 675 – 02 (2007)
FIG. 4 Single Oblique-Bore Stopcock
TABLE 4 Single Oblique-Bore Stopcock
Distance from Large End
Diameter of Plug at Length of Shell, Diameter of Bore Distance between
Stopcock of Shell to Gaging
Gaging Point, mm 60.5 mm in Plug, mm Bore Holes,
Designation Point, 60.5 mm
A
D E F P
N
1 12.60 40 1 14.0 12
1 1
1 ⁄2 12.60 40 1 ⁄2 14.0 12
2 12.60 40 2 14.0 12
3 17.35 50 3 16.5 17
4 17.35 50 4 16.5 17
A
See 3.3.3.
FIG. 5 Master Plug Gage for Single Oblique-Bore Stopcocks
6. The overall diameter of the ring gage shall be approximately twice the diameter of the bore at its midpoint, but not less than
25 mm.
4.3.1 PlugGage—Theuppercircumferentialreferencelineshallbethegagingpoint.Eachreferencelineshallhaveashortaxial
line intersecting it, the two axial lines being on opposite sides of the plug and in the same plane running through the axis (180 6
0.5° apart) for checking location of bore holes.
E 675 – 02 (2007)
FIG. 6 Master Ring Gage for Single Oblique-Bore Stopcocks
TABLE 5 Master Plug Gages for Single Oblique-Bore Stopcocks
Length of Distance from Large End of Distance from Gaging Point
Diameter at Gaging
Tapered Portion, Tapered Portion to Gaging to Lower Reference
Stopcock Designation Point, 60.003 mm
+2.0 mm, −0 mm Point +1.5 mm, −0 mm Line 60.03 mm
DD
EE NN PP
1 52 12.60 24.5 12
1 ⁄2 52 12.60 24.5 12
2 52 12.60 24.5 12
3 62 17.35 27.0 17
4 62 17.35 27.0 17
TABLE 6 Master Ring Gages for Single Oblique-Bore Stopcocks
Distance from Gaging
Length of Ring, +0.2 Inside Diameter at Gaging Point
Distance from Top to Gaging
mm, −0 mm Point, 60.003 mm to Lower Reference Point,
Stopcock Designation Point (Approximate)
EE DD 60.03 mm
NN
PP
1 40 12.60 14.0 12
1 ⁄2 40 12.60 14.0 12
2 40 12.60 14.0 12
3 50 17.35 16.5 17
4 50 17.35 16.5 17
4.3.2 Ring Gage—The width of the milled recesses, or windows, measured parallel with the axis shall be approximately one
fourth of the length of the ring, and the width of the opening at the inner surface of ring, measured perpendicular to the axis, shall
not exceed one fourth of the length of the ring. The recesses shall be so placed that the reference lines fall approximately midway
in the recess.
4.3.3 FitofProductinWorkingGages—The product (both inner and outer members) shall fit the corresponding working gages
so that the centerlines through the openings correspond with the reference lines on the gages within 6 0.3 mm for 1, 1 ⁄2 , and
2-mm bores, and 6 0.5 mm for 3 and 4-mm bores.
5. Requirements for Double Oblique-Bore (Three-Way) Stopcocks
5.1 Design, dimensions, and tolerances for 1, 1 ⁄2 , 2, 3, and 4-mm, three-way bore stopcocks shall be as shown in Fig. 7 and
Table 7.
5.2 Taper—All double oblique-bore stopcocks shall have a taper of 1 6 0.006 mm of diameter per 10 mm of length (1 to 10).
5.3 Master Gages—Dimensions and tolerances for master gages shall be as shown in Fig. 8 and Fig. 9 and Table 8 and Table
9. The overall diameter of the ring gage shall be approximately twice the diameter of the bore at the reference line in the central
window.
E 675 – 02 (2007)
FIG. 7 Double Oblique-Bore Stopcock
TABLE 7 Double Oblique-Bore Stopcock
Distance from Distance from Distance from
Diameter of
Length of Diameter of Large End of Gaging Point to Gaging Point to
Stopcock Plug at
Shell, 60.5 mm Bore in Plug, mm Shell to Gaging point, Centerline of Bore Near Centerline of
Designation Gaging Point, mm
E F 60.5 mm Large End, mm Bore Near Small End
D
A A
N R S
1 14.5 50 1 25 12.5 11.5
1 1
1 ⁄2 14.5 50 1 ⁄2 25 12.5 11.5
2 14.5 50 2 25 12.5 11.5
3 16.2 56 3 28 14.0 12.9
4 16.2 56 4 28
...


Questions, Comments and Discussion
Ask us and Technical Secretary will try to provide an answer. You can facilitate discussion about the standard in here.