ASTM F1978-00e1
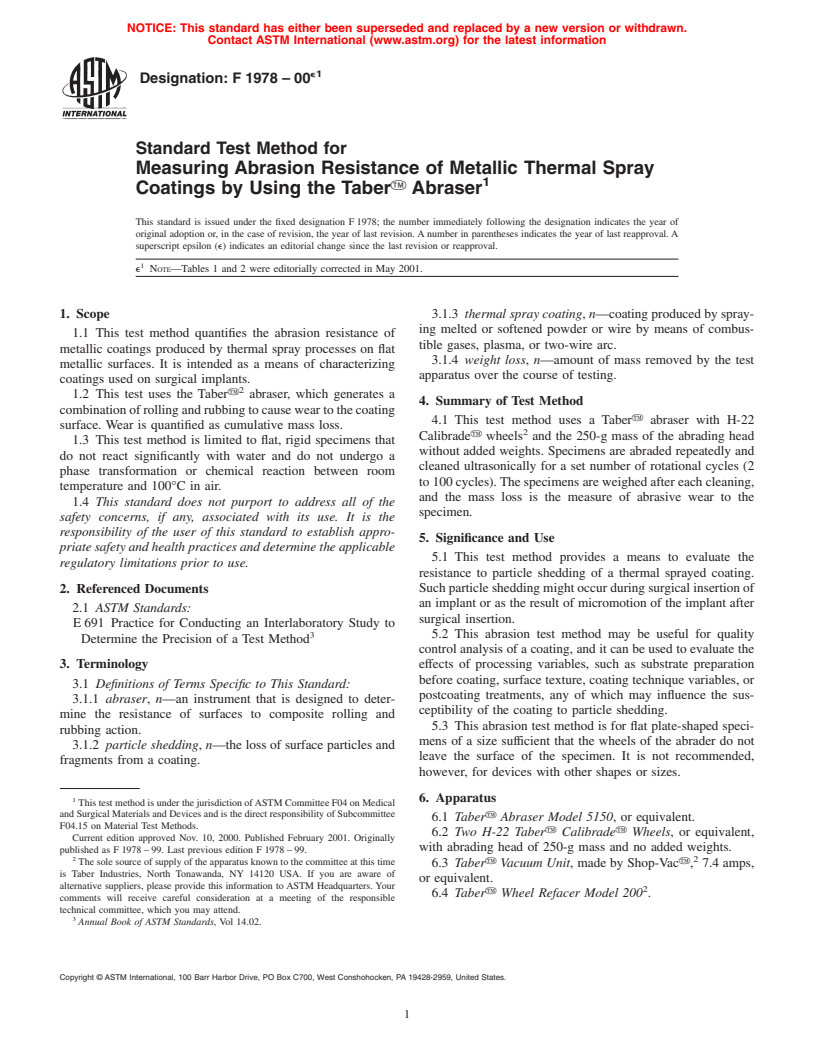
(Test Method)Standard Test Method for Measuring Abrasion Resistance of Metallic Thermal Spray Coatings by Using the TaberTM Abraser
Standard Test Method for Measuring Abrasion Resistance of Metallic Thermal Spray Coatings by Using the Taber<sup>TM</sup> Abraser
SCOPE
1.1 This test method quantifies the abrasion resistance of metallic coatings produced by thermal spray processes on flat metallic surfaces. It is intended as a means of characterizing coatings used on surgical implants.
1.2 This test uses the TaberTM abraser, which generates a combination of rolling and rubbing to cause wear to the coating surface. Wear is quantified as cumulative mass loss.
1.3 This test method is limited to flat, rigid specimens that do not react significantly with water and do not undergo a phase transformation or chemical reaction between room temperature and 100oC in air.
1.4 This standard does not purport to address all of the safety concerns, if any, associated with its use. It is the responsibility of the user of this standard to establish appropriate safety and health practices and determine the applicability of regulatory limitations prior to use.
General Information
Relations
Standards Content (Sample)
NOTICE: This standard has either been superseded and replaced by a new version or withdrawn.
Contact ASTM International (www.astm.org) for the latest information
e1
Designation:F1978–00
Standard Test Method for
Measuring Abrasion Resistance of Metallic Thermal Spray
1
Coatings by Using the TaberY Abraser
This standard is issued under the fixed designation F 1978; the number immediately following the designation indicates the year of
original adoption or, in the case of revision, the year of last revision. A number in parentheses indicates the year of last reapproval. A
superscript epsilon (e) indicates an editorial change since the last revision or reapproval.
1
e NOTE—Tables 1 and 2 were editorially corrected in May 2001.
1. Scope 3.1.3 thermal spray coating, n—coating produced by spray-
ing melted or softened powder or wire by means of combus-
1.1 This test method quantifies the abrasion resistance of
tible gases, plasma, or two-wire arc.
metallic coatings produced by thermal spray processes on flat
3.1.4 weight loss, n—amount of mass removed by the test
metallic surfaces. It is intended as a means of characterizing
apparatus over the course of testing.
coatings used on surgical implants.
2
1.2 This test uses the Tabery abraser, which generates a
4. Summary of Test Method
combinationofrollingandrubbingtocauseweartothecoating
4.1 This test method uses a Tabery abraser with H-22
surface. Wear is quantified as cumulative mass loss.
2
Calibradey wheels and the 250-g mass of the abrading head
1.3 This test method is limited to flat, rigid specimens that
without added weights. Specimens are abraded repeatedly and
do not react significantly with water and do not undergo a
cleaned ultrasonically for a set number of rotational cycles (2
phase transformation or chemical reaction between room
to 100 cycles).The specimens are weighed after each cleaning,
temperature and 100°C in air.
and the mass loss is the measure of abrasive wear to the
1.4 This standard does not purport to address all of the
specimen.
safety concerns, if any, associated with its use. It is the
responsibility of the user of this standard to establish appro-
5. Significance and Use
priate safety and health practices and determine the applicable
5.1 This test method provides a means to evaluate the
regulatory limitations prior to use.
resistance to particle shedding of a thermal sprayed coating.
Such particle shedding might occur during surgical insertion of
2. Referenced Documents
an implant or as the result of micromotion of the implant after
2.1 ASTM Standards:
surgical insertion.
E 691 Practice for Conducting an Interlaboratory Study to
3 5.2 This abrasion test method may be useful for quality
Determine the Precision of a Test Method
control analysis of a coating, and it can be used to evaluate the
3. Terminology effects of processing variables, such as substrate preparation
before coating, surface texture, coating technique variables, or
3.1 Definitions of Terms Specific to This Standard:
postcoating treatments, any of which may influence the sus-
3.1.1 abraser, n—an instrument that is designed to deter-
ceptibility of the coating to particle shedding.
mine the resistance of surfaces to composite rolling and
5.3 This abrasion test method is for flat plate-shaped speci-
rubbing action.
mens of a size sufficient that the wheels of the abrader do not
3.1.2 particle shedding, n—the loss of surface particles and
leave the surface of the specimen. It is not recommended,
fragments from a coating.
however, for devices with other shapes or sizes.
1 6. Apparatus
This test method is under the jurisdiction ofASTM Committee F04 on Medical
and Surgical Materials and Devices and is the direct responsibility of Subcommittee
6.1 Tabery Abraser Model 5150, or equivalent.
F04.15 on Material Test Methods.
6.2 Two H-22 Tabery Calibradey Wheels, or equivalent,
Current edition approved Nov. 10, 2000. Published February 2001. Originally
with abrading head of 250-g mass and no added weights.
published as F 1978 – 99. Last previous edition F 1978 – 99.
2 2
The sole source of supply of the apparatus known to the committee at this time
6.3 Tabery Vacuum Unit, made by Shop-Vacy, 7.4 amps,
is Taber Industries, North Tonawanda, NY 14120 USA. If you are aware of
or equivalent.
alternative suppliers, please provide this information to ASTM Headquarters. Your
2
6.4 Tabery Wheel Refacer Model 200 .
comments will receive careful consideration at a meeting of the responsible
technical committee, which you may attend.
3
Annual Book of ASTM Standards, Vol 14.02.
Copyright © ASTM International, 100 Barr Harbor Drive, PO Box C700, West Conshohocken, PA 19428-2959, United States.
1
---------------------- Page: 1 ----------------------
F1978
6.5 Ultrasonic Cleaning Unit, for cleaning specimens after 8.1.4.5 Place the cleaned sample in a 100°C oven and dry
abrading. for 10 min.
6.6 Drying Oven, capable of operation at 100 6 2°C, for
8.1.4.6 Allow the sample to cool to room temperature
drying s
...


Questions, Comments and Discussion
Ask us and Technical Secretary will try to provide an answer. You can facilitate discussion about the standard in here.