ASTM A476/A476M-00(2014)
(Specification)Standard Specification for Ductile Iron Castings for Paper Mill Dryer Rolls
Standard Specification for Ductile Iron Castings for Paper Mill Dryer Rolls
ABSTRACT
This specification covers ductile iron castings for use in pressure containing paper mill dryer rolls. The castings shall be stress relieved through heat treatment and shall undergo chemical analysis and conform to the required chemical composition in total carbon, silicon, phosphorus, and sulfur. Tension test specimens shall be obtained from test coupons poured from the same iron as the castings represented and shall conform to the prescribed mechanical properties such as yield strength, tensile strength, and elongation. Hardness test shall be conducted on the material and shall meet the required Brinell hardness value.
SCOPE
1.1 This specification covers ductile iron castings for use in pressure containing paper mill dryer rolls at temperatures up to 450°F [230°C].
1.2 No precise quantitative relationship can be stated between the properties of the iron in various locations of the same casting or between the properties of a casting and those of a test specimen cast from the same iron (see Appendix X1).
1.3 The values stated in either SI units or inch-pound units are to be regarded separately as standard. The values stated in each system may not be exact equivalents; therefore, each system shall be used independently of the other. Combining values from the two systems may result in non-conformance with the standard.
1.3.1 Exception—Within the text, the SI units are shown in brackets.
General Information
Relations
Standards Content (Sample)
NOTICE: This standard has either been superseded and replaced by a new version or withdrawn.
Contact ASTM International (www.astm.org) for the latest information
Designation: A476/A476M −00 (Reapproved 2014)
Standard Specification for
1,2
Ductile Iron Castings for Paper Mill Dryer Rolls
This standard is issued under the fixed designationA476/A476M; the number immediately following the designation indicates the year
of original adoption or, in the case of revision, the year of last revision. A number in parentheses indicates the year of last reapproval.
A superscript epsilon (´) indicates an editorial change since the last revision or reapproval.
1. Scope 4.1.1 Quantity,
4.1.2 Specification number and date of issue,
1.1 This specification covers ductile iron castings for use in
4.1.3 Description of casting by pattern number or drawing,
pressure containing paper mill dryer rolls at temperatures up to
4.1.4 Heat treatment, if required (see 5.1),
450°F [230°C].
4.1.5 Type of test coupon (see 9.2),
1.2 No precise quantitative relationship can be stated be-
4.1.6 Certification, if required (see 13.1),
tweenthepropertiesoftheironinvariouslocationsofthesame
4.1.7 Marking location (see 14.1), and
castingorbetweenthepropertiesofacastingandthoseofatest
4.1.8 Additional requirements.
specimen cast from the same iron (see Appendix X1).
5. Heat Treatment
1.3 The values stated in either SI units or inch-pound units
5.1 The castings may be stress relieved at a temperature not
are to be regarded separately as standard. The values stated in
to exceed 1200°F [650°C].
each system may not be exact equivalents; therefore, each
system shall be used independently of the other. Combining
6. Chemical Requirements
values from the two systems may result in non-conformance
6.1 The castings shall conform to the following chemical
with the standard.
requirements:
1.3.1 Exception—Within the text, the SI units are shown in
Total carbon, min, % 3.0
brackets.
Silicon, max, % 3.0
Phosphorus, max, % 0.08
2. Referenced Documents
Sulfur, max, % 0.05
2.1 ASTM Standards:
6.2 The castings shall have a carbon equivalent of 3.8 to 4.5
A644 Terminology Relating to Iron Castings
inclusive.
E8 Test Methods for Tension Testing of Metallic Materials
NOTE 1—The carbon content equivalent is calculated as follows:
E10 Test Method for Brinell Hardness of Metallic Materials
Total carbon + 0.3 (silicon + phosphorus)
E94 Guide for Radiographic Examination
6.3 The chemical analysis for total carbon shall be made on
E446 Reference Radiographs for Steel Castings Up to 2 in.
(50.8 mm) in Thickness either chilled cast pencil-type specimens or on thin wafers
approximately ⁄32 in. [0.8 mm] thick, cut from test coupons.
3. Terminology
Drillings shall not be used due to attendant loss of graphite.
3.1 Definitions for many terms common to iron castings are
7. Mechanical Properties
found in Terminology A644.
7.1 The iron represented by test coupons shall conform to
4. Ordering Information
tensile requirements prescribed in Table 1.
4.1 Ordersformaterialpurchasedtotherequirementsofthis
7.2 The yield strength prescribed in Table 1 may be deter-
specification should include the following information:
mined by any of the approved procedures described in 7.3 of
Test Methods E8.
This specification is under the jurisdiction of ASTM Committee A04 on Iron
Castings and is the direct responsibility of Subcommittee A04.02 on Malleable and 7.3 The Brinell hardness of the material shall be a minimum
Ductile Iron Castings.
of 201 HB. Hardness tests shall be conducted in accordance
Current edition approved April 1, 2014. Published April 2014. Originally
with Test Method E10, using a 3000-kgf load. The test may be
approved in 1962. Last previous edition approved in 2009 as A476/A476M - 00
made on either the casting or on a test coupon representing the
(2009). DOI: 10.1520/A0476_A0476M-00R14.
For ASME Boiler and Pressure Vessel Code Applications see related Specifi-
casting.
cations SA-467 in Section II of that Code.
For referenced ASTM standards, visit the ASTM website, www.astm.org, or 8. Workmanship, Finish, and Appearance
contact ASTM Customer Service at service@astm.org. For Annual Book of ASTM
8.1 The castings shall conform to the dimensions on the
Standards volume information, refer to the standard’s Document Summary page on
the ASTM website. drawings furnished by the purchaser, or if no drawing has been
Copyright © ASTM International, 100 Barr Harbor Drive, PO Box C700, West Conshohocken, PA 19428-2959. United States
A476/A476M − 00 (2014)
TABLE 1 Tensile Requirements
Test Coupon Section Thickness 1 in. [25 mm] 3 in. [75 mm]
Tensile strength, min, ksi [MPa] 80 [555] 80 [555]
Yield strength, min, ksi [MPa] 60 [415] 60 [415]
Elongation in 2 in. [50 mm], min, % 3.0 [3.0] 1.0 [1.0]
provided, to the dimensions predicated by the pattern supplied
by the purchaser. Surfaces of the castings shall be free of
adheringsand.Runners,risers,fins,andotherextraneousmetal
shall be removed.
9. Sampling
9.1 Test coupons shall be poured from the same iron as the
castings represented.
9.2 Test coupons shall be cast either to the “Y” block size
and shape shown in Fig. 1 or to the dimensions of the 1-in.
NOTE 1—The length of keel block shall be 6 in. [150 mm].
[25-mm] keel block shown in Fig. 2. The type of test coupon
FIG. 2 Keel Block for Test Coupons
and, when selected, the size of the “Y” block shall be specified
by the purchaser.
TABLE 2 Equivalent Geometric Shapes Corresponding to “Y”
9.3 The test coupons shall be cast in open molds made of
Blocks
suitable core sand with a minimum 1 ⁄2 in. [38 mm] of sand for
Infinite Plate
“Y” Block Round Diameter, Cube Edge,
the 1-in. [25 mm] size and 3 in. [75 mm] of sand for the 3-in. Thickness,
Size, in. [mm] in. [mm] in. [mm]
in. [mm]
[75-mm]size.Thecouponsshallbeleftinthemolduntilblack.
1 [25] 0.9 [22.5] 1.75 [44] 2.75 [44]
3 [75] 1.6 [40] 3.1 [78] 4.8 [120]
9.4 Table 2 shows the equivalent geometrical shapes with
various dimensions and the equivalent “Y” block, based on
cooling rates, and may be used as a guide for selection of the
proper “Y” block to be specified to represent the casting.
10. Tension Test
9.5 Whenthecastingsareheattreated,thetestcouponsshall
10.1 Tension test specimens shall be obtained from test
be heat treated with the castings they represent.
coupons shown in either Fig. 1 or Fig. 2, and machined to the
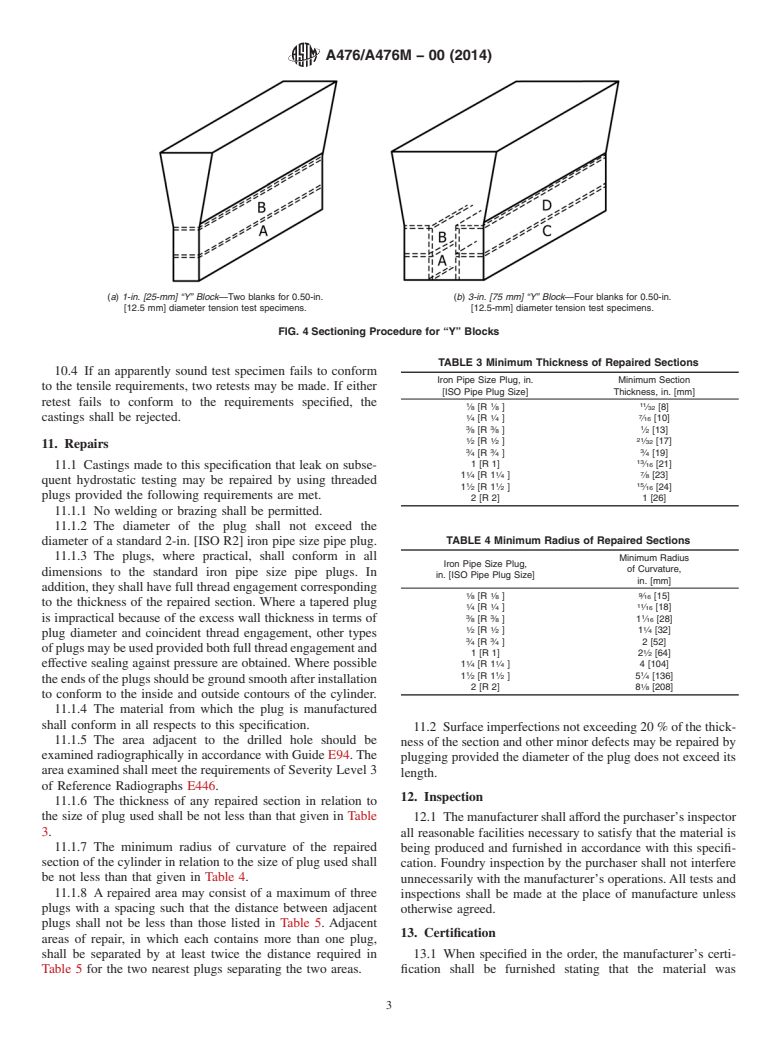
dimensions shown in Fig. 3. Test coupons cast as “Y” blocks
(Fig. 1) shall be sectioned as shown in Fig. 4.
10.2 One tension test shall be performed for each casting.
10.3 If any specimen shows defective machining or flaws, it
may be discarded and another substituted from the same
casting represented.
“Y” Block Size
For Castings of Thickness For Castings of Thickness
1 1 1
Dimensions ⁄2 in. to 1 ⁄2 in. of 1 ⁄2 in. [40 mm] and
[12.5-40 mm] Over
in. [mm] in. [mm]
A 1 [25] 3 [75]
NOTE 1—The gage length and fillets shall be as shown, but the ends
B1 ⁄8 [55] 5 [125]
may be of any shape to fit the holders of the testing machine in such a way
C 3 [75] 4 [100]
that the load shall be axial. The reduced section shall have a gradual taper
D 6 [150] 8 [200]
from the ends toward the center, with the ends 0.003 to 0.005 in.
E 7 [175] 7 [175]
[0.08-0.13 mm] larger in diameter than the center.
approx approx
FIG. 3 Standard Round Tension Test Specimen with 2-in. [50-mm]
FIG. 1 “Y” Blocks for Test Coupons Gage Length
A476/A476M − 00 (2014)
(a) 1-in. [25-mm] “Y” Block—Two blanks for 0.50-in. (b) 3-in. [75 mm] “Y” Block—Four blanks for 0.50-in.
[12.5 mm] diameter tension test specimens. [12.5-mm] diameter tension test specimens.
FIG. 4 Sectioning Procedure for “Y” Blocks
TABLE 3 Minimum Thickness of Repaired Sections
10.4 If an apparently sound test specimen fails to conform
Iron Pipe Size Plug, in. Minimum Section
to the tensile requirements, two retest
...


Questions, Comments and Discussion
Ask us and Technical Secretary will try to provide an answer. You can facilitate discussion about the standard in here.