ASTM F2469-20
(Test Method)Standard Test Method for Measuring Optical Angular Deviation of Transparent Parts Using the Double-Exposure Method
Standard Test Method for Measuring Optical Angular Deviation of Transparent Parts Using the Double-Exposure Method
SIGNIFICANCE AND USE
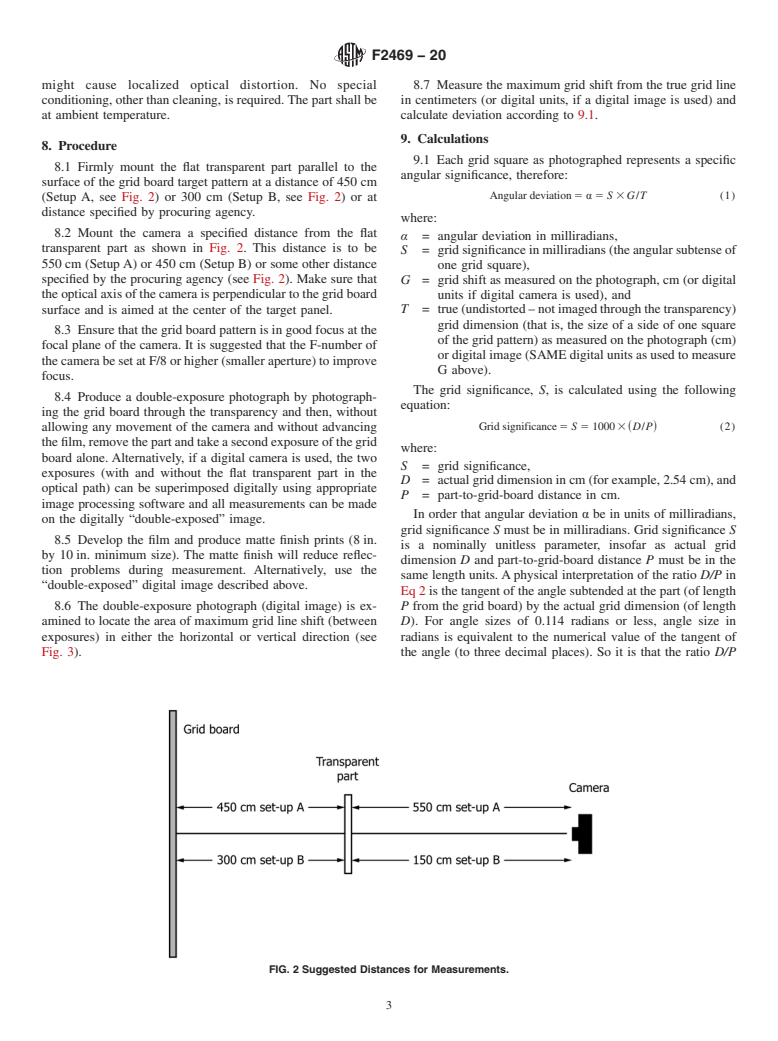
5.1 The optical angular deviation of flat transparent parts, such as aircraft windshields, canopies, cabin windows, and visors, can be measured using these methods. Angular deviation in a windscreen or visor can cause objects to appear at a location different from where they actually are. Variations in angular deviation can be used to characterize distortion and magnification in transparent parts. Also, angular deviation measurements made from the typical right and left eye positions for a windscreen or other transparent medium can be used to determine binocular disparity differences (see Test Method F1181).
SCOPE
1.1 This test method covers the measurement of the optical angular deviation of a light ray imposed by flat transparent parts such as a commercial or military aircraft windshield, canopy, or cabin window.
1.2 The values stated in SI units are to be regarded as standard. No other units of measurement are included in this standard.
1.2.1 Exceptions—The values given in parentheses are for information only. Also, print size is provided in inch-pound measurements.
1.3 This standard does not purport to address all of the safety concerns, if any, associated with its use. It is the responsibility of the user of this standard to establish appropriate safety, health, and environmental practices and determine the applicability of regulatory limitations prior to use.
1.4 This international standard was developed in accordance with internationally recognized principles on standardization established in the Decision on Principles for the Development of International Standards, Guides and Recommendations issued by the World Trade Organization Technical Barriers to Trade (TBT) Committee.
General Information
Relations
Buy Standard
Standards Content (Sample)
This international standard was developed in accordance with internationally recognized principles on standardization established in the Decision on Principles for the
Development of International Standards, Guides and Recommendations issued by the World Trade Organization Technical Barriers to Trade (TBT) Committee.
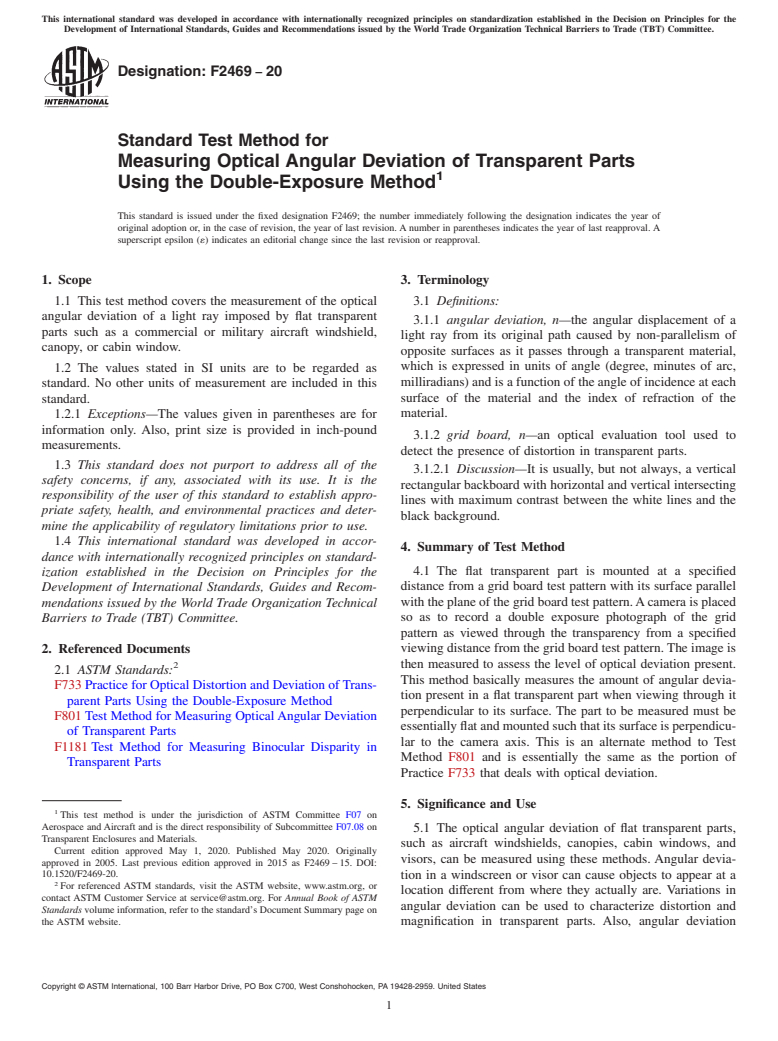
Designation: F2469 − 20
Standard Test Method for
Measuring Optical Angular Deviation of Transparent Parts
1
Using the Double-Exposure Method
This standard is issued under the fixed designation F2469; the number immediately following the designation indicates the year of
original adoption or, in the case of revision, the year of last revision. A number in parentheses indicates the year of last reapproval. A
superscript epsilon (´) indicates an editorial change since the last revision or reapproval.
1. Scope 3. Terminology
1.1 This test method covers the measurement of the optical 3.1 Definitions:
angular deviation of a light ray imposed by flat transparent
3.1.1 angular deviation, n—the angular displacement of a
parts such as a commercial or military aircraft windshield,
light ray from its original path caused by non-parallelism of
canopy, or cabin window.
opposite surfaces as it passes through a transparent material,
which is expressed in units of angle (degree, minutes of arc,
1.2 The values stated in SI units are to be regarded as
milliradians) and is a function of the angle of incidence at each
standard. No other units of measurement are included in this
surface of the material and the index of refraction of the
standard.
material.
1.2.1 Exceptions—The values given in parentheses are for
information only. Also, print size is provided in inch-pound
3.1.2 grid board, n—an optical evaluation tool used to
measurements.
detect the presence of distortion in transparent parts.
1.3 This standard does not purport to address all of the
3.1.2.1 Discussion—It is usually, but not always, a vertical
safety concerns, if any, associated with its use. It is the
rectangular backboard with horizontal and vertical intersecting
responsibility of the user of this standard to establish appro-
lines with maximum contrast between the white lines and the
priate safety, health, and environmental practices and deter-
black background.
mine the applicability of regulatory limitations prior to use.
1.4 This international standard was developed in accor-
4. Summary of Test Method
dance with internationally recognized principles on standard-
4.1 The flat transparent part is mounted at a specified
ization established in the Decision on Principles for the
Development of International Standards, Guides and Recom- distance from a grid board test pattern with its surface parallel
with the plane of the grid board test pattern.Acamera is placed
mendations issued by the World Trade Organization Technical
Barriers to Trade (TBT) Committee. so as to record a double exposure photograph of the grid
pattern as viewed through the transparency from a specified
viewing distance from the grid board test pattern. The image is
2. Referenced Documents
2 then measured to assess the level of optical deviation present.
2.1 ASTM Standards:
This method basically measures the amount of angular devia-
F733 Practice for Optical Distortion and Deviation of Trans-
tion present in a flat transparent part when viewing through it
parent Parts Using the Double-Exposure Method
perpendicular to its surface. The part to be measured must be
F801 Test Method for Measuring OpticalAngular Deviation
essentially flat and mounted such that its surface is perpendicu-
of Transparent Parts
lar to the camera axis. This is an alternate method to Test
F1181 Test Method for Measuring Binocular Disparity in
Method F801 and is essentially the same as the portion of
Transparent Parts
Practice F733 that deals with optical deviation.
5. Significance and Use
1
This test method is under the jurisdiction of ASTM Committee F07 on
Aerospace and Aircraft and is the direct responsibility of Subcommittee F07.08 on
5.1 The optical angular deviation of flat transparent parts,
Transparent Enclosures and Materials.
such as aircraft windshields, canopies, cabin windows, and
Current edition approved May 1, 2020. Published May 2020. Originally
visors, can be measured using these methods. Angular devia-
approved in 2005. Last previous edition approved in 2015 as F2469 – 15. DOI:
10.1520/F2469-20.
tion in a windscreen or visor can cause objects to appear at a
2
For referenced ASTM standards, visit the ASTM website, www.astm.org, or
location different from where they actually are. Variations in
contact ASTM Customer Service at service@astm.org. For Annual Book of ASTM
angular deviation can be used to characterize distortion and
Standards volume information, refer to the standard’s Document Summary page on
the ASTM website. magnification in transparent parts. Also, angular deviation
Copyright © ASTM International, 100 Barr Harbor Drive, PO Box C700, West Conshohocken, PA 19428-2959. United States
1
----
...
This document is not an ASTM standard and is intended only to provide the user of an ASTM standard an indication of what changes have been made to the previous version. Because
it may not be technically possible to adequately depict all changes accurately, ASTM recommends that users consult prior editions as appropriate. In all cases only the current version
of the standard as published by ASTM is to be considered the official document.
Designation: F2469 − 15 F2469 − 20
Standard Test Method for
Measuring Optical Angular Deviation of Transparent Parts
1
Using the Double-Exposure Method
This standard is issued under the fixed designation F2469; the number immediately following the designation indicates the year of
original adoption or, in the case of revision, the year of last revision. A number in parentheses indicates the year of last reapproval. A
superscript epsilon (´) indicates an editorial change since the last revision or reapproval.
1. Scope
1.1 This test method covers the measurement of the optical angular deviation of a light ray imposed by flat transparent parts
such as a commercial or military aircraft windshield, canopy, or cabin window.
1.2 The values stated in SI units are to be regarded as standard. No other units of measurement are included in this standard.
1.2.1 Exceptions—The values given in parentheses are for information only. Also, print size is provided in inch-pound
measurements.
1.3 This standard does not purport to address all of the safety concerns, if any, associated with its use. It is the responsibility
of the user of this standard to establish appropriate safety safety, health, and healthenvironmental practices and determine the
applicability of regulatory limitations prior to use.
1.4 This international standard was developed in accordance with internationally recognized principles on standardization
established in the Decision on Principles for the Development of International Standards, Guides and Recommendations issued
by the World Trade Organization Technical Barriers to Trade (TBT) Committee.
2. Referenced Documents
2
2.1 ASTM Standards:
F733 Practice for Optical Distortion and Deviation of Transparent Parts Using the Double-Exposure Method
F801 Test Method for Measuring Optical Angular Deviation of Transparent Parts
F1181 Test Method for Measuring Binocular Disparity in Transparent Parts
F733 Practice for Optical Distortion and Deviation of Transparent Parts Using the Double-Exposure Method
3. Terminology
3.1 Definitions:
3.1.1 angular deviation—deviation, n—the angular displacement of a light ray from its original path caused by non-parallelism
of opposite surfaces as it passes through a transparent material, which is expressed in units of angle (degree, minutes of arc,
milliradians) and is a function of the angle of incidence at each surface of the material and the index of refraction of the material.
3.1.2 grid board—board, n—an optical evaluation tool used to detect the presence of distortion in transparent parts. It is usually,
but not always, a vertical rectangular backboard with horizontal and vertical intersecting lines with maximum contrast between the
white lines and the black background.
3.1.2.1 Discussion—
It is usually, but not always, a vertical rectangular backboard with horizontal and vertical intersecting lines with maximum contrast
between the white lines and the black background.
1
This test method is under the jurisdiction of ASTM Committee F07 on Aerospace and Aircraft and is the direct responsibility of Subcommittee F07.08 on Transparent
Enclosures and Materials.
Current edition approved Nov. 1, 2015May 1, 2020. Published November 2015May 2020. Originally approved in 2005. Last previous edition approved in 20102015 as
F2469 – 10.F2469 – 15. DOI: 10.1520/F2469-15.10.1520/F2469-20.
2
For referenced ASTM standards, visit the ASTM website, www.astm.org, or contact ASTM Customer Service at service@astm.org. For Annual Book of ASTM Standards
volume information, refer to the standard’s Document Summary page on the ASTM website.
Copyright © ASTM International, 100 Barr Harbor Drive, PO Box C700, West Conshohocken, PA 19428-2959. United States
1
---------------------- Page: 1 ----------------------
F2469 − 20
4. Summary of Test Method
4.1 The flat transparent part is mounted at a specified distance from a grid board test pattern with its surface parallel with the
plane of the grid board test pattern. A camera is placed so as to record a double exposure photograph of the grid pattern as viewed
through the transparency from a specified viewing distance from the grid board test pattern. The image is then measured to assess
the level of optical deviation present. This method basically measures the amount of angular deviation present in a flat transparent
part when viewing through it perpendicular to its surface. The part to be measured must be essentially flat and mounted such that
its surface is perpendicular to the camera axis. This is an alternate method to Te
...


Questions, Comments and Discussion
Ask us and Technical Secretary will try to provide an answer. You can facilitate discussion about the standard in here.