ISO/TR 16043:2015
(Main)Iron ores — Determination of chlorine content — X-ray fluorescence spectrometric method
Iron ores — Determination of chlorine content — X-ray fluorescence spectrometric method
ISO/TR 16043:2015 sets out a wavelength dispersive X-ray fluorescence procedure for the determination of chlorine in iron ores. The method is applicable to a concentration range of 0,027 % to 1,15 % of chlorine in iron ores regardless of mineralogical type. It is not intended that this method be used for the purpose of trade in iron ores due to the precision of the method.
Minerais de fer — Dosage du chlore — Méthode par spectrométrie de fluorescence de rayons X
General Information
- Status
- Published
- Publication Date
- 19-Oct-2015
- Technical Committee
- ISO/TC 102/SC 2 - Chemical analysis
- Drafting Committee
- ISO/TC 102/SC 2 - Chemical analysis
- Current Stage
- 6060 - International Standard published
- Start Date
- 20-Oct-2015
- Completion Date
- 14-Feb-2026
Overview
ISO/TR 16043:2015 - "Iron ores - Determination of chlorine content - X-ray fluorescence spectrometric method" is a Technical Report that describes a wavelength-dispersive X-ray fluorescence (WDXRF) procedure for measuring total chlorine in iron ores. The method covers chlorine concentrations from 0.027 % to 1.15 % and is applicable irrespective of iron ore mineralogy. It was published as a Technical Report (not a full International Standard) because inter-laboratory precision was judged insufficient for trade purposes.
Key topics and technical requirements
- Analytical principle: Preparation of fused borate glass discs (fusion/casting) to remove particle-size effects; measurement by wavelength-dispersive XRF.
- Sample preparation: Fusion of test portion with a borate flux (Flux A or Flux B) to form glass discs; strict control of flux contamination and use of the same flux batch for calibration, blanks and samples.
- Calibration and reagents: Calibration based on linear relationship between chlorine concentration and fluorescent intensity; chlorine introduced via sodium chloride stock solution (13.2 g/L). Use of high-purity reagents (e.g., Fe2O3 pre-treatment at 1 000 °C where specified).
- Apparatus and materials: Platinum (or Pt-alloy) crucibles and moulds, analytical balances (4 decimal places), conventional or high-frequency furnaces or commercial disc-making machines. Fluxes dried at 500 °C and stored in desiccators.
- Measurement details: Applicable to both simultaneous and sequential WDXRF instruments; background correction (net line intensities), selection of analytical lines/crystals/collimators and counting times are described.
- Quality and precision: The report includes guidance on repeatability, between-laboratory precision, background equivalent concentration (BEC) acceptability, trueness checks and reporting. The method is explicitly not intended for trade due to its precision limitations.
Applications and users
ISO/TR 16043:2015 is useful for:
- Analytical laboratories performing chlorine determination in iron ores (QA/QC and internal control).
- Mining and metallurgical companies monitoring feedstock composition and potential chlorine-related impacts on downstream processing.
- Instrument manufacturers and method developers validating WDXRF procedures for chlorides in mineral matrices.
- Research and laboratory personnel needing a documented WDXRF protocol for total chlorine (complements ISO 9516-1 and ISO 9517).
Related standards
- ISO 9517 - Determination of water-soluble chloride in iron ores (complements range and applicability).
- ISO 9516-1 - Related iron ore analysis methods (context within ISO/TC 102 work).
Keywords: ISO/TR 16043:2015, iron ores, chlorine determination, X-ray fluorescence, wavelength-dispersive XRF, fused glass discs, borate flux, chlorine content, analytical method.
Get Certified
Connect with accredited certification bodies for this standard

Bureau Veritas Chile
Bureau Veritas certification services in Chile.

Bureau Veritas Peru
Bureau Veritas certification services in Peru.

BVQI Peru
Bureau Veritas certification in Peru.
Sponsored listings
Frequently Asked Questions
ISO/TR 16043:2015 is a technical report published by the International Organization for Standardization (ISO). Its full title is "Iron ores — Determination of chlorine content — X-ray fluorescence spectrometric method". This standard covers: ISO/TR 16043:2015 sets out a wavelength dispersive X-ray fluorescence procedure for the determination of chlorine in iron ores. The method is applicable to a concentration range of 0,027 % to 1,15 % of chlorine in iron ores regardless of mineralogical type. It is not intended that this method be used for the purpose of trade in iron ores due to the precision of the method.
ISO/TR 16043:2015 sets out a wavelength dispersive X-ray fluorescence procedure for the determination of chlorine in iron ores. The method is applicable to a concentration range of 0,027 % to 1,15 % of chlorine in iron ores regardless of mineralogical type. It is not intended that this method be used for the purpose of trade in iron ores due to the precision of the method.
ISO/TR 16043:2015 is classified under the following ICS (International Classification for Standards) categories: 73.060.10 - Iron ores. The ICS classification helps identify the subject area and facilitates finding related standards.
ISO/TR 16043:2015 is available in PDF format for immediate download after purchase. The document can be added to your cart and obtained through the secure checkout process. Digital delivery ensures instant access to the complete standard document.
Standards Content (Sample)
TECHNICAL ISO/TR
REPORT 16043
First edition
2015-10-15
Iron ores — Determination of
chlorine content — X-ray fluorescence
spectrometric method
Minerais de fer — Dosage du chlore — Méthode par spectrométrie de
fluorescence de rayons X
Reference number
©
ISO 2015
© ISO 2015, Published in Switzerland
All rights reserved. Unless otherwise specified, no part of this publication may be reproduced or utilized otherwise in any form
or by any means, electronic or mechanical, including photocopying, or posting on the internet or an intranet, without prior
written permission. Permission can be requested from either ISO at the address below or ISO’s member body in the country of
the requester.
ISO copyright office
Ch. de Blandonnet 8 • CP 401
CH-1214 Vernier, Geneva, Switzerland
Tel. +41 22 749 01 11
Fax +41 22 749 09 47
copyright@iso.org
www.iso.org
ii © ISO 2015 – All rights reserved
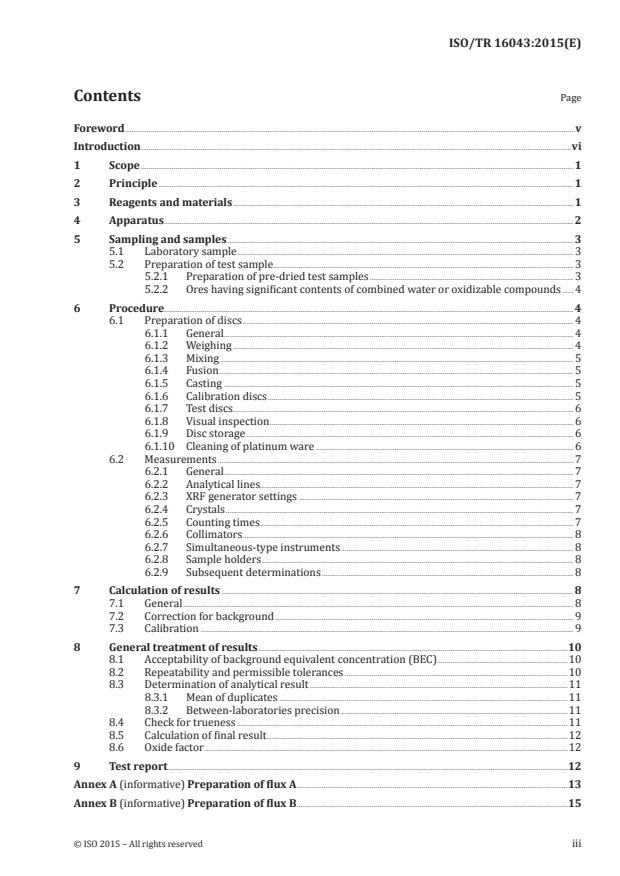
Contents Page
Foreword .v
Introduction .vi
1 Scope . 1
2 Principle . 1
3 Reagents and materials . 1
4 Apparatus . 2
5 Sampling and samples . 3
5.1 Laboratory sample . 3
5.2 Preparation of test sample . 3
5.2.1 Preparation of pre-dried test samples . 3
5.2.2 Ores having significant contents of combined water or oxidizable compounds . 4
6 Procedure. 4
6.1 Preparation of discs . 4
6.1.1 General. 4
6.1.2 Weighing . 4
6.1.3 Mixing . 5
6.1.4 Fusion . 5
6.1.5 Casting . 5
6.1.6 Calibration discs . 5
6.1.7 Test discs . 6
6.1.8 Visual inspection . 6
6.1.9 Disc storage . 6
6.1.10 Cleaning of platinum ware . 6
6.2 Measurements . 7
6.2.1 General. 7
6.2.2 Analytical lines. 7
6.2.3 XRF generator settings . 7
6.2.4 Crystals . 7
6.2.5 Counting times . 7
6.2.6 Collimators . 8
6.2.7 Simultaneous-type instruments . 8
6.2.8 Sample holders . 8
6.2.9 Subsequent determinations . 8
7 Calculation of results . 8
7.1 General . 8
7.2 Correction for background . 9
7.3 Calibration . 9
8 General treatment of results .10
8.1 Acceptability of background equivalent concentration (BEC).10
8.2 Repeatability and permissible tolerances .10
8.3 Determination of analytical result .11
8.3.1 Mean of duplicates .11
8.3.2 Between-laboratories precision .11
8.4 Check for trueness .11
8.5 Calculation of final result .12
8.6 Oxide factor .12
9 Test report .12
Annex A (informative) Preparation of flux A .13
Annex B (informative) Preparation of flux B .15
Annex C (informative) Flowsheet of the procedure for the acceptance of analytical values
for test samples .16
Annex D (informative) Derivation of repeatability and permissible tolerance .17
Bibliography .18
iv © ISO 2015 – All rights reserved
Foreword
ISO (the International Organization for Standardization) is a worldwide federation of national standards
bodies (ISO member bodies). The work of preparing International Standards is normally carried out
through ISO technical committees. Each member body interested in a subject for which a technical
committee has been established has the right to be represented on that committee. International
organizations, governmental and non-governmental, in liaison with ISO, also take part in the work.
ISO collaborates closely with the International Electrotechnical Commission (IEC) on all matters of
electrotechnical standardization.
The procedures used to develop this document and those intended for its further maintenance are
described in the ISO/IEC Directives, Part 1. In particular the different approval criteria needed for the
different types of ISO documents should be noted. This document was drafted in accordance with the
editorial rules of the ISO/IEC Directives, Part 2 (see www.iso.org/directives).
Attention is drawn to the possibility that some of the elements of this document may be the subject of
patent rights. ISO shall not be held responsible for identifying any or all such patent rights. Details of
any patent rights identified during the development of the document will be in the Introduction and/or
on the ISO list of patent declarations received (see www.iso.org/patents).
Any trade name used in this document is information given for the convenience of users and does not
constitute an endorsement.
For an explanation on the meaning of ISO specific terms and expressions related to conformity
assessment, as well as information about ISO’s adherence to the WTO principles in the Technical
Barriers to Trade (TBT) see the following URL: Foreword - Supplementary information
The committee responsible for this document is ISO/TC 102, Iron ore and direct reduced iron,
Subcommittee SC 2, Chemical analysis.
Introduction
This Technical Report summarizes the results of inter-laboratory testing for the determination of chlorine
in iron ores by X-ray fluorescence. The method was developed by Technical Committee ISO/TC 102, Iron
ore and direct reduced iron, Subcommittee SC 2, Chemical analysis. As no other methods for determination
of chlorine exist in ISO/TC 102, the method was designed to complement method ISO 9516-1. A method
for water soluble chloride does exist (ISO 9517) but the range of application of ISO 9517 is significantly
less than the XRF method described in this Technical Report. The method described in this Technical
Report represents the first attempt of the committee to determine total chloride.
Evaluation of the data from the inter-laboratory test indicated that the method could not be considered
for publication as an International Standard as the precision of the method was less good than the
precision of the method for water soluble chloride described in ISO 9517. In addition, a test on the
trueness of the method was not possible as no potential test samples that were certified for Cl were
available. Although the test samples used were characterized using neutron activation, the XRF values
were biased with respect to the neutron activation values and the neutron activation method itself was
not considered to be a standard method.
Although the method was not considered suitable for publication as an International Standard, it was
agreed that the method was otherwise suitable for use in the industry and the committee agreed that it
should be published as a Technical Report.
vi © ISO 2015 – All rights reserved
TECHNICAL REPORT ISO/TR 16043:2015(E)
Iron ores — Determination of chlorine content — X-ray
fluorescence spectrometric method
WARNING — This Technical Report may involve hazardous materials, operations and equipment.
This Technical Report does not purport to address all of the safety problems associated with its
use. It is the responsibility of the user of this Technical Report to establish appropriate health
and safety practices and determine the applicability of regulatory limitations prior to use.
1 Scope
This Technical Report sets out a wavelength dispersive X-ray fluorescence procedure for the
determination of chlorine in iron ores.
The method is applicable to a concentration range of 0,027 % to 1,15 % of chlorine in iron ores
regardless of mineralogical type.
It is not intended that this method be used for the purpose of trade in iron ores due to the precision
of the method.
2 Principle
The glass discs for X-ray fluorescence measurement are prepared by incorporating the test portion of
the iron ore sample, via fusion, into a borate glass disc using a casting procedure. By using a fused glass
disc, particle size effects are eliminated.
The method is applicable to data from simultaneous and sequential X-ray fluorescence spectrometers.
Calibration is carried out using pure chemicals, with chlorine added as a stock solution of sodium
chloride. Because the oxygen of the flux is the dominant element in the glass disc, and because oxygen
is a heavy absorber to Cl Kα, matrix effects are small and calibration is based on a linear relationship
between concentration and measured fluorescent intensity. Background measurements are made to
determine net line intensities.
3 Reagents and materials
3.1 During analysis, use only reagents of recognized high purity.
Where reagents have been ignited, they should be covered during cooling in the desiccator and weighed
as soon as possible.
3.2 Iron (III) oxide (Fe O ), nominally 99,999 % Fe O .
2 3 2 3
The iron (III) oxide should contain less than 3 µg/g of chlorine. It should initially be heated at 1 000 °C
in a platinum crucible for a minimum of 12 h to reduce contaminant concentrations and cooled in a
desiccator. Subsequently, if required, it should be re-ignited at 1 000 °C for 1 h and cooled in a desiccator.
3.3 Sodium chloride (NaCl), 13,2 g/l solution.
Analytical grade sodium chloride should be dried at 105 °C for 1 h and cooled in a desiccator. Weigh
13,2 g dried sodium chloride into a 1 000 ml one-mark volumetric flask and dilute to volume.
3.4 Desiccant, should be a freshly-regenerated self-indicating silica gel.
3.5 Flux.
3.5.1 General
Flux A or flux B may be used. The levels of contamination in the flux should be checked (see 8.1). Because
levels of contamination may vary from batch to batch, the same batch of flux should be used for all discs
(iron ore, blank, and calibration) involved in the batch of determinations.
3.5.2 Flux A
Flux A should be prepared by fusion of a mixture of anhydrous lithium tetraborate (Li B O ) and
2 4 7
anhydrous lithium metaborate (Li BO ) by the procedure specified in Annex A. Flux should be dried at
2 2
500 °C for a minimum of 4 h and stored in a desiccator.
3.5.3 Flux B
Flux B should be prepared using lithium tetraborate by the procedure specified in Annex B. Flux should
be dried at 500 °C for a minimum of 4 h and stored in a desiccator.
4 Apparatus
4.1 General
A conventional electric furnace, high-frequency furnace, gas burner or a commercial disc-making
machine may be used to fuse and cast the discs.
4.2 Balance, an analytical balance capable of weighing to four decimal places.
4.3 Crucible and mould, made from a non-wetting platinum alloy.
NOTE Either platinum/gold or platinum/gold/rhodium alloys are suitable.
The sample may be fused with the flux in a crucible and then poured into a separate mould or, if an
appropriately shaped crucible is used, the fusion may be carried out and the glass is allowed to cool in
the same crucible. Both methods will produce glass discs of the same quality.
The crucible should have sufficient capacity to hold the flux and sample required for fusion. Where
the crucible is to be used as a mould as well as for fusion, it should have a flat bottom of a diameter
appropriate to the spectrometer. The inside of the crucible should be polished regularly with
approximately 3 µm diamond paste to ensure that the glass disc releases easily. To prevent deformation
through repeated heating and cooling, the base should be thicker than 2 mm.
Because the bottom of the disc is the analytical surface, the inside bottom surface of the mould should
be flat and should be polished regularly with approximately 3 µm diamond paste to ensure that the
glass disc releases easily from the mould. To prevent deformation through repeated heating and cooling,
the base should be greater than 2 mm thick.
4.4 Electric furnace, capable of maintaining a temperature in the range of 1 000 °C to 1 050 °C.
The furnace may be of a conventional type with heating elements or may be a high-frequency furnace.
The temperature of the melt should be in the range 1 000 °C to 1 050 °C and is not to exceed 1 050°C
to minimize loss of chlorine by volatilization. The temperature should be checked using an optical
pyrometer while the crucible contains several grams of flux. Alternatively, if an optical pyrometer is
not available, heat about 10 g of potassium sulphate (mp 1 069°C) in a crucible for 10 min. There should
be no evidence that the salt has melted during heating, but it may be sintered. If the potassium sulphate
has melted, then repeat at a lower fusion temperature.
The furnace should be regularly cleaned to prevent contamination of the samples.
2 © ISO 2015 – All rights reserved
4.5 Gas-oxygen burner.
Where fusions are made over a gas-oxygen flame, the flame should not be excessively oxygen-rich to
minimize chlorine loss. As for the electric furnace, temperature is not to exceed 1 050°C to minimize
loss of chlorine by volatilization. The temperature is to be checked using an optical pyrometer or by
heating potassium sulphate as described in 4.4. A gas burner may be used for heating the mould and it
is to be adjusted so that the mould is a bright red (approximately 950 °C). A Meker burner should not be
used, as uptake of iron from the glass into the platinum ware may occur.
4.6 Desiccator.
4.7 Spatulas, non-magnetic, for weighing of the test portion and for mixing. Vibrating spatulas are not
acceptable because they can lead to segregation of the sample.
4.8 X-ray fluorescence spectrometer, any wavelength dispersive, vacuum (or helium) path, X-ray
fluorescence spectrometer, provided that the instrument has been checked.
Performance checks should be carried out in accordance with the precision tests set out in AS 2563,
accumulating at least 10 counts for each measurement.
4.9 Ultrasonic bath.
This item is optional. It may be used to aid cleaning of the platinum ware.
4.10 Cooling device.
It is recommended that the mould and glass be cooled using an air jet. Commercial disc-making
machines use this method.
Whatever the method of cooling, it is vital that samples be treated identically, as the curvature of the
analytical surface of the disc depends on the rate of cooling.
4.11 Laboratory glass ware, one-mark pipettes (0,5 ml and 1,0 ml) and a one-mark 1 000 ml volumetric
flask complying with the specifications of ISO 648 or ISO 1042, respectively.
4.12 Cotton gloves, recommended to be worn by operators when handling fused beads to minimize
chlorine contamination.
5 Sampling and samples
5.1 Laboratory sample
For analysis, use a laboratory sample of minus 100 μm particle size which has been taken and prepared
in accordance with ISO 3082. In the case of ores having significant contents of combined water or
oxidizable compounds, use a particle size of minus 160 μm.
5.2 Preparation of test sample
5.2.1 Preparation of pre-dried test samples
Thoroughly mix the laboratory sample and, taking multiple increments, extract a test sample in such a
way that it is representative of the whole contents of the container. Dry the test sample at (105 ± 2) °C,
as specified in ISO 7764.
5.2.2 Ores having significant contents of combined water or oxidizable compounds
Prepare an air-equilibrated test sample in accordance with ISO 2596 with the following types of ores:
a) processed ores containing metallic iron;
b) natural or processed ores in which the sulphur content is higher than 0,2 % (m/m);
c) natural or processed ores in which the content of combined water is higher than 2,5 % (m/m).
6 Procedure
6.1 Preparation of discs
6.1.1 General
Independent duplicate sets (day 1 and day 2) of test samples, blanks and calibration samples should be
prepared. The expression “independent” implies that the repetition of the procedure be carried out at a
different time or by a different operator.
The operator should have demonstrated the ability to make discs consistently with high precision. This
ability should be verified each month.
In preparing discs, great care is to be taken to avoid contamination and, in particular, the crucible in
which the fusion is carried out should be thoroughly cleaned prior to use (see 6.1.10). To minimize
contamination sources, it is recommended that chlorine- and sodium-based cleaners are avoided in the
laboratory area. It is recommended that operators wear clean cotton gloves when handling fused beads.
6.1.2 Weighing
Table 1 shows the components used in making the glass discs. Provided that the proportions are kept
approximately as given in Table 1, the masses can be varied to suit mould diameter and shape (see Note
after Table 1).
Table 1 — Masses of specimen components
Mass, g
Component Standard masses, g
Disc diameter
32 mm 40 mm
Flux 6,80 4,10 to 4,61 6,40 to 7,20
Sample 0,66 0,41 to 0,44 0,64 to 0,68
The specified masses may be weighed as “catch” weights, recording the mass weighed to the nearest
0,001 g for the flux and to the nearest 0,000 1 g for the test and calibration portions.
NOTE If a disc diameter used differs from those given in Table 1, masses are to be adjusted to be approximately
proportional to the area of the glass disc. If masses used are higher than recommended, crystallization and
segregation with consequent cracking are likely to occur as the glass cools.
Because the components are hygroscopic, they should be
...


Questions, Comments and Discussion
Ask us and Technical Secretary will try to provide an answer. You can facilitate discussion about the standard in here.
Loading comments...