ISO 6362-6:2025
(Main)Wrought aluminium and aluminium alloys — Extruded rods/bars, tubes and profiles — Part 6: Tolerances on form and dimensions for round, square, rectangular and hexagonal tubes
Wrought aluminium and aluminium alloys — Extruded rods/bars, tubes and profiles — Part 6: Tolerances on form and dimensions for round, square, rectangular and hexagonal tubes
This document specifies the tolerances on form and dimensions of the following: — wrought aluminium and aluminium alloy extruded round tubes, having diameters from 13 mm up to 450 mm. — wrought aluminium and aluminium alloy extruded square, rectangular and hexagonal tubes, having circumscribing circle up to 350 mm in diameter. This document is applicable to extruded round, square, rectangular and hexagonal tubes. Four-digit numerical designations are in line with the Registration of International Alloy Designations and Chemical Composition Limits for Wrought Aluminum and Wrought Aluminum Alloys (known as "Teal sheets").[1]
Aluminium et alliages d'aluminium corroyés — Barres, tubes et profilés filés — Partie 6: Tubes ronds, carrés, rectangulaires et hexagonaux — Tolérances sur forme et dimensions
General Information
Relations
Standards Content (Sample)
International
Standard
ISO 6362-6
Second edition
Wrought aluminium and aluminium
2025-03
alloys — Extruded rods/bars, tubes
and profiles —
Part 6:
Tolerances on form and dimensions
for round, square, rectangular and
hexagonal tubes
Aluminium et alliages d'aluminium corroyés — Barres, tubes et
profilés filés —
Partie 6: Tubes ronds, carrés, rectangulaires et hexagonaux —
Tolérances sur forme et dimensions
Reference number
© ISO 2025
All rights reserved. Unless otherwise specified, or required in the context of its implementation, no part of this publication may
be reproduced or utilized otherwise in any form or by any means, electronic or mechanical, including photocopying, or posting on
the internet or an intranet, without prior written permission. Permission can be requested from either ISO at the address below
or ISO’s member body in the country of the requester.
ISO copyright office
CP 401 • Ch. de Blandonnet 8
CH-1214 Vernier, Geneva
Phone: +41 22 749 01 11
Email: copyright@iso.org
Website: www.iso.org
Published in Switzerland
ii
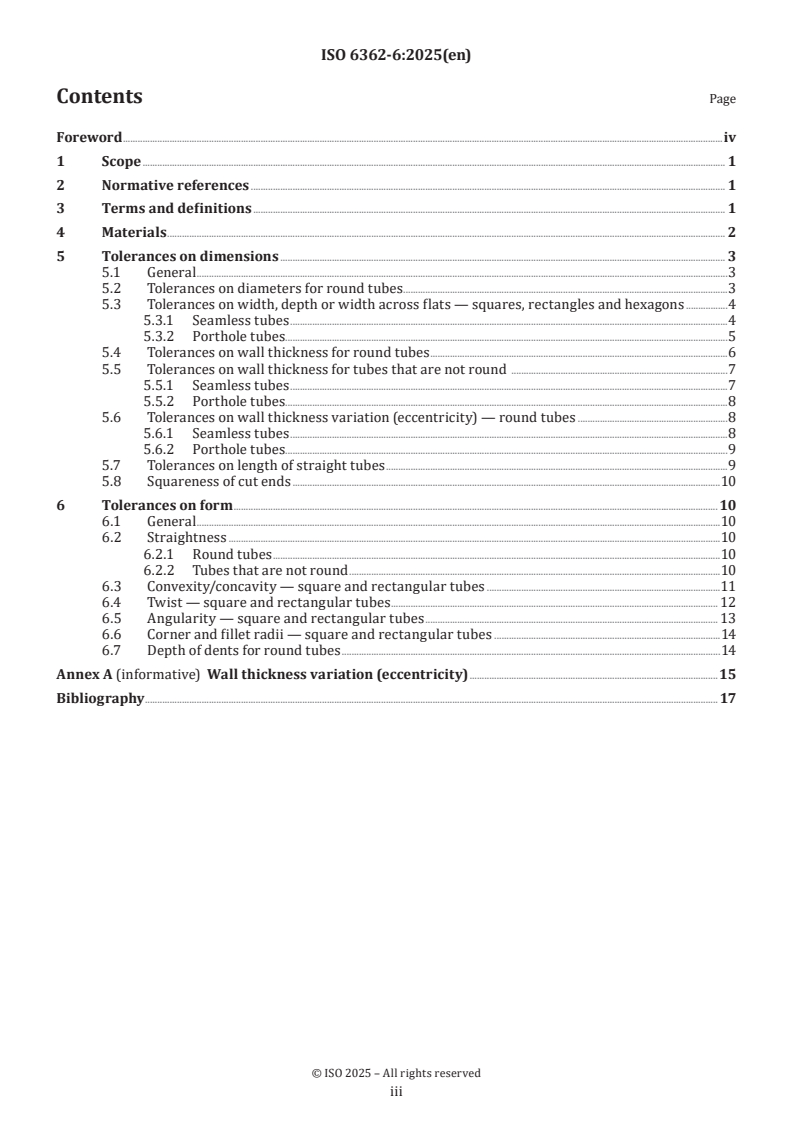
Contents Page
Foreword .iv
1 Scope . 1
2 Normative references . 1
3 Terms and definitions . 1
4 Materials . 2
5 Tolerances on dimensions . 3
5.1 General .3
5.2 Tolerances on diameters for round tubes .3
5.3 Tolerances on width, depth or width across flats — squares, rectangles and hexagons .4
5.3.1 Seamless tubes .4
5.3.2 Porthole tubes.5
5.4 Tolerances on wall thickness for round tubes .6
5.5 Tolerances on wall thickness for tubes that are not round .7
5.5.1 Seamless tubes .7
5.5.2 Porthole tubes.8
5.6 Tolerances on wall thickness variation (eccentricity) — round tubes .8
5.6.1 Seamless tubes .8
5.6.2 Porthole tubes.9
5.7 Tolerances on length of straight tubes .9
5.8 Squareness of cut ends .10
6 Tolerances on form . 10
6.1 General .10
6.2 Straightness .10
6.2.1 Round tubes .10
6.2.2 Tubes that are not round .10
6.3 Convexity/concavity — square and rectangular tubes .11
6.4 Twist — square and rectangular tubes . 12
6.5 Angularity — square and rectangular tubes . 13
6.6 Corner and fillet radii — square and rectangular tubes .14
6.7 Depth of dents for round tubes .14
Annex A (informative) Wall thickness variation (eccentricity) .15
Bibliography . 17
iii
Foreword
ISO (the International Organization for Standardization) is a worldwide federation of national standards
bodies (ISO member bodies). The work of preparing International Standards is normally carried out through
ISO technical committees. Each member body interested in a subject for which a technical committee
has been established has the right to be represented on that committee. International organizations,
governmental and non-governmental, in liaison with ISO, also take part in the work. ISO collaborates closely
with the International Electrotechnical Commission (IEC) on all matters of electrotechnical standardization.
The procedures used to develop this document and those intended for its further maintenance are described
in the ISO/IEC Directives, Part 1. In particular, the different approval criteria needed for the different types
of ISO document should be noted. This document was drafted in accordance with the editorial rules of the
ISO/IEC Directives, Part 2 (see www.iso.org/directives).
ISO draws attention to the possibility that the implementation of this document may involve the use of (a)
patent(s). ISO takes no position concerning the evidence, validity or applicability of any claimed patent
rights in respect thereof. As of the date of publication of this document, ISO had not received notice of (a)
patent(s) which may be required to implement this document. However, implementers are cautioned that
this may not represent the latest information, which may be obtained from the patent database available at
www.iso.org/patents. ISO shall not be held responsible for identifying any or all such patent rights.
Any trade name used in this document is information given for the convenience of users and does not
constitute an endorsement.
For an explanation of the voluntary nature of standards, the meaning of ISO specific terms and expressions
related to conformity assessment, as well as information about ISO's adherence to the World Trade
Organization (WTO) principles in the Technical Barriers to Trade (TBT), see www.iso.org/iso/foreword.html.
This document was prepared by Technical Committee ISO/TC 79, Light metals and their alloys, Subcommittee
SC 6, Wrought aluminium and aluminium alloys.
This second edition cancels and replaces the first edition (ISO 6362-6:2012), which has been technically
revised.
The main changes compared with the previous edition are as follows:
— correction of errors and modification of expressions throughout the document;
— modification of the title in accordance with the other parts;
— addition of an editorial clarification in the Scope;
— addition of alloy 3021 in Clause 4;
— dimensional tolerance increased in Table 3.
A list of all parts in the ISO 6362 series can be found on the ISO website.
Any feedback or questions on this document should be directed to the user’s national standards body. A
complete listing of these bodies can be found at www.iso.org/members.html.
iv
International Standard ISO 6362-6:2025(en)
Wrought aluminium and aluminium alloys — Extruded rods/
bars, tubes and profiles —
Part 6:
Tolerances on form and dimensions for round, square,
rectangular and hexagonal tubes
1 Scope
This document specifies the tolerances on form and dimensions of the following:
— wrought aluminium and aluminium alloy extruded round tubes, having diameters from 13 mm up to 450 mm.
— wrought aluminium and aluminium alloy extruded square, rectangular and hexagonal tubes, having
circumscribing circle up to 350 mm in diameter.
This document is applicable to extruded round, square, rectangular and hexagonal tubes.
Four-digit numerical designations are in line with the Registration of International Alloy Designations
and Chemical Composition Limits for Wrought Aluminum and Wrought Aluminum Alloys (known as "Teal
[1]
sheets").
2 Normative references
The following documents are referred to in text in such a way that some or all of their content constitutes
requirements of this document. For dated references, only the edition cited applies. For undated references,
the latest edition of the referenced document (including any amendments) applies.
ISO 6362-1, Wrought aluminium and aluminium alloys — Extruded rods/bars, tubes and profiles — Part 1:
Technical conditions for inspection and delivery
3 Terms and definitions
For the purposes of this document, the terms and definitions given in ISO 6362-1 apply.
ISO and IEC maintain terminological databases for use in standardization at the following addresses:
— ISO Online browsing platform: available at https:// www .iso .org/ obp
— IEC Electropedia: available at https:// www .electropedia .org/
4 Materials
For the purposes of this document, wrought aluminium and aluminium alloys are divided into two groups,
which correspond to varying difficulty when manufacturing the products.
The division into Group I and Group II of the most commonly used general engineering alloys is specified in
Table 1 for seamless tubes and Table 2 for porthole tubes. Grouping of other alloys is subject to agreement
between the purchaser and the supplier.
Table 1 — Alloys for seamless tubes
Grouping Alloy system Alloy number
Pure aluminium 1070, 1050, 1050A, 1350, 1100, 1200
Al-Mn system alloy 3102, 3003, 3103, 3203, 3021
Group I
Al-Mg system alloy 5005, 5005A, 5051A
6101, 6101A, 6101B, 6005, 6005A, 6005C, 6008, 6014, 6060, 6360, 6063,
Al-Mg-Si system alloy
6063A, 6463
Al-Cu-Mg system alloy 2007, 2011, 2011A, 2014, 2014A, 2017, 2017A, 2024, 2030
Al-Mg system alloy 5019, 5049, 5051, 5251, 5052, 5154, 5154A, 5454, 5754, 5056, 5083, 5086
Group II
Al-Mg-Si system alloy 6110A, 6012, 6018, 6351, 6061, 6261, 6262, 6081, 6082
Al-Zn-Mg system alloy 7003, 7204, 7005, 7108, 7108A, 7020, 7021, 7022, 7049A, 7050, 7075
Table 2 — Alloys for porthole tubes
Grouping Alloy system Alloy number
Pure aluminium 1070, 1050, 1050A, 1350, 1100, 1200
Al-Mn system alloy 3102, 3003, 3103, 3203, 3021
Group I
Al-Mg system alloy 5005, 5005A
6101, 6101A, 6101B, 6005, 6005A, 6005C, 6008, 6014, 6060, 6360, 6063,
Al-Mg-Si system alloy
6063A, 6463
Al-Mg system alloy 5051, 5049, 5251, 5052
Group II Al-Mg-Si system alloy 6110A, 6012, 6018, 6351, 6061, 6261, 6262, 6081, 6082
Al-Zn-Mg system alloy 7003, 7005, 7108, 7108A, 7020
5 Tolerances on dimensions
5.1 General
When outside diameter, D , inside diameter, D , and wall thickness, t, are all specified, standard tolerances
O I
shall apply to any two of these dimensions, but not to all three. As a result, the purchaser shall only state two
nominal dimensions on any given order.
For round tubes, see Figure 1. For all other tubes, see Figure 2.
Key
D inside diameter
I
D outside diameter
O
t wall thickness
Figure 1 — Diameter of a round tube
Key
D circumscribed diameter
C
Figure 2 — Circumscribing circle for a tube that is not round
5.2 Tolerances on diameters for round tubes
Tolerances on diameters for round tubes shall be in
...


Questions, Comments and Discussion
Ask us and Technical Secretary will try to provide an answer. You can facilitate discussion about the standard in here.