ISO 7961:2021
(Main)Aerospace — Bolts — Test methods
Aerospace — Bolts — Test methods
The following documents are referred to in the text in such a way that some or all of their content constitutes requirements of this document. For dated references, only the edition cited applies. For undated references, the latest edition of the referenced document (including any amendments) applies. ISO 7500‑1, Metallic materials — Calibration and verification of static uniaxial testing machines — Part 1: Tension/compression testing machines — Calibration and verification of the force-measuring system
Aéronautique et espace — Vis — Méthodes d'essai
General Information
- Status
- Published
- Publication Date
- 27-Jan-2021
- Technical Committee
- ISO/TC 20/SC 4 - Aerospace fastener systems
- Drafting Committee
- ISO/TC 20/SC 4/WG 3 - Supporting documents
- Current Stage
- 9020 - International Standard under periodical review
- Start Date
- 15-Jan-2026
- Completion Date
- 15-Jan-2026
Relations
- Consolidated By
ISO 18416:2015/Amd 1:2022 - Cosmetics — Microbiology — Detection of Candida albicans — Amendment 1 - Effective Date
- 06-Jun-2022
- Effective Date
- 21-Oct-2017
Overview
ISO 7961:2021 - "Aerospace - Bolts - Test methods" defines standardized test methods for bolts used in aerospace structures. The second edition (2021) replaces the 1994 version and provides detailed procedures, apparatus requirements and reporting rules to ensure consistent, reproducible assessment of bolt mechanical and environmental performance.
Key topics and technical requirements
- Scope and normative reference
- Applies to test methods for aerospace bolts; it references ISO 7500‑1 for calibration and verification of tension/compression testing machines.
- Test types covered
- Tensile tests at ambient and elevated temperatures (apparatus, fixtures, and controlled load application).
- Double shear tests using guillotine-style fixtures.
- Tension fatigue tests with automatic load maintenance and frequency/temperature limits.
- Stress durability (ambient), stress relaxation (elevated temperature), stress corrosion, and stress rupture tests.
- Inspection for grinding burns and general test validity checks.
- Apparatus and assembly requirements
- Functional fixture details (cups, lower/upper blocks, spacers, washers) and guidance for ensuring axial loading and uniform stress (e.g., centering tolerances and stress uniformity limits).
- Requirements that test nuts or threaded parts be of sufficient strength to ensure bolt failure, and limits on thread exposure during assembly.
- Calibration requirements conforming to ISO 7500‑1 and additional requirements in Annex A.
- Procedure, loading and reporting
- Controlled loading rates (specified in tables) and procedural steps for each test to ensure reproducibility.
- Mandatory elements for test reports and recordkeeping described in Clause 6 and Annex B.
- Supporting material
- Normative annexes for apparatus calibration and test-report formats, plus an informative annex with relevant formulae.
Applications and users
- Who uses ISO 7961
- Aerospace fastener manufacturers, OEMs, component suppliers, independent test laboratories, quality assurance teams, and procurement/specification engineers.
- Practical uses
- Qualification of bolt designs and materials for aircraft and spacecraft structures.
- Incoming inspection and lot acceptance testing to meet procurement specifications.
- Supplier and process audits, failure analysis, and certification evidence for regulatory compliance.
- Establishing test plans and laboratory procedures consistent with international practice.
Related standards
- ISO 7500‑1 - Calibration and verification of static uniaxial testing machines (tension/compression) - directly referenced for force-measuring system calibration.
Keywords: ISO 7961, aerospace bolts, bolt test methods, tensile test, double shear test, fatigue testing, stress corrosion, ISO 7500-1, bolt qualification, aerospace fasteners.
Get Certified
Connect with accredited certification bodies for this standard

DEKRA North America
DEKRA certification services in North America.

Eagle Registrations Inc.
American certification body for aerospace and defense.

Element Materials Technology
Materials testing and product certification.
Sponsored listings
Frequently Asked Questions
ISO 7961:2021 is a standard published by the International Organization for Standardization (ISO). Its full title is "Aerospace — Bolts — Test methods". This standard covers: The following documents are referred to in the text in such a way that some or all of their content constitutes requirements of this document. For dated references, only the edition cited applies. For undated references, the latest edition of the referenced document (including any amendments) applies. ISO 7500‑1, Metallic materials — Calibration and verification of static uniaxial testing machines — Part 1: Tension/compression testing machines — Calibration and verification of the force-measuring system
The following documents are referred to in the text in such a way that some or all of their content constitutes requirements of this document. For dated references, only the edition cited applies. For undated references, the latest edition of the referenced document (including any amendments) applies. ISO 7500‑1, Metallic materials — Calibration and verification of static uniaxial testing machines — Part 1: Tension/compression testing machines — Calibration and verification of the force-measuring system
ISO 7961:2021 is classified under the following ICS (International Classification for Standards) categories: 49.030.20 - Bolts, screws, studs. The ICS classification helps identify the subject area and facilitates finding related standards.
ISO 7961:2021 has the following relationships with other standards: It is inter standard links to ISO 18416:2015/Amd 1:2022, ISO 7961:1994. Understanding these relationships helps ensure you are using the most current and applicable version of the standard.
ISO 7961:2021 is available in PDF format for immediate download after purchase. The document can be added to your cart and obtained through the secure checkout process. Digital delivery ensures instant access to the complete standard document.
Standards Content (Sample)
INTERNATIONAL ISO
STANDARD 7961
Second edition
2021-01
Aerospace — Bolts — Test methods
Aéronautique et espace — Vis — Méthodes d'essai
Reference number
©
ISO 2021
© ISO 2021
All rights reserved. Unless otherwise specified, or required in the context of its implementation, no part of this publication may
be reproduced or utilized otherwise in any form or by any means, electronic or mechanical, including photocopying, or posting
on the internet or an intranet, without prior written permission. Permission can be requested from either ISO at the address
below or ISO’s member body in the country of the requester.
ISO copyright office
CP 401 • Ch. de Blandonnet 8
CH-1214 Vernier, Geneva
Phone: +41 22 749 01 11
Email: copyright@iso.org
Website: www.iso.org
Published in Switzerland
ii © ISO 2021 – All rights reserved
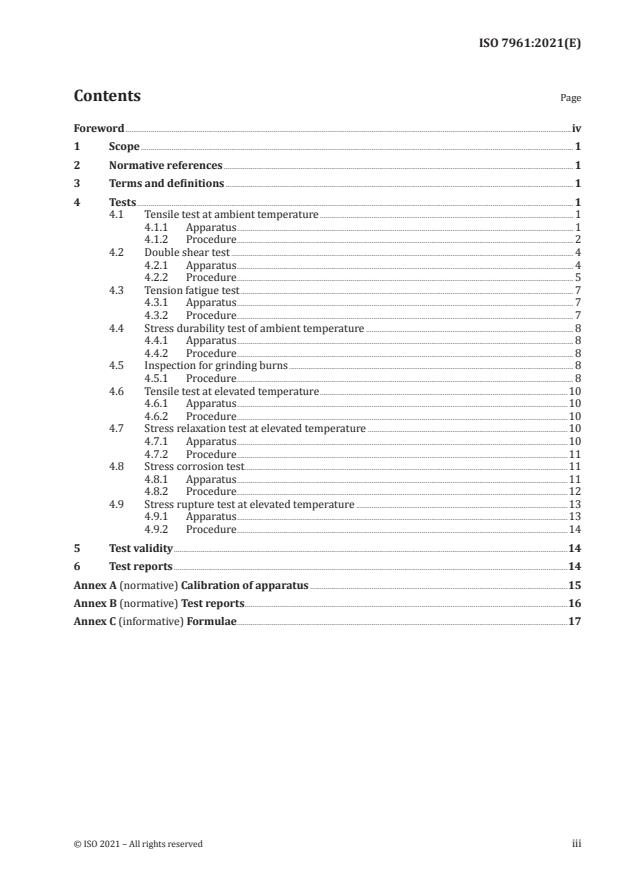
Contents Page
Foreword .iv
1 Scope . 1
2 Normative references . 1
3 Terms and definitions . 1
4 Tests . 1
4.1 Tensile test at ambient temperature . 1
4.1.1 Apparatus . 1
4.1.2 Procedure . 2
4.2 Double shear test . 4
4.2.1 Apparatus . 4
4.2.2 Procedure . 5
4.3 Tension fatigue test . 7
4.3.1 Apparatus . 7
4.3.2 Procedure . 7
4.4 Stress durability test of ambient temperature . 8
4.4.1 Apparatus . 8
4.4.2 Procedure . 8
4.5 Inspection for grinding burns . 8
4.5.1 Procedure . 8
4.6 Tensile test at elevated temperature .10
4.6.1 Apparatus .10
4.6.2 Procedure .10
4.7 Stress relaxation test at elevated temperature .10
4.7.1 Apparatus .10
4.7.2 Procedure .11
4.8 Stress corrosion test .11
4.8.1 Apparatus .11
4.8.2 Procedure .12
4.9 Stress rupture test at elevated temperature .13
4.9.1 Apparatus .13
4.9.2 Procedure .14
5 Test validity .14
6 Test reports .14
Annex A (normative) Calibration of apparatus .15
Annex B (normative) Test reports .16
Annex C (informative) Formulae .17
Foreword
ISO (the International Organization for Standardization) is a worldwide federation of national standards
bodies (ISO member bodies). The work of preparing International Standards is normally carried out
through ISO technical committees. Each member body interested in a subject for which a technical
committee has been established has the right to be represented on that committee. International
organizations, governmental and non-governmental, in liaison with ISO, also take part in the work.
ISO collaborates closely with the International Electrotechnical Commission (IEC) on all matters of
electrotechnical standardization.
The procedures used to develop this document and those intended for its further maintenance are
described in the ISO/IEC Directives, Part 1. In particular, the different approval criteria needed for the
different types of ISO documents should be noted. This document was drafted in accordance with the
editorial rules of the ISO/IEC Directives, Part 2 (see www .iso .org/ directives).
Attention is drawn to the possibility that some of the elements of this document may be the subject of
patent rights. ISO shall not be held responsible for identifying any or all such patent rights. Details of
any patent rights identified during the development of the document will be in the Introduction and/or
on the ISO list of patent declarations received (see www .iso .org/ patents).
Any trade name used in this document is information given for the convenience of users and does not
constitute an endorsement.
For an explanation of the voluntary nature of standards, the meaning of ISO specific terms and
expressions related to conformity assessment, as well as information about ISO's adherence to the
World Trade Organization (WTO) principles in the Technical Barriers to Trade (TBT), see www .iso .org/
iso/ foreword .html.
This document was prepared by Technical Committee ISO/TC 20, Aircraft and space vehicles,
Subcommittee SC 4, Aerospace fastener systems.
This second edition cancels and replaces the first edition (ISO 7961:1994), which has been technically
revised.
The main changes compared to the previous edition are:
— modification of Figures 3, 5 and 6 (corrected tolerances, further explanations added);
— modification of Annex B;
— editorial adjustment.
Any feedback or questions on this document should be directed to the user’s national standards body. A
complete listing of these bodies can be found at www .iso .org/ members .html.
iv © ISO 2021 – All rights reserved
INTERNATIONAL STANDARD ISO 7961:2021(E)
Aerospace — Bolts — Test methods
1 Scope
This document specifies test methods for bolts for aerospace constructions.
2 Normative references
The following documents are referred to in the text in such a way that some or all of their content
constitutes requirements of this document. For dated references, only the edition cited applies. For
undated references, the latest edition of the referenced document (including any amendments) applies.
ISO 7500-1, Metallic materials — Calibration and verification of static uniaxial testing machines — Part 1:
Tension/compression testing machines — Calibration and verification of the force-measuring system
3 Terms and definitions
No terms and definitions are listed in this document.
ISO and IEC maintain terminological databases for use in standardization at the following addresses:
— ISO Online browsing platform: available at https:// www .iso .org/ obp
— IEC Electropedia: available at http:// www .electropedia .org/
4 Tests
4.1 Tensile test at ambient temperature
4.1.1 Apparatus
4.1.1.1 Test device (see Figure 1).
4.1.1.1.1 The test device shall be centred such that the stress at four equi-spaced points around the
test sample is uniform within 1 %, or such that the coaxiality between the bolt and the clearance holes is
less than or equal to 0,025 mm to ensure the application of the tensile load along the axis of the bolt.
Calibration requirements of the test device shall conform to ISO 7500-1 and Annex A.
Other types of device may be used provided they respect the requirements of Figure 3.
4.1.1.1.2 Cups, fixed or removable, in conformity with Figure 3, which specifies only functional
requirements.
4.1.1.1.3 Test nut (free-running or self-locking) or threaded part (assuming the role of a nut), of
sufficient strength to guarantee bolt failure.
4.1.1.2 Tapered spacer, placed under the head during the test, when required by the procurement
specification or definition document to evaluate the effect of angularity. The minimum clearance between
the hole and the bolt shank shall be 0,13 mm. At least 90 % of the bolt bearing area shall be supported by
the spacer which shall have a diameter sufficient to support the width across the corners of the bolt. The
+00, 8
tolerance on the hole diameter in the spacer shall be mm.
4.1.1.3 Washers, used under bolt heads or nuts only in the case outlined in 4.1.1.2.
4.1.1.4 Tensile or compressive test machine, depending on the fixture, capable of applying the
test loads.
4.1.2 Procedure
4.1.2.1 Assemble the bolt in the test device (4.1.1.1) as shown in Figure 1. Install the nut (4.1.1.1.3) as
shown in Figure 2. Place the complete assembly between the loading platens of the machine.
4.1.2.2 Apply the load until the bolt breaks at the rate specified in Table 1, in a controlled way.
Key
1 upper cup (see Figure 3)
2 lower cup (see Figure 3)
F load
Figure 1 — Tensile test — Test device
2 © ISO 2021 – All rights reserved
a
2 complete threads min.
Figure 2 — Tensile test — Position of the nut in relation to the complete threads (shank side)
Dimensions in millimetres,
Surface roughness in micrometres
a) Upper cup for protruding head bolts
b) Upper cup for flush head bolts
c) Lower cup
Key
B nominal = D + 0,025
D = maximum diameter of bolt
H ≥ nominal diameter of bolt
T = perpendicularity tolerance corresponding to 2°
α = nominal angle of countersunk head
break sharp edges
material: steel of hardness > 43 HRC
a
Optional.
NOTE Radius or chamfer compatible (compatible means radius or chamfer of upper cup equals to the
maximum radius of the bolt plus 0,1 mm to 0,2 mm) with head to shank blend radius.
Figure 3 — Tensile test — Upper and lower cup details
Table 1 — Rates of load application — Tensile test
Nominal shank Rate Nominal shank Rate Nominal shank Rate
a a a
diameter kN/min diameter kN/min diameter kN/min
3 5 12 80 27 400
4 9 14 110 30 500
5 14 16 140 33 600
6 20 18 180 36 700
7 27 20 220 39 850
8 35 22 270
10 55 24 320
a 2
For other shank diameters, bolts shall be tested at a loading rate, accurate to ±10 %, of 750 N per minute per 1 mm of
nominal shank cross-section.
4.2 Double shear test
4.2.1 Apparatus
See Figures 4 and 5, the latter only defining functional requirements.
Totally enclosed top and bottom blades may be used as an alternative.
4 © ISO 2021 – All rights reserved
4.2.2 Procedure
4.2.2.1 Assemble the bolt into the lower part of the guillotine. The blend radius under the head and the
threaded portion shall not be in contact with the lower part of the guillotine (see Figure 4).
4.2.2.2 Apply the load until the bolt breaks at the rate specified in Table 2, in a controlled way.
If this load is attained without breakage of the bolt, the test may be terminated.
Key
1 upper blade
2 lower blade
3 support block
Figure 4 — Double shear test — Test device
Dimensions in millimetres,
Surface roughness in micrometres
a) Upper blade
b) Lower blade
c) Support base
Key
D = nominal diameter of the bolt
a
Radius to clear head of test bolt.
NOTE 1 Shear edges radius or break edge 0,13 max.
NOTE 2 Rework when edges reach a radius of or break edge of 0,25 max.
NOTE 3 Material: Steel of hardness 60 HRC to 62 HRC
Figure 5 — Double shear test — Upper and lower blocks
Table 2 — Rates of load application — Double shear test
Nominal shank Rate Nominal shank Rate Nominal shank Rate
a a a
diameter kN/min diameter kN/min diameter kN/min
3 10 12 160 27 800
4 18 14 215 30 990
5 27 16 280 33 1 200
6 40 18 350 36 1 400
7 54 20 440 39 1 700
8 70 22 530
10 110 24 630
a
For other shank diameters, bolts shall be tested at a loading rate, accurate to ±10 %, of 750 N per minute per
1 mm of double the nominal shank cross-section.
6 © ISO 2021 – All rights reserved
4.3 Tension fatigue test
4.3.1 Apparatus
4.3.1.1 Test device (see Figure 1).
4.3.1.1.1 Universal joints and spherical seats shall not be used in the test column. The test device
shall be centered such that the stress at four equi-spaced points around the test sample shall be uniform
within 3 % of the mean stress value.
Calibration requirements of the test device shall conform to ISO 7500-1 and Annex A.
Other types of device may be used provided they respect the requirements of Figure 3.
Test bolts shall not be re-used.
4.3.1.1.2 Cups, fixed or removeable, in conformity with Figure 3, which specifies only functional
requirements.
4.3.1.1.3 Test nut or threaded part (assuming the role of a nut), with a height greater than or equal to
0,8 D and of sufficient strength to ensure bolt breakage.
Test nuts or threaded parts may be re-used provided that it meets the dimensional requirements and
has not been damaged by a previous test.
For referee purposes, only unused nuts or threaded parts shall be used.
4.3.1.2 Load measuring system, of an accuracy within ±2 % of th
...


Questions, Comments and Discussion
Ask us and Technical Secretary will try to provide an answer. You can facilitate discussion about the standard in here.
Loading comments...