ISO 2926:2013
(Main)Aluminium oxide used for the production of primary aluminium — Particle size analysis for the range 45 µm to 150 µm — Method using electroformed sieves
Aluminium oxide used for the production of primary aluminium — Particle size analysis for the range 45 µm to 150 µm — Method using electroformed sieves
ISO 2926:2013 specifies a dry sieve method using electroformed sieves for determining the mass distribution of the particle sizes in aluminium oxide used for the production of primary aluminium. This method is applicable to calcined aluminium oxide containing a maximum of 20 % mass fraction of particles having a mean diameter exceeding 150 µm, and containing a maximum of 15 % mass fraction of particles having a mean diameter less than 45 µm. This method is not applicable to the use of woven wire sieves.
Oxyde d'aluminium utilisé pour la production d'aluminium primaire — Analyse granulométrique dans la gamme 45 µm à 150 µm — Méthode par emploi de tamis électroformés
General Information
- Status
- Published
- Publication Date
- 13-Aug-2013
- Technical Committee
- ISO/TC 226 - Materials for the production of primary aluminium
- Drafting Committee
- ISO/TC 226/WG 3 - Smelter grade alumina
- Current Stage
- 9093 - International Standard confirmed
- Start Date
- 25-Sep-2024
- Completion Date
- 12-Feb-2026
Relations
- Effective Date
- 07-Aug-2008
Overview - ISO 2926:2013 (aluminium oxide particle size analysis)
ISO 2926:2013 specifies a dry sieve method using electroformed sieves to determine the mass distribution of particle sizes in calcined aluminium oxide (alumina) used for the production of primary aluminium. The method covers the particle size range 45 µm to 150 µm, and is intended for samples containing up to 20% by mass >150 µm and up to 15% by mass <45 µm. The procedure uses a mechanical sieve shaker, electroformed test sieves (150, 106, 75, 53, 45 µm), and laboratory weighing to produce cumulative mass‑percent retained results.
Key topics and technical requirements
- Sieve type: Smooth electroformed sheets with square openings (woven wire sieves are not applicable). Aperture tolerances per ISO 3310-3.
- Nominal sieve sizes: 150 µm, 106 µm, 75 µm, 53 µm, 45 µm.
- Sample mass: Final test portion weighed to 0.01 g, nominally 45–55 g (50 g recommended).
- Apparatus: Mechanical sieve shaker imparting combined horizontal rotary motion and vertical tapping; top‑pan balance (0.01 g); fine soft brush for sieve cleaning.
- Procedure: Clean and inspect sieves, assemble stack (largest aperture at top), sieve for 30 minutes, weigh retained fractions and bottom receiver, calculate cumulative mass percent.
- Effective aperture (EA): EA determination using certified reference materials (e.g., NIST CRMs like 1004a/1004b, 1017b) is recommended. Tolerance guidance: ±2 µm for 45 µm sieves, ±5 µm for 53–150 µm sieves.
- Quality metrics: Precision data (repeatability r and reproducibility R) provided from interlaboratory studies; results are sample dependent.
- Cleaning & inspection: Brushing and visual/microscope inspection for blinding or ruptures; repairs permitted if verified.
Practical applications
- Incoming quality control of calcined alumina for smelters - verify particle size distribution to meet process and material specifications.
- Process control and optimisation in primary aluminium production - particle size affects dissolution and smelting behaviour.
- Supplier qualification and material acceptance - objective test method for contracts and specifications.
- Laboratory benchmarking and interlaboratory studies - use of EA and NIST CRMs supports comparability across labs.
Who should use ISO 2926:2013
- Aluminium refinery quality laboratories and production engineers
- Material suppliers and procurement teams specifying calcined alumina
- Third‑party testing labs and accreditation bodies
- R&D teams studying feedstock granulometry and process effects
Related standards and references
- ISO 3310‑3 (test sieves - electroformed sheets) - normative reference.
- ISO/TC 226 (committee responsible for materials for primary aluminium).
- Method origins: based on AS 2879.6‑1995; interlaboratory programme referenced AS 2850.
Keywords: ISO 2926:2013, particle size analysis, aluminium oxide, electroformed sieves, 45 µm to 150 µm, calcined alumina, effective aperture, sieve method.
Get Certified
Connect with accredited certification bodies for this standard

ECOCERT
Organic and sustainability certification.

Eurofins Food Testing Global
Global leader in food, environment, and pharmaceutical product testing.

Intertek Bangladesh
Intertek certification and testing services in Bangladesh.
Sponsored listings
Frequently Asked Questions
ISO 2926:2013 is a standard published by the International Organization for Standardization (ISO). Its full title is "Aluminium oxide used for the production of primary aluminium — Particle size analysis for the range 45 µm to 150 µm — Method using electroformed sieves". This standard covers: ISO 2926:2013 specifies a dry sieve method using electroformed sieves for determining the mass distribution of the particle sizes in aluminium oxide used for the production of primary aluminium. This method is applicable to calcined aluminium oxide containing a maximum of 20 % mass fraction of particles having a mean diameter exceeding 150 µm, and containing a maximum of 15 % mass fraction of particles having a mean diameter less than 45 µm. This method is not applicable to the use of woven wire sieves.
ISO 2926:2013 specifies a dry sieve method using electroformed sieves for determining the mass distribution of the particle sizes in aluminium oxide used for the production of primary aluminium. This method is applicable to calcined aluminium oxide containing a maximum of 20 % mass fraction of particles having a mean diameter exceeding 150 µm, and containing a maximum of 15 % mass fraction of particles having a mean diameter less than 45 µm. This method is not applicable to the use of woven wire sieves.
ISO 2926:2013 is classified under the following ICS (International Classification for Standards) categories: 71.100.10 - Materials for aluminium production. The ICS classification helps identify the subject area and facilitates finding related standards.
ISO 2926:2013 has the following relationships with other standards: It is inter standard links to ISO 2926:2005. Understanding these relationships helps ensure you are using the most current and applicable version of the standard.
ISO 2926:2013 is available in PDF format for immediate download after purchase. The document can be added to your cart and obtained through the secure checkout process. Digital delivery ensures instant access to the complete standard document.
Standards Content (Sample)
INTERNATIONAL ISO
STANDARD 2926
Third edition
2013-09-01
Aluminium oxide used for the
production of primary aluminium —
Particle size analysis for the range
45 µm to 150 µm — Method using
electroformed sieves
Oxyde d’aluminium utilisé pour la production d’aluminium
primaire — Analyse granulométrique dans la gamme 45 µm à 150
µm — Méthode par emploi de tamis électroformés
Reference number
©
ISO 2013
© ISO 2013
All rights reserved. Unless otherwise specified, no part of this publication may be reproduced or utilized otherwise in any form
or by any means, electronic or mechanical, including photocopying, or posting on the internet or an intranet, without prior
written permission. Permission can be requested from either ISO at the address below or ISO’s member body in the country of
the requester.
ISO copyright office
Case postale 56 • CH-1211 Geneva 20
Tel. + 41 22 749 01 11
Fax + 41 22 749 09 47
E-mail copyright@iso.org
Web www.iso.org
Published in Switzerland
ii © ISO 2013 – All rights reserved
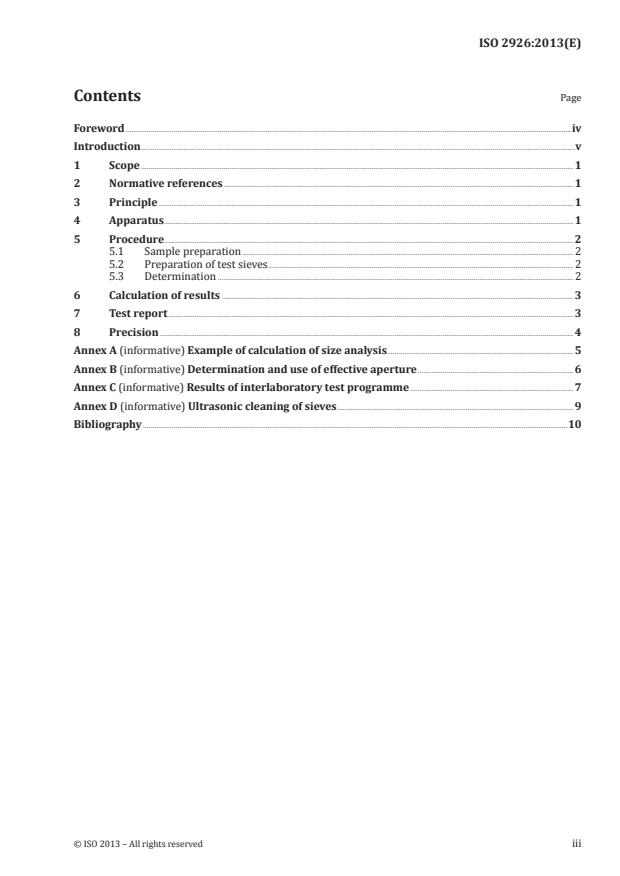
Contents Page
Foreword .iv
Introduction .v
1 Scope . 1
2 Normative references . 1
3 Principle . 1
4 Apparatus . 1
5 Procedure. 2
5.1 Sample preparation . 2
5.2 Preparation of test sieves . 2
5.3 Determination . 2
6 Calculation of results . 3
7 Test report . 3
8 Precision . 4
Annex A (informative) Example of calculation of size analysis . 5
Annex B (informative) Determination and use of effective aperture . 6
Annex C (informative) Results of interlaboratory test programme . 7
Annex D (informative) Ultrasonic cleaning of sieves
........................................................................................................................... 9
Bibliography .10
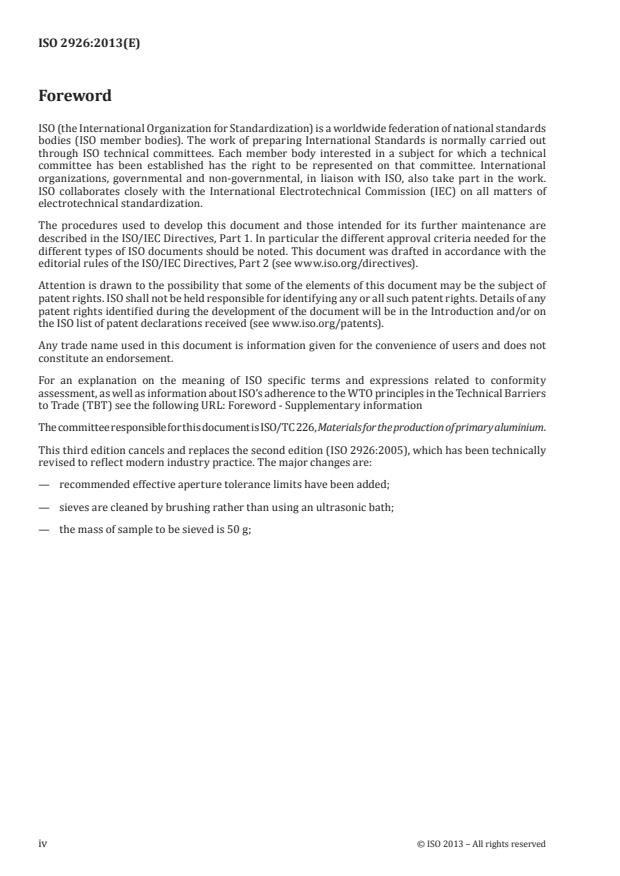
Foreword
ISO (the International Organization for Standardization) is a worldwide federation of national standards
bodies (ISO member bodies). The work of preparing International Standards is normally carried out
through ISO technical committees. Each member body interested in a subject for which a technical
committee has been established has the right to be represented on that committee. International
organizations, governmental and non-governmental, in liaison with ISO, also take part in the work.
ISO collaborates closely with the International Electrotechnical Commission (IEC) on all matters of
electrotechnical standardization.
The procedures used to develop this document and those intended for its further maintenance are
described in the ISO/IEC Directives, Part 1. In particular the different approval criteria needed for the
different types of ISO documents should be noted. This document was drafted in accordance with the
editorial rules of the ISO/IEC Directives, Part 2 (see www.iso.org/directives).
Attention is drawn to the possibility that some of the elements of this document may be the subject of
patent rights. ISO shall not be held responsible for identifying any or all such patent rights. Details of any
patent rights identified during the development of the document will be in the Introduction and/or on
the ISO list of patent declarations received (see www.iso.org/patents).
Any trade name used in this document is information given for the convenience of users and does not
constitute an endorsement.
For an explanation on the meaning of ISO specific terms and expressions related to conformity
assessment, as well as information about ISO’s adherence to the WTO principles in the Technical Barriers
to Trade (TBT) see the following URL: Foreword - Supplementary information
The committee responsible for this document is ISO/TC 226, Materials for the production of primary aluminium.
This third edition cancels and replaces the second edition (ISO 2926:2005), which has been technically
revised to reflect modern industry practice. The major changes are:
— recommended effective aperture tolerance limits have been added;
— sieves are cleaned by brushing rather than using an ultrasonic bath;
— the mass of sample to be sieved is 50 g;
iv © ISO 2013 – All rights reserved
Introduction
This International Standard is based on AS 2879.6-1995 prepared by Standards Australia.
INTERNATIONAL STANDARD ISO 2926:2013(E)
Aluminium oxide used for the production of primary
aluminium — Particle size analysis for the range 45 µm to
150 µm — Method using electroformed sieves
1 Scope
This International Standard specifies a dry sieve method using electroformed sieves for determining the
mass distribution of the particle sizes in aluminium oxide used for the production of primary aluminium.
This method is applicable to calcined aluminium oxide containing a maximum of 20 % mass fraction of
particles having a mean diameter exceeding 150 µm, and containing a maximum of 15 % mass fraction
of particles having a mean diameter less than 45 µm.
This method is not applicable to the use of woven wire sieves.
2 Normative references
The following documents, in whole or in part, are normatively referenced in this document and are
indispensable for its application. For dated references, only the edition cited applies. For undated
references, the latest edition of the referenced document (including any amendments) applies.
ISO 3310-3, Test sieves — Technical requirements and testing — Part 3: Test sieves of electroformed sheets
3 Principle
A test portion of the crude sample is sieved mechanically through electroformed sieves.
Each of the separate fractions is weighed on the sieve, and a cumulative mass of material retained on
each sieve aperture size is calculated.
4 Apparatus
4.1 Test sieves, each including a sieving medium (screen) and a frame.
The frames shall be cylindrical, having nominal diameters of 200 mm and heights between 50 mm and
75 mm. A lid and a bottom receiver shall be included. The sieves, lid and bottom receiver shall be capable
1)
of being fitted together tightly to form a series of test sieves .
The screens shall be constructed of smooth electroformed sheet having square openings. The aperture
tolerances shall be in accordance with ISO 3310-3.
The sieve apertures shall have nominal sizes of 150 µm, 106 µm, 75 µm, 53 µm and 45 µm. Refer to
Annex B for effective aperture determination and tolerance limits.
1) Certified electroformed sieves manufactured by Precision Eforming of Cortland, New York, USA, are examples of
suitable products available commercially. This information is given for the convenience of users of this International
Standard and does not constitute an endorsement by ISO of these products.
4.2 Mechanical sieve shaker, capable of clamping the sieves mounted inside each other together with
the top lid and bottom receiver to form a vertical assembly.
2)
The apparatus shall impart to the sieve assembly a simultaneous horizontal rotary motion and a
vertical tapping action resulting from the fall of a hammer. This combined action shall cause sufficient
displacement of the aluminium oxide particles to prevent aggregation but not cause any deformation
of the sieving screen or any size reduction of the aluminium oxide particles through shock or abrasion.
4.3 Laboratory top pan balance, capable of weighing the sieves to the nearest 0,01 g.
The balance may be fitted with a lightweight frame mounted on the weighing pan to enable direct
weighing of test sieves and receiver.
4.4 Brush, fine bristled, soft, a few centimetres wide.
5 Procedure
5.1 Sample preparation
Split the sample into test portions by riffling or rotary sample division until the required mass is obtained.
Weigh the final split to the nearest 0,01 g. The mass (m ) of the final split should fall in the range 45 to 55 g.
5.2 Preparation of test sieves
Prepare the test sieves as follows.
a) Clean each test sieve (4.1) in turn by inverting it over a suitable container, brushing the mesh to
remove trapped particles and tapping the sieve frame lightly to remove any adhering particles.
b) Inspect each sieve to ensure that the mesh is not ruptured and there is not excessive aperture
binding. Upon holding the sieve up to a light source, areas of
...


Questions, Comments and Discussion
Ask us and Technical Secretary will try to provide an answer. You can facilitate discussion about the standard in here.
Loading comments...