ASTM B523/B523M-01
(Specification)Standard Specification for Seamless and Welded Zirconium and Zirconium Alloy Tubes
Standard Specification for Seamless and Welded Zirconium and Zirconium Alloy Tubes
SCOPE
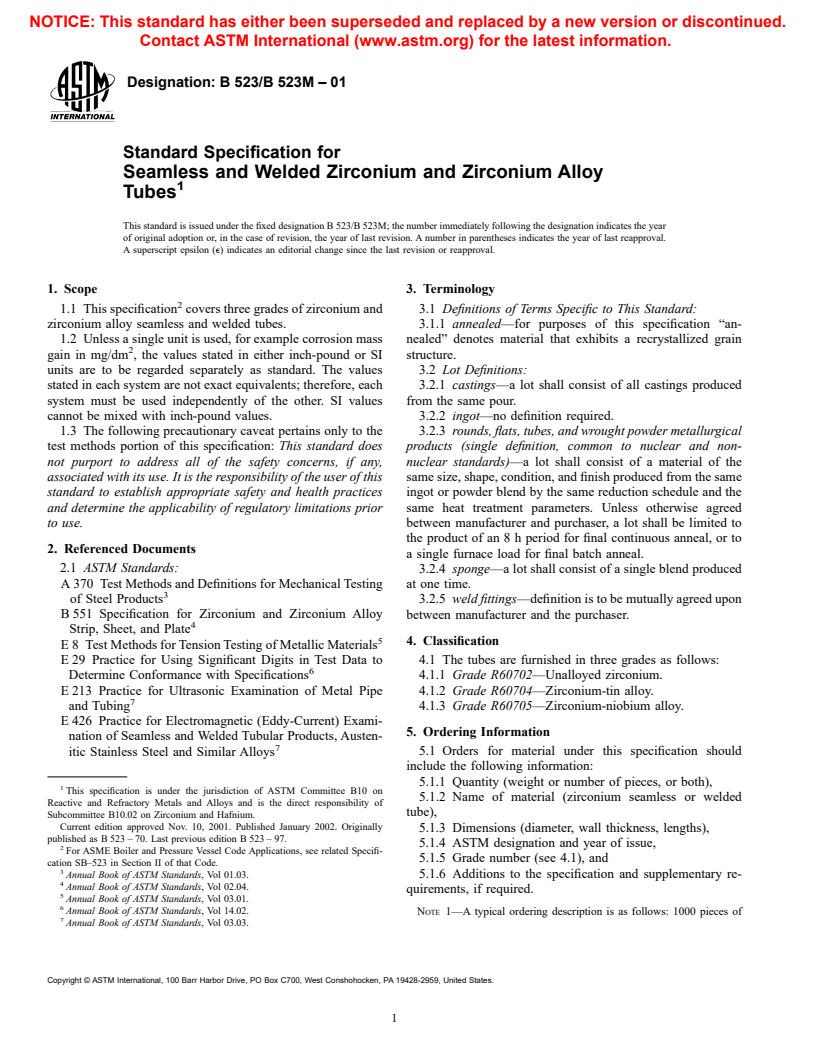
1.1 This specification covers three grades of zirconium and zirconium alloy seamless and welded tubes.
1.2 Unless a single unit is used, for example corrosion mass gain in mg/dm2, the values stated in either inch-pound or SI units are to be regarded separately as standard. The values stated in each system are not exact equivalents; therefore, each system must be used independently of the other. SI values cannot be mixed with inch-pound values.
1.3 The following precautionary caveat pertains only to the test methods portion of this specification: This standard does not purport to address all of the safety concerns, if any, associated with its use. It is the responsibility of the user of this standard to establish appropriate safety and health practices and determine the applicability of regulatory limitations prior to use.
General Information
Relations
Standards Content (Sample)
NOTICE: This standard has either been superseded and replaced by a new version or discontinued.
Contact ASTM International (www.astm.org) for the latest information.
Designation: B 523/B 523M – 01
Standard Specification for
Seamless and Welded Zirconium and Zirconium Alloy
Tubes
This standard is issued under the fixed designation B 523/B 523M; the number immediately following the designation indicates the year
of original adoption or, in the case of revision, the year of last revision. A number in parentheses indicates the year of last reapproval.
A superscript epsilon (e) indicates an editorial change since the last revision or reapproval.
1. Scope 3. Terminology
1.1 This specification covers three grades of zirconium and 3.1 Definitions of Terms Specific to This Standard:
zirconium alloy seamless and welded tubes. 3.1.1 annealed—for purposes of this specification “an-
1.2 Unless a single unit is used, for example corrosion mass nealed” denotes material that exhibits a recrystallized grain
gain in mg/dm , the values stated in either inch-pound or SI structure.
units are to be regarded separately as standard. The values 3.2 Lot Definitions:
stated in each system are not exact equivalents; therefore, each 3.2.1 castings—a lot shall consist of all castings produced
system must be used independently of the other. SI values from the same pour.
cannot be mixed with inch-pound values. 3.2.2 ingot—no definition required.
1.3 The following precautionary caveat pertains only to the 3.2.3 rounds, flats, tubes, and wrought powder metallurgical
test methods portion of this specification: This standard does products (single definition, common to nuclear and non-
not purport to address all of the safety concerns, if any, nuclear standards)—a lot shall consist of a material of the
associated with its use. It is the responsibility of the user of this same size, shape, condition, and finish produced from the same
standard to establish appropriate safety and health practices ingot or powder blend by the same reduction schedule and the
and determine the applicability of regulatory limitations prior same heat treatment parameters. Unless otherwise agreed
to use. between manufacturer and purchaser, a lot shall be limited to
the product of an 8 h period for final continuous anneal, or to
2. Referenced Documents
a single furnace load for final batch anneal.
2.1 ASTM Standards: 3.2.4 sponge—a lot shall consist of a single blend produced
A 370 Test Methods and Definitions for Mechanical Testing
at one time.
of Steel Products 3.2.5 weld fittings—definition is to be mutually agreed upon
B 551 Specification for Zirconium and Zirconium Alloy
between manufacturer and the purchaser.
Strip, Sheet, and Plate
4. Classification
E 8 Test Methods for Tension Testing of Metallic Materials
E 29 Practice for Using Significant Digits in Test Data to 4.1 The tubes are furnished in three grades as follows:
Determine Conformance with Specifications 4.1.1 Grade R60702—Unalloyed zirconium.
E 213 Practice for Ultrasonic Examination of Metal Pipe 4.1.2 Grade R60704—Zirconium-tin alloy.
and Tubing 4.1.3 Grade R60705—Zirconium-niobium alloy.
E 426 Practice for Electromagnetic (Eddy-Current) Exami-
5. Ordering Information
nation of Seamless and Welded Tubular Products, Austen-
itic Stainless Steel and Similar Alloys 5.1 Orders for material under this specification should
include the following information:
5.1.1 Quantity (weight or number of pieces, or both),
This specification is under the jurisdiction of ASTM Committee B10 on
5.1.2 Name of material (zirconium seamless or welded
Reactive and Refractory Metals and Alloys and is the direct responsibility of
tube),
Subcommittee B10.02 on Zirconium and Hafnium.
Current edition approved Nov. 10, 2001. Published January 2002. Originally
5.1.3 Dimensions (diameter, wall thickness, lengths),
published as B 523 – 70. Last previous edition B 523 – 97.
5.1.4 ASTM designation and year of issue,
For ASME Boiler and Pressure Vessel Code Applications, see related Specifi-
5.1.5 Grade number (see 4.1), and
cation SB–523 in Section II of that Code.
Annual Book of ASTM Standards, Vol 01.03. 5.1.6 Additions to the specification and supplementary re-
Annual Book of ASTM Standards, Vol 02.04.
quirements, if required.
Annual Book of ASTM Standards, Vol 03.01.
Annual Book of ASTM Standards, Vol 14.02.
NOTE 1—A typical ordering description is as follows: 1000 pieces of
Annual Book of ASTM Standards, Vol 03.03.
Copyright © ASTM International, 100 Barr Harbor Drive, PO Box C700, West Conshohocken, PA 19428-2959, United States.
NOTICE: This standard has either been superseded and replaced by a new version or discontinued.
Contact ASTM International (www.astm.org) for the latest information.
B 523/B 523M
TABLE 2 Permissible Variation in Product Analysis Between
seamless zirconium tubes, 2 in. (50 mm) in outside diameter by 0.06 in.
Different Laboratories
(15 mm) in wall thickness by 10 ft (3 m) in length, ASTM B 523, dated
___, Grade R60702.
Permissible Variation in Product
Element
Analysis, %
6. Materials and Manufacture
Hydrogen 0.002
Nitrogen 0.01
6.1 Seamless tube shall be made by any seamless method
Carbon 0.01
that will yield a product meeting the requirements of this
Hafnium 0.1
specification.
Iron + chromium 0.025
Tin 0.05
6.2 Welded tube shall be made from sheet or strip meeting
Niobium 0.05
the requirements of Specification B 551 by an automatic
Oxygen 0.02
arc-welding process or other method of welding that will yield
a product meeting the requirements of this specification. Filler
metal shall not be used. Welded tubing shall be supplied as
TABLE 3 Tensile Requirements
follows:
UNS Grade Designation
6.2.1 As welded, and
R60702 R60704 R60705
6.2.2 As welded and further reduced.
Tensile strength, 55 (380) 60 (415) 80 (550)
6.3 The tube shall be furnished annealed.
min, ksi (MPa)
Yield strength, min, 30 (205) 35 (240) 55 (380)
ksi (MPa)
7. Chemical Composition
Elongation in 2 in. 16 14 16
7.1 The material shall conform to the requirements as to
or 50 mm, min, %
chemical composition prescribed in Table 1.
7.2 The manufacturer’s ingot analysis shall be considered
the chemical analysis for tubing, except for hydrogen and
of ⁄8 in. (3.2 mm) for each 10 ft (3 m) or fraction thereof shall
nitrogen, which shall be determined on the finished product.
be permissible up to ⁄2 in. (13 mm), maximum.
7.3 When requested by the purchaser and stated in the
9.3 Straightness—The tube shall be free of bends or kinks
purchase order, a product analysis for any elements listed in
and the maximum uniform bow shall not exceed the values
Table 1 shall be made on the finished product.
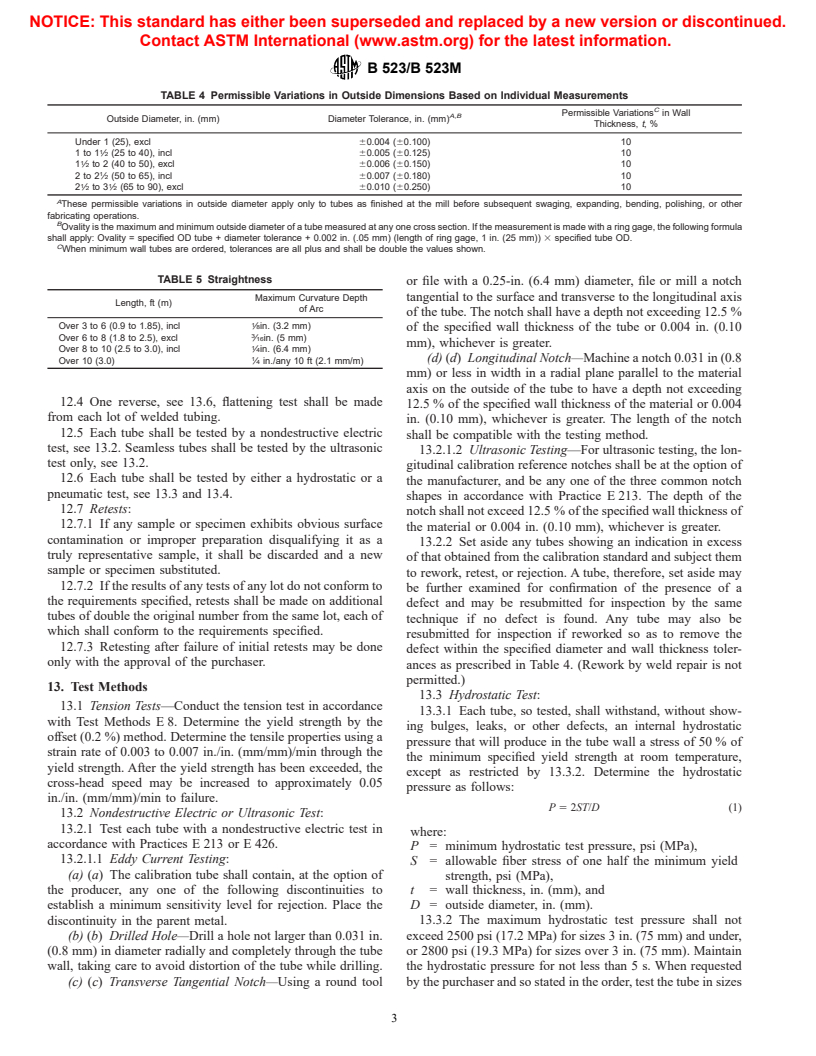
shown in Table 5.
7.3.1 The manufacturer’s analysis shall be considered as
9.4 Squareness of Cut—The angle of cut of the end of any
verified if the check analysis confirms the manufacturer’s
tube up to 1 ⁄2 in. (40 mm) in outside diameter may depart from
reported values within the tolerances prescribed in Table 2.
square not more than 0.016 in./in. (mm/mm).
8. Tensile Requirements
10. Workmanship and Quality Level Requirements
8.1 The material, as represented by the test specimens, shall
10.1 The finished tube shall be clean and free of foreign
conform to the tensile properties prescribed in Table 3.
material, shall have smooth ends, free of burrs, and shall be
free of injurious external and internal imperfections in accor-
9. Permissible Variation in Dimensions
dance with standards of acceptability agreed upon between the
9.1 Diameter—Variations in outside diameter shall not ex-
manufacturer and the purchaser. Minor defects may be re-
ceed those prescribed in Table 4.
moved provided the dimensional tolerances of Table 4 are not
9.2 Length—When tubes are ordered cut to length, the
exceeded.
length shall be not less than that specified, but a variation of ⁄8
in. (3.2 mm) will be permitted on tube up to 10 ft (3 m),
11. Significance of Numerical Limits
inclusive. For lengths over 10 ft, an additional over-tolerance
11.1 For the purpose of determining compliance with the
specified limits for requirements of the properties listed in the
A
TABLE 1 Chemical Requirements
following table, an observed value or a calculated value shall
Composition, %
be rounded as indicated in accordance with the rounding
methods of Practice E 29.
Element UNS Grade Designation
Rounded Unit for Observed
R60702 R60704 R60705
Property or Calculated Value
B
Zirconium + hafnium, min 99.2 97.5 95.5
Hafnium, max 4.5 4.5 4.5
Chemical composition, and toler- nearest unit in the last right-hand
Iron + chromium 0.2 max 0.2 to 0.4 0.2 max
ances (when expressed as decimals) place of figures of the specified limit
Tin . . . 1.0 to 2.0 . . .
Tensile strength and yield strength nearest 1000 psi (10 MPa)
Hydrogen, max 0.005 0.005 0.005
Elongation nearest 1 %
Nitrogen, max 0.025 0.025 0.025
Carbon, max 0.05 0.05 0.05
12. Number of Tests and Retests
Niobium . . . . . . 2.0 to 3.0
Oxygen, max 0.16 0.18 0.18
12.1 One longitudinal tension test, see 13.1, shall be made
A
from each lot.
By agreement between the purchaser and the manufacturer, analysis may be
required and limits established for elements and compounds not specified in the
12.2 One chemistry test, see 7.2 and 13.7, for hydrogen and
table of chemical composition.
nitrogen shall be made from each lot of finished product.
B
The value for zirconium + hafnium, min, is a warranted but not a measured
value. 12.3 One flare test, see 13.5, shall be made from each lot.
NOTICE: This standard has either been superseded and replaced by a new version or discontinued.
Contact ASTM International (www.astm.org) for the latest information.
B 523/B 523M
TABLE 4 Permissible Variations in Outside Dimensions Based on Individual Measurements
C
Permissible Variations in Wall
A,B
Outside Diameter, in. (mm) Diameter Tolerance, in. (mm)
Thickness, t,%
Under 1 (25), excl 60.004 (60.100) 10
1to1 ⁄2 (25 to 40), incl 60.005 (60.125) 10
1 ⁄2 to 2 (40 to 50), excl 60.006 (60.150) 10
2to2 ⁄2 (50 to 65), incl 60.007 (60.180) 10
1 1
2 ⁄2 to 3 ⁄2 (65 to 90), excl 60.010 (60.250) 10
A
These permissible variations in outside diameter apply only to tubes as finished at the mill before subsequent swaging, expanding, bending, polishing, or other
fabricating operations.
B
Ovality is the maximum and minimum outside diameter of a tube measured at any one cross section. If the measurement is made with a ring gage, the following formula
shall apply: Ovality = specified OD tube + diameter tolerance + 0.002 in. (.05 mm) (length of ring gage, 1 in. (25 mm)) 3 specified tube OD.
C
When minimum wall tubes are ordered, tolerances are all plus and shall be double the values shown.
TABLE 5 Straightness
or file with a 0.25-in. (6.4 m
...


Questions, Comments and Discussion
Ask us and Technical Secretary will try to provide an answer. You can facilitate discussion about the standard in here.