ASTM F319-19
(Practice)Standard Practice for Polarized Light Detection of Flaws in Aerospace Transparency Heating Elements
Standard Practice for Polarized Light Detection of Flaws in Aerospace Transparency Heating Elements
SIGNIFICANCE AND USE
4.1 This practice is useful as a screening basis for acceptance or rejection of transparencies during manufacturing so that units with identifiable flaws will not be carried to final inspection for rejection at that time.
4.2 This practice may also be employed as a go-no go technique for acceptance or rejection of the finished product.
4.3 This practice is simple, inexpensive, and effective. Flaws identified by this practice, as with other optical methods, are limited to those that produce temperature gradients when electrically powered. Any other type of flaw, such as minor scratches parallel to the direction of electrical flow, are not detectable.
SCOPE
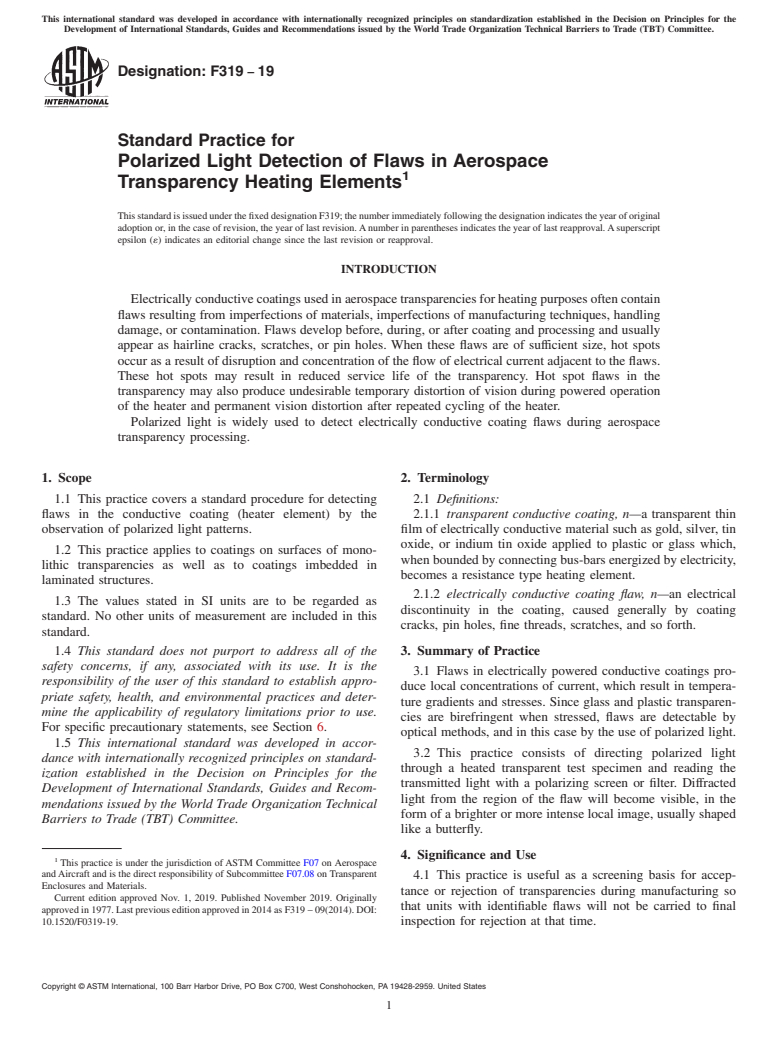
1.1 This practice covers a standard procedure for detecting flaws in the conductive coating (heater element) by the observation of polarized light patterns.
1.2 This practice applies to coatings on surfaces of monolithic transparencies as well as to coatings imbedded in laminated structures.
1.3 The values stated in SI units are to be regarded as standard. No other units of measurement are included in this standard.
1.4 This standard does not purport to address all of the safety concerns, if any, associated with its use. It is the responsibility of the user of this standard to establish appropriate safety, health, and environmental practices and determine the applicability of regulatory limitations prior to use. For specific precautionary statements, see Section 6.
1.5 This international standard was developed in accordance with internationally recognized principles on standardization established in the Decision on Principles for the Development of International Standards, Guides and Recommendations issued by the World Trade Organization Technical Barriers to Trade (TBT) Committee.
General Information
Relations
Buy Standard
Standards Content (Sample)
This international standard was developed in accordance with internationally recognized principles on standardization established in the Decision on Principles for the
Development of International Standards, Guides and Recommendations issued by the World Trade Organization Technical Barriers to Trade (TBT) Committee.
Designation: F319 − 19
Standard Practice for
Polarized Light Detection of Flaws in Aerospace
Transparency Heating Elements
ThisstandardisissuedunderthefixeddesignationF319;thenumberimmediatelyfollowingthedesignationindicatestheyearoforiginal
adoption or, in the case of revision, the year of last revision.Anumber in parentheses indicates the year of last reapproval.Asuperscript
epsilon (´) indicates an editorial change since the last revision or reapproval.
INTRODUCTION
Electricallyconductivecoatingsusedinaerospacetransparenciesforheatingpurposesoftencontain
flaws resulting from imperfections of materials, imperfections of manufacturing techniques, handling
damage, or contamination. Flaws develop before, during, or after coating and processing and usually
appear as hairline cracks, scratches, or pin holes. When these flaws are of sufficient size, hot spots
occur as a result of disruption and concentration of the flow of electrical current adjacent to the flaws.
These hot spots may result in reduced service life of the transparency. Hot spot flaws in the
transparency may also produce undesirable temporary distortion of vision during powered operation
of the heater and permanent vision distortion after repeated cycling of the heater.
Polarized light is widely used to detect electrically conductive coating flaws during aerospace
transparency processing.
1. Scope 2. Terminology
1.1 This practice covers a standard procedure for detecting 2.1 Definitions:
flaws in the conductive coating (heater element) by the 2.1.1 transparent conductive coating, n—a transparent thin
observation of polarized light patterns. film of electrically conductive material such as gold, silver, tin
oxide, or indium tin oxide applied to plastic or glass which,
1.2 This practice applies to coatings on surfaces of mono-
when bounded by connecting bus-bars energized by electricity,
lithic transparencies as well as to coatings imbedded in
becomes a resistance type heating element.
laminated structures.
2.1.2 electrically conductive coating flaw, n—an electrical
1.3 The values stated in SI units are to be regarded as
discontinuity in the coating, caused generally by coating
standard. No other units of measurement are included in this
cracks, pin holes, fine threads, scratches, and so forth.
standard.
1.4 This standard does not purport to address all of the 3. Summary of Practice
safety concerns, if any, associated with its use. It is the
3.1 Flaws in electrically powered conductive coatings pro-
responsibility of the user of this standard to establish appro-
duce local concentrations of current, which result in tempera-
priate safety, health, and environmental practices and deter-
ture gradients and stresses. Since glass and plastic transparen-
mine the applicability of regulatory limitations prior to use.
cies are birefringent when stressed, flaws are detectable by
For specific precautionary statements, see Section 6.
optical methods, and in this case by the use of polarized light.
1.5 This international standard was developed in accor-
3.2 This practice consists of directing polarized light
dance with internationally recognized principles on standard-
through a heated transparent test specimen and reading the
ization established in the Decision on Principles for the
transmitted light with a polarizing screen or filter. Diffracted
Development of International Standards, Guides and Recom-
light from the region of the flaw will become visible, in the
mendations issued by the World Trade Organization Technical
form of a brighter or more intense local image, usually shaped
Barriers to Trade (TBT) Committee.
like a butterfly.
4. Significance and Use
This practice is under the jurisdiction of ASTM Committee F07 on Aerospace
andAircraft and is the direct responsibility of Subcommittee F07.08 on Transparent
4.1 This practice is useful as a screening basis for accep-
Enclosures and Materials.
tance or rejection of transparencies during manufacturing so
Current edition approved Nov. 1, 2019. Published November 2019. Originally
that units with identifiable flaws will not be carried to final
approved in 1977. Last previous edition approved in 2014 as F319 – 09(2014). DOI:
10.1520/F0319-19. inspection for rejection at that time.
Copyright © ASTM International, 100 Barr Harbor Drive, PO Box C700, West Conshohocken, PA 19428-2959. United States
F319 − 19
4.2 This practice may also be employed as a go-no go test specimen is curved severely, its position may have to be
technique for acceptance or rejection of the finished product. adjustedduringinspectionsothatthelightpathiswithin20°of
normal to the location being viewed. Since specimen size and
4.3 This practice is simple, inexpensive, and effective.
curvature vary considerably, a dimensionally fixed standard is
Flaws identified by this practice, as with other optical methods,
not given.
are limited to those that produce temperature gradients when
electrically powered. Any other type of flaw, such as minor 5.2 The apparatus, in the order of assembly, consists of the
scratches parallel to the direction of electrical flow, are not following:
detectable. 5.2.1 Uniform Light Source, such as a bank of fluorescent
lamps.
5. Apparatus
5.2.2 Translucent Light Diffusion Plate, such as milk-white
glass located so as to provide a uniform light distribution.
5.1 Theelementsoftheapparatusaredetailedbelowintheir
5.2.3 Polarizing Screen, which converts the diffused light to
physical relationship as shown in Fig. 1. The minimum size
polarized light.
and spacing of the elements of the apparatus are determined by
the size and curvature of the part.The size of light source, light 5.2.4 Transparent Dust Shield (optional).
diffuser, and polarizing screen shall be large enough so that 5.2.5 Support for the specimen.
every portion of the electrically coated area of the test 5.2.6 Polarizing Viewer, hand-held or mounted so it can be
specimen is in the light path and is uniformly back-lit. If the rotated to give maximum contrast as an analyzer.
FIG. 1 Typical Arrangement for Polarized Light Method
F319 − 19
5.2.7 Electrical Power Supply, regulated. The object of this step is to record defects that are unrelated to
5.2.8 Timer, for controlling power application. the energized conductive coating.
5.2.9 Meters, for measuring power input to heater element.
...
This document is not an ASTM standard and is intended only to provide the user of an ASTM standard an indication of what changes have been made to the previous version. Because
it may not be technically possible to adequately depict all changes accurately, ASTM recommends that users consult prior editions as appropriate. In all cases only the current version
of the standard as published by ASTM is to be considered the official document.
Designation: F319 − 09 (Reapproved 2014) F319 − 19
Standard Practice for
Polarized Light Detection of Flaws in Aerospace
Transparency Heating Elements
This standard is issued under the fixed designation F319; the number immediately following the designation indicates the year of original
adoption or, in the case of revision, the year of last revision. A number in parentheses indicates the year of last reapproval. A superscript
epsilon (´) indicates an editorial change since the last revision or reapproval.
INTRODUCTION
Electrically conductive coatings used in aerospace transparencies for heating purposes mayoften
contain flaws resulting from imperfections of materials, imperfections of manufacturing techniques,
handling damage, or contamination. Flaws may develop before, during, or after coating and processing
and usually appear as hairline cracks, scratches, or pin holes. When these flaws are of sufficient size,
hot spots can occur as a result of disruption and concentration of the flow of electrical current adjacent
to the flaws. These hot spots may result in reduced service life of the transparency. Hot spot flaws in
the transparency may also produce undesirable temporary distortion of vision during powered
operation of the heater and permanent vision distortion after repeated cycling of the heater.
Polarized light is widely used to detect electrically conductive coating flaws during aerospace
transparency processing.
1. Scope
1.1 This practice covers a standard procedure for detecting flaws in the conductive coating (heater element) by the observation
of polarized light patterns.
1.2 This practice applies to coatings on surfaces of monolithic transparencies as well as to coatings imbedded in laminated
structures.
1.3 The values stated in SI units are to be regarded as standard. No other units of measurement are included in this standard.
1.4 This standard does not purport to address all of the safety concerns, if any, associated with its use. It is the responsibility
of the user of this standard to establish appropriate safety safety, health, and healthenvironmental practices and determine the
applicability of regulatory limitations prior to use. For specific precautionary statements, see Section 6.
1.5 This international standard was developed in accordance with internationally recognized principles on standardization
established in the Decision on Principles for the Development of International Standards, Guides and Recommendations issued
by the World Trade Organization Technical Barriers to Trade (TBT) Committee.
2. Terminology
2.1 Definitions:
2.1.1 transparent conductive coating—coating, n—a transparent thin film of electrically conductive material such as gold,
stannous silver, tin oxide, or indium tin oxide applied to plastic or glass which, when bounded by connecting bus-bars energized
by electricity, becomes a resistance type heating element.
2.1.2 electrically conductive coating flaw—flaw, n—an electrical discontinuity in the coating, caused generally by coating
cracks, pin holes, fine threads, scratches, and so forth.
3. Summary of Practice
3.1 Flaws in electrically powered conductive coatings produce local concentrations of current, which result in temperature
gradients and stresses. Since glass and plastic transparencies are birefringent when stressed, flaws can be detected are detectable
by optical methods, and in this case by the use of polarized light.
This practice is under the jurisdiction of ASTM Committee F07 on Aerospace and Aircraft and is the direct responsibility of Subcommittee F07.08 on Transparent
Enclosures and Materials.
Current edition approved Dec. 1, 2014Nov. 1, 2019. Published December 2014November 2019. Originally approved in 1977. Last previous edition approved in 20092014
as F319 – 09.F319 – 09(2014). DOI: 10.1520/F0319-09R14.10.1520/F0319-19.
Copyright © ASTM International, 100 Barr Harbor Drive, PO Box C700, West Conshohocken, PA 19428-2959. United States
F319 − 19
3.2 This practice consists of directing polarized light through a heated transparent test specimen and reading the transmitted
light with a polarizing screen or filter. Diffracted light from the region of the flaw will become visible, in the form of a brighter
or more intense local image, usually shaped like a butterfly.
4. Significance and Use
4.1 This practice is useful as a screening basis for acceptance or rejection of transparencies during manufacturing so that units
with identifiable flaws will not be carried to final inspection for rejection at that time.
4.2 This practice may also be employed as a go-no go technique for acceptance or rejection of the finished product.
4.3 This practice is simple, inexpensive, and effective. Flaws identified by this practice, as with other optical methods, are
limited to those that produce temperature gradients when electrically powered. Any other type of flaw, such as minor scratches
parallel to the direction of electrical flow, are not detectable.
5. Apparatus
5.1 The elements of the apparatus are detailed below in their physical relationship as shown in Fig. 1. The minimum size and
spacing of the elements of the apparatus are determined by the size and curvature of the part. The size of light source, light diffuser,
and polarizing screen shall be large enough so that every portion of the electrically coated area of the test specimen is in the light
FIG. 1 Typical Arrangement for Polarized Light Method
F319 − 19
path and is uniformly back-lit. If the test specimen is curved severely, its position may have to be adjusted during inspection so
that the light path is within 20° of normal to the location being viewed. Since specimen size and curvature vary considerably, a
dimensionally fixed standard is not given.
5.2 The apparatus, in the order of assembly, consists of the following:
5.2.1 Uniform Light Source, such as a bank of fluorescent lamps.
5.2.2 Translucent Light Diffusion Plate, such as milk-white glass located so as to provide a uniform light distribution.
5.2.3 Polarizing Screen, which converts the diffused light to polarized light.
5.2.4 Transparent Dust Shield (optional).
5.2.5 Support for the specimen.
5.2.6 Polarizing Viewer, hand-held or mounted so it can be rotated to give maximum contrast as an analyzer.
5.2.7 Electrical Power Supply, regulated.
5.2.8 Timer, for controlling power application.
5.2.9 Meters, for measuring power input to heater element.
6. Safety Precautions
6.1 ThisWarning—This practice may require application of high voltages. Exercise precautions to prevent direct or indirect
exposu
...
NOTICE: This standard has either been superseded and replaced by a new version or withdrawn.
Contact ASTM International (www.astm.org) for the latest information
Designation: F319 − 19
Standard Practice for
Polarized Light Detection of Flaws in Aerospace
Transparency Heating Elements
This standard is issued under the fixed designation F319; the number immediately following the designation indicates the year of original
adoption or, in the case of revision, the year of last revision. A number in parentheses indicates the year of last reapproval. A superscript
epsilon (´) indicates an editorial change since the last revision or reapproval.
INTRODUCTION
Electrically conductive coatings used in aerospace transparencies for heating purposes often contain
flaws resulting from imperfections of materials, imperfections of manufacturing techniques, handling
damage, or contamination. Flaws develop before, during, or after coating and processing and usually
appear as hairline cracks, scratches, or pin holes. When these flaws are of sufficient size, hot spots
occur as a result of disruption and concentration of the flow of electrical current adjacent to the flaws.
These hot spots may result in reduced service life of the transparency. Hot spot flaws in the
transparency may also produce undesirable temporary distortion of vision during powered operation
of the heater and permanent vision distortion after repeated cycling of the heater.
Polarized light is widely used to detect electrically conductive coating flaws during aerospace
transparency processing.
1. Scope 2. Terminology
1.1 This practice covers a standard procedure for detecting 2.1 Definitions:
flaws in the conductive coating (heater element) by the 2.1.1 transparent conductive coating, n—a transparent thin
observation of polarized light patterns. film of electrically conductive material such as gold, silver, tin
oxide, or indium tin oxide applied to plastic or glass which,
1.2 This practice applies to coatings on surfaces of mono-
when bounded by connecting bus-bars energized by electricity,
lithic transparencies as well as to coatings imbedded in
becomes a resistance type heating element.
laminated structures.
2.1.2 electrically conductive coating flaw, n—an electrical
1.3 The values stated in SI units are to be regarded as
discontinuity in the coating, caused generally by coating
standard. No other units of measurement are included in this
cracks, pin holes, fine threads, scratches, and so forth.
standard.
3. Summary of Practice
1.4 This standard does not purport to address all of the
safety concerns, if any, associated with its use. It is the
3.1 Flaws in electrically powered conductive coatings pro-
responsibility of the user of this standard to establish appro-
duce local concentrations of current, which result in tempera-
priate safety, health, and environmental practices and deter-
ture gradients and stresses. Since glass and plastic transparen-
mine the applicability of regulatory limitations prior to use.
cies are birefringent when stressed, flaws are detectable by
For specific precautionary statements, see Section 6.
optical methods, and in this case by the use of polarized light.
1.5 This international standard was developed in accor-
3.2 This practice consists of directing polarized light
dance with internationally recognized principles on standard-
through a heated transparent test specimen and reading the
ization established in the Decision on Principles for the
transmitted light with a polarizing screen or filter. Diffracted
Development of International Standards, Guides and Recom-
light from the region of the flaw will become visible, in the
mendations issued by the World Trade Organization Technical
form of a brighter or more intense local image, usually shaped
Barriers to Trade (TBT) Committee.
like a butterfly.
4. Significance and Use
This practice is under the jurisdiction of ASTM Committee F07 on Aerospace
and Aircraft and is the direct responsibility of Subcommittee F07.08 on Transparent
4.1 This practice is useful as a screening basis for accep-
Enclosures and Materials.
tance or rejection of transparencies during manufacturing so
Current edition approved Nov. 1, 2019. Published November 2019. Originally
that units with identifiable flaws will not be carried to final
approved in 1977. Last previous edition approved in 2014 as F319 – 09(2014). DOI:
10.1520/F0319-19. inspection for rejection at that time.
Copyright © ASTM International, 100 Barr Harbor Drive, PO Box C700, West Conshohocken, PA 19428-2959. United States
F319 − 19
4.2 This practice may also be employed as a go-no go test specimen is curved severely, its position may have to be
technique for acceptance or rejection of the finished product. adjusted during inspection so that the light path is within 20° of
normal to the location being viewed. Since specimen size and
4.3 This practice is simple, inexpensive, and effective.
curvature vary considerably, a dimensionally fixed standard is
Flaws identified by this practice, as with other optical methods,
not given.
are limited to those that produce temperature gradients when
electrically powered. Any other type of flaw, such as minor 5.2 The apparatus, in the order of assembly, consists of the
scratches parallel to the direction of electrical flow, are not following:
detectable. 5.2.1 Uniform Light Source, such as a bank of fluorescent
lamps.
5. Apparatus
5.2.2 Translucent Light Diffusion Plate, such as milk-white
glass located so as to provide a uniform light distribution.
5.1 The elements of the apparatus are detailed below in their
5.2.3 Polarizing Screen, which converts the diffused light to
physical relationship as shown in Fig. 1. The minimum size
polarized light.
and spacing of the elements of the apparatus are determined by
the size and curvature of the part. The size of light source, light 5.2.4 Transparent Dust Shield (optional).
diffuser, and polarizing screen shall be large enough so that 5.2.5 Support for the specimen.
every portion of the electrically coated area of the test 5.2.6 Polarizing Viewer, hand-held or mounted so it can be
specimen is in the light path and is uniformly back-lit. If the rotated to give maximum contrast as an analyzer.
FIG. 1 Typical Arrangement for Polarized Light Method
F319 − 19
5.2.7 Electrical Power Supply, regulated. The object of this step is to record defects that are unrelated to
5.2.8 Timer, for controlling power application. the energized conductive coating.
5.2.9 Meters, for measuring power input to heater element.
10.3 Power Application—With the specimen stabilized at
room temperatur
...



Questions, Comments and Discussion
Ask us and Technical Secretary will try to provide an answer. You can facilitate discussion about the standard in here.